Strange Antiquities

Strange Antiquities

80 个评价
Strange Antiquities 100% achievement guide
由 Solomaher 制作
Here's the complete guide to Strange Antiquities. My first ever. Enjoy!
5
3
7
2
2
   
奖励
收藏
已收藏
取消收藏
General things
Hello!
Here in this guide I'll try to describe the story day by day: what your clients need, how to solve riddles in clue cards and letters and whatnot. And though I won't tell about the endings exactly, I'll describe certain choices and how they affect the state of the people in the end.
Also sorry if any pieces of information is incomprehensible - English is not my first language, but I can try to clarify those in the comments.
Anyway I hope you'll find this guide useful.
Story
This section contains day by day description of events and the artefacts people can't name. Major spoilers ahead.
Days 1-7
Day 1
  • Eli White gives you the book about artefacts.
  • You should look at the table under the counter and check its drawers to gain the ability to travel. The table ornament is missing four wooden tiles - one of them is also in one of the drawers.
  • You can visit Strange Horticulture (#2 on the map) and get yourself a new plant (the very important one as I know now).
Day 2
  • Verona Green gives you the book about symbols.
  • Julia Braddock will need Selenic Totem.
  • Daisy Winters tells you about her friend stealing from her. You can give her either Binding Seed (her friend - Edith Moore - will come a few days later and ask you for Horned Shackle) or Zeah (Edith will ask for Shield Charm). This choice doesn't affect anything in the game it seems.
Day 3
  • Hugh Langston gives you a hand-drawn mini-map.
Day 4
  • Edith Moore's visit.
  • Edmund Bishop gives you the map of Gleaston castle. As you complete his task you receive the book about gemstones.
Day 5
  • Rebecca Rose tells you about her blindness. You can give her either Aries Remnant (she'll come once again to thank you) or Spirit Eye (she'll start seeing and hearing otherworldly things; this will result in her joining you on your journey - if you choose to go to the catacombs in the end (the Relic Hunter endings) - and saving Barton Potter (without Rebecca he gets killed))
Day 6
  • Simone Green tells you she's doing a research on your shop and brings you the clue for the first hidden vault (you'll need to place Horned Shackle, Evocant and Selenic Totem on the plinths under the counter). In this vault you'll find four artefacts and two more tiles for the table ornament.
Day 7
  • Investigating the way mentioned in the Anna Bryant's letter you'll need Voice of Cernunnos.
  • Angus Eaton brings you the key to the secret drawer, which Eli will tell you about later.
  • Francesca Robertson tells you about the zero patient of the black eyes curse - Jack Hungerford. You can give her either Restful Mether (Jack will fall deeper into trans and never recover, even if you lift the curse) or Witch's Finger (he'll get better).
Days 8-13
Day 8
  • After solving a daily clue card you get the first half of the torn note. It's useless for now.
  • Francesca Robertson will need Selenic Totem.
  • Barton Porter brings you the map of the catacombs and a note from Eli, mentioning the secret drawer. The wheel lifting the drawer up is under the counter, to the left of where Jupiter resides. You can push the petals on the key, changing its form, until you're able to open the drawer.
    Inside you'll find the last book - about curses - and an artefact.
  • Bonnie Robertson tells you she knows who's behind the curse and wants to kill him with Corvan's Might. You can give her either what she wants (she'll try to kill Barton Potter, but won't succeed and will flee from the town) or Grey's Grace (she'll steal Jupiter and try to threaten you).
Day 9
  • If you chose not to give Bonnie Corvan's Might, Jupiter dissapears.
  • Simone brings you the clue for the second hidden vault - it's the thaumic fields riddle, but you can't solve it yet.
  • If you chose not to give Bonnie Corvan's Might, she awaits you in the forest where you're presented with another choice: you either give her the desired artefact (with all the same consequences) or you use Divergent Hook on her damaging her mind. In any case you'll learn that Jupiter is on the Mary Bell (#23 on the map).
  • Wyatt Collings will need Moonstone Guardian.
Day 10
  • Investigating the way mentioned in the Mrs R. Bream's letter you'll need Hearing Charm.
  • Freddie Lamb will need Cyrene Ward. He gives you the last tile for the table ornament. If you place them in the blanks continuing the pattern - you'll fix the Thaumic Lens.

  • Now you can solve the thaumic fields riddle and open the second hidden vault - you can see every artefact's thaumic field by placing them on the Lens. Now you have to place three artefacts with corresponding fields on the plinths (e.g. Shadow Hold, Lead Heart and Horned Shackle). In this vault you'll find an artefact.
Day 11
  • Sarah Barrington will need Ascus.
  • To gain access to the barred shelves you need to reveal Ethereal Key (do some circular motion while holding it).
  • If you chose to give Bonnie Corvan's Might, Barton Potter visits you telling about the attack and asks for Silent Breath (from this point he will escape any danger no matter what).
Day 12
  • You receive a letter from M.B.M., but you can't explore the hall of shields right away - you'll need to capture a Wondering Shroud first.
  • Nancy Irwin will need Lamb's Syphon.
  • Simone brings you the clue for the third hidden vault - it's the resonance riddle (you need to look for the three artefacts with resonance using Resonance Compass and discover which one is the lightest and which one is the heaviest using the scales(the artefacts are Ambra, Elva Stone and Corvan's Might)). Then you need to deal with the moon door:
    1. Press the button on the clock (in the upper right corner) and switch the dial to the one showing the moon phases.
    2. Pull the pendulum down changing the shown phase to the one pictured on the door.
    3. Switch the dial again.
    4. Press the buttons surrounding the door correspondingly to the numbers the hands are pointing to (IV, VI, XI). Then press the diamond-shaped button below.


    Inside you'll find an artefact.
  • Audrey Bell tells you she needs something to persuade her followers to stay. You can give her either Morgan's Folly (the followers will kill her) or Fortinance (she'll keep her leader position and eventually propose you to take part in the Sacrament ritual in the end, if you choose the Priest endings).
Day 13
  • After solving a daily clue card you get the second half of the torn note. Now you can open the castle vaults (with Moonstone Guardian for example). Inside you'll find the Bishop's Square. You can solve its first riddle, written in the upper right corner of the castle map, right away.
  • Barton sends you a letter about capturing a Wondering Shroud - you'll need Spirit Vault.
  • Now you can revisit the hall of shields from earlier on. You'll need Spirit Vault and Sun Bond.
  • Evelyn Bennett will need Grey's Grace.
  • Barton Potter tells you he wants to research some kind of monolith. You can give him either Pitt (he'll go missing) or Babellia (he'll tell you how to lift the black eyes curse without killing anyone).
Days 14-19
Day 14
  • If you chose to give Barton Pitt AND gave Bonnie Corvan's Might earlier, he comes to tell how he avoided death due to the effect of Silent Breath, but from now on he doesn't want to go anywhere near the Casket and the nameless gods (blocks you from the Relic Hunter endings)
  • Jacob Priestly (is he a Jedi?) will need Solemn Mether.
Day 15
  • Simone brings you the clue for the fourth hidden vault - it's the gem riddle (e.g. Corvan's Might, Eye of Cernunnos, Holgen Grimm) and the moon door (III, IX,XII) again. Inside you'll find an artefact.
  • If you chose to give Barton Babellia, he comes to you unable to speak and will need Tormund's Bane
  • Cursed Verona Green tells you that the curse she's struggling against isn't yet complete. You can give her either Abrasive Mether (she'll fully succumb to the black eyes curse and try to open Nalean Casket at all costs if you choose to destroy it with Eli in the end) or Zephyrim (she'll defeat the curse and try to destroy the Casket).
Day 16
  • Gilbert Ames will need Cussic Purifier.
  • Leopold Morris will need Folium.
Day 17
  • Thaddeus White will tell you the whereabouts of Nalean Casket. You can give him either Dread Vivant (he'll live) or Lunima (he'll die). Regardless of your choice Eli will steal the Casket to destroy it.
  • Investigating the way mentioned in the unsigned letter about the texts on arcane artefacts you'll need Babellia.
  • Isabelle Stowe will need Fortinance.
Day 18
  • Eli gives you the clue for the final hidden vault (you'll need Carrick's Candle, Shadow Anchor and Witch's Finger, the moon door numbers are II, VII, IX). Inside you'll find Nalean Casket.
Now that the Casket is in your hands you have the choice of what to do with it: destroy, open or give it to the nameless gods.
Destroying Nalean Casket: go to the Pit (#20 on the map), after some cutscenes you'll need to perform a ritual - you should place Sun Bond and Tenebran Cloak on any opposite slots (north-south or east-west), do the same with Fortinance and Witherance, place Light of Corchen in the center. For example:
Then you'll be given a choice if you want to open the Casket instead (after binding Eli with Wyxic Cord) or actually destroy it.

Opening Nalean Casket: go to the Bleak Stones (#24 on the map), after the cutscenes you'll need to perform a ritual - you should place four artefact to the corresponding slots (spring - Sithean Charm, summer - Sun Bond, autumn - Weaving Edge, winter - Vessager).
Then when you realise you're the sacrifice, you'll have to protect yourself with either Corvan's Might (Audrey dies, you become kinda the cult leader) or St Cedric's Thunder (you're sacrificed, but somehow continue living - write about what happened in your diary and proceed to day 19 even).

Giving Nalean Casket away: go to Blencathra's Skull (the lower right corner of the catacombs), you'll need Deaedalus Link, Cyrene Ward and Griss (only if Rebecca's with you) along your way.
Day 19
There will be only visits from different clients for you to identify all the remaining artefacts.
  • Tess Sherwood will need Diverging Hook.
  • Peggy Grafton will need Manus.
  • Cecil Bateman will need Witch's Finger.
  • Owen Foxe will need Corchenna.
  • Tommy Brown will need Aries Remnant.
  • Thomas Pope will need Pitt.
  • William Wheatley will need Zeah.
  • Constance Bader will need Morgan's Folly.
  • Jane Fairburn will need Binding Seed.
  • Peter Leland will need Tormund's Bane. He doesn't come if you previously used the artefact on Barton.
  • David Chafer will need Storm Ward.
Map locations
The exact locations are highlighted.
Clue cards
Clue cards arrive at the end of each day, so I'll use the numbers of the days you actually solve them. Solving all 17 clue card results in the "Tarot Reader" achievement and also needed for the "Ascendant Thaumaturge" one.
I'll hide the pictures under spoilers and give you some hints first.
Day 2
Pretty straightforward. The prison is #10 on the map.

Day 3
This one shows a silhouette of a certain block in the town.

Day 4
This one seems tricky until you read the map legend.

Day 5
This one is a cut out silhouette of a certain room in Gleaston castle.

Day 6
There are a lot of stairs in Gleaston castle.

Day 7
The mentioned tower is Galfrey's tower (#22 on the map), you can travel to all the numbered locations without any fear growing. The place you actually need though is in Mossy wood (#21 on the map).


Day 8
Keep in mind that the map of Gleaston castle is not oriented north, so the castle towers aren't either. You need the west one, which is at the south-east of the castle on the map.

Day 9
This one is a silhouette of one of the graves in the catacombs.

Day 10
This one contains some more complex grave searching. All the things mentioned in the riddle are about ornaments on the graves.

Day 11
You need to look for an intersection among the three pictured blocks.

Day 12
The riddle is about gravestone ornament again.

Day 13
Pretty straightforward once again. It's about a planet symbol on the Gleaston castle map.

Day 14
This one is about one of the graves. You can look up date of death of the Knight of Thorns in the Shimmer article in the book.

Day 15
This one was really tricky. It's about the names of the streets.

Day 16
This one resemble one certain way in the catacombs.

Day 17
So now your shop's moon clock is involved. But it's all about the graves eventually again.

Day 18
Stopping by the library reveals the actual way.


Letters and notes
I don't think these ones need spoilers - they are pretty direct.
Day 1
Eli's reminder
Charlie Weathers' letter
Day 2
John Royston's letter
Day 3
Hugh Langston's mini-map
Day 4
Edmund Bishop's note to the Gleaston castle map
Day 5
Thomas Pope's letter
Day 7
Anna Bryant's letter
Day 9
Bonnie Robertson's threat note
Day 10
Mrs R. Bream's letter
Day 13
Torn note
Bishop's Square first riddle (written on a map itself in the upper right corner)
Barton's letter about a Wondering Shroud
M. B. M.'s letter (it arrives on day 12, but you can't explore the hall of shields until you capture a Wondering Shroud)
Day 14
Bishop's Square second riddle
Day 15
Barton's letter about the Ossuary of the Damned
Day 16
Twinings' visit card
Day 17
Unsigned letter about the texts on arcane artefacts
Day 18
Bishop's Square third riddle
Artefacts
Most of the time clients just say which artefact they want to buy. In cases they don't know the name, there will be ??? on a label, and the exact artefact will be mentioned in the description of the Day. You can search for certain artefacts using the alphabetical subcategories or use ctrl+F.
Identifying all 83 artefacts results in the "Ascending Thaumaturge" achievement.
Artefacts A-B
Abrasive Mether
Acumenical
Ambra
Amphisian Talon
Argyll
Aries Remnant
Ascus
Babellia
Binding Seed
Blood-Beck
Bonesguard
Brighic Charm
Artefacts C-E
Carrick's Candle
Cassander
Corchenna
Corvan's Might
Cussic Purifier
Cyrene Ward
Daedalus Link
Diverging Hook
Dread Vivant
Elva Stone
Ethereal Key (initial and revealed) - this artefact is identified automatically and doesn't have the identification screen - opens the barred shelves
Evocant
Eye of Cernunnos
Artefacts F-H
Folium
Fortinance
Gowdian Siren
Grey's Grace
Griss
Guise of Lillian
Hearing Charm
Heart Chamber
Holgen Grimm
Horned Shackle
Hunter's Boon
Artefacts L-O
Lamb's Syphon
Lead Heart
Libula
Light of Corchen
Loem
Lunima
Manus
Moonstone Guardian
Morgan's Folly
Nephroquant
Orford Spire
Ossic Ring
Artefacts P-S
Pitt
Resonance Compass - this artefact is identified automatically and doesn't have the identification screen - points to the artefacts with resonance
Restful Mether
Selenic Totem
Sextrum
Shadow Anchor
Shadow Hold
Shield Charm
Shimmer
Shinn
Silent Breath
Sithean Charm
Sleep Vessel
Solemn Mether
Spirit Eye
Spirit Vault
St Cedric's Thunder
St John's Anvil
Storm Ward
Sun Bond
Artefacts T-Z
Tenebran Cloak
Thaumic Needle
Tormund's Bane
Truth Conduit
Valent
Veiled Phenn
Vessager
Voice of Cernunnos
Water's Shadow
Weaving Edge
Witch's Finger
Witherance
Wyxic Cord
Zeah
Zephyrim
Achievments
Business as Unusual
Handle your first customer
Gained after giving Thomas Pope his Hunter's Boon on day 1.

Apprentice
Identify 10 items
Just follow the story and eventually you'll get it.

Explorer
Solve your first clue card
Can be done on any day, the closest one is day 2.

Sanity Restored
Win the dice game
If you fill up your fear bar, you'll have to play the dice game to regain sanity.

Burning Blood
Find the booklet on curses
It's in the secret drawer, you'll get the key on day 7 (look up day 8 in the Story section).

Breaking in
Open the locked section
Meaning the barred shelves. You'll have to do it on day 11.

Feline Priorities
Pet Jupiter 30 times
Well, just pet the cat a lot.

Catnapped, Not Forgotten
Rescue Jupiter
You'll have to turn down Bonnie Robertson on day 8 (don't give her Corvan's Might right away). She then kidcatnaps Jupiter on the next day. After confronting her in the forest you'll find out he's on the Mary Bell (#23 on the map).

Second Sight
Find the Thaumic Lens
You'll need four wooden tiles to fix the Lens. One's in the table in the upper left drawer, the other two are in the first hidden vault (day 6), the last wooden tile is given you on day 10.

Unbound
Lift a curse
The first one you encounter is on Wyatt Collings (day 9).

Tarot Reader
Solve all the clue cards
There are 17 of them, all explained in the Map locations section of the guide.

Ethereal Encounter
Catch a Wandering Shroud
You'll get the opportunity on day 13.

Hidden Knowledge
Use the Bishop's Square
You can get the Square after opening the castle vaults on day 13.

Pillar of Calaris
Destroy the Casket
Follow the Destroying the Casket section on day 18.

This is the End
Reach an ending
Reach any ending.

The Bleak Stones
Follow the Priest's path
Follow the Opening the Casket section on day 18.

The Skull of Blencathra
Follow the Relic Hunter's path
Follow the Giving the Casket away section on day 18.

Ascendant Thaumaturge
Identify all the items
There are 83 artefacts in general. If you solve every clue card and explore every letter and note that comes to you, you'll eventually get all the texts and all the artefacts and will be able to identify them all on day 19.

Master Thaumaturge
Complete the game without using hints
Well the main reason this guide exists I guess.

A Hidden Sanctum
Open a vault
What's meant here is any moon door vault, so namely the third, the fourth and the final.

Mask of Jupiter
Put the mask on Jupiter
You can put Holgen Grimm on Jupiter while he sits.

Heart of the Shop
Reach the Heart of Strange Antiquities
So basically it's another hidden vault. To access the moon door you should place on the plinths the three artefacts marked with a cross in the Artefacts book(they are Babellia, Orford Spire, Thaumic Needle). Two of the clock hands doesn't work properly, so you need to figure out the hands movement pattern (huge thanks for the explanation to a fellow thaumaturge resetti here) - with every pull of the pendulum the hand with a circular hole moves three numbers counter-clockwise, the hand with a cross-bar - five numbers clockwise and the hand with the circle and tear-shaped pointer moves one number clockwise (but it's the only hand working, so it points to the right number).So the numbers you need are V, X and XII. What to do next? Find the symbol pictured in the center of the newly found altar. It's on the tomb with the Triple goddess sign in the upper left corner of the catacombs (first time I found it by sheer brute-forcing through every possible place on the maps, before i even saw the cross marks in the book). It happens to be Strange Antiquities former owner's tomb. You'll need Carrick's candle to read the message. It will tell you about the heart of the shop and give you the instructions to reach it. So now it's time to protect yourself. As the message suggests we should place Sextrum, Palliance (the plant you aquired from Strange Horticulture) and Sleep Vessel on the altar slots in any order to gain access to the Heart.
13 条留言
etw_wander 9 月 29 日 下午 9:39 
Notgerus- The Blessings in Spring note is a Bishop's Square puzzle, if you haven't solved it already.
Notgerus 9 月 28 日 下午 12:50 
Try as I might, I cannot find Tormund's Bane anywhere. I am stuck at Day 15 with a mumbling Barton waiting foor the cure... I must have missed a step, I solved all the tarot cards so far and I only have three notes left. One about Bishop's square, one about Holgen's inception ritual (free translation from French), and one that says "Blessings in Spring, Ascensions in Fall".
Solomaher  [作者] 9 月 22 日 上午 11:17 
Thanks!
gumdrop9 9 月 22 日 上午 7:13 
Excellent guide. Cheers.
Solomaher  [作者] 9 月 22 日 上午 7:03 
Stange. There shouldn't be. I've just tried to check if it works on the earliest day possible - day 10, when you get the last of the three artefacts - the Needle , and still managed to access the secret clock.
So I'm sorry, don't know what it could be.
Young Donald Sutherland 9 月 21 日 下午 3:43 
Is there something else you have to do to get to the secret clock puzzle? Nothing happens when I put Babellia, Orford Spire and Thaumatic Needle on the plinths - on that or any other order.

This is on a save game where I have already completed the game, going back to previous days.
Solomaher  [作者] 9 月 20 日 下午 12:43 
Yep, figured that some time later - the guide's been updated. I was just lucky to connect cross-marked artefacts and the tomb the first time.
resetti 9 月 20 日 上午 9:28 
@FunnyChicken - you need Spirit Vault if you click on any grave in the lower half of the catacombs. You'll get the Spirit Vault prompt regardless of whether the grave is a puzzle solution.

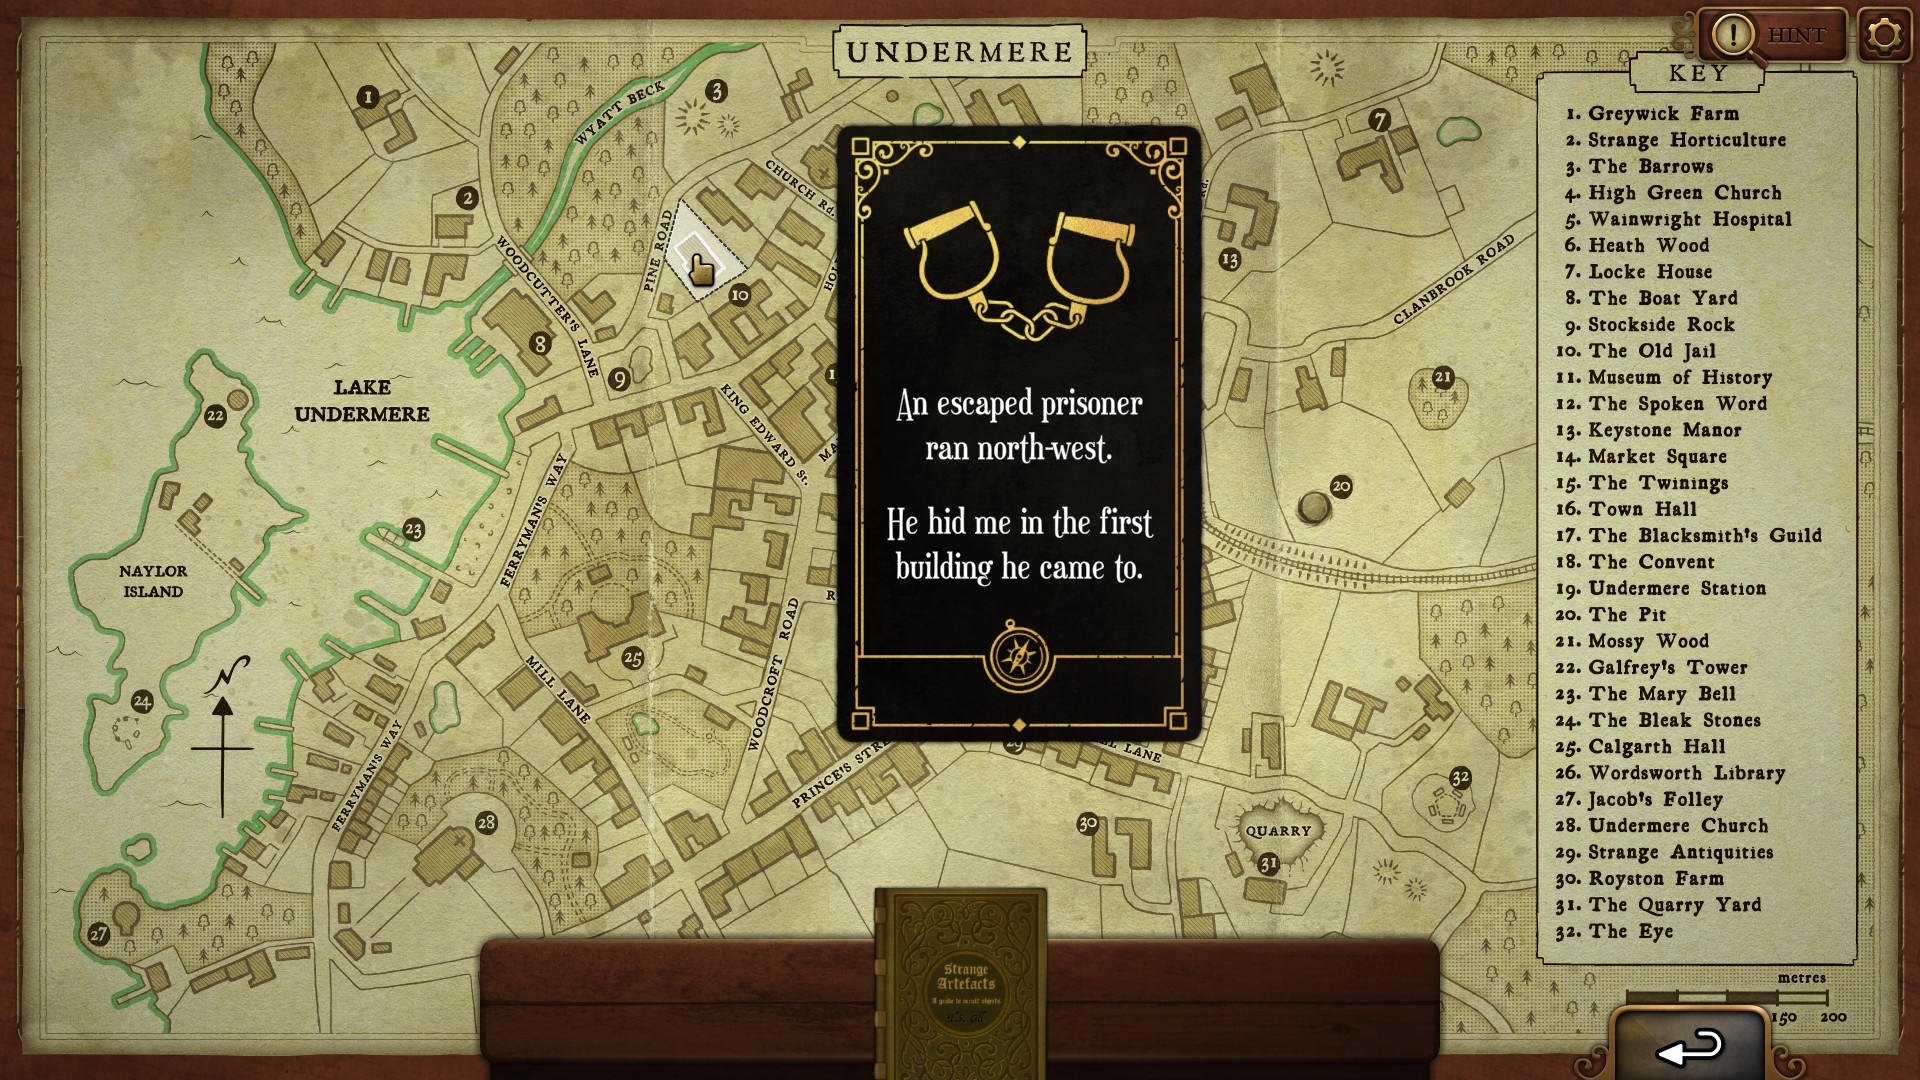
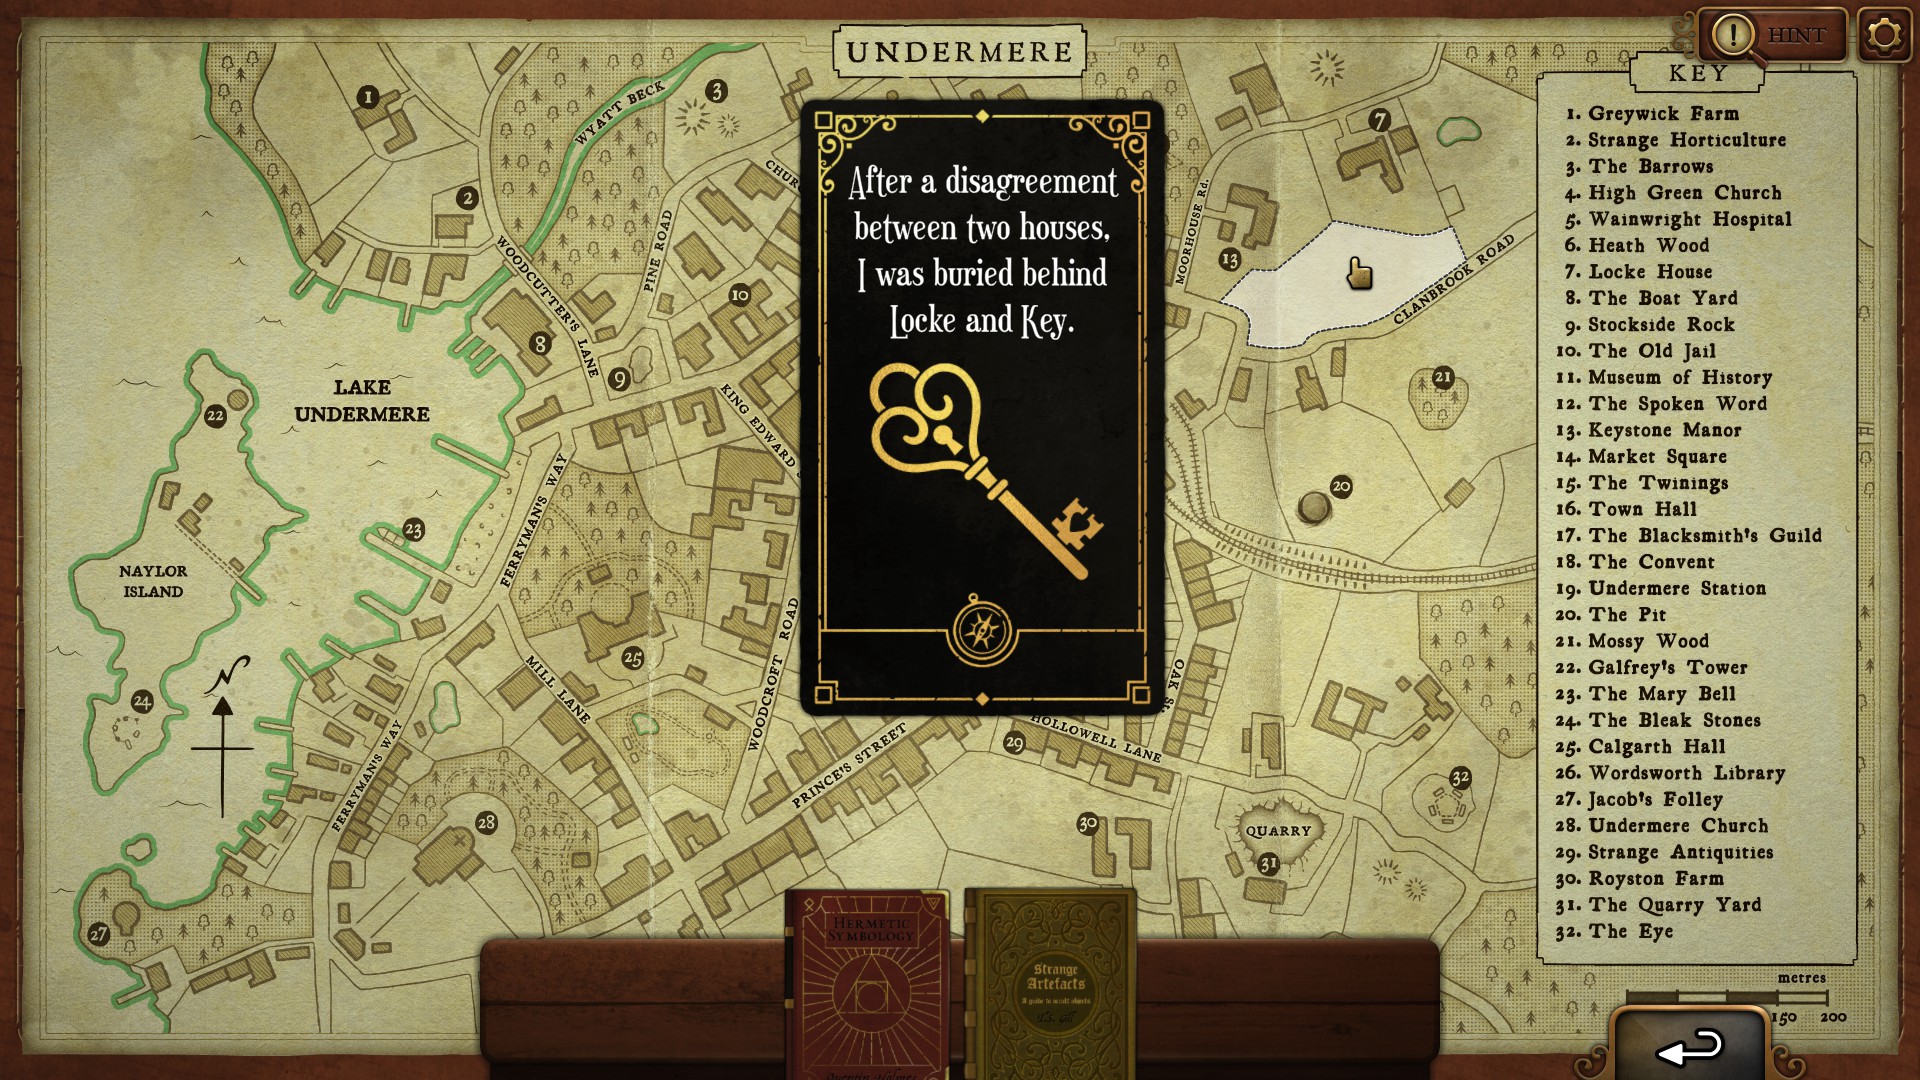
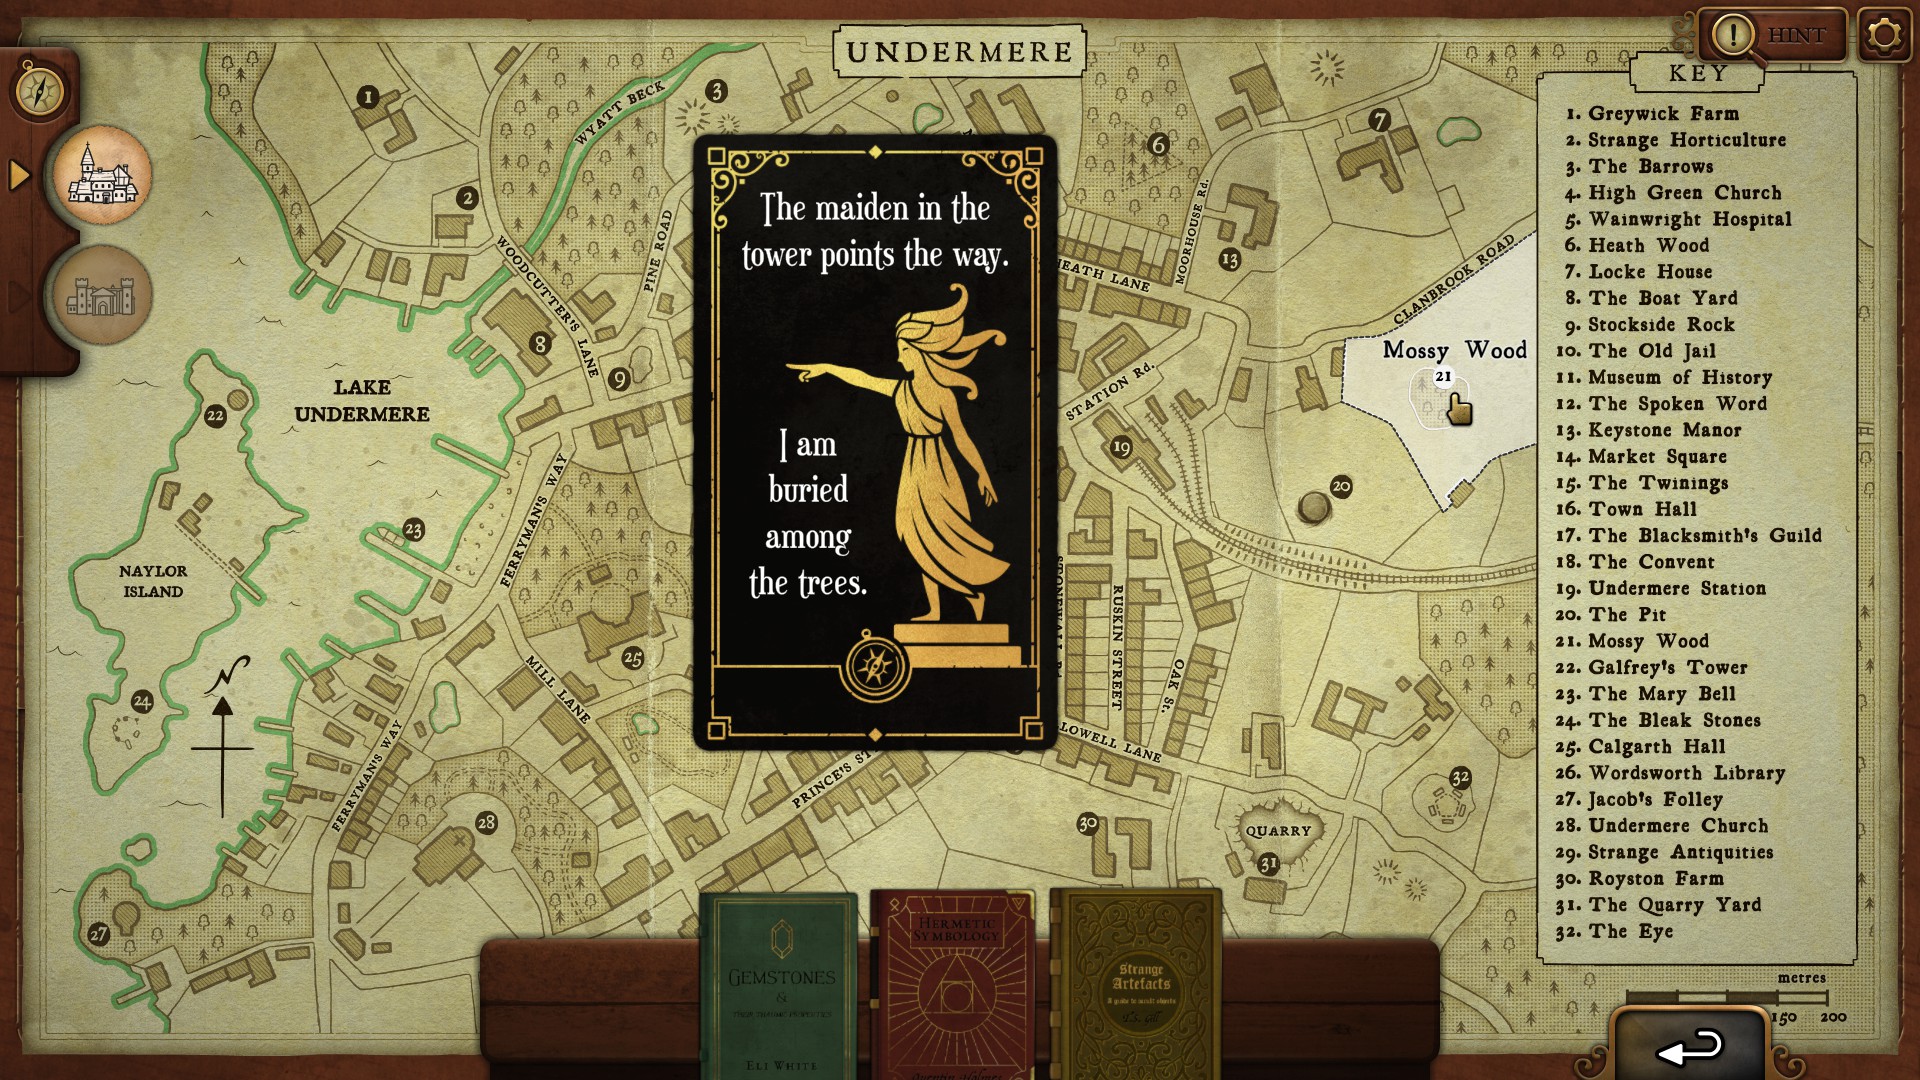
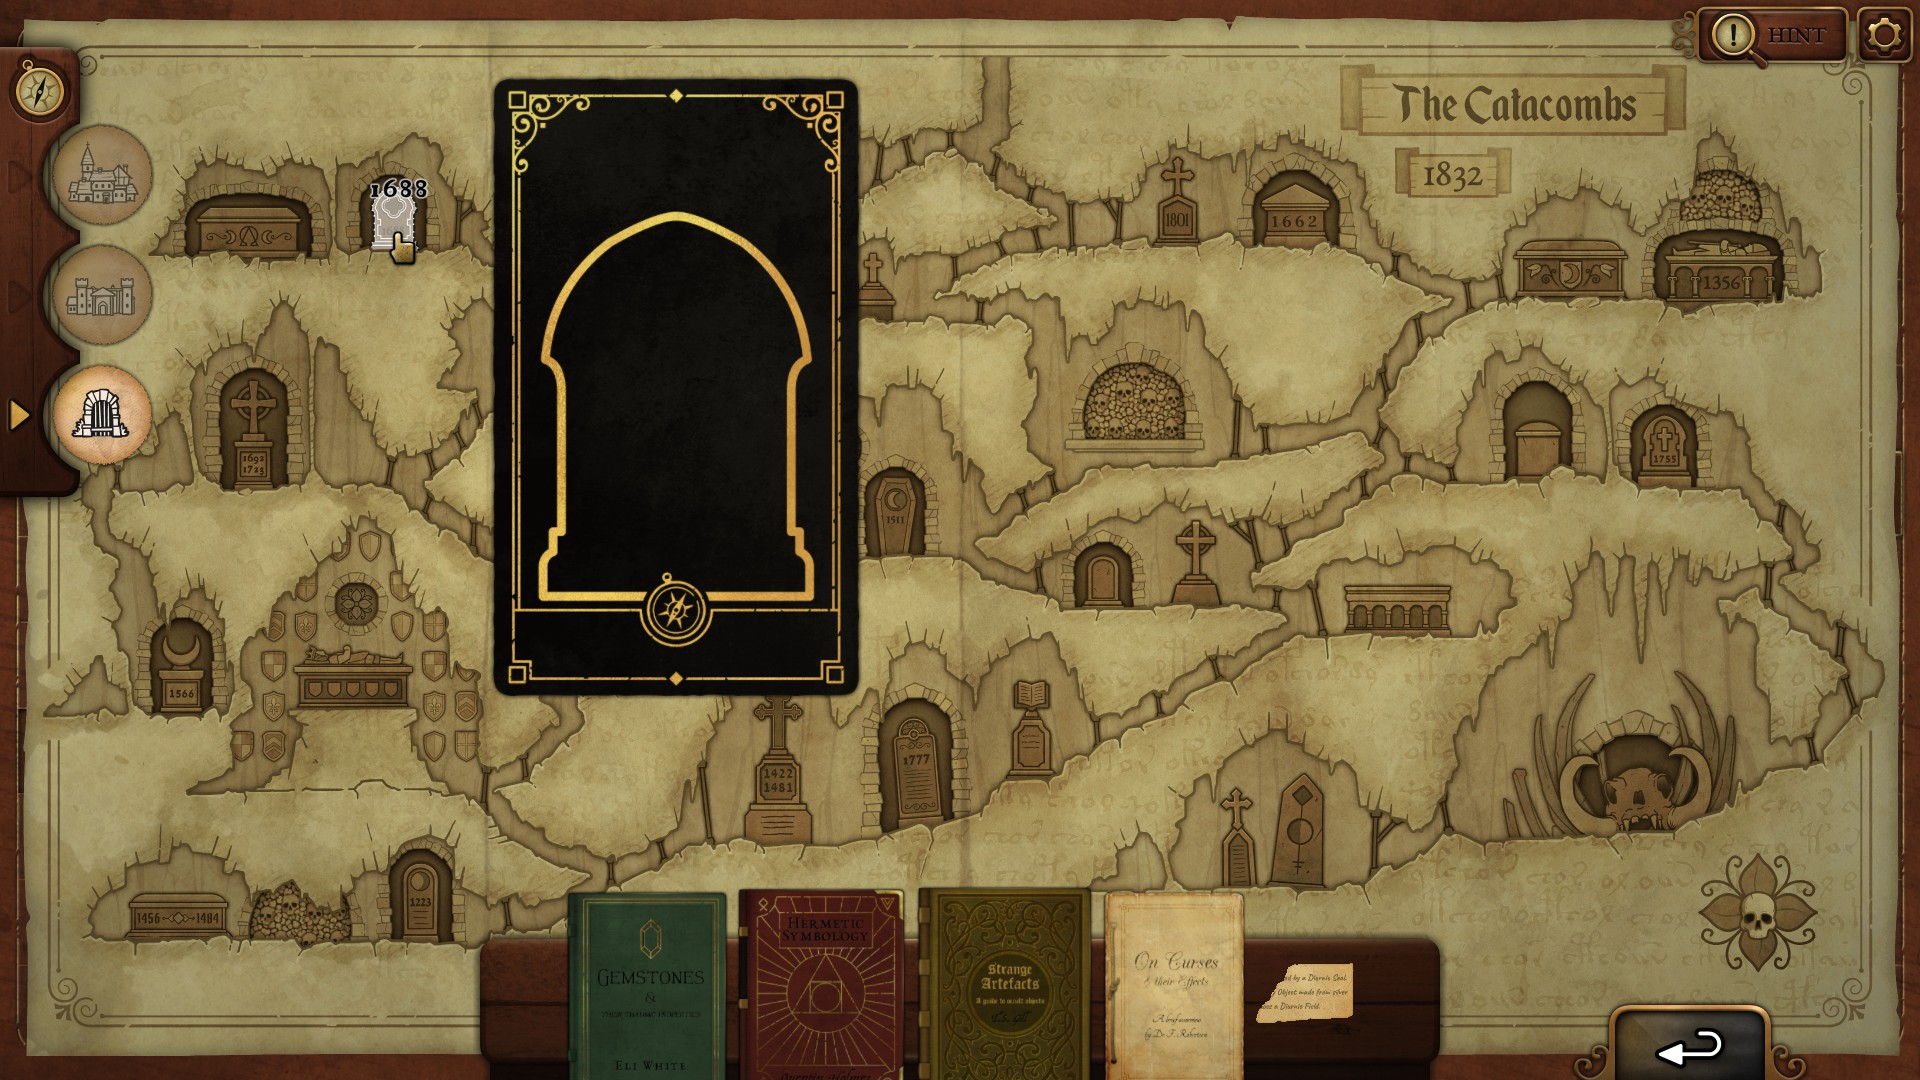
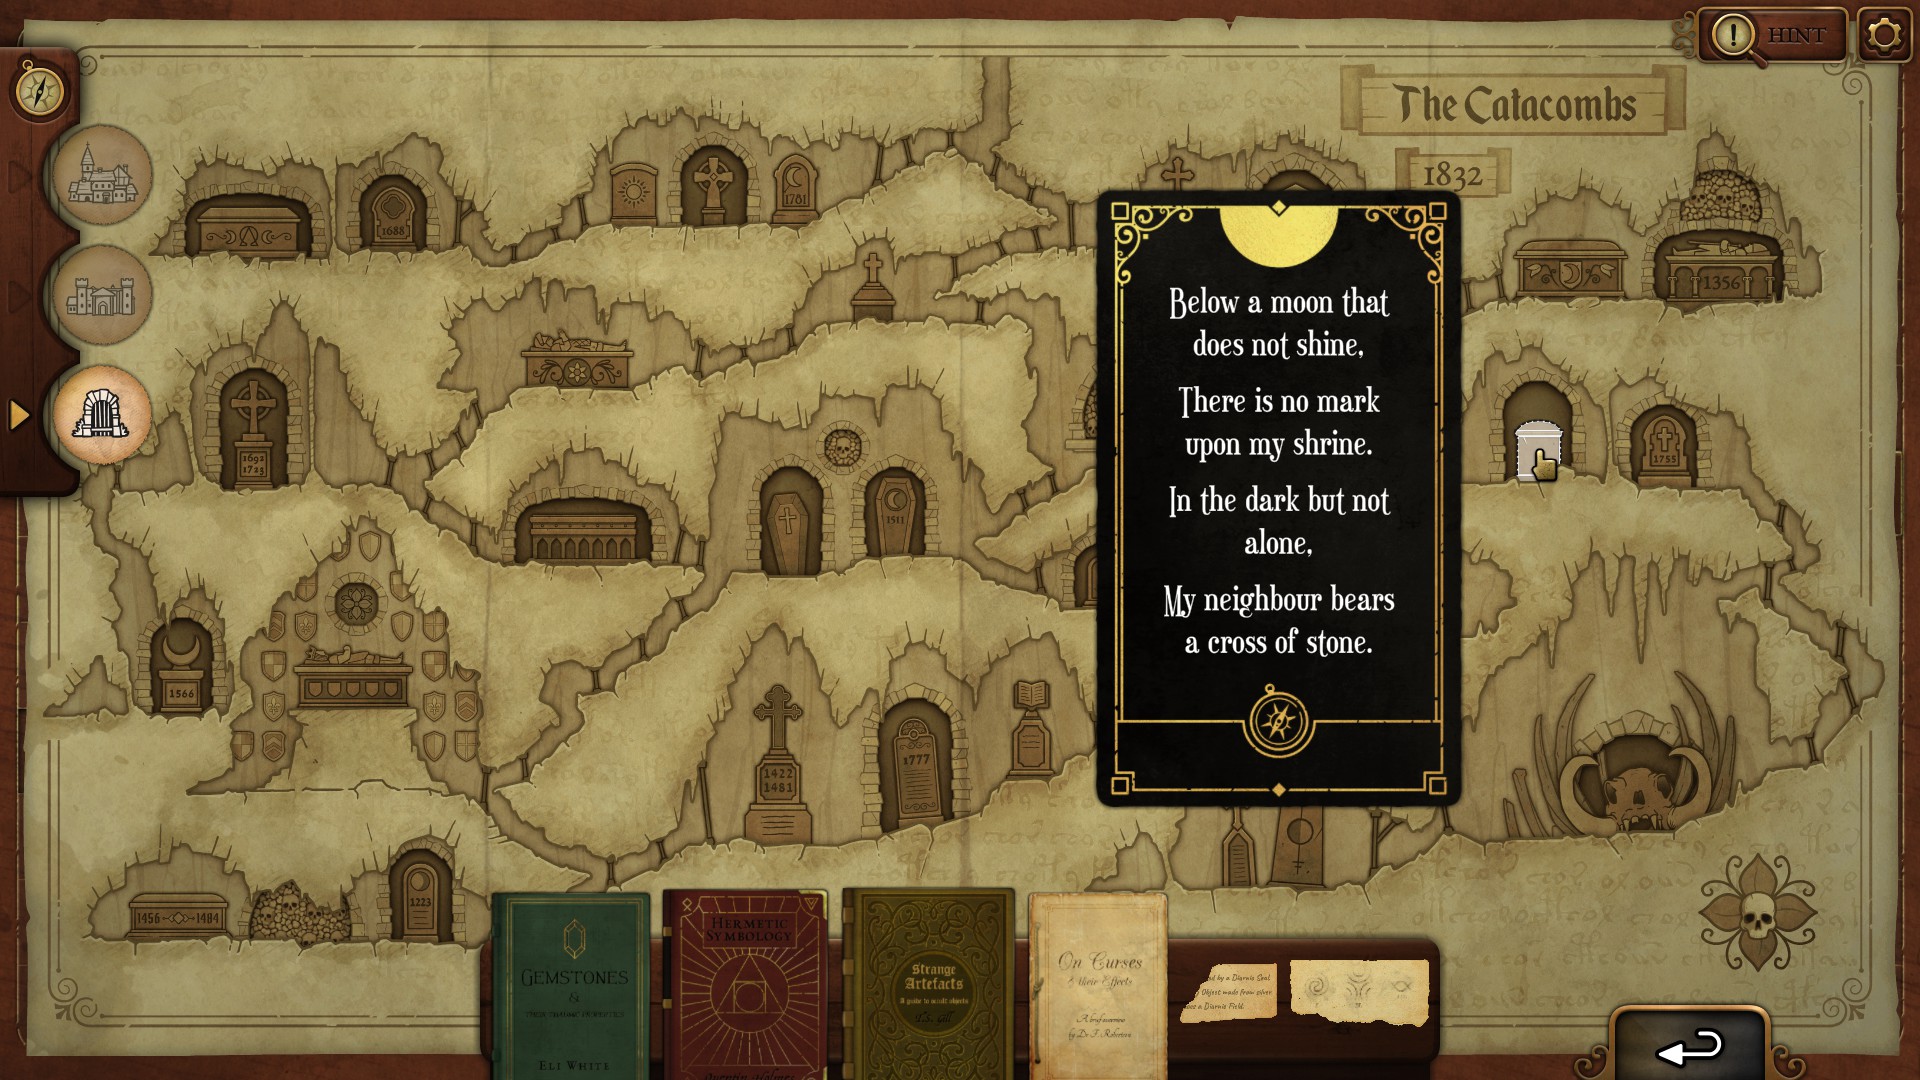
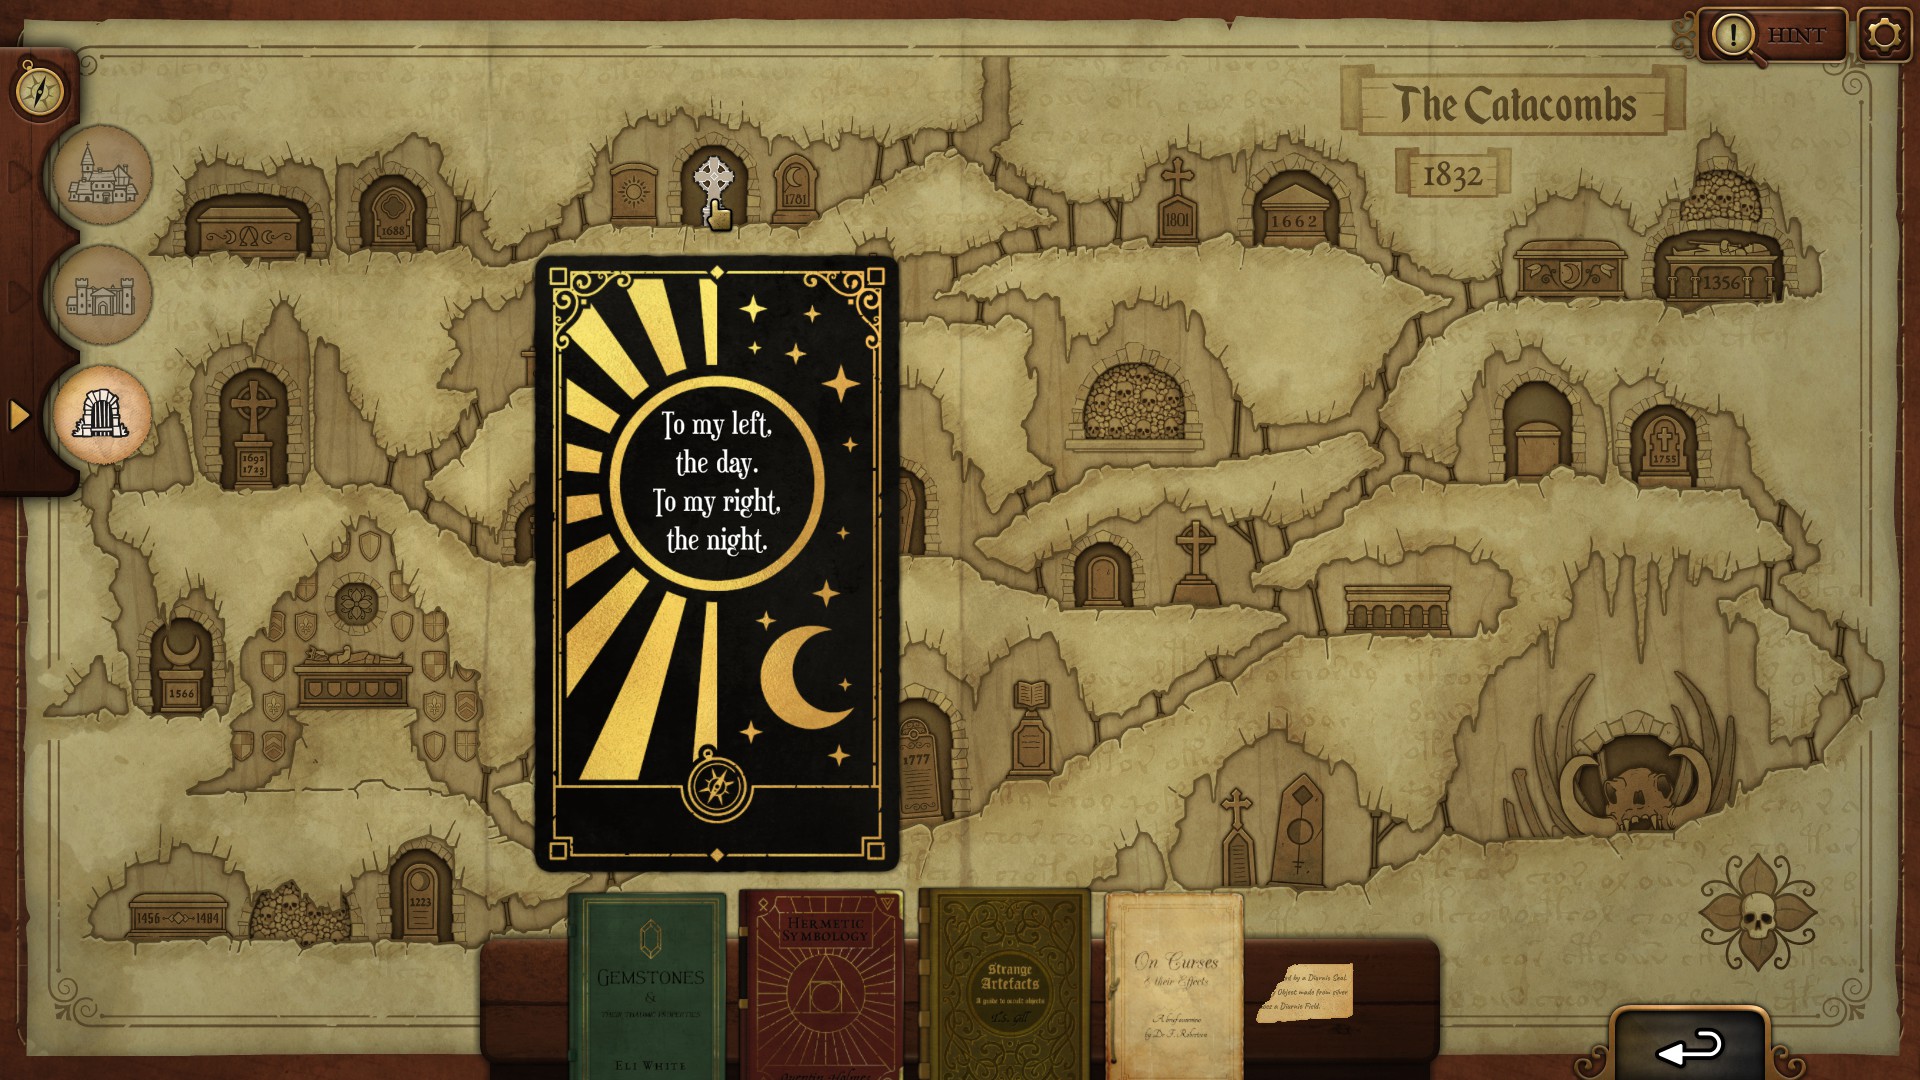
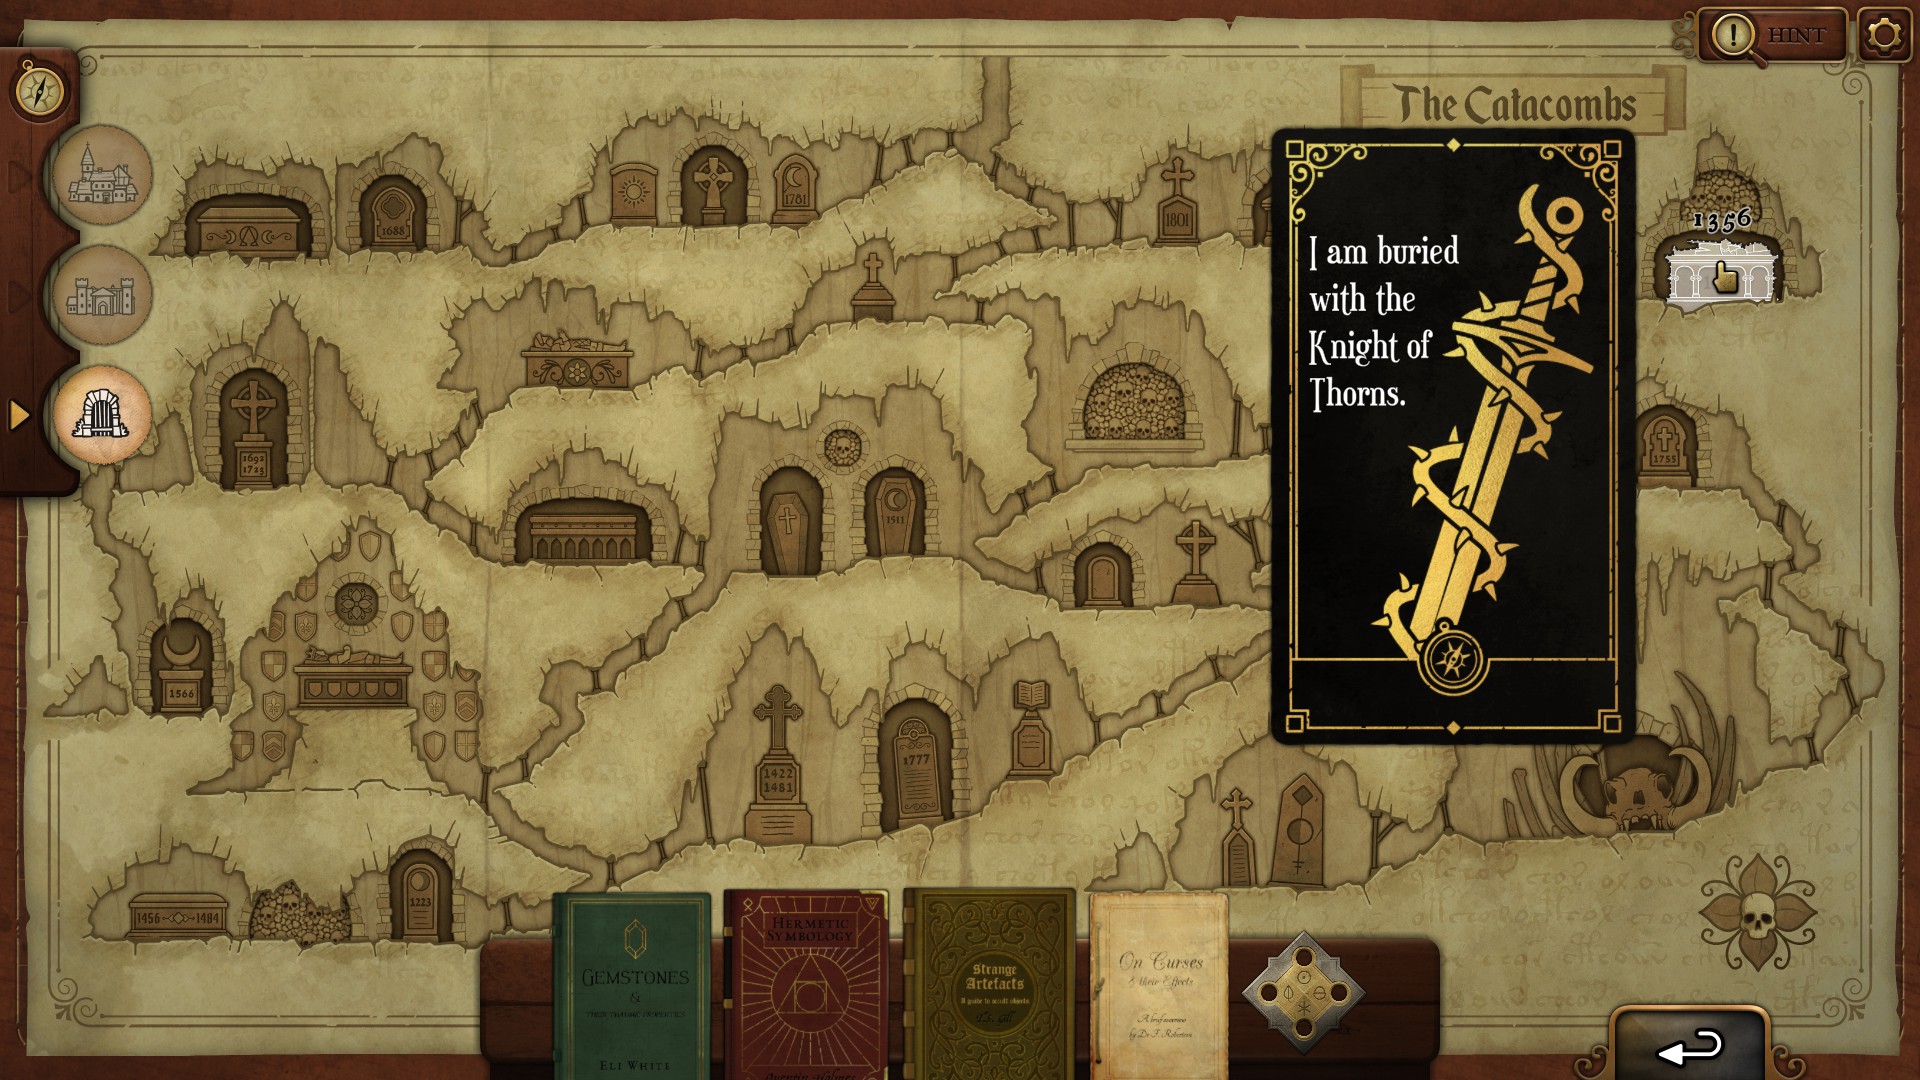
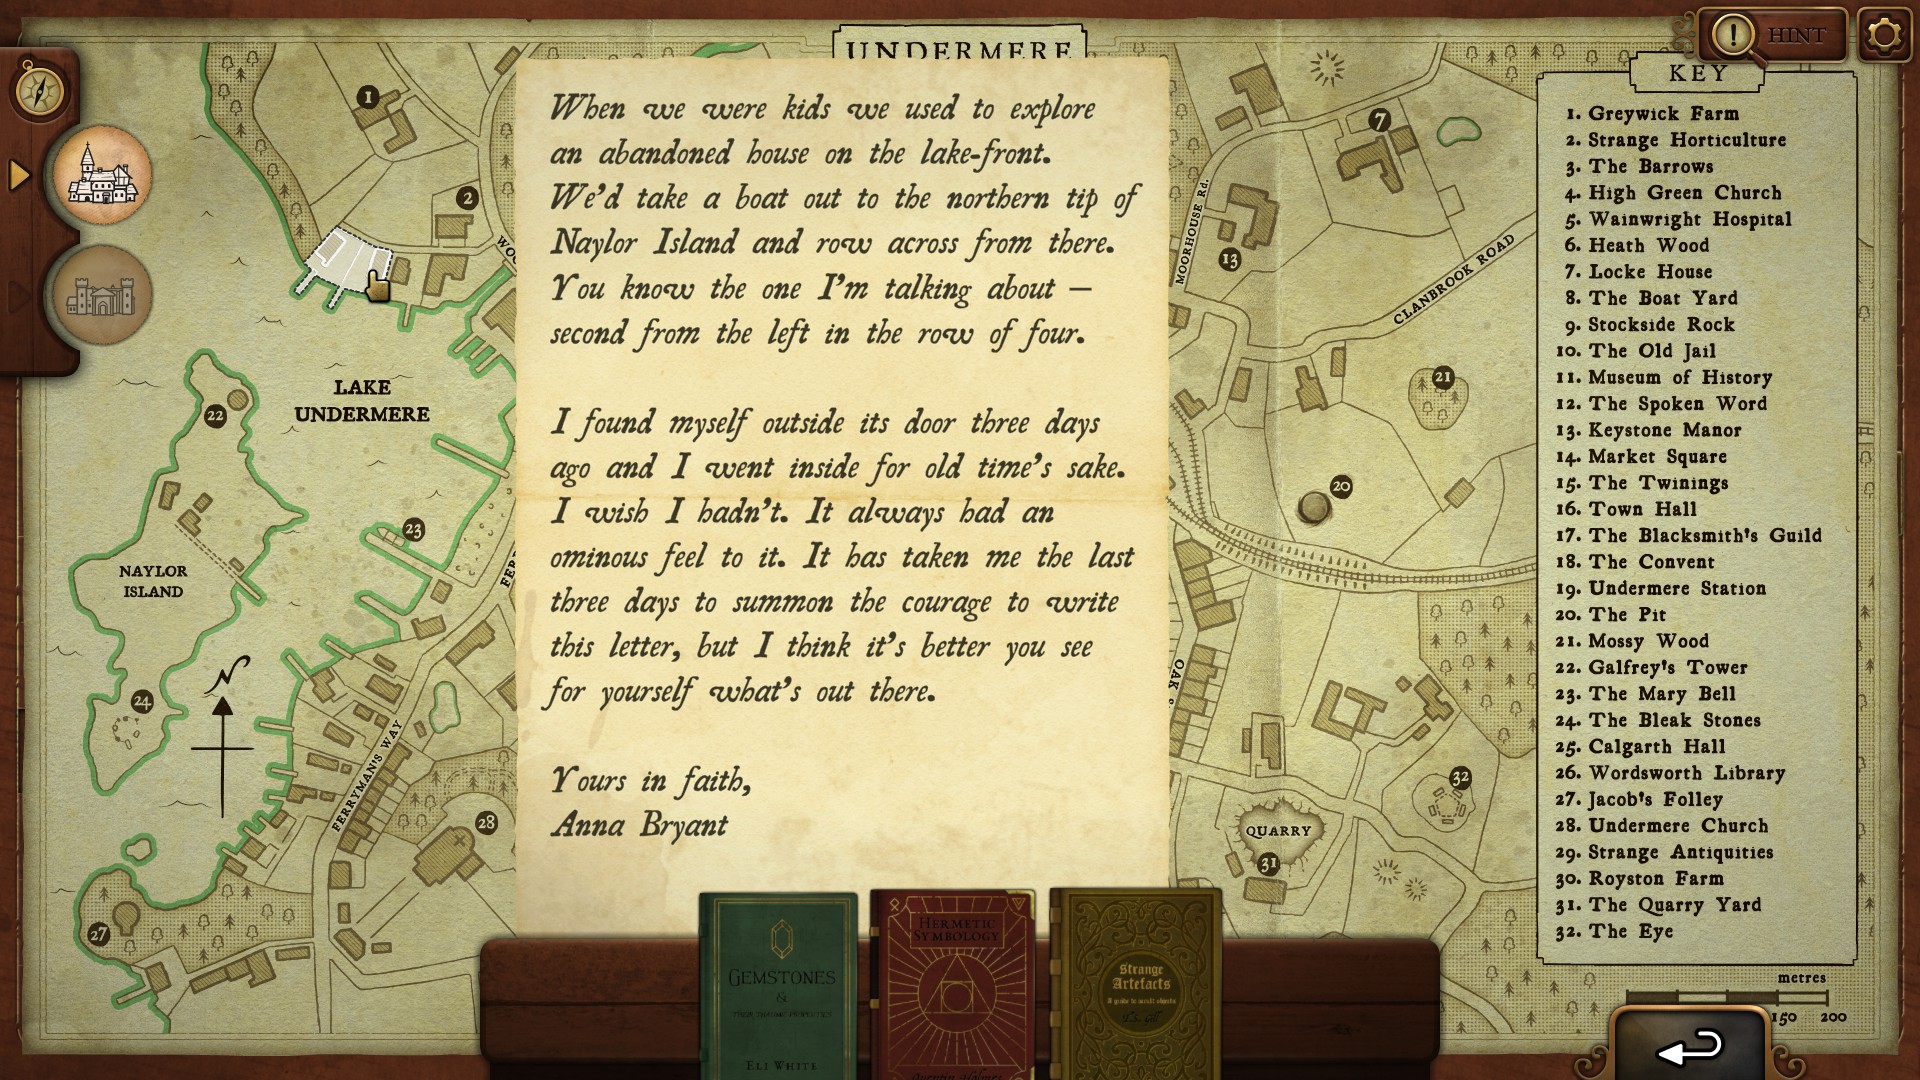
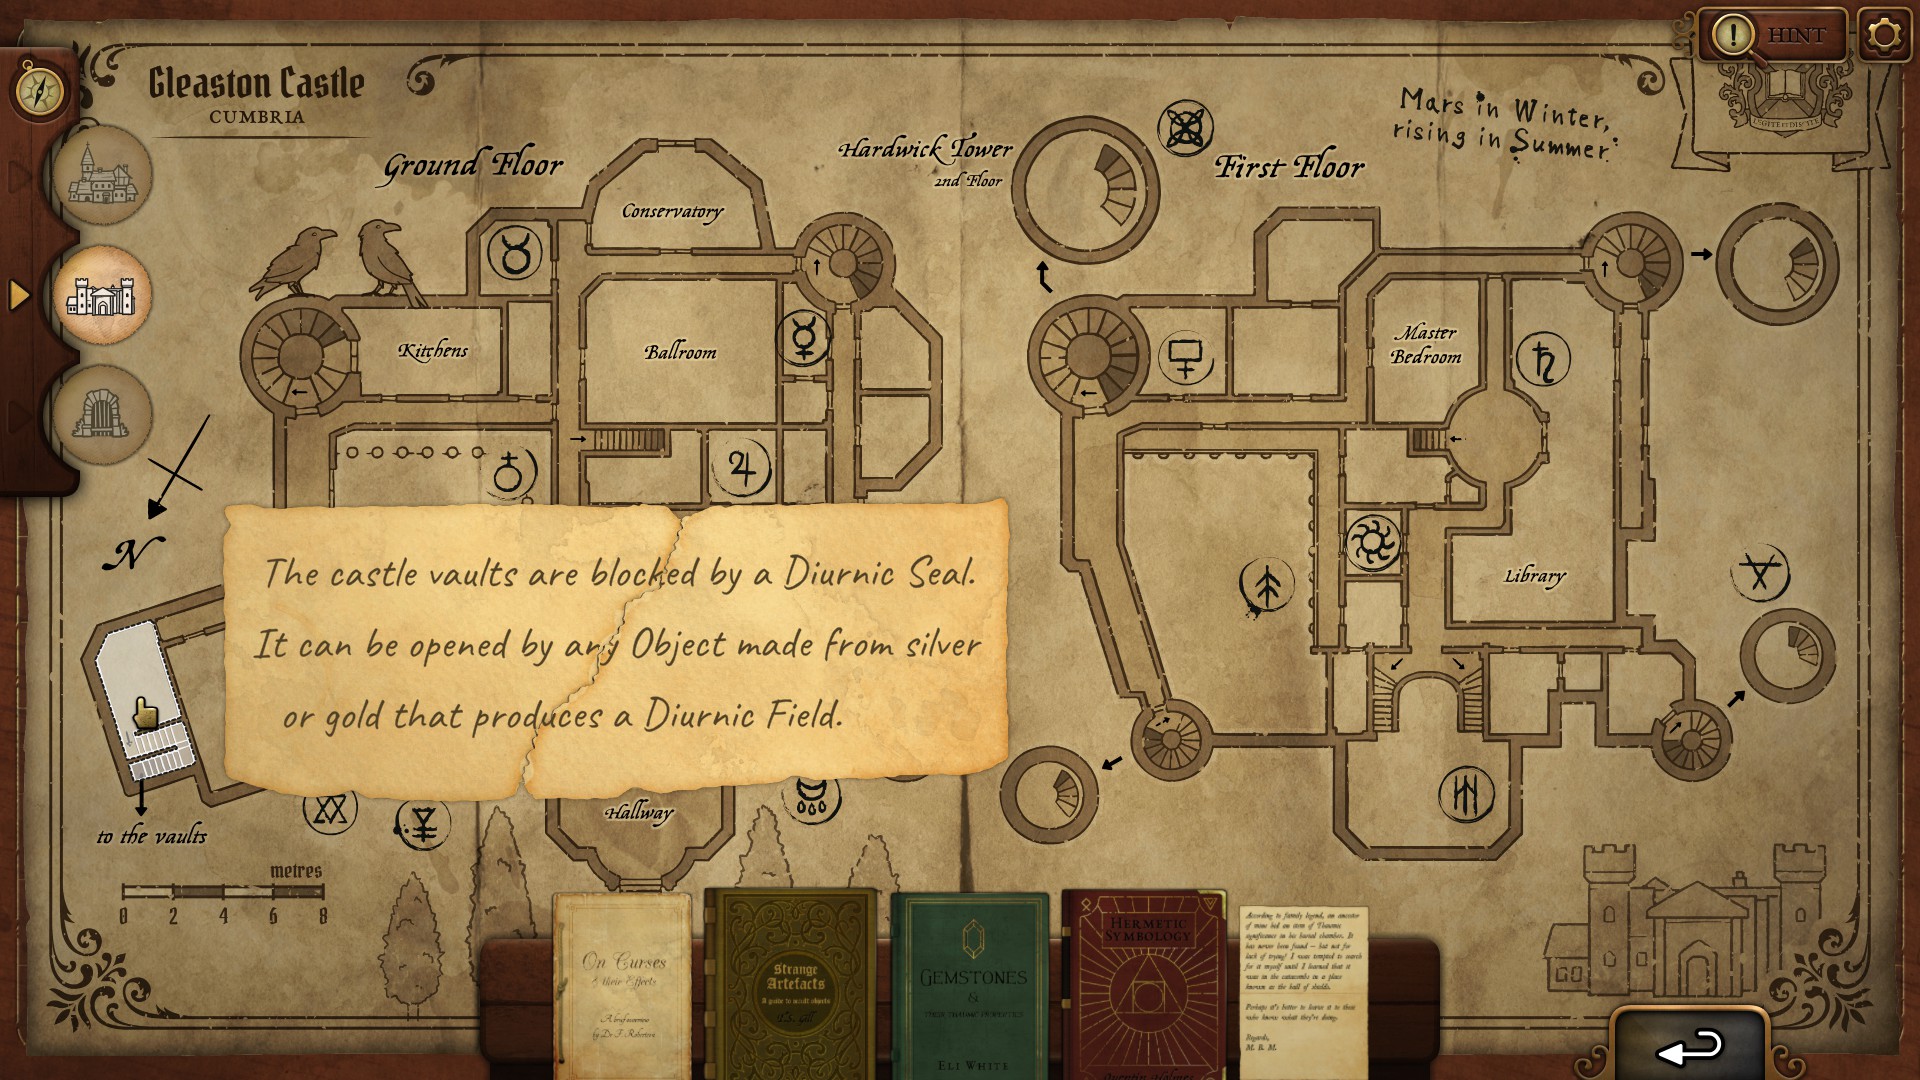
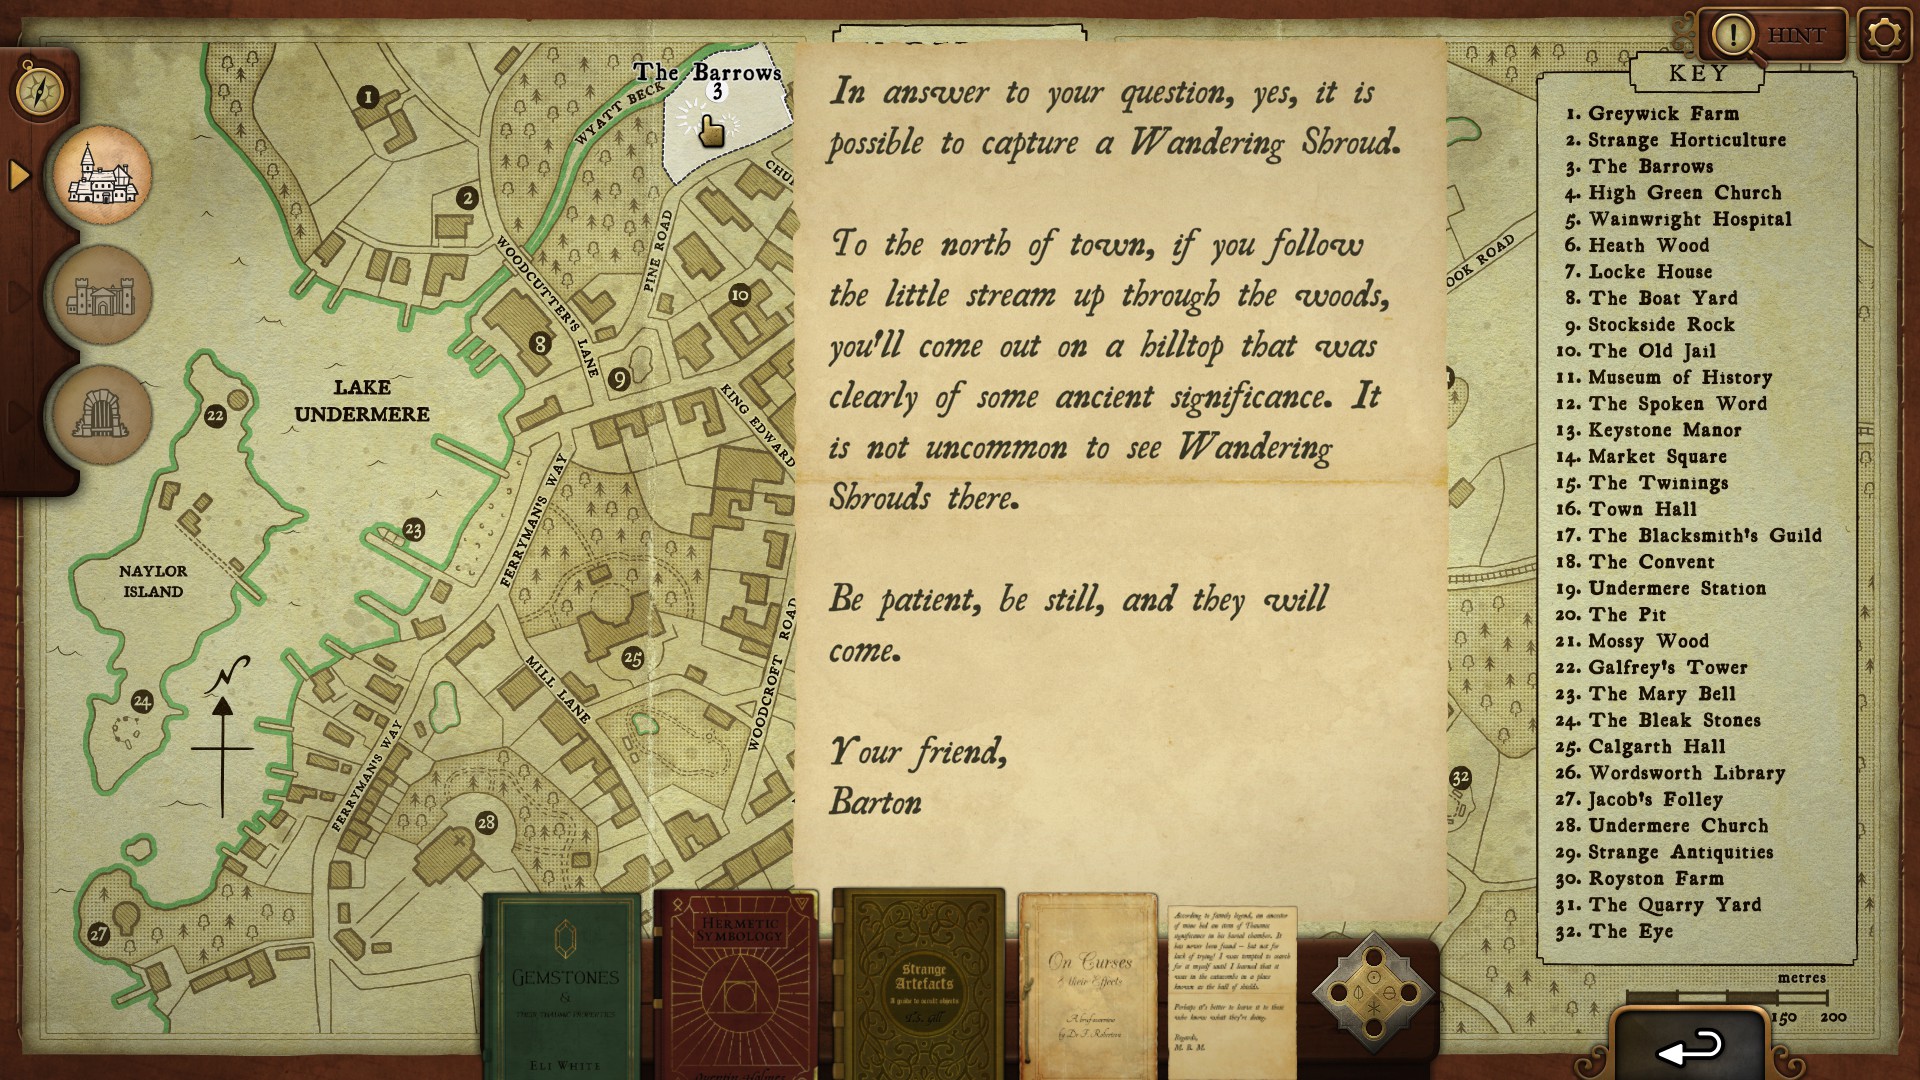
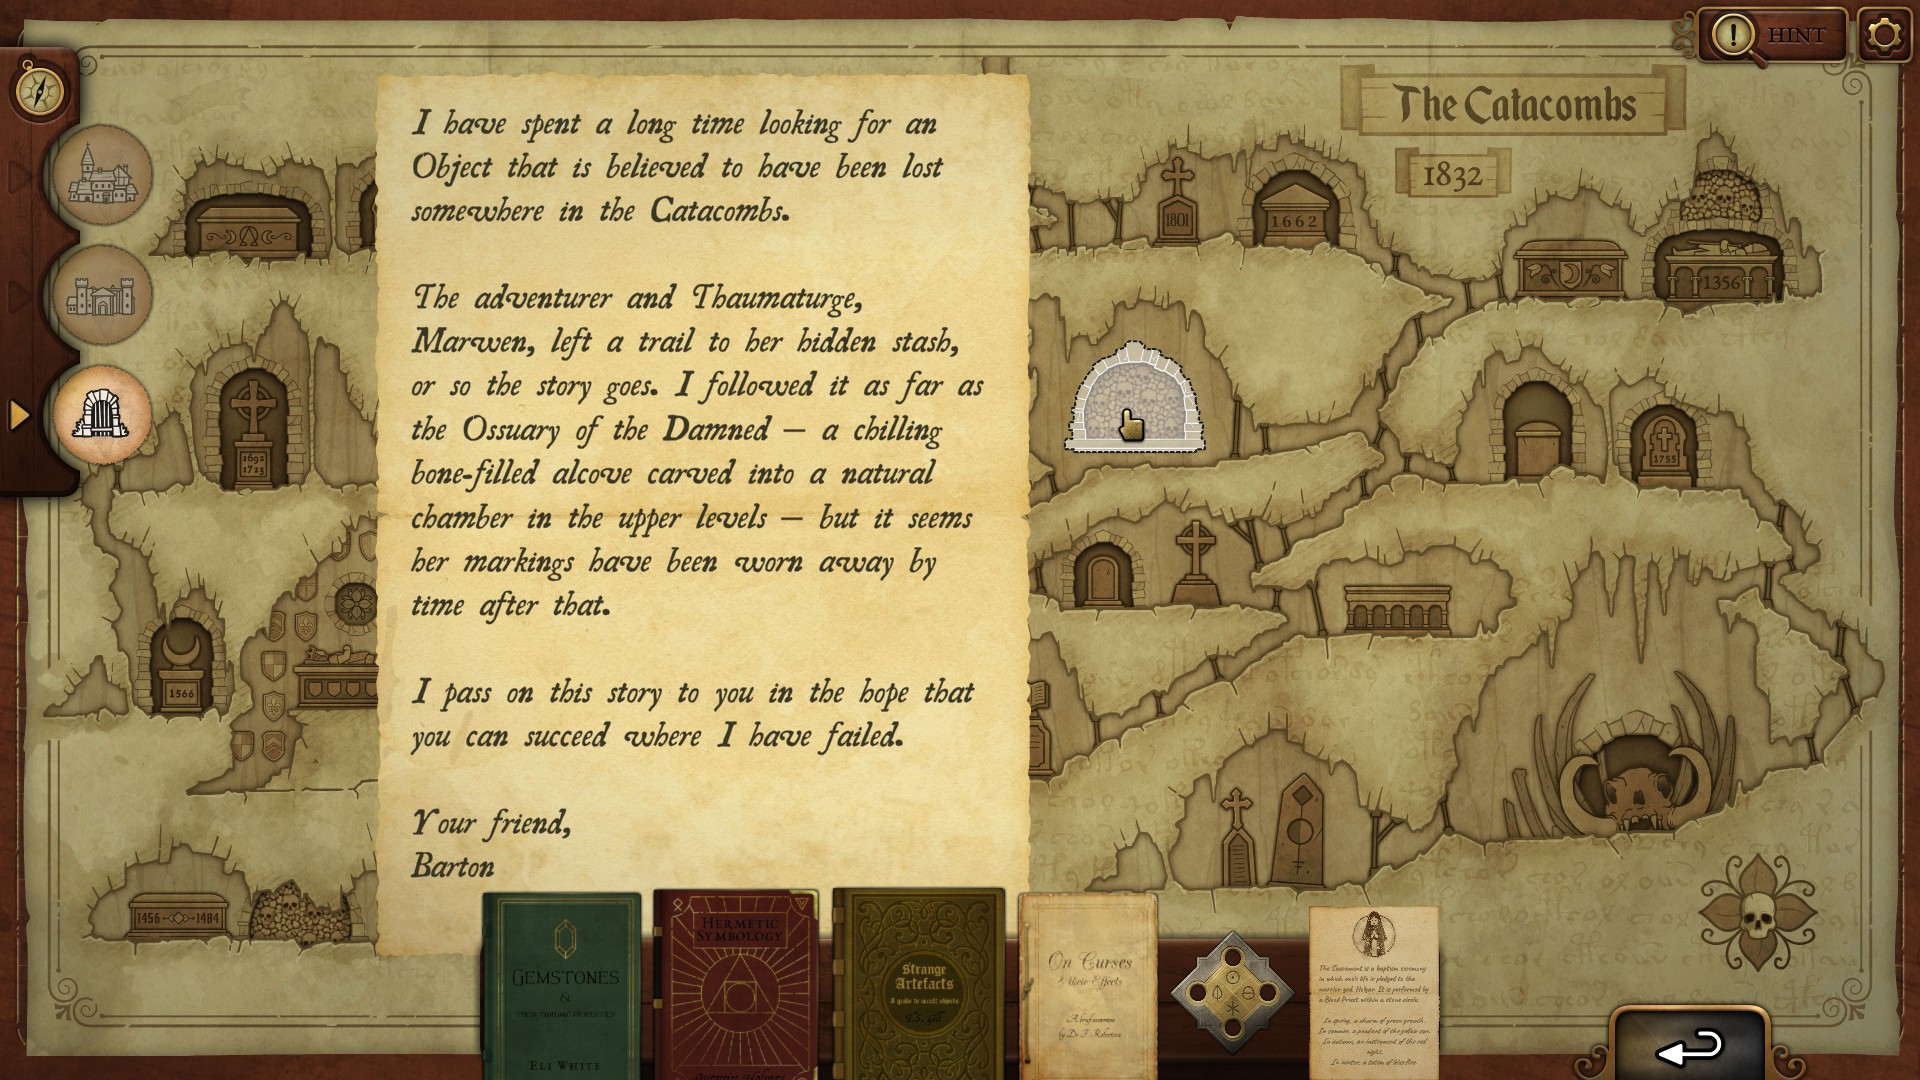
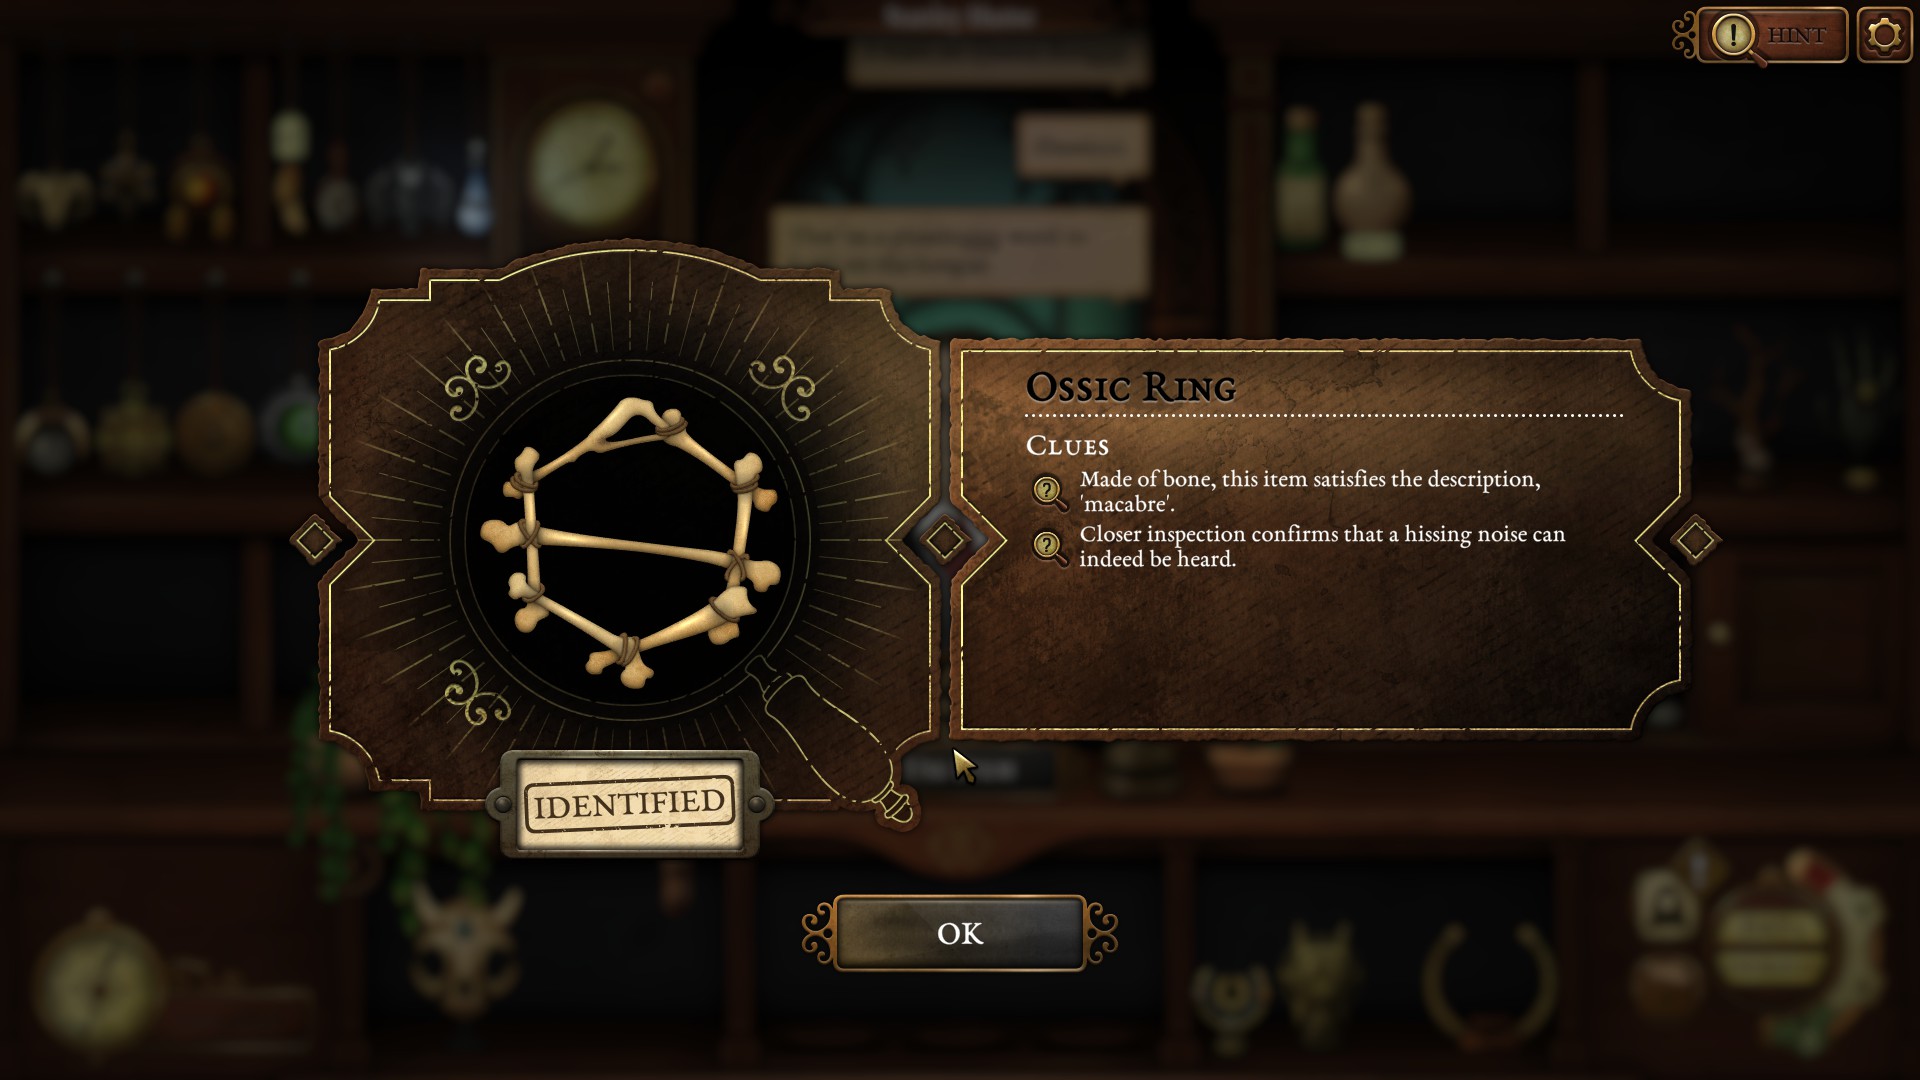
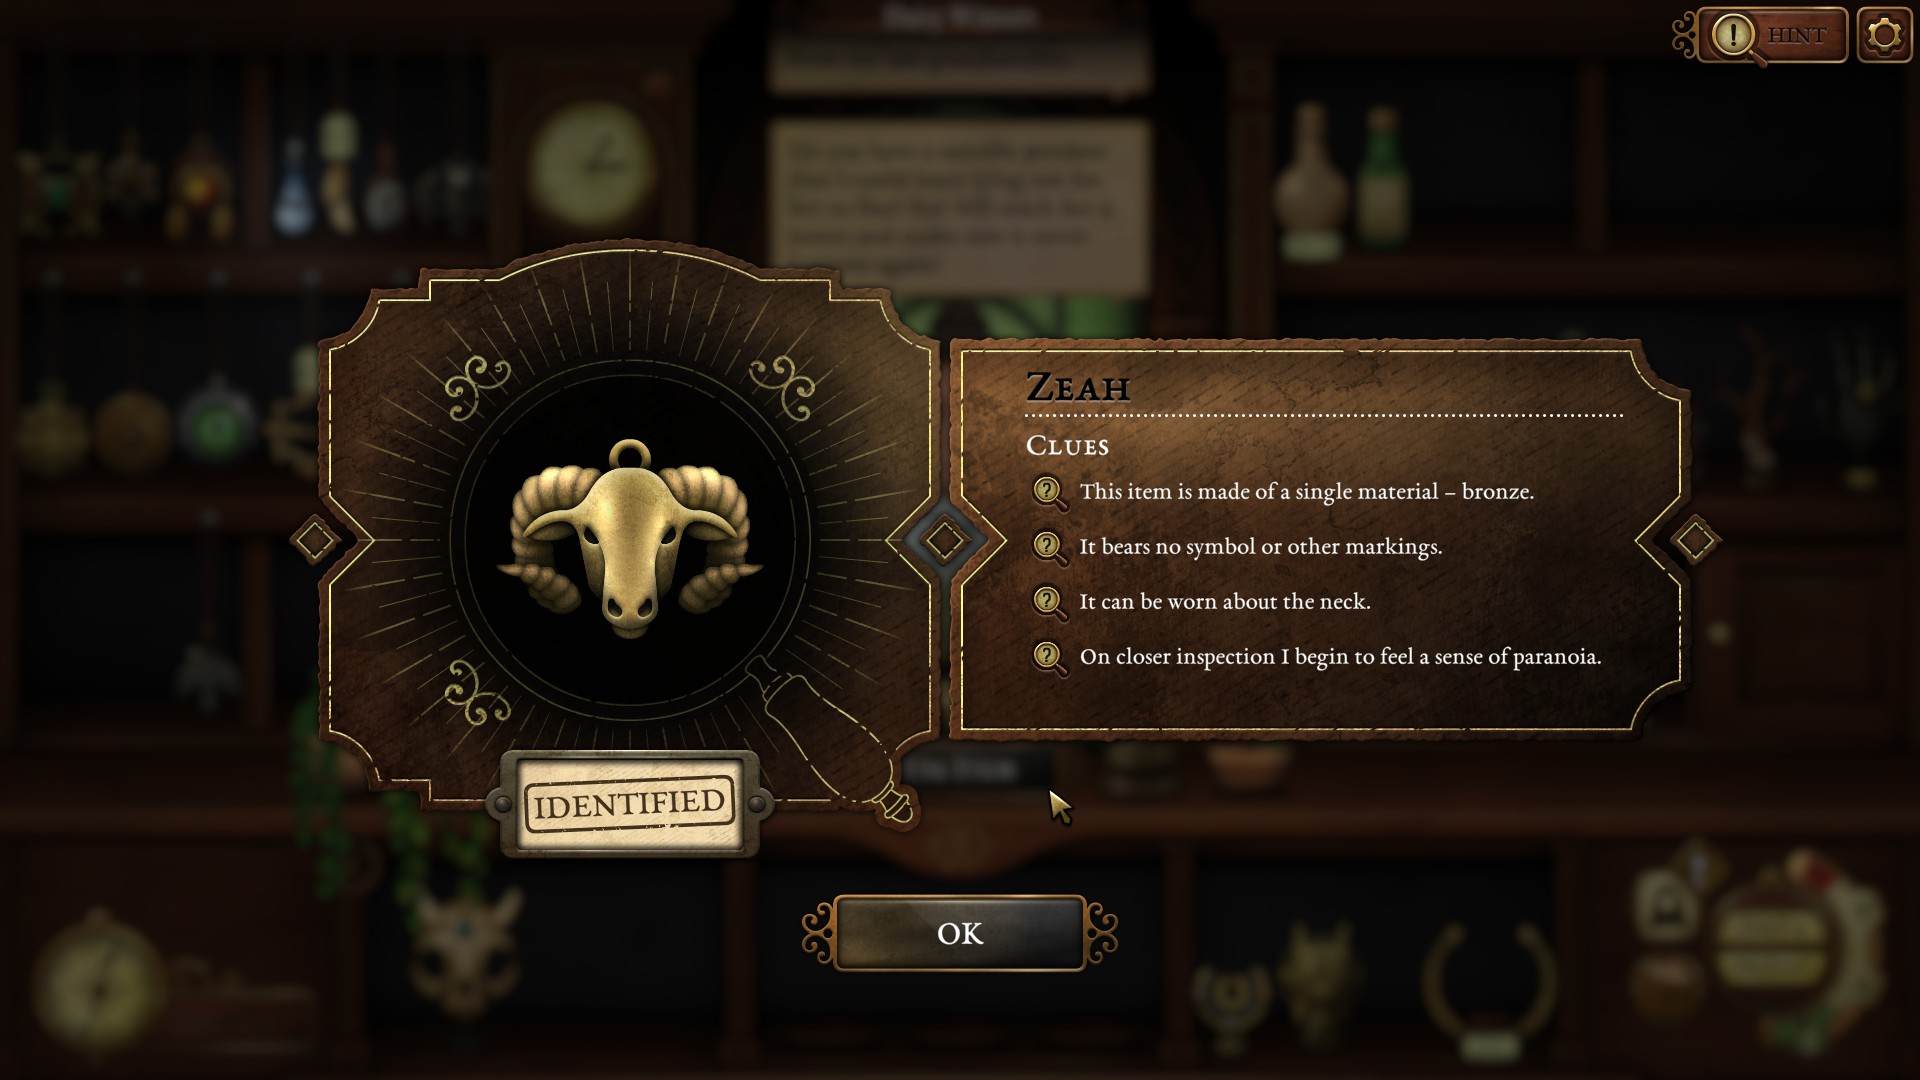
I encountered this when I first did the puzzle. I'm guessing you chose the the 1777 grave , however it's not this grave because the clue says "there is no mark upon my shrine" whereas this grave has writing on it .
resetti 9 月 20 日 上午 9:17 
@Solomaher - the clue for the tomb is after you complete the clock puzzle . I think the intended order of steps to solve the puzzle without brute forcing anything is:

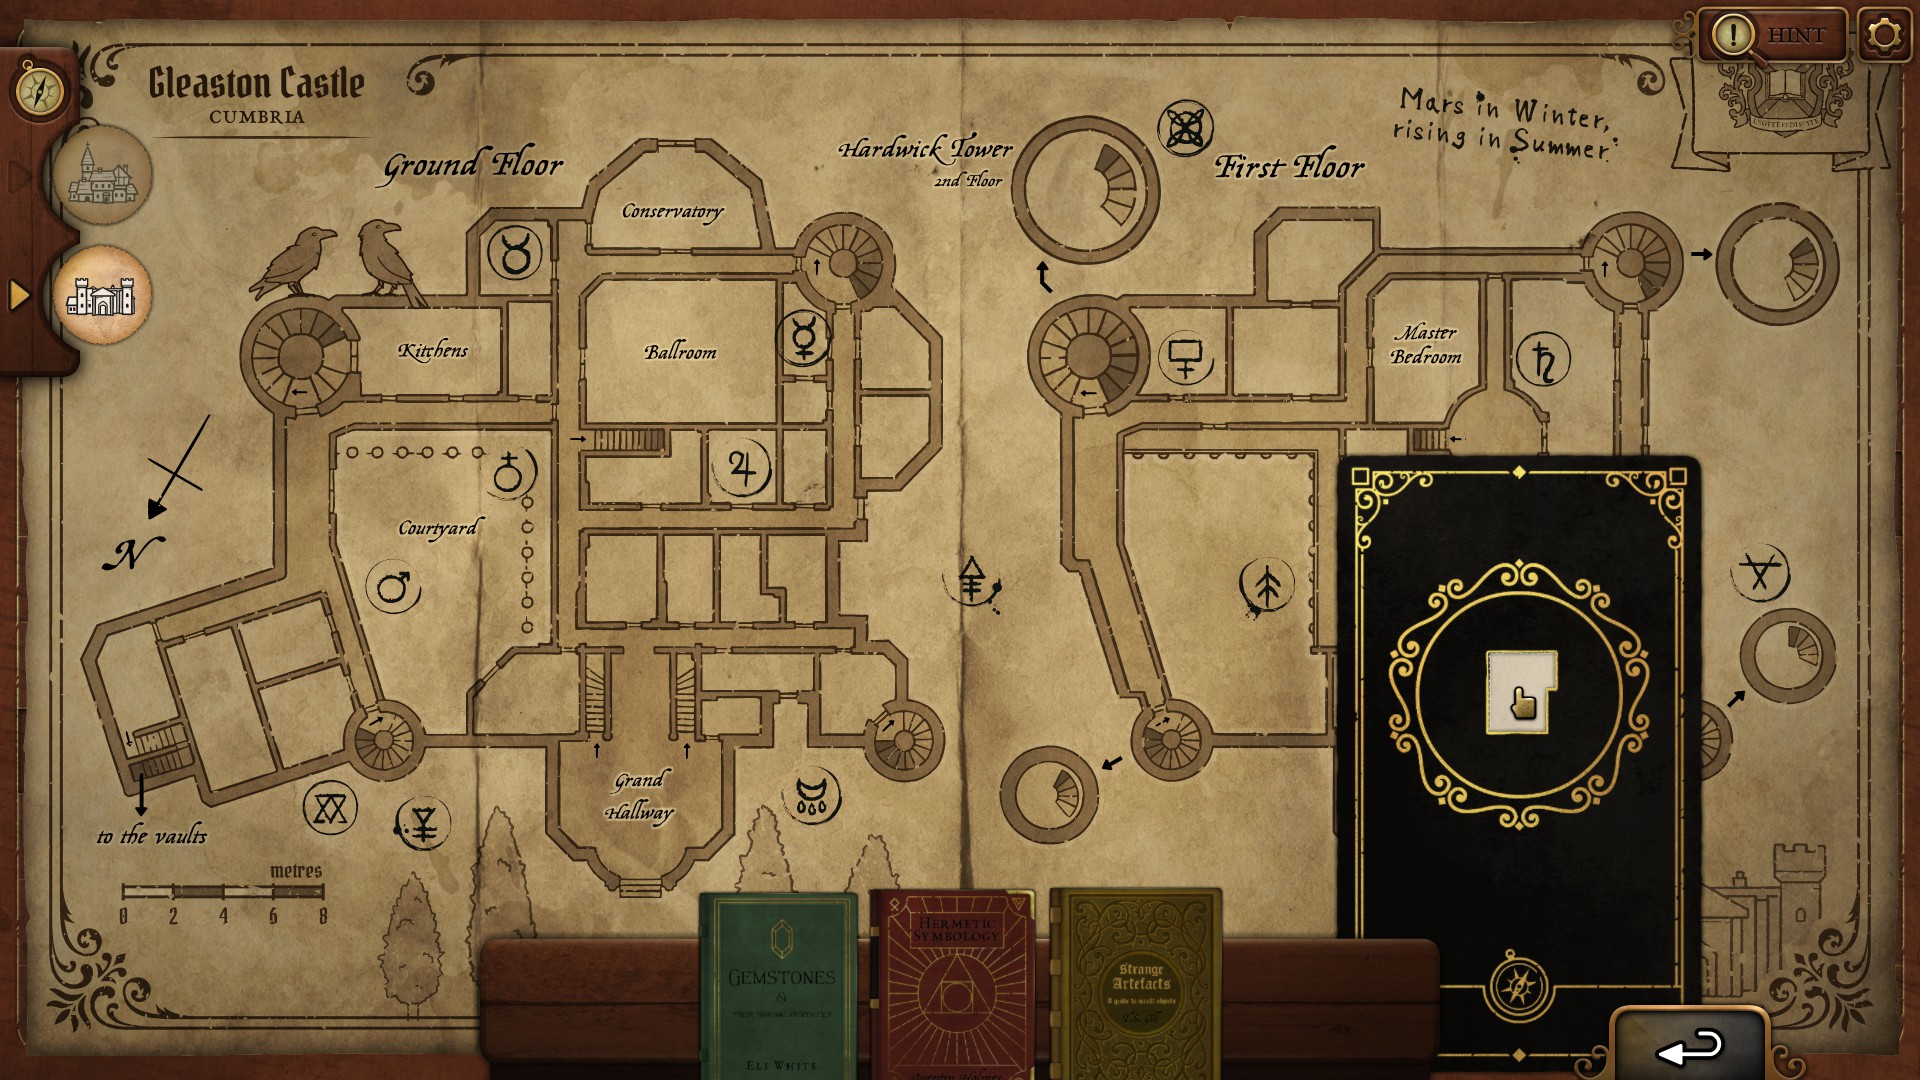
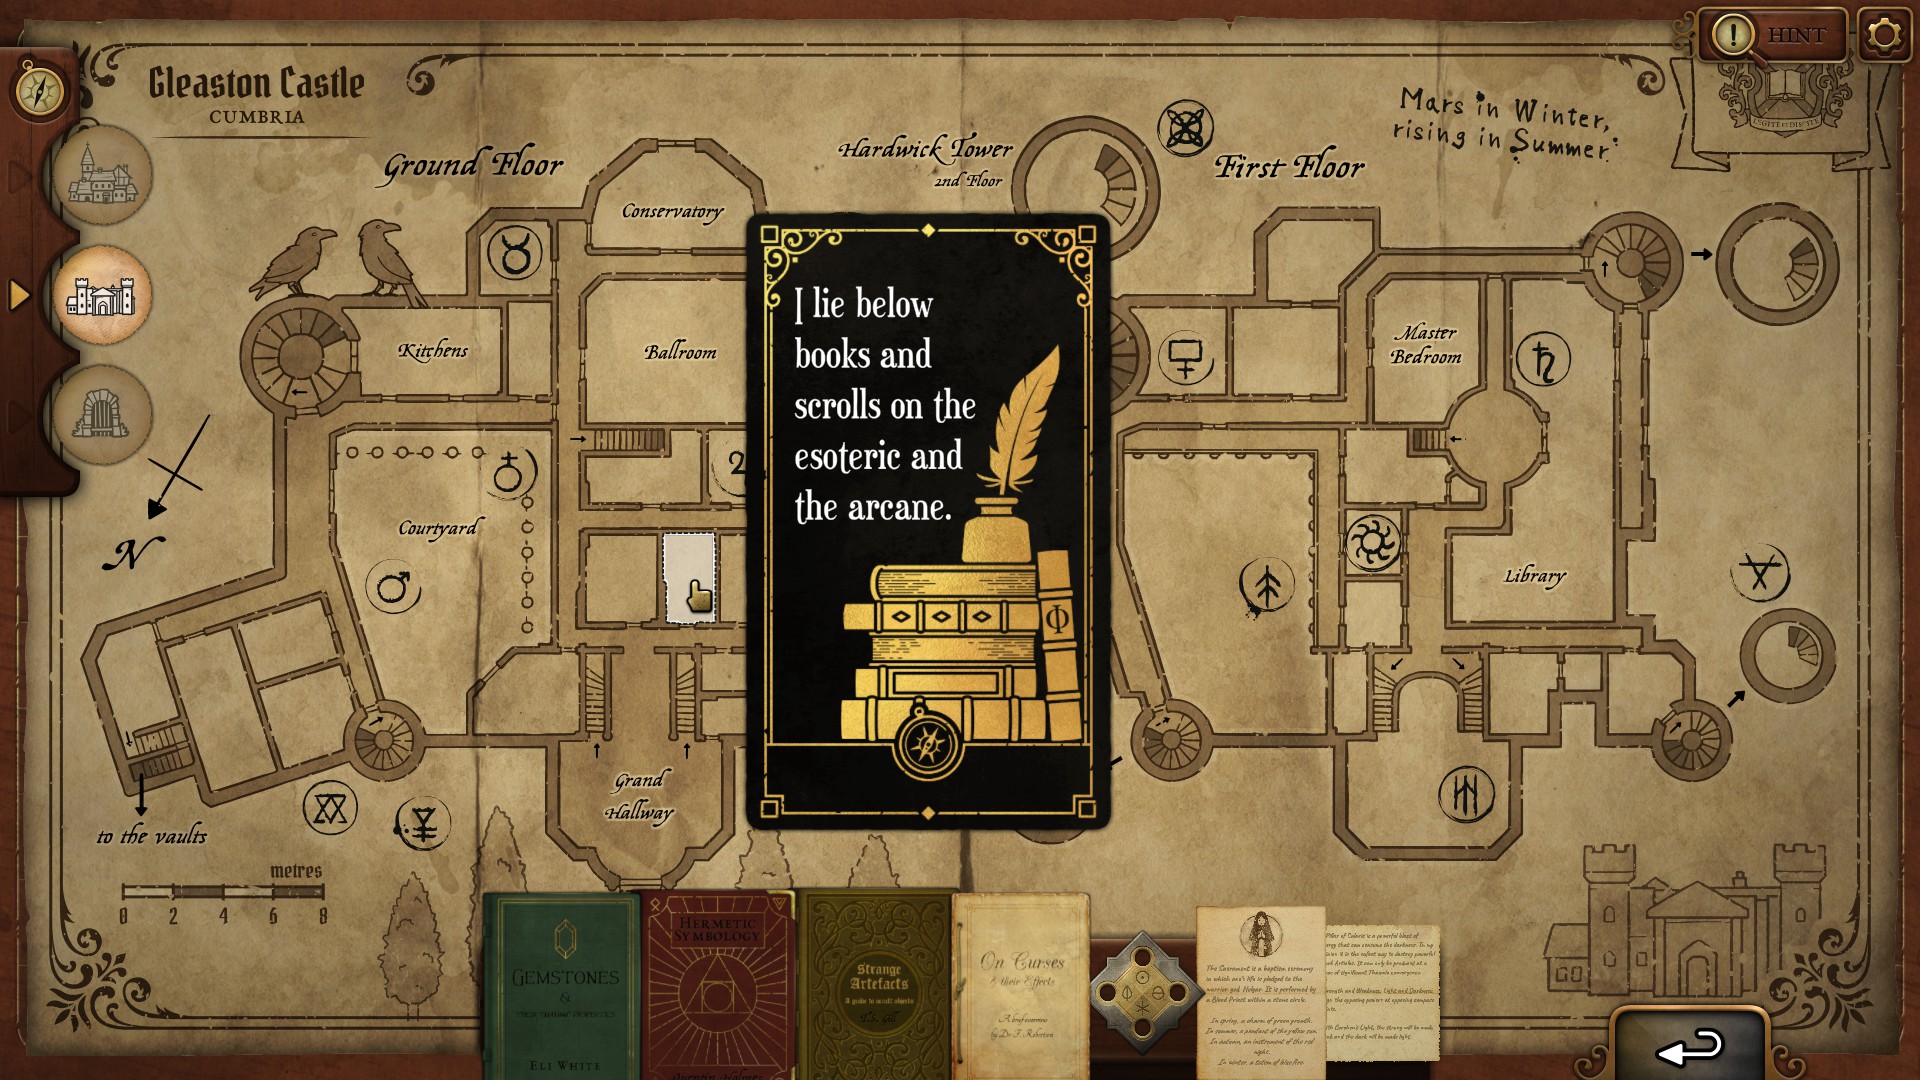
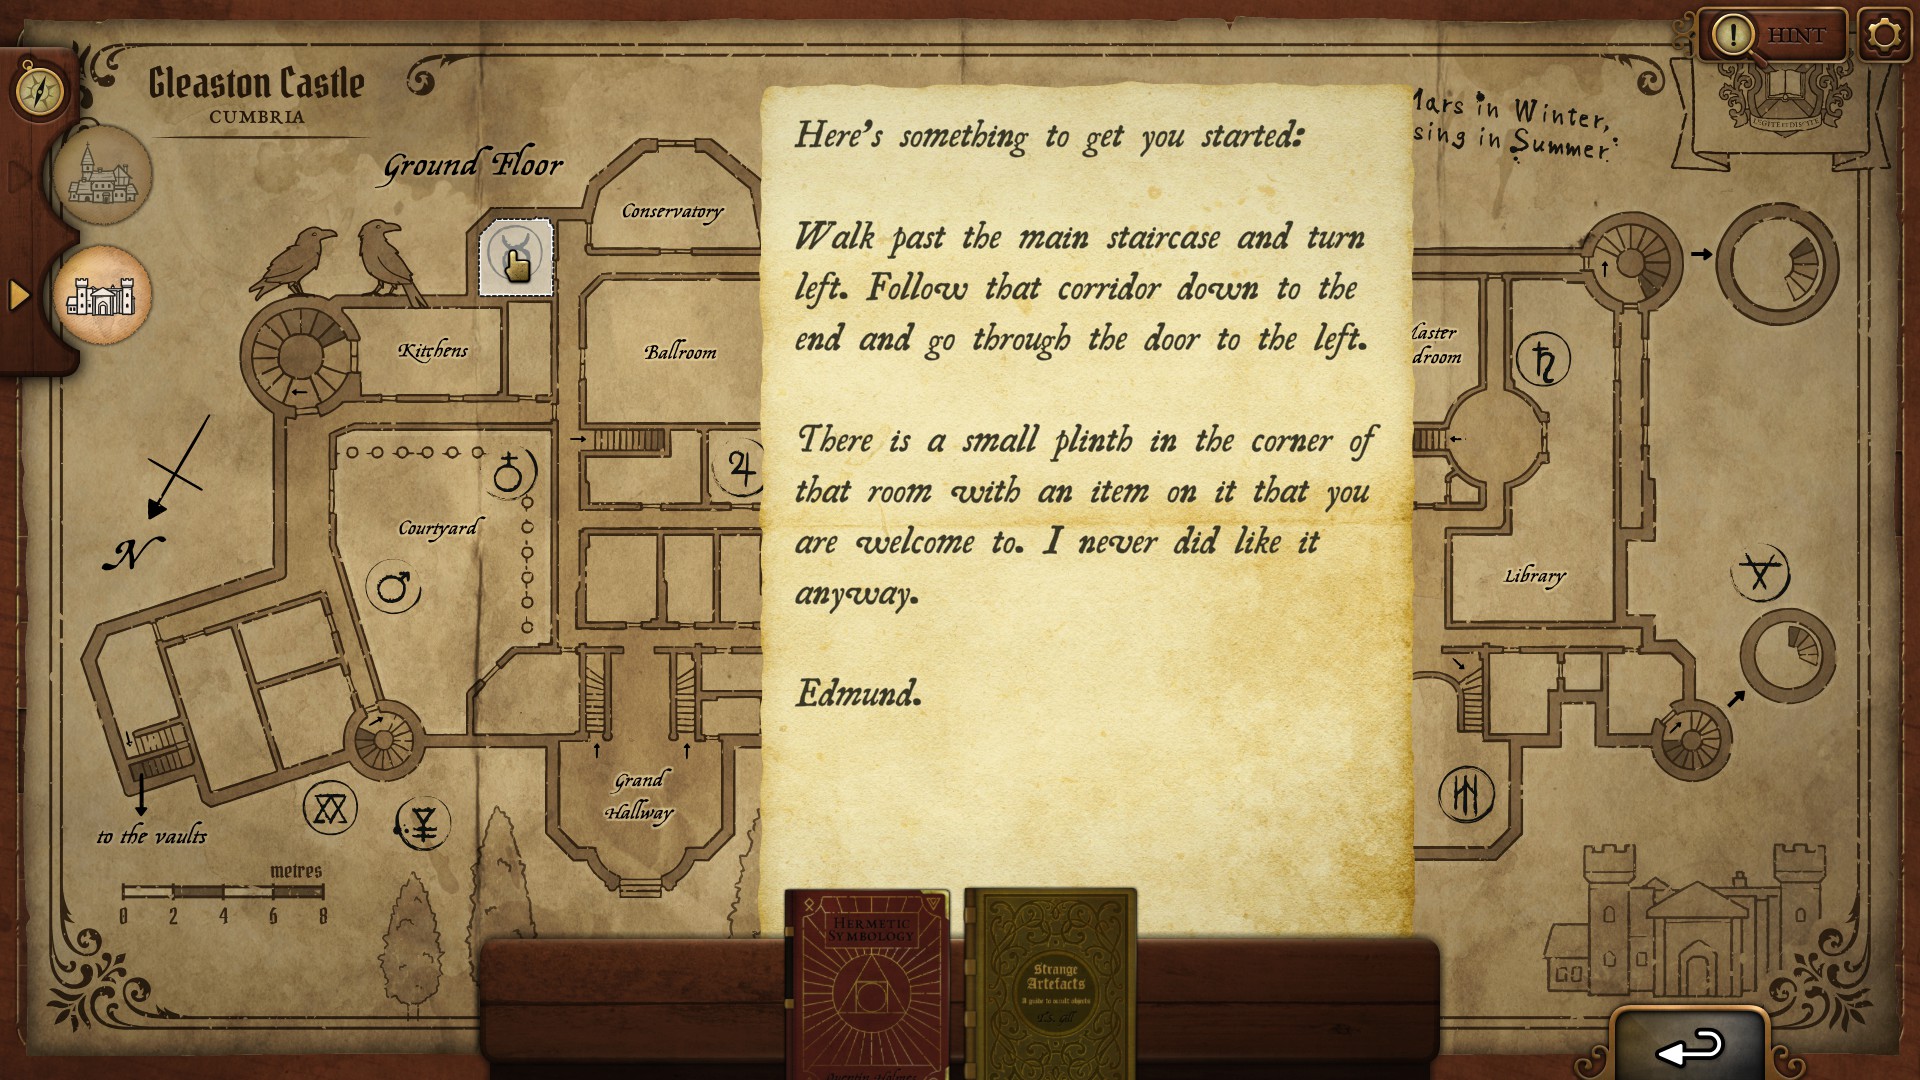
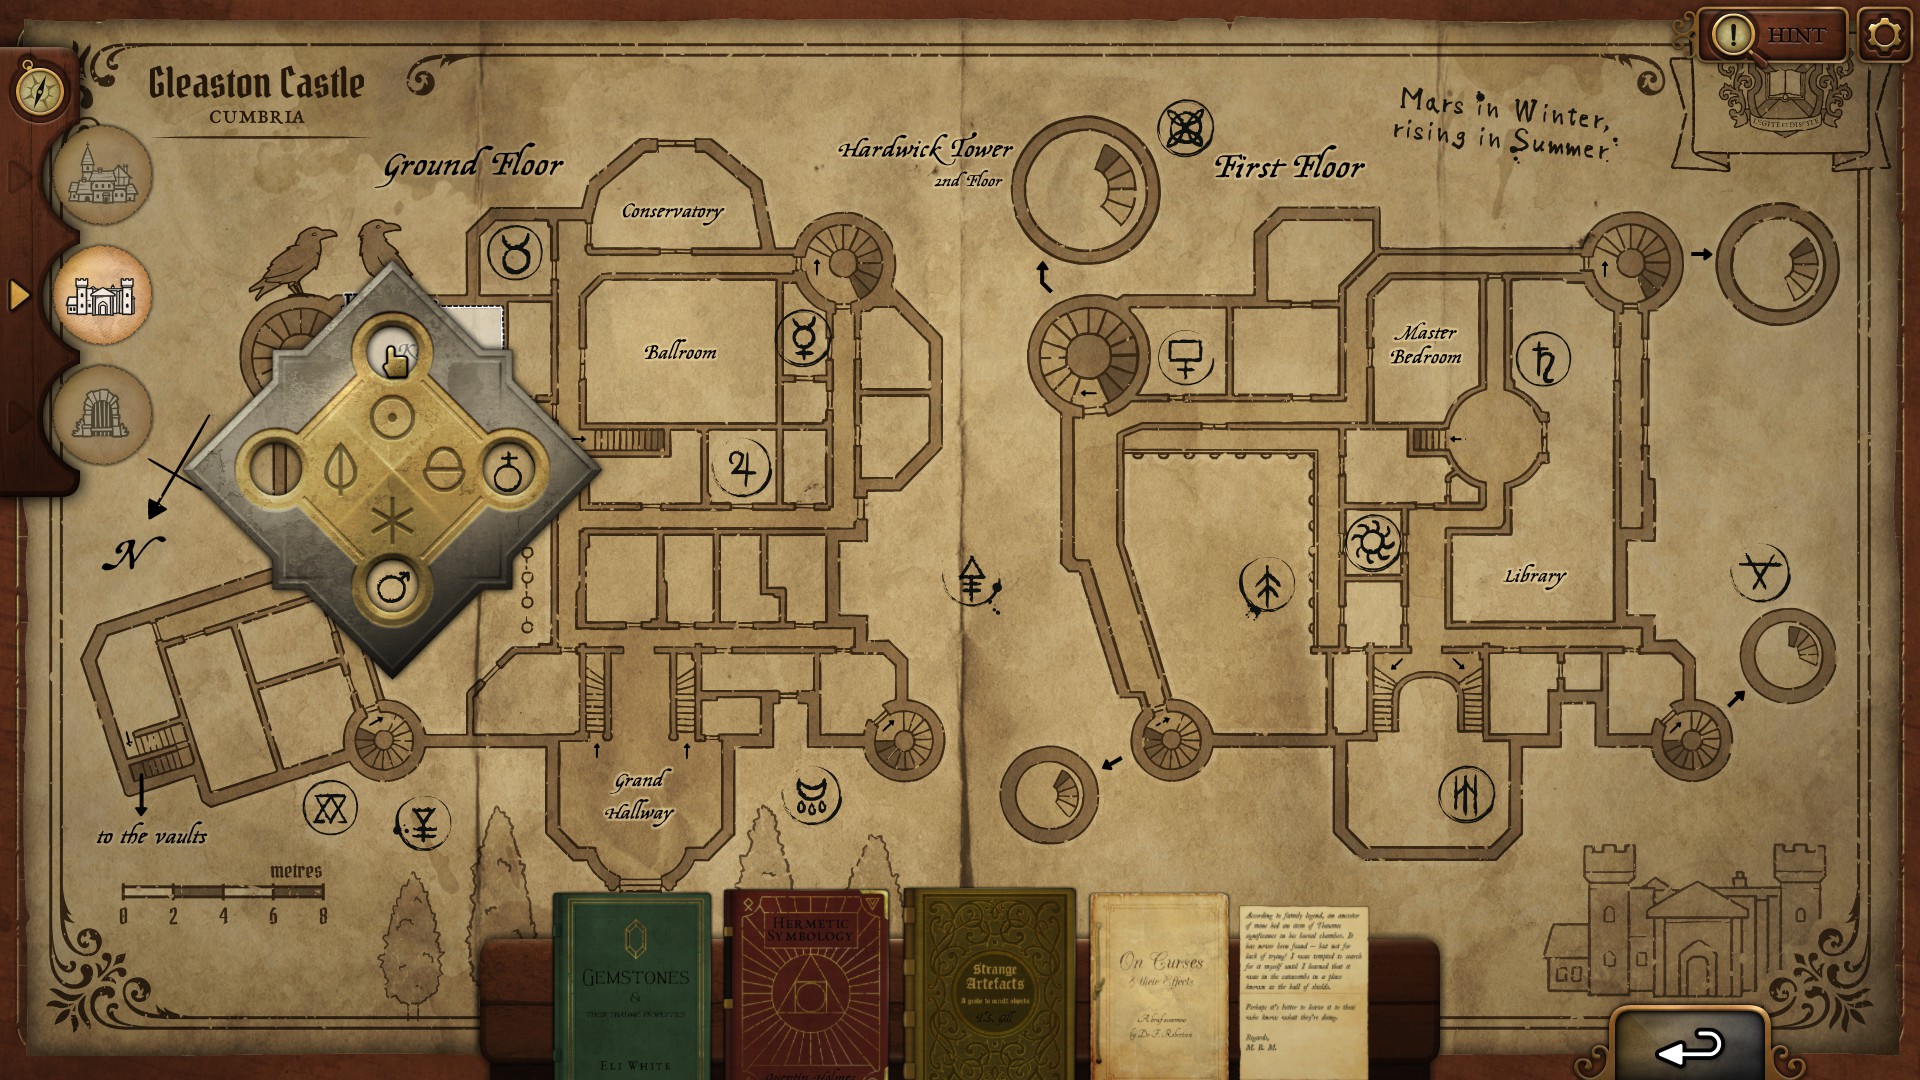
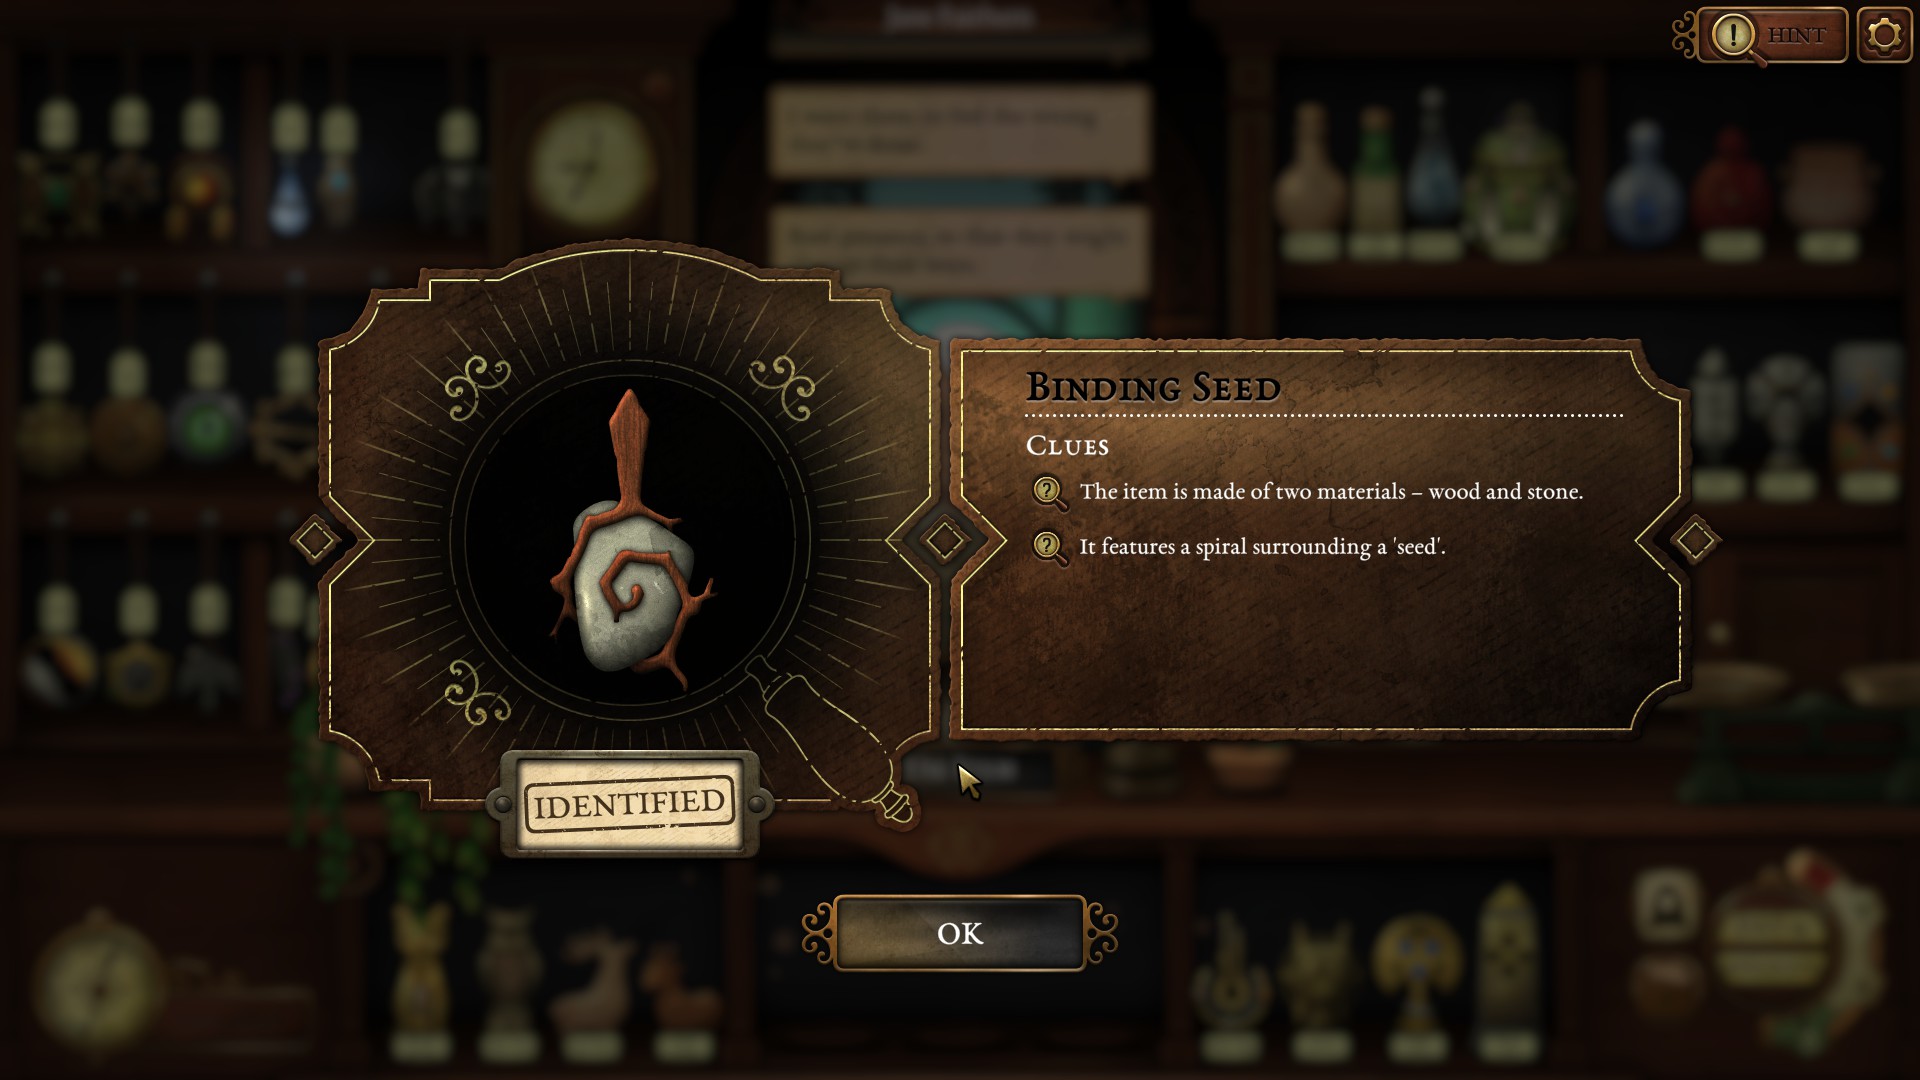
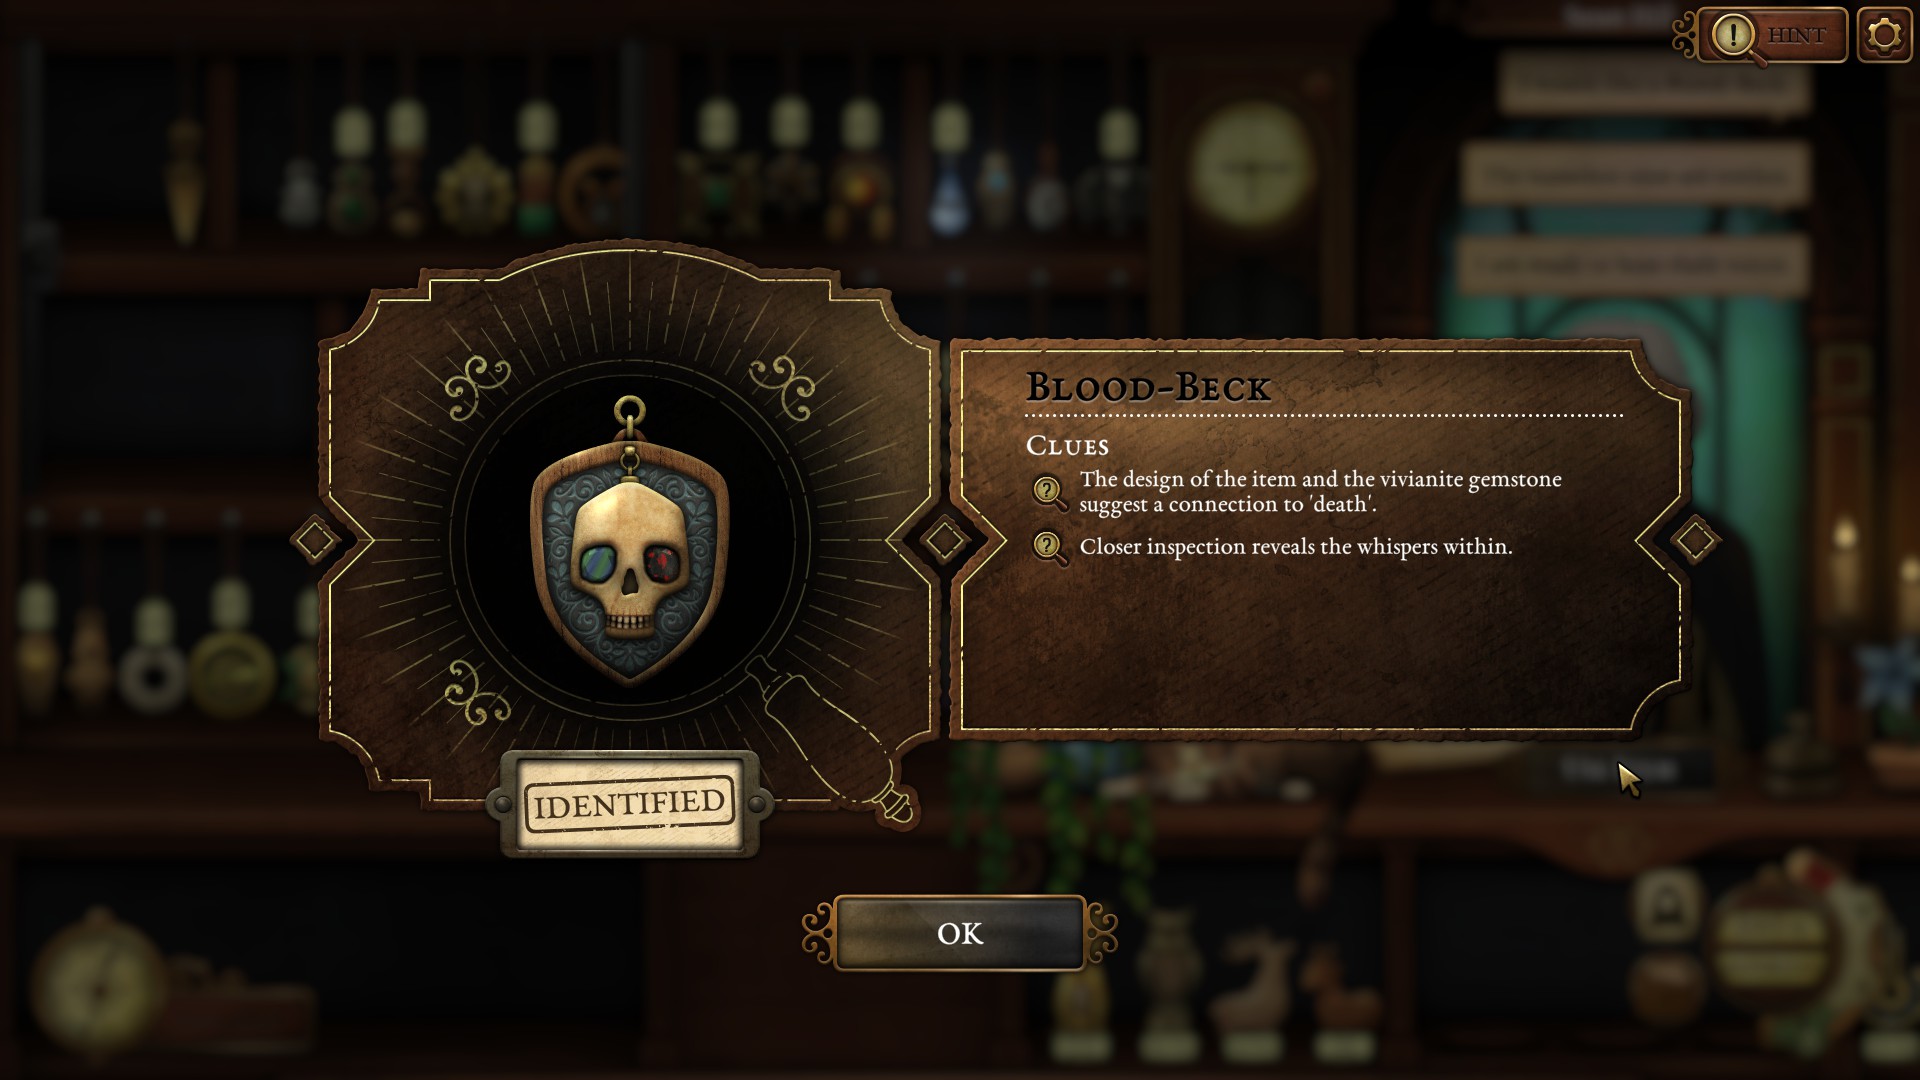
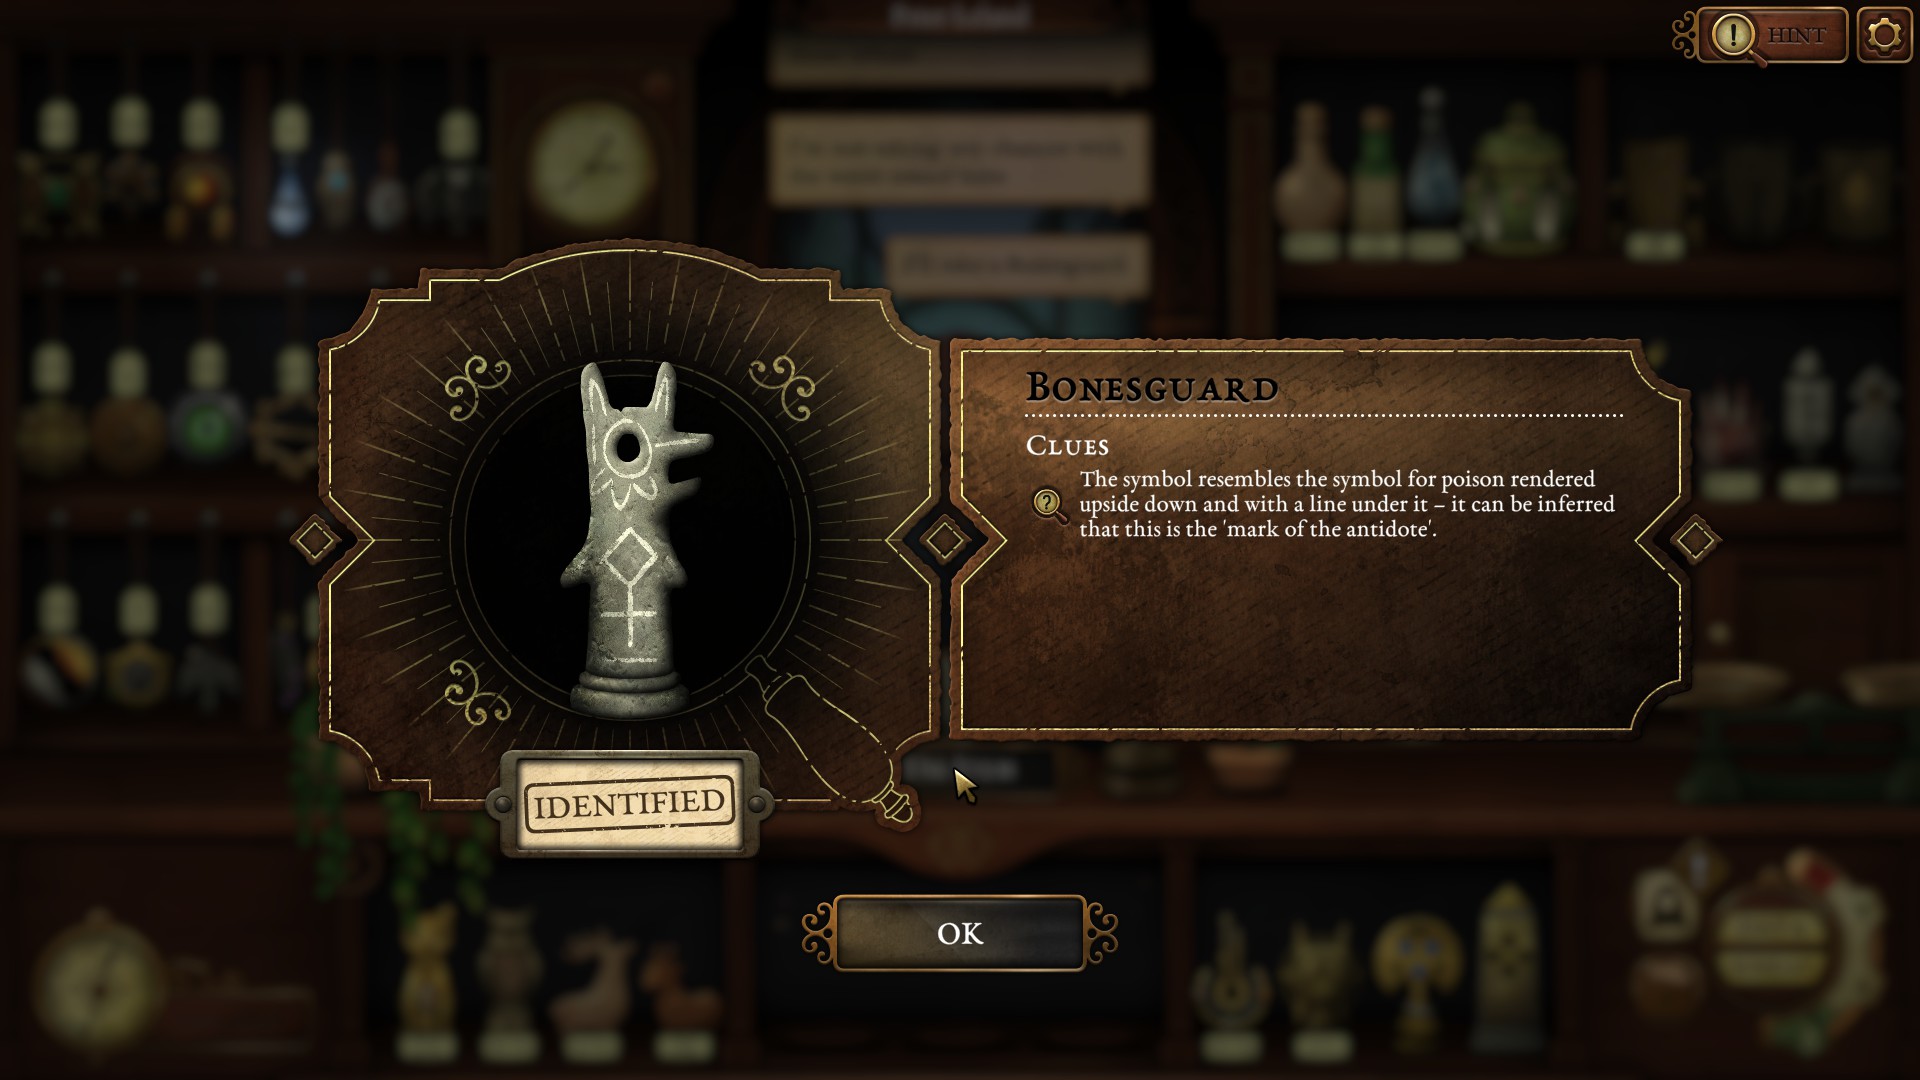
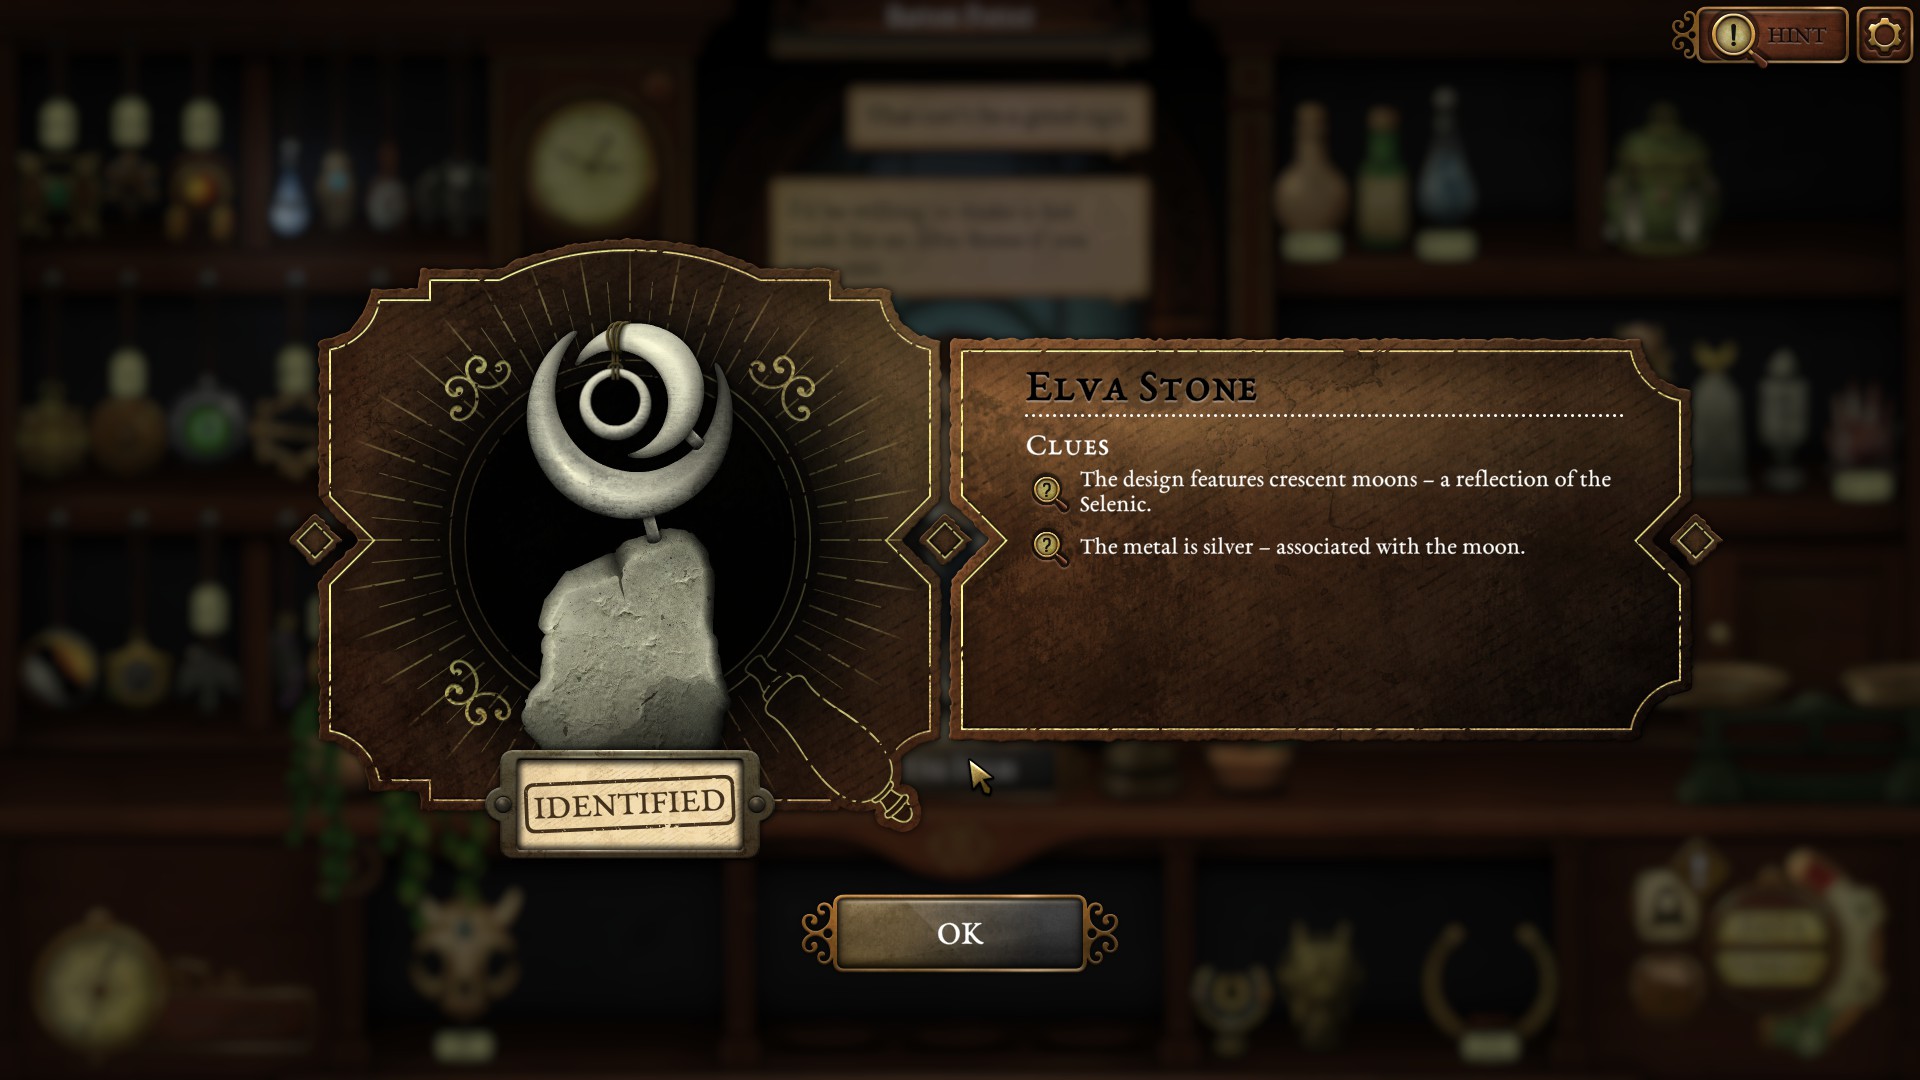
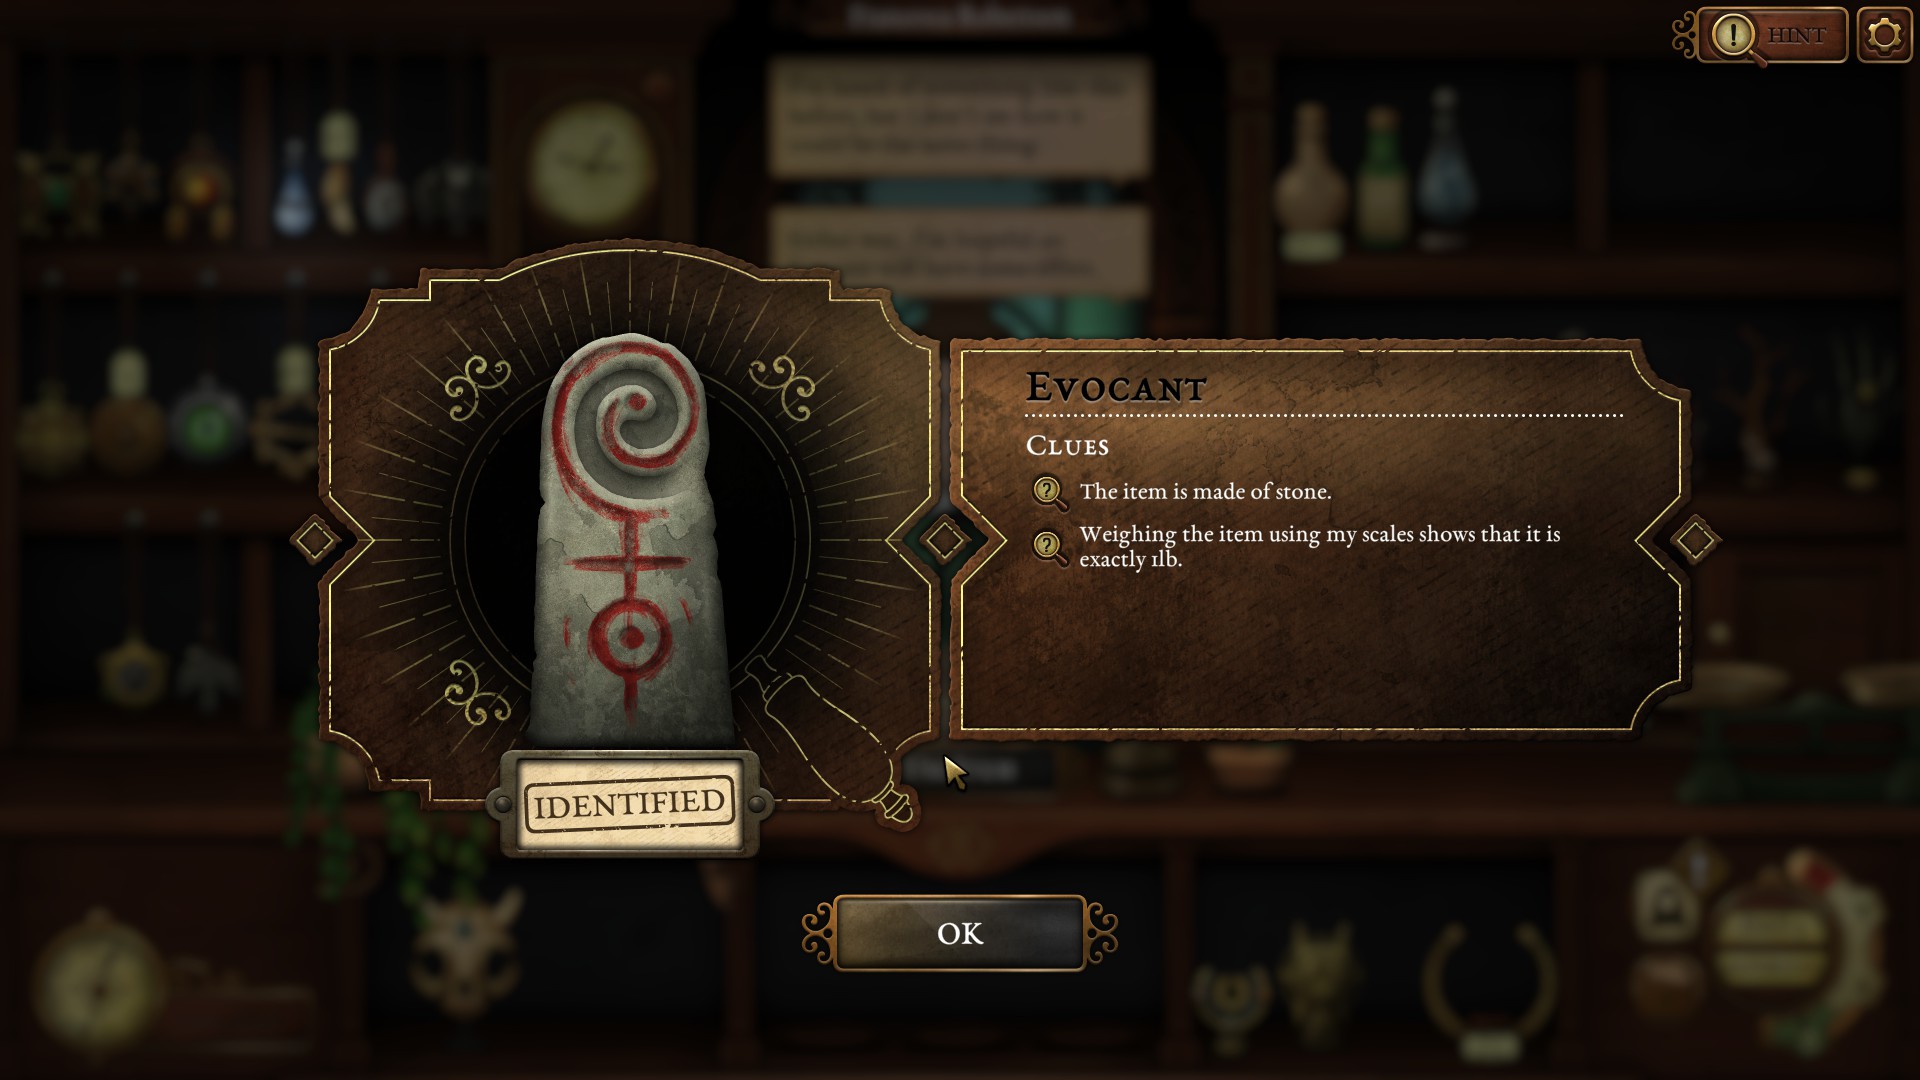
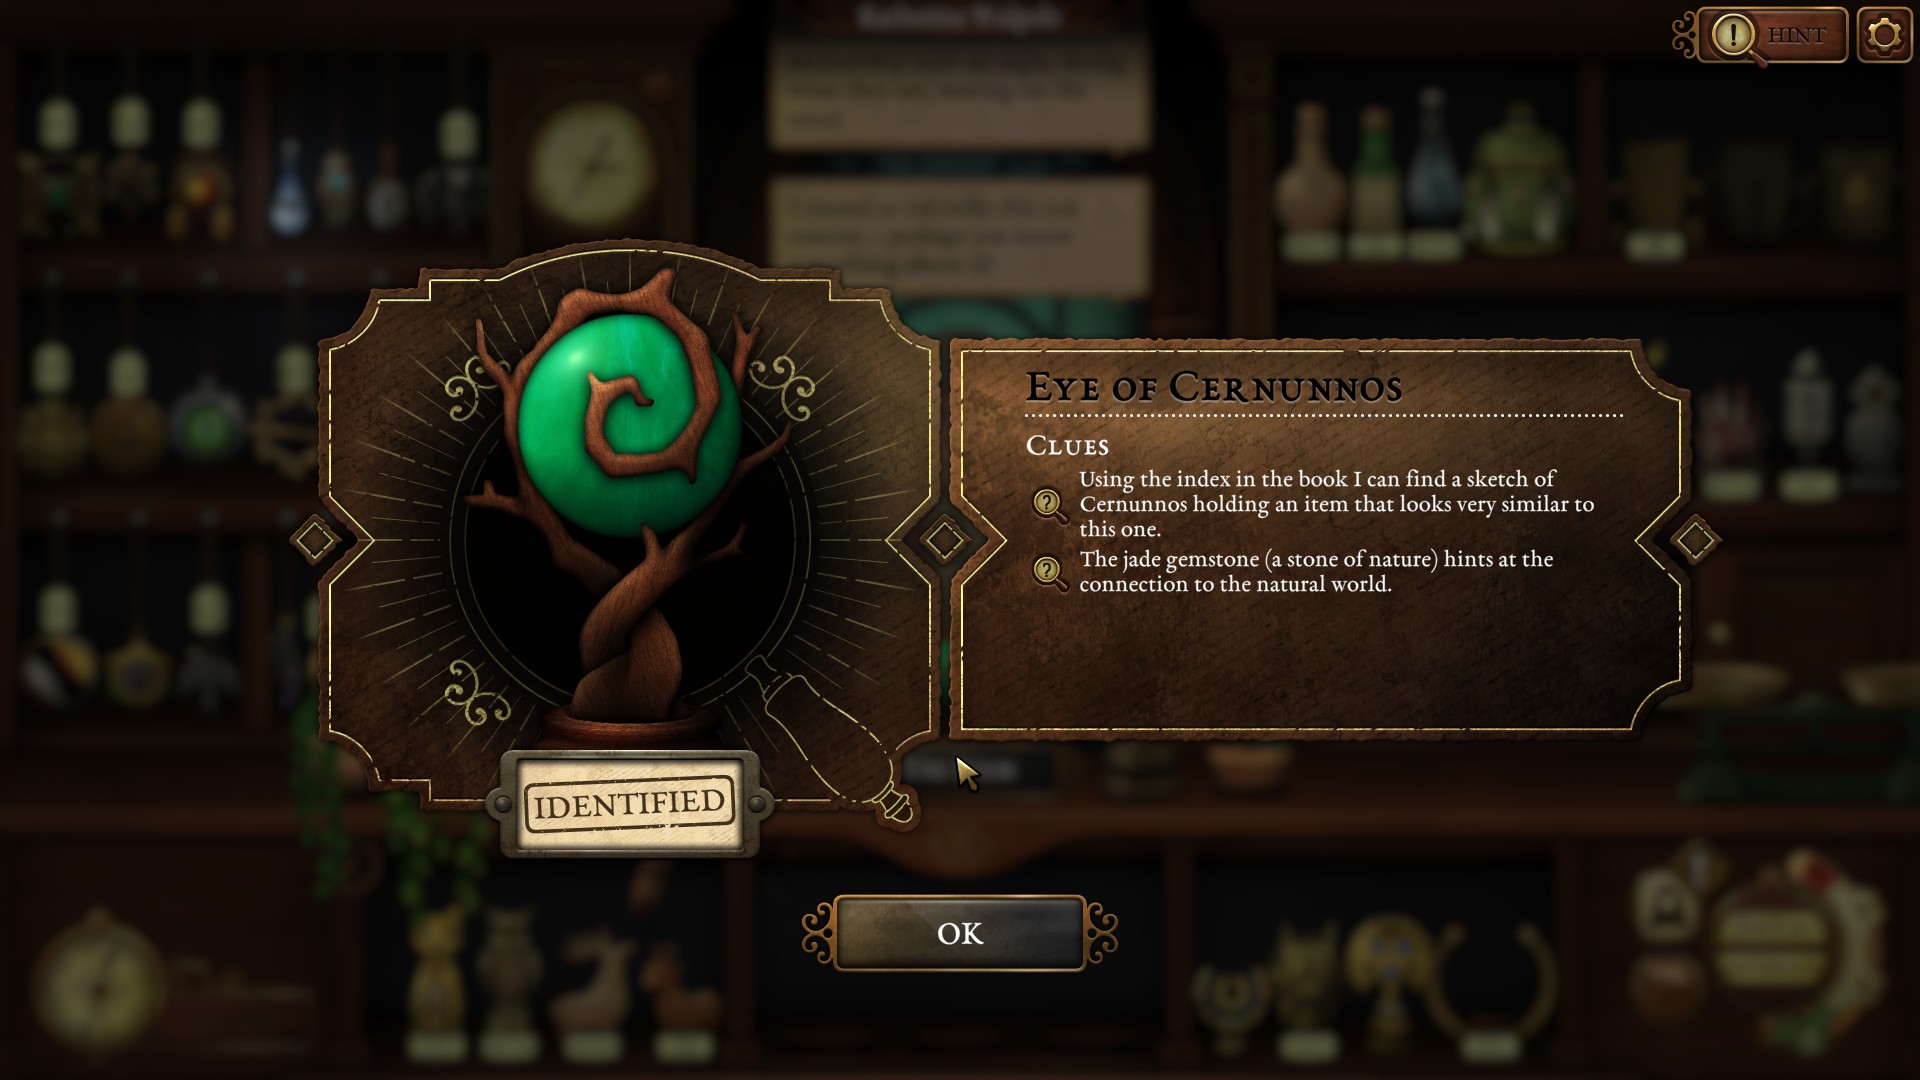
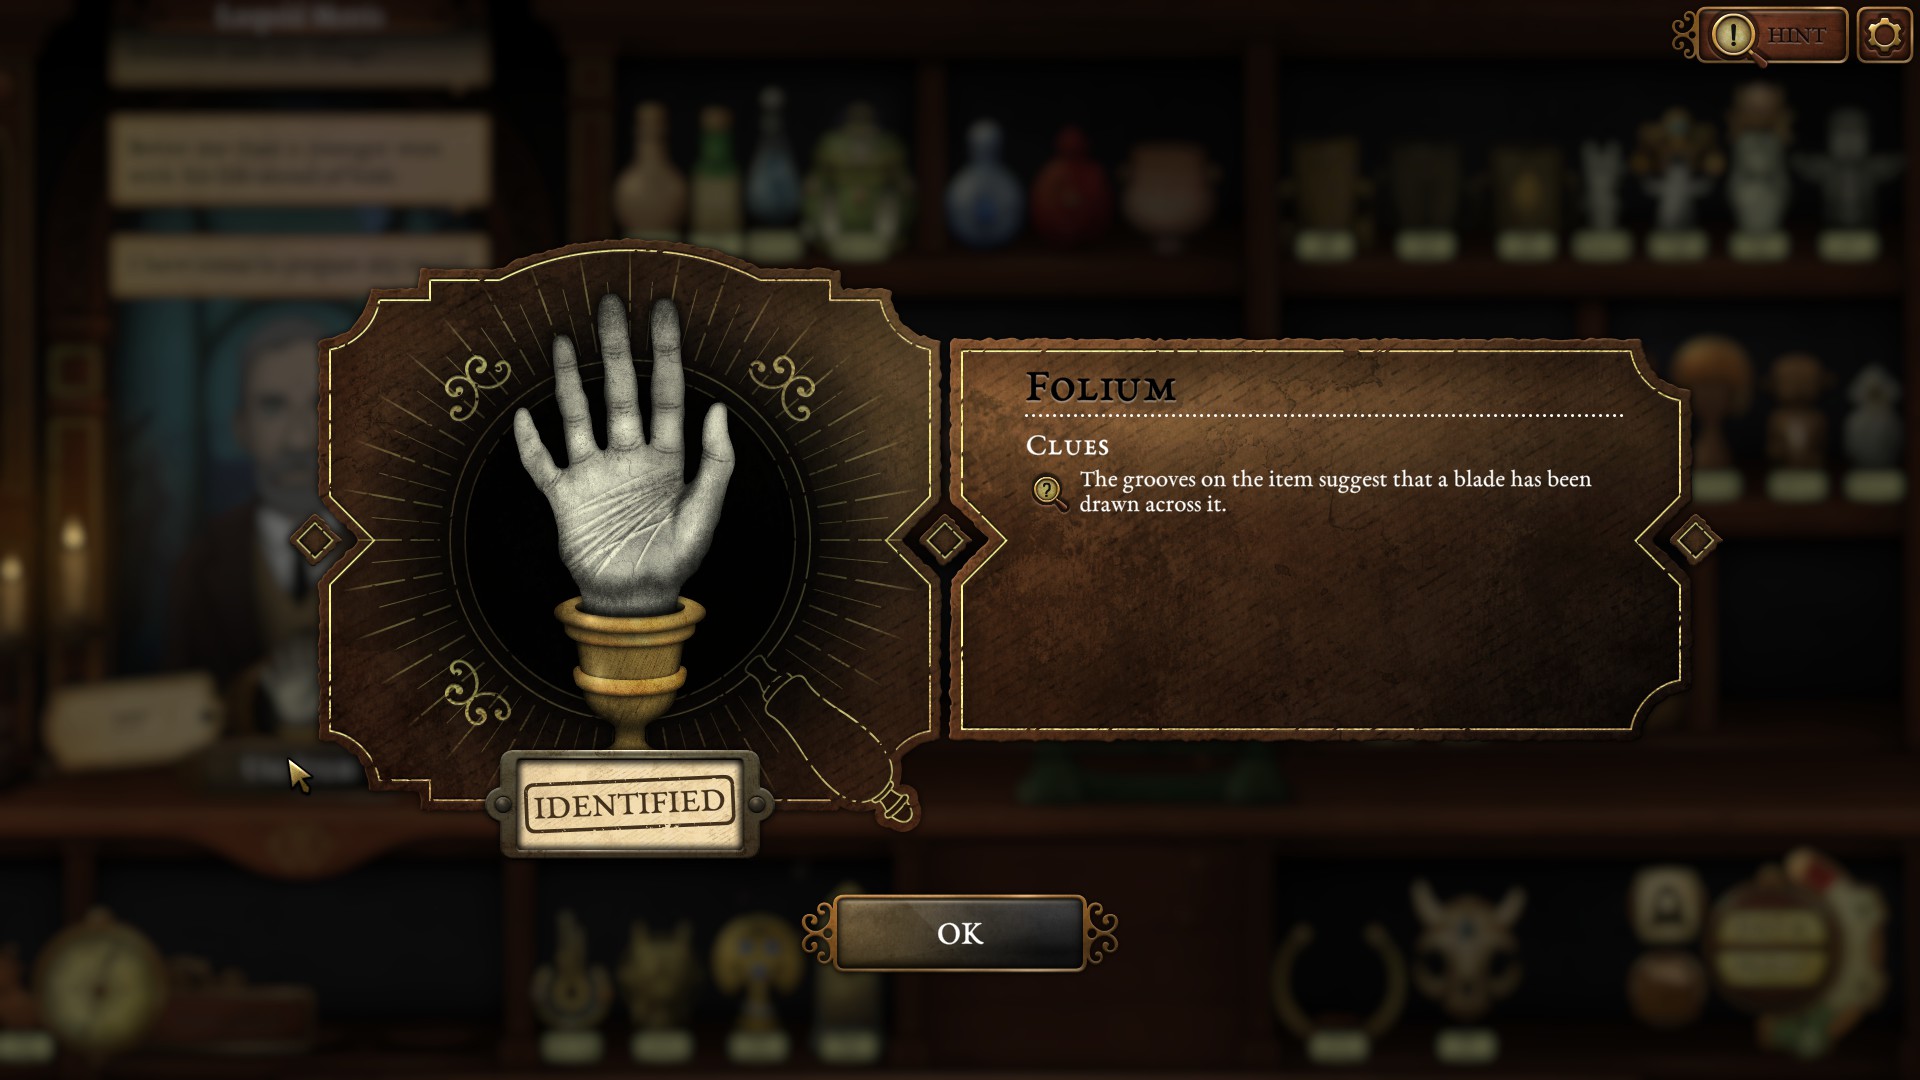
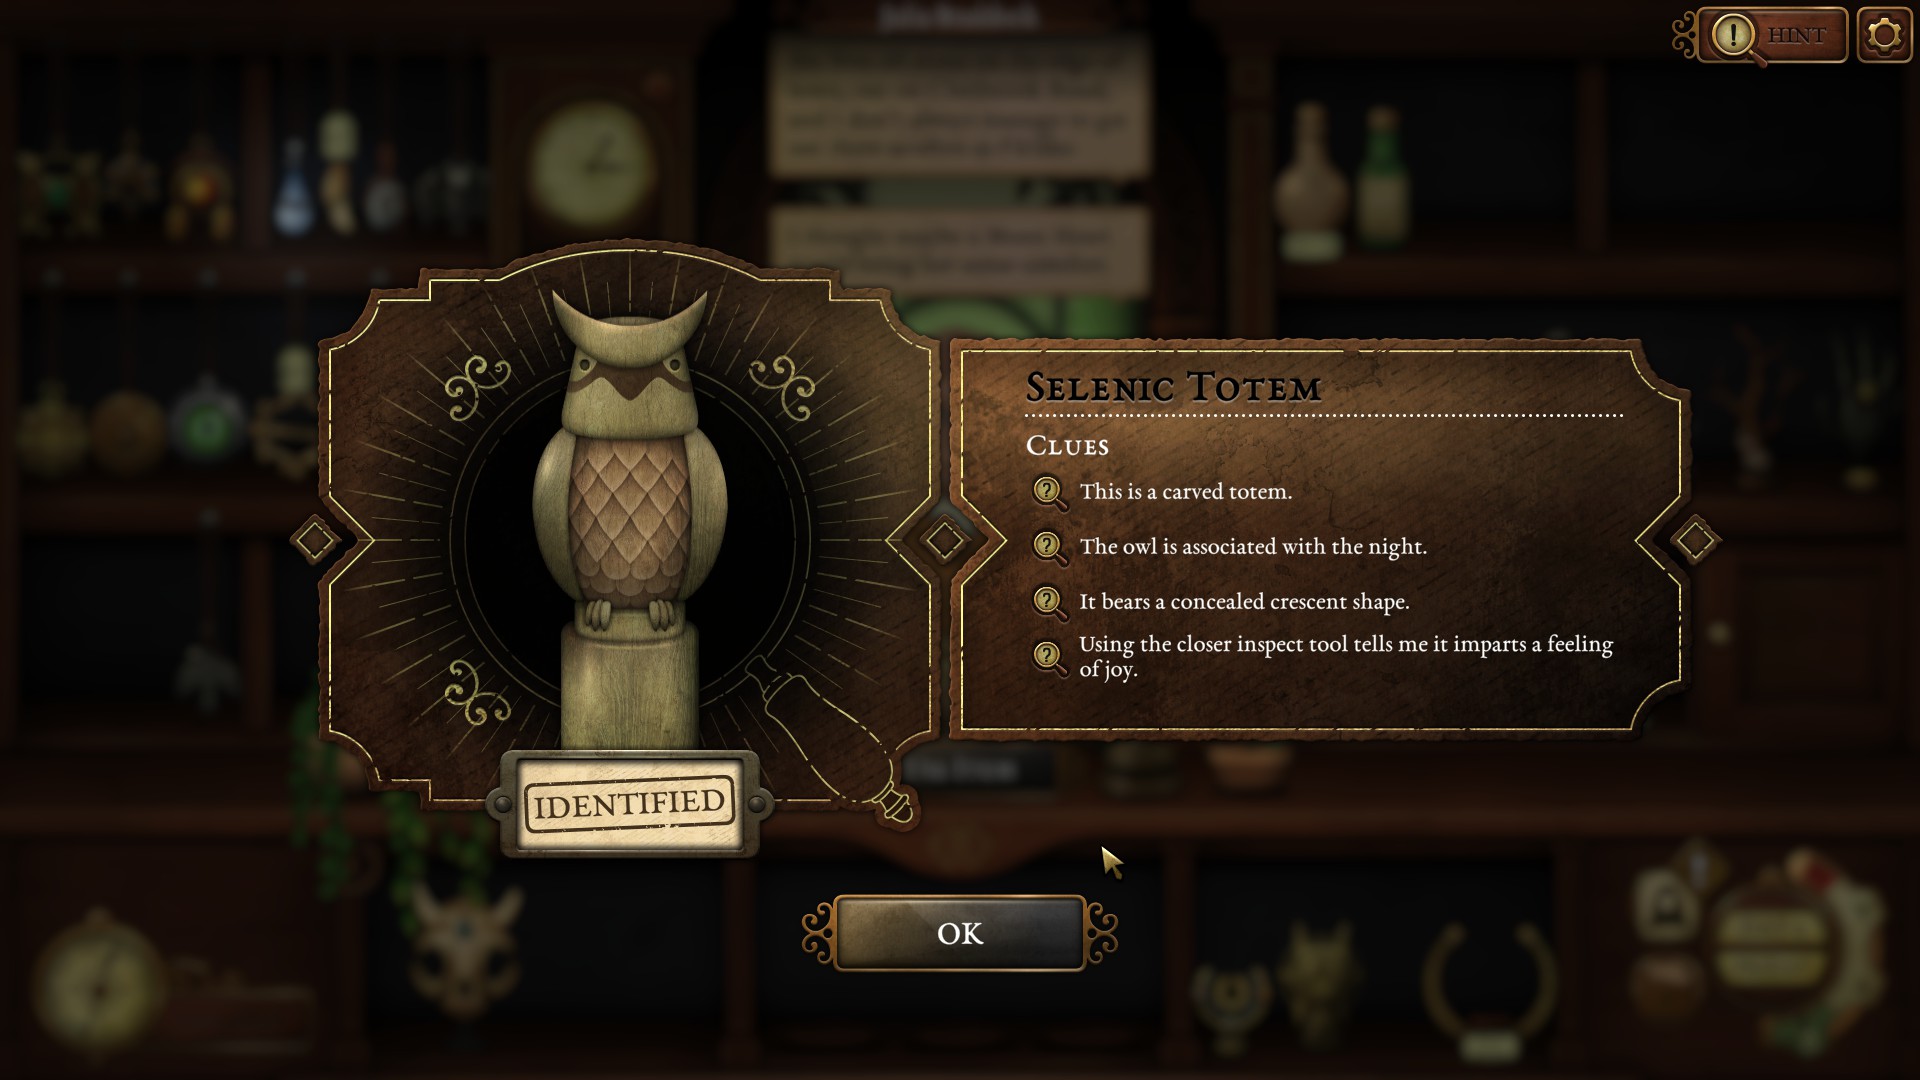
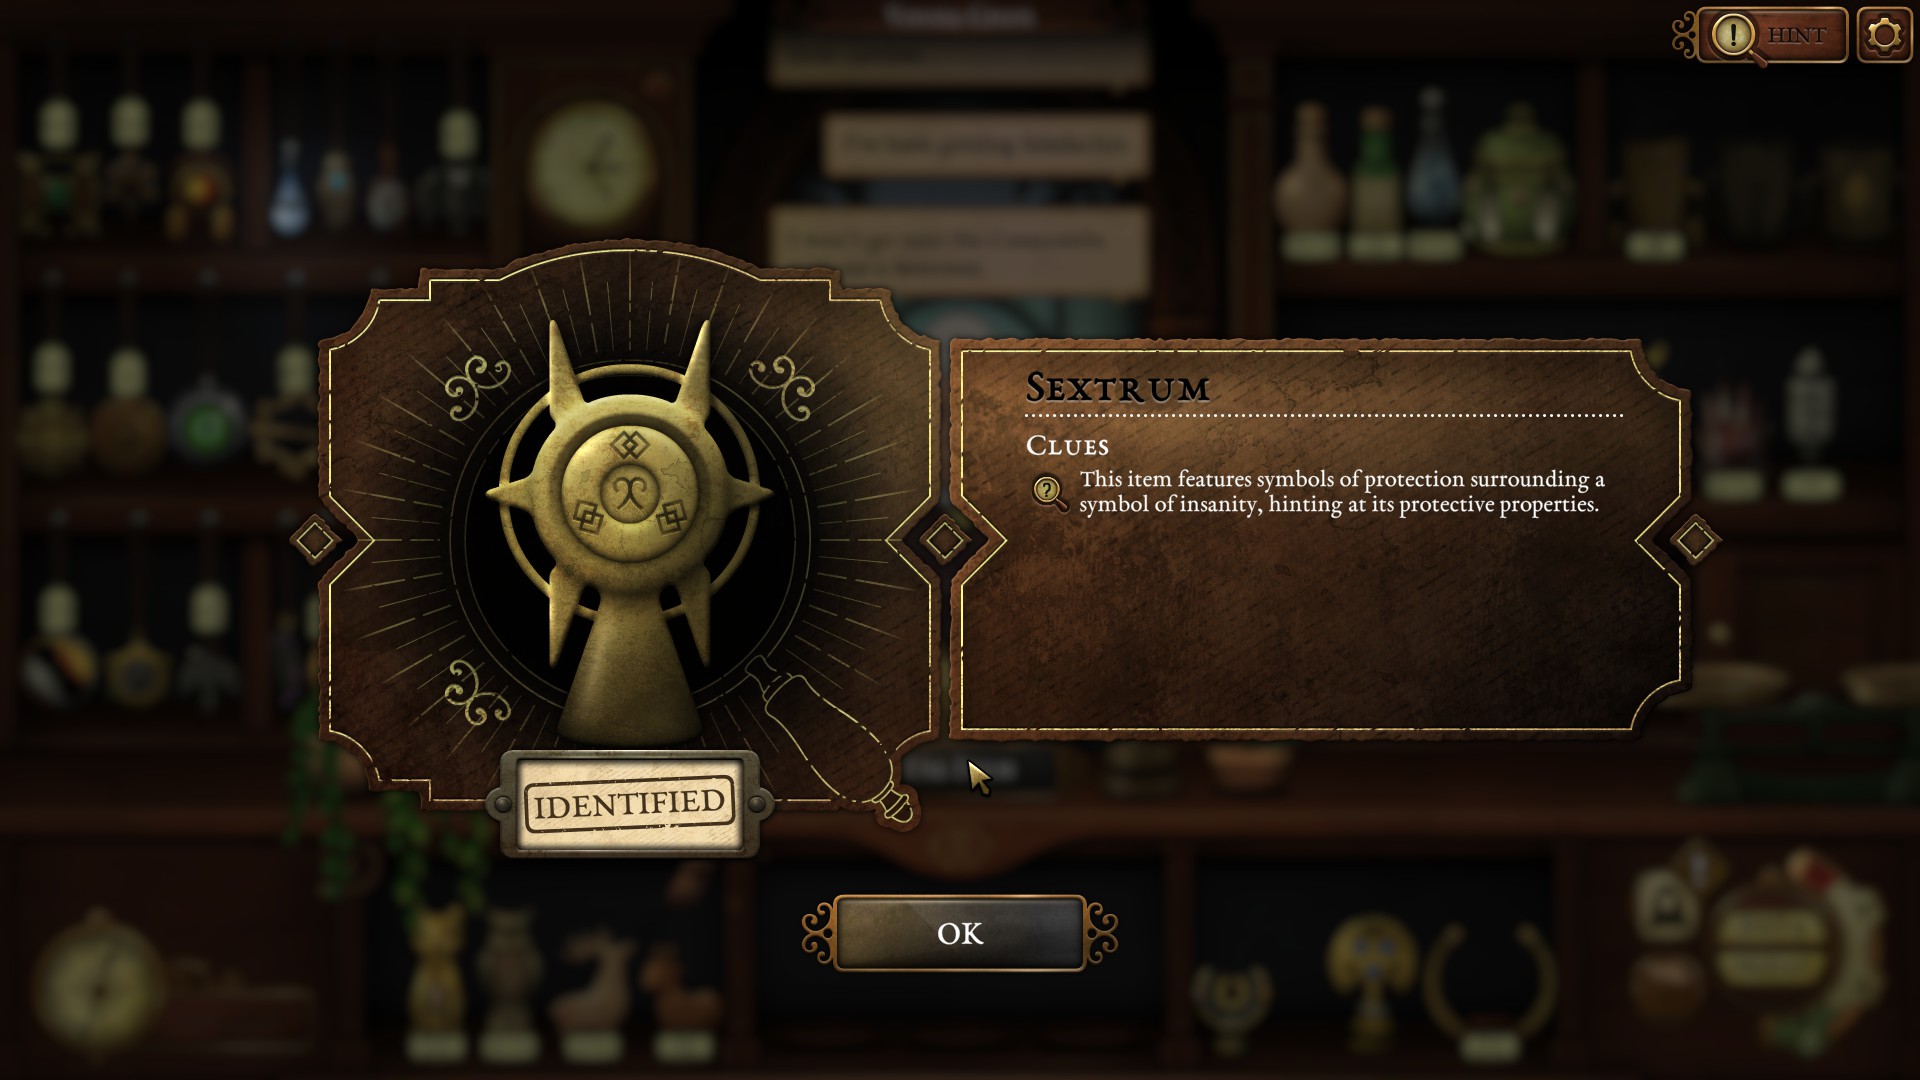
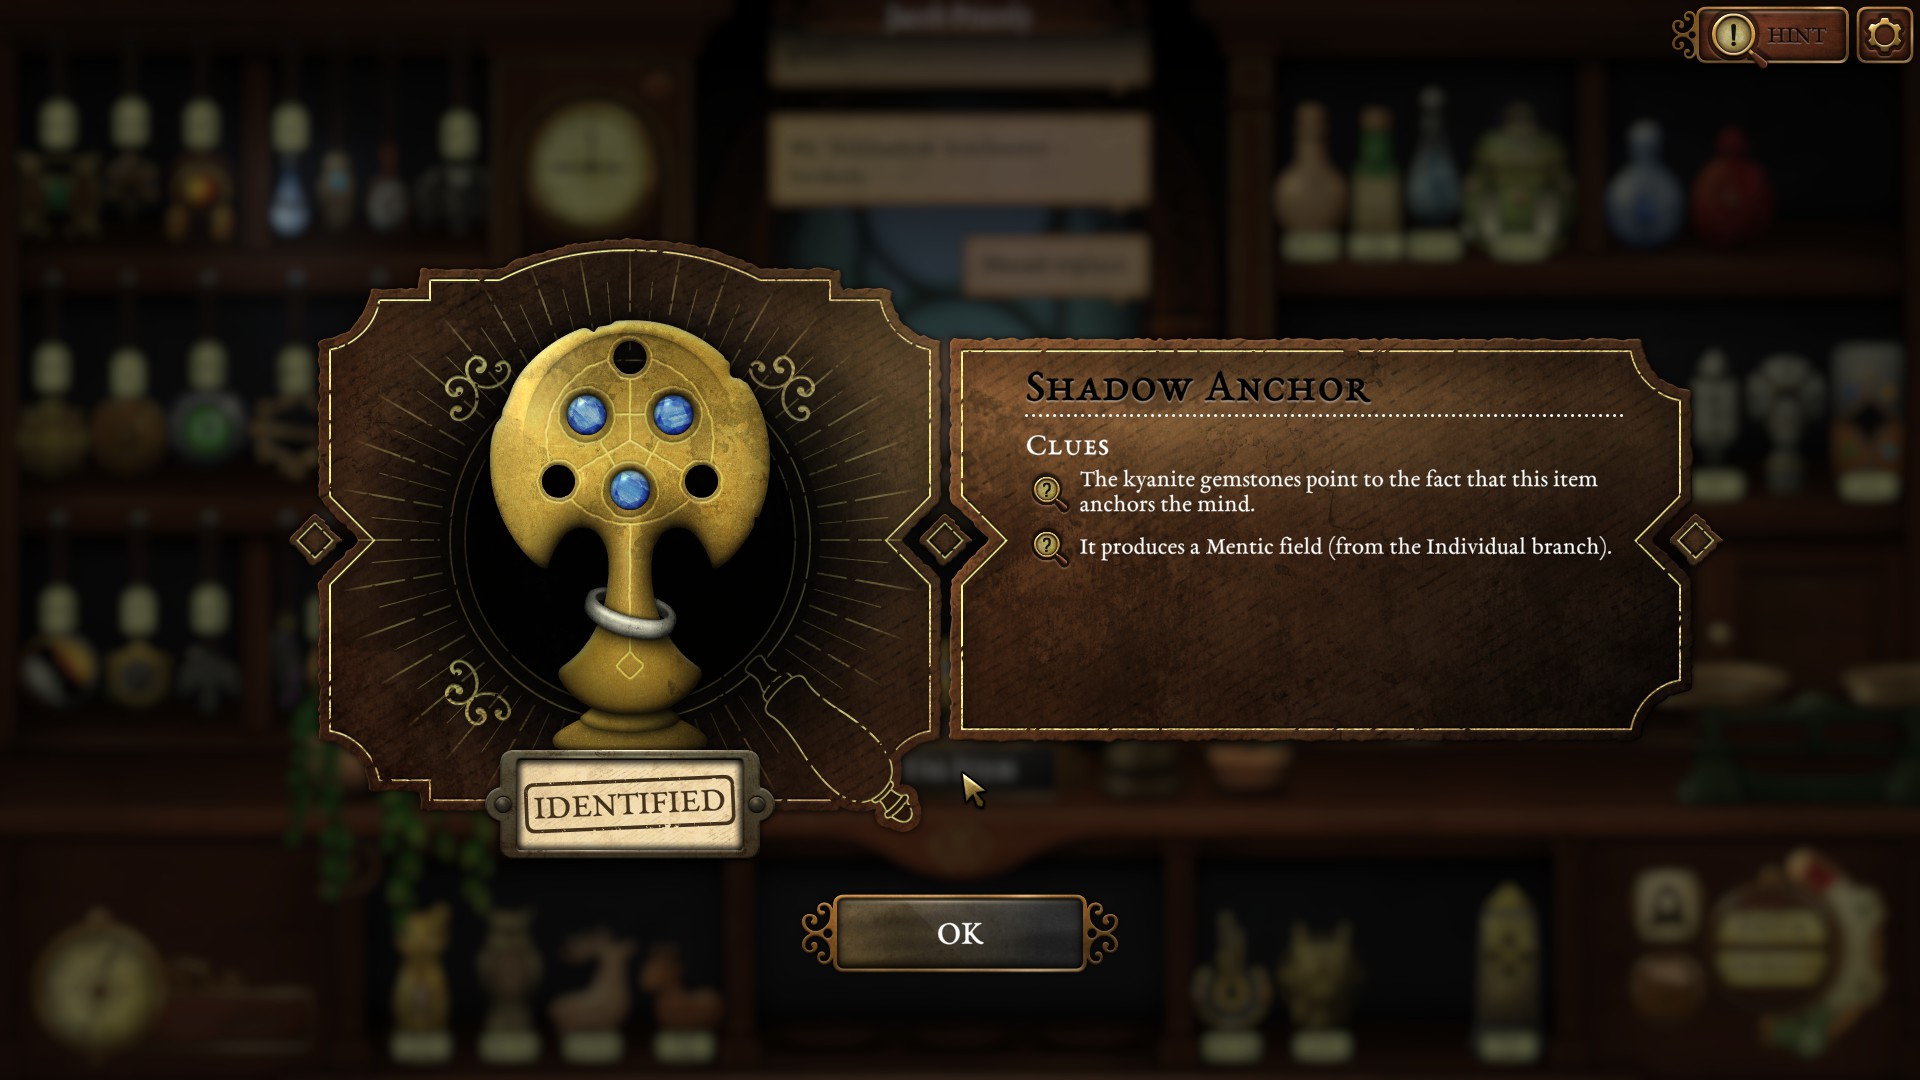
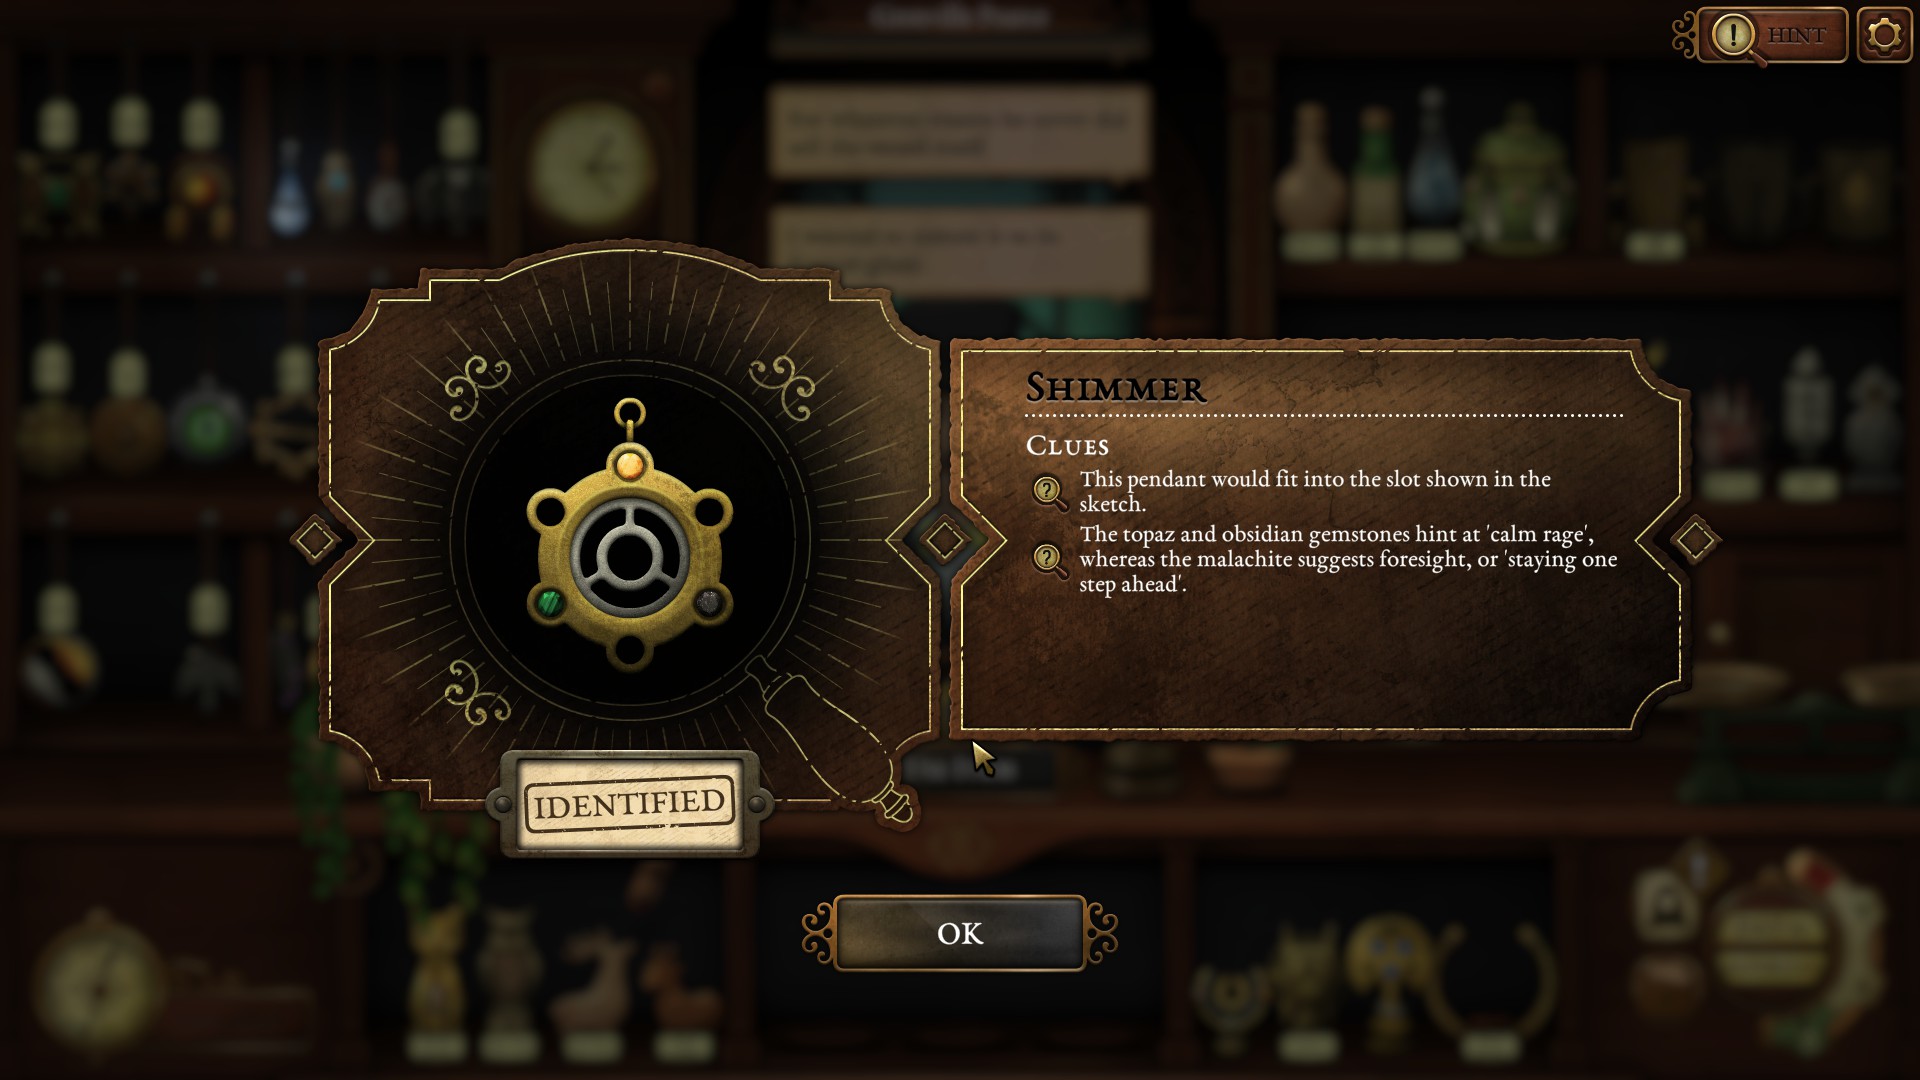
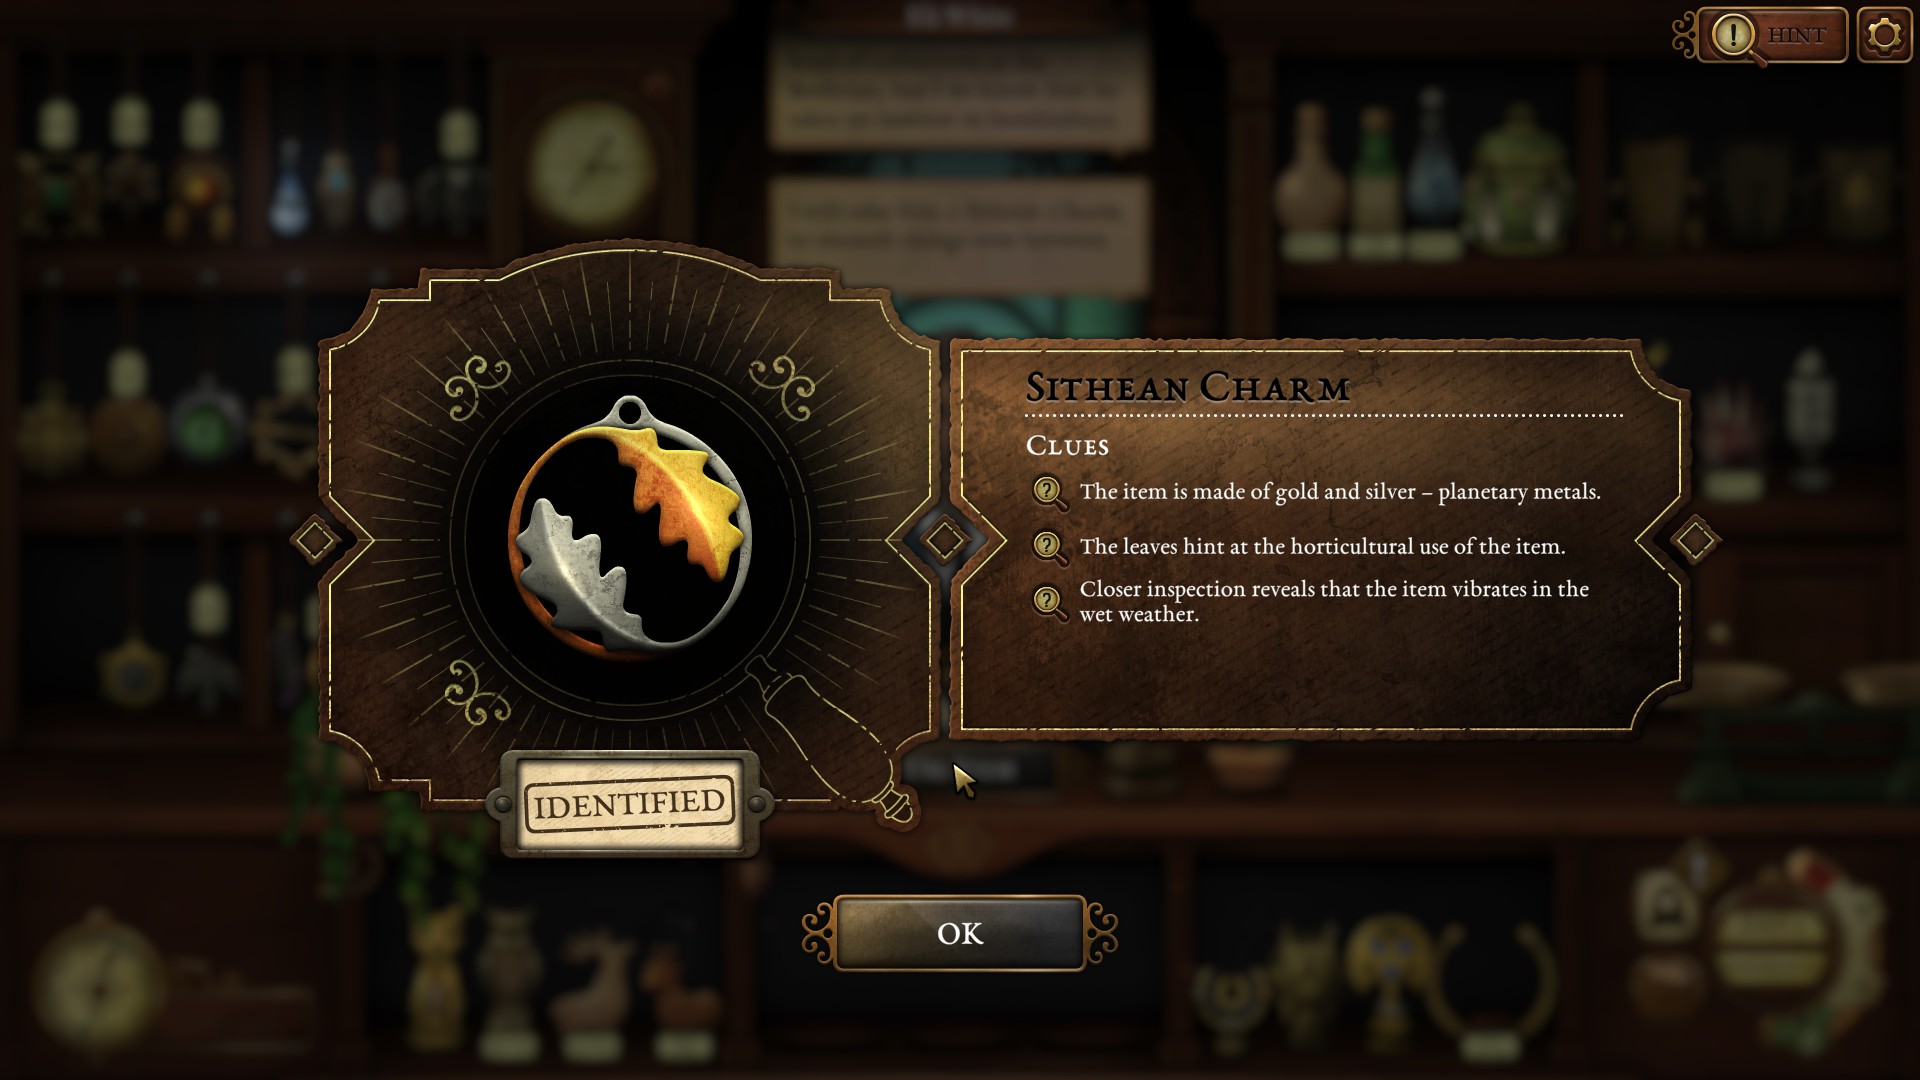
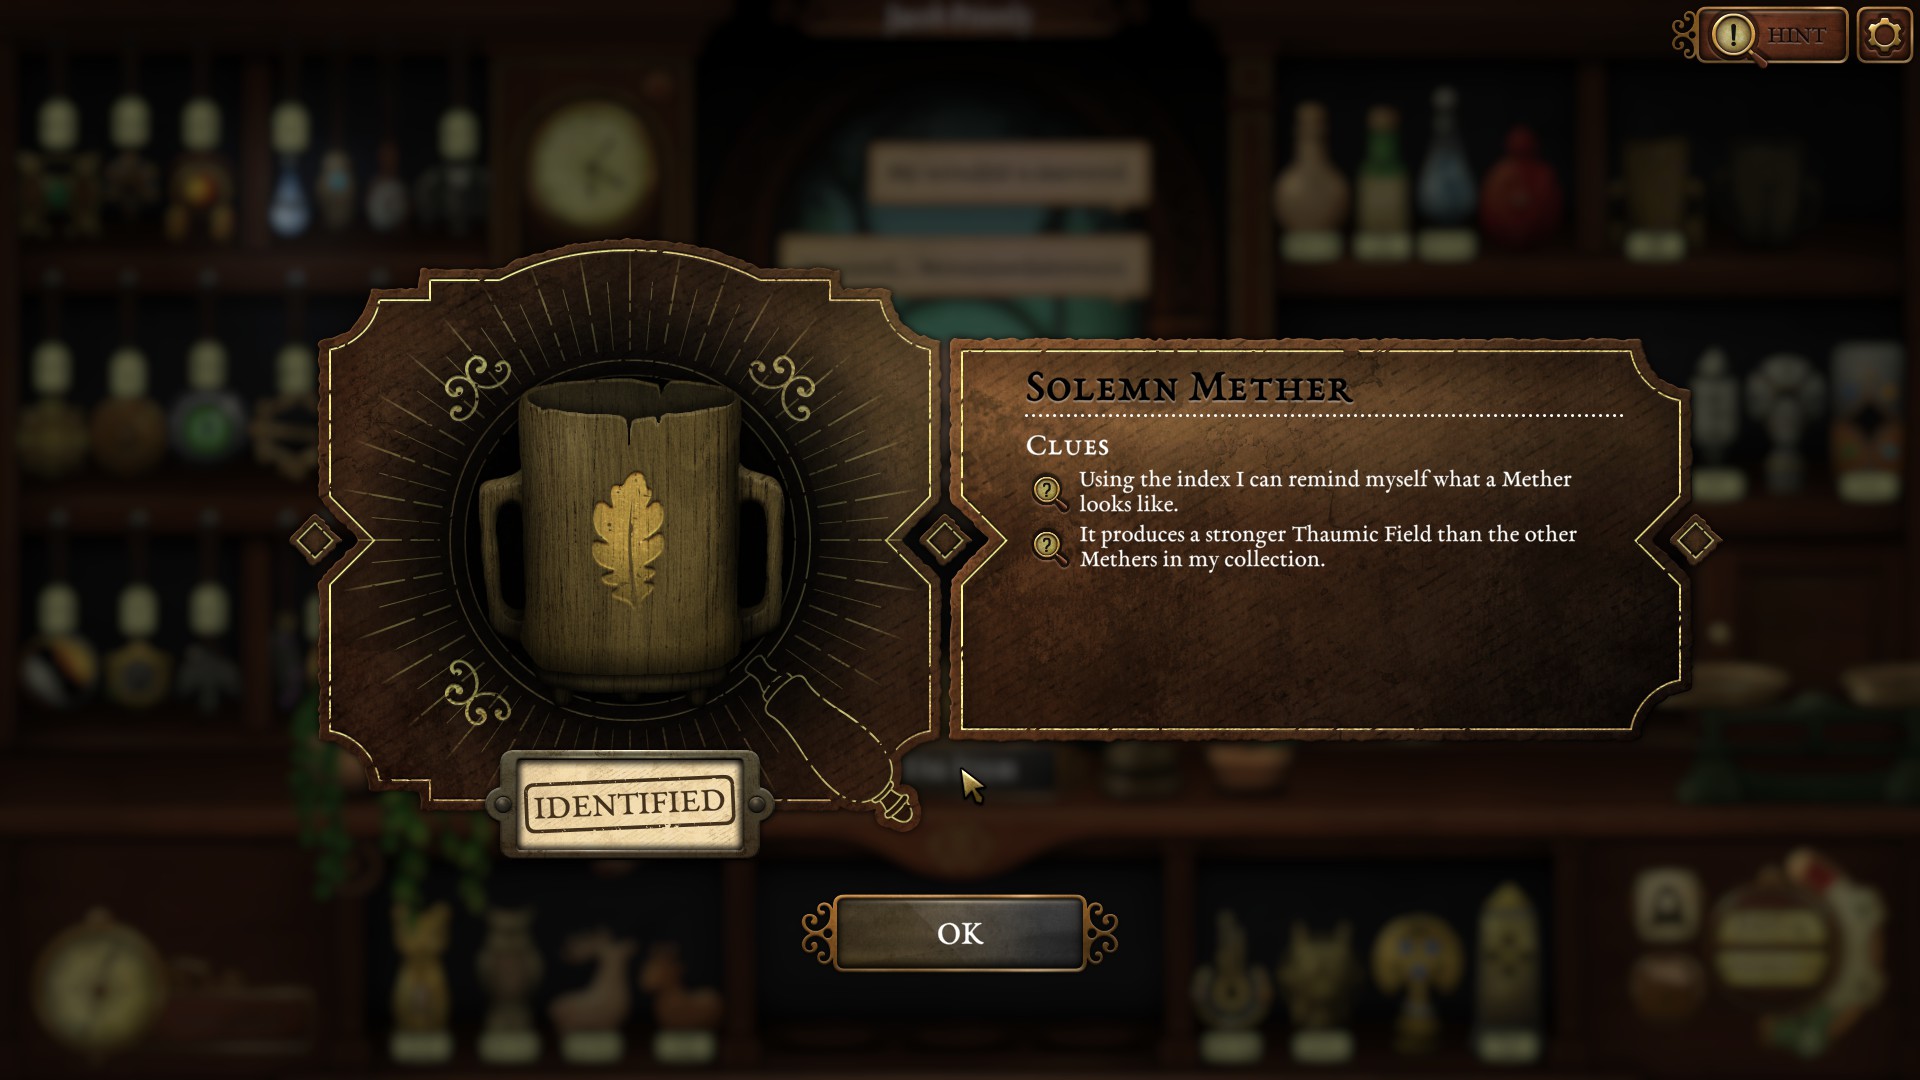
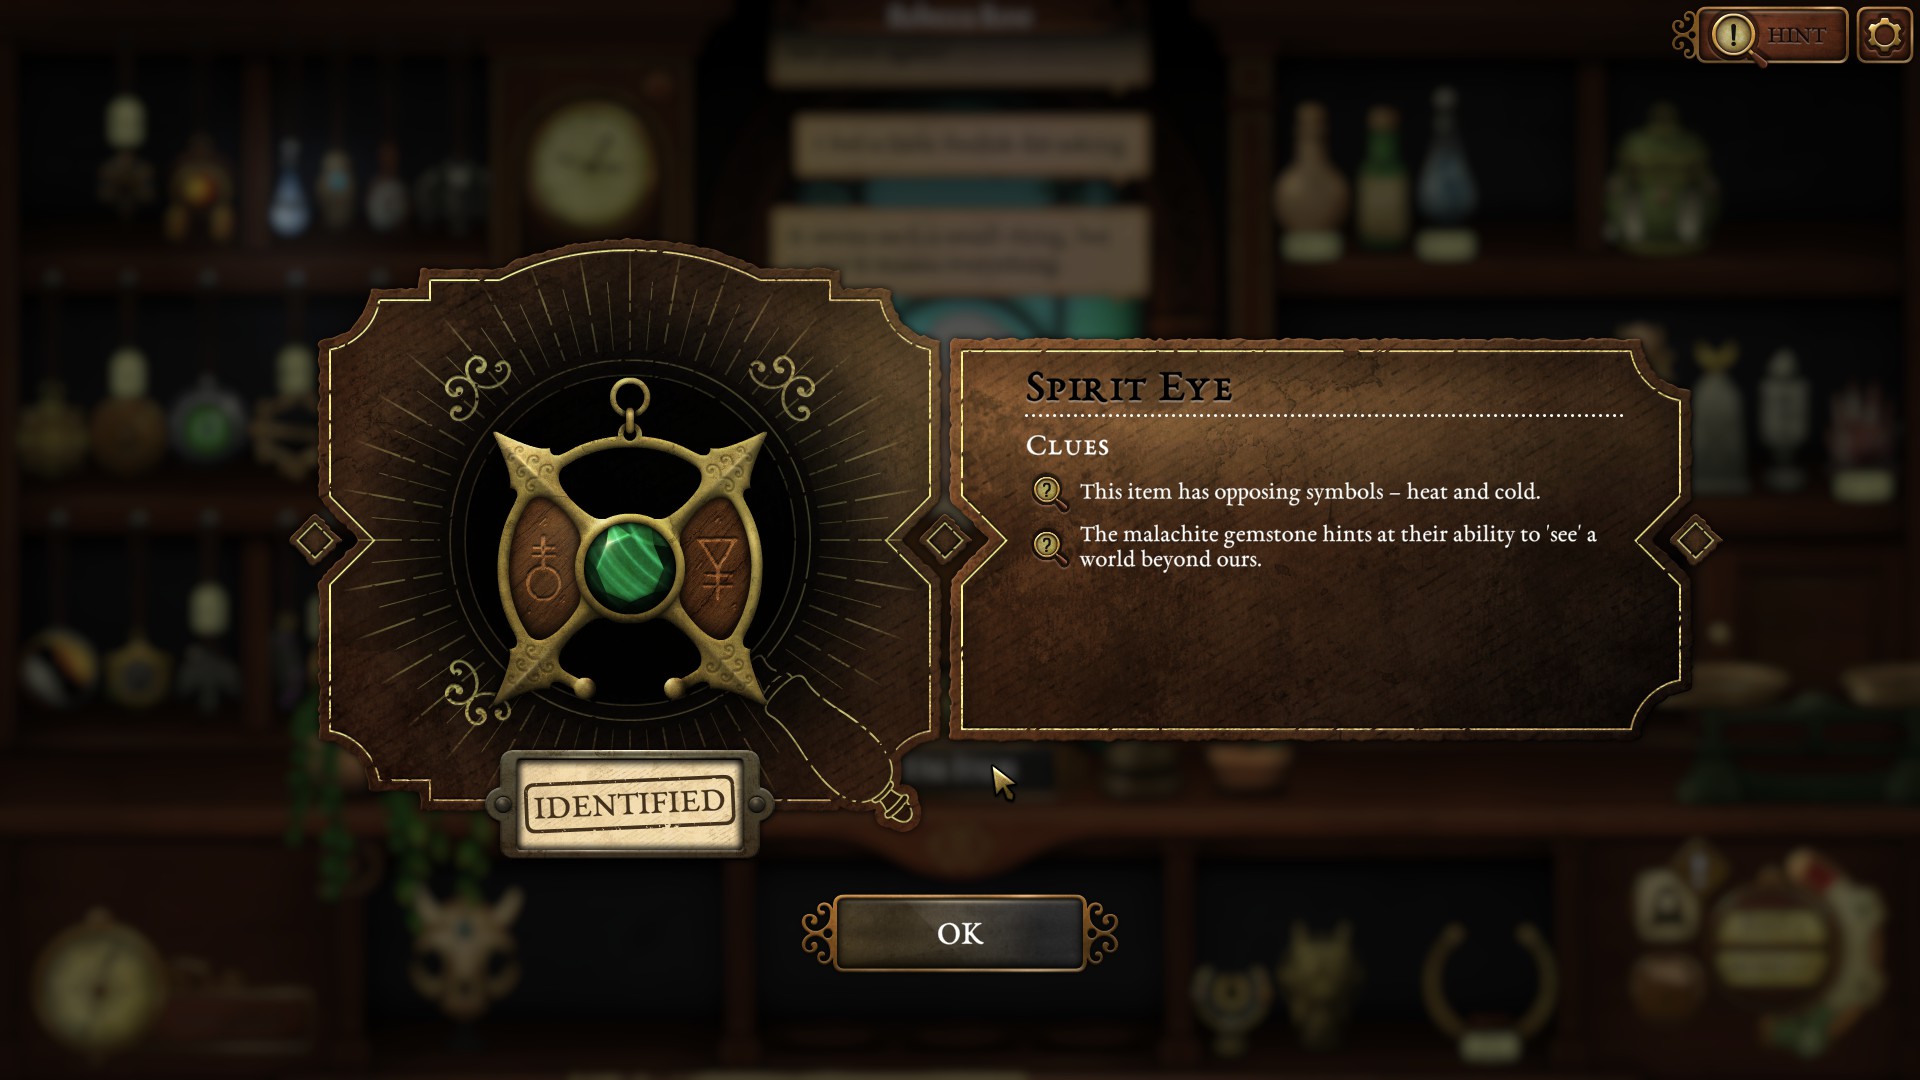
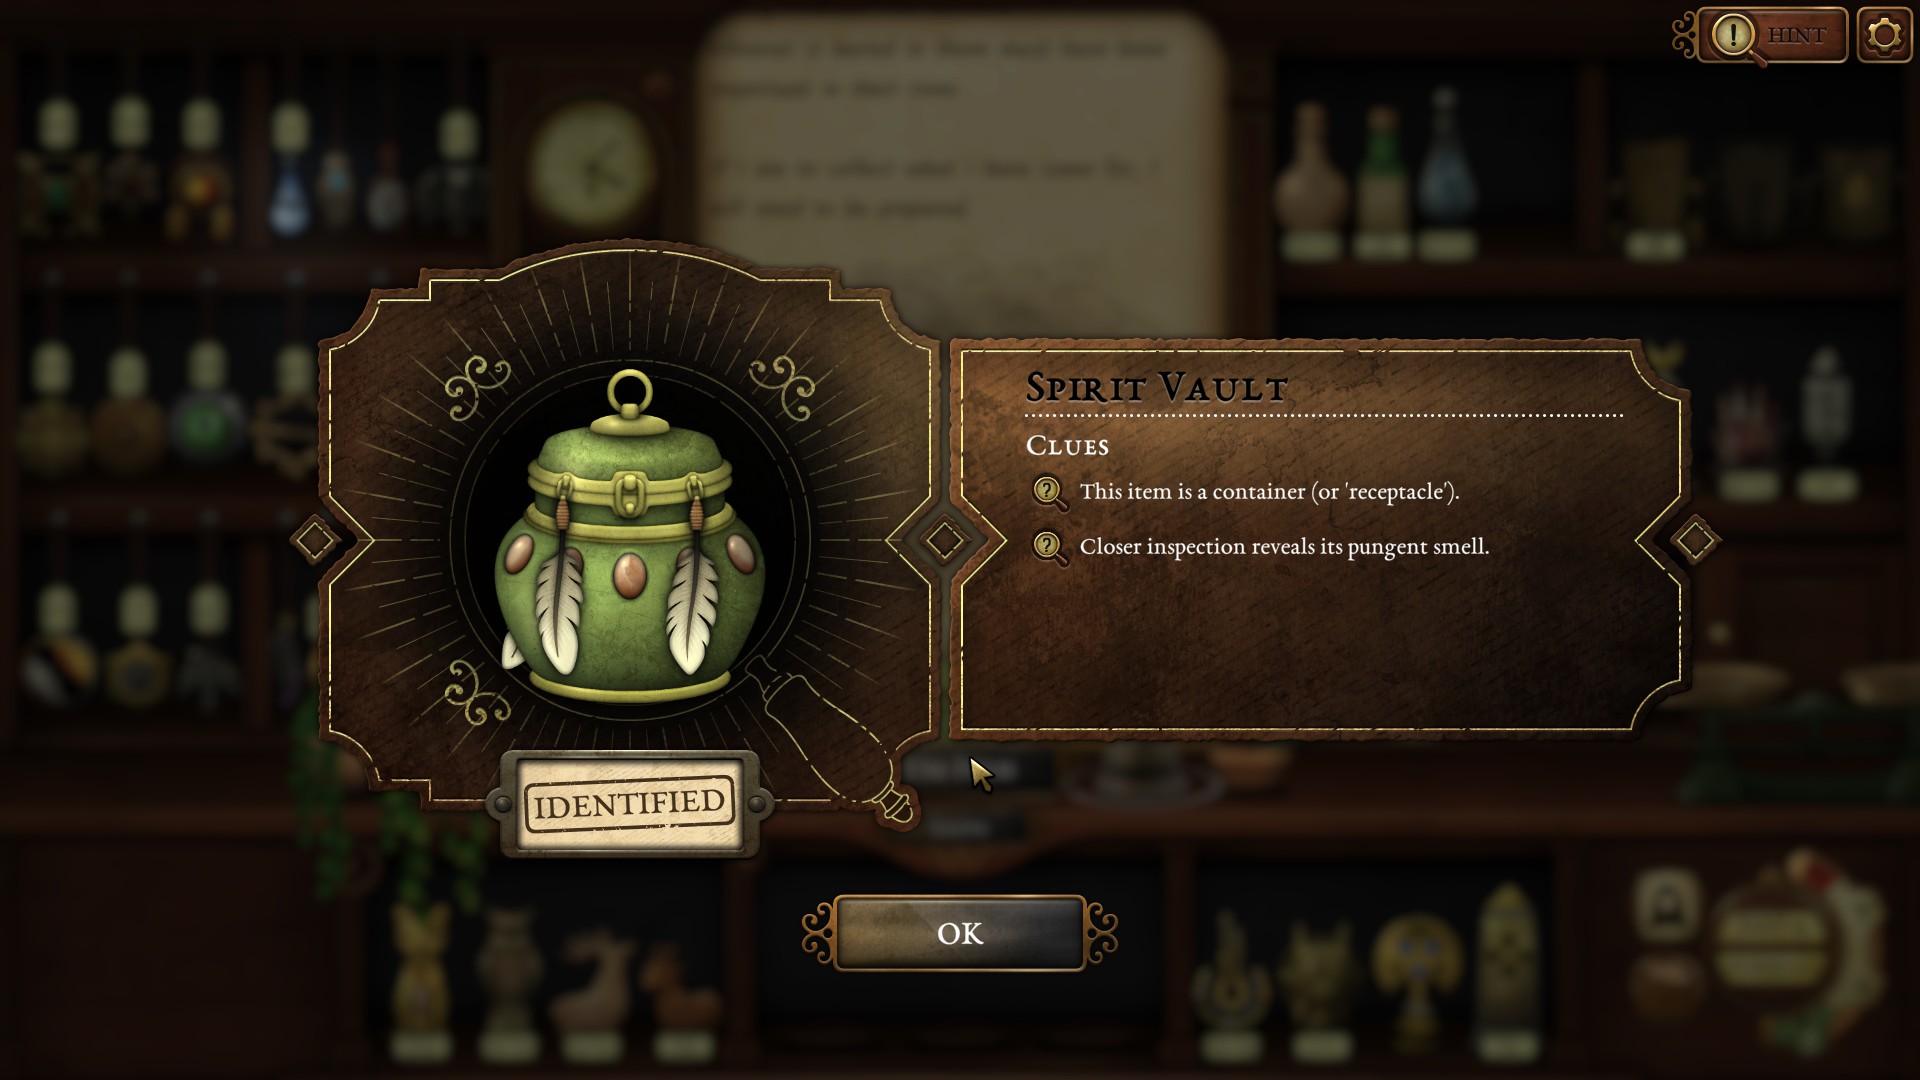
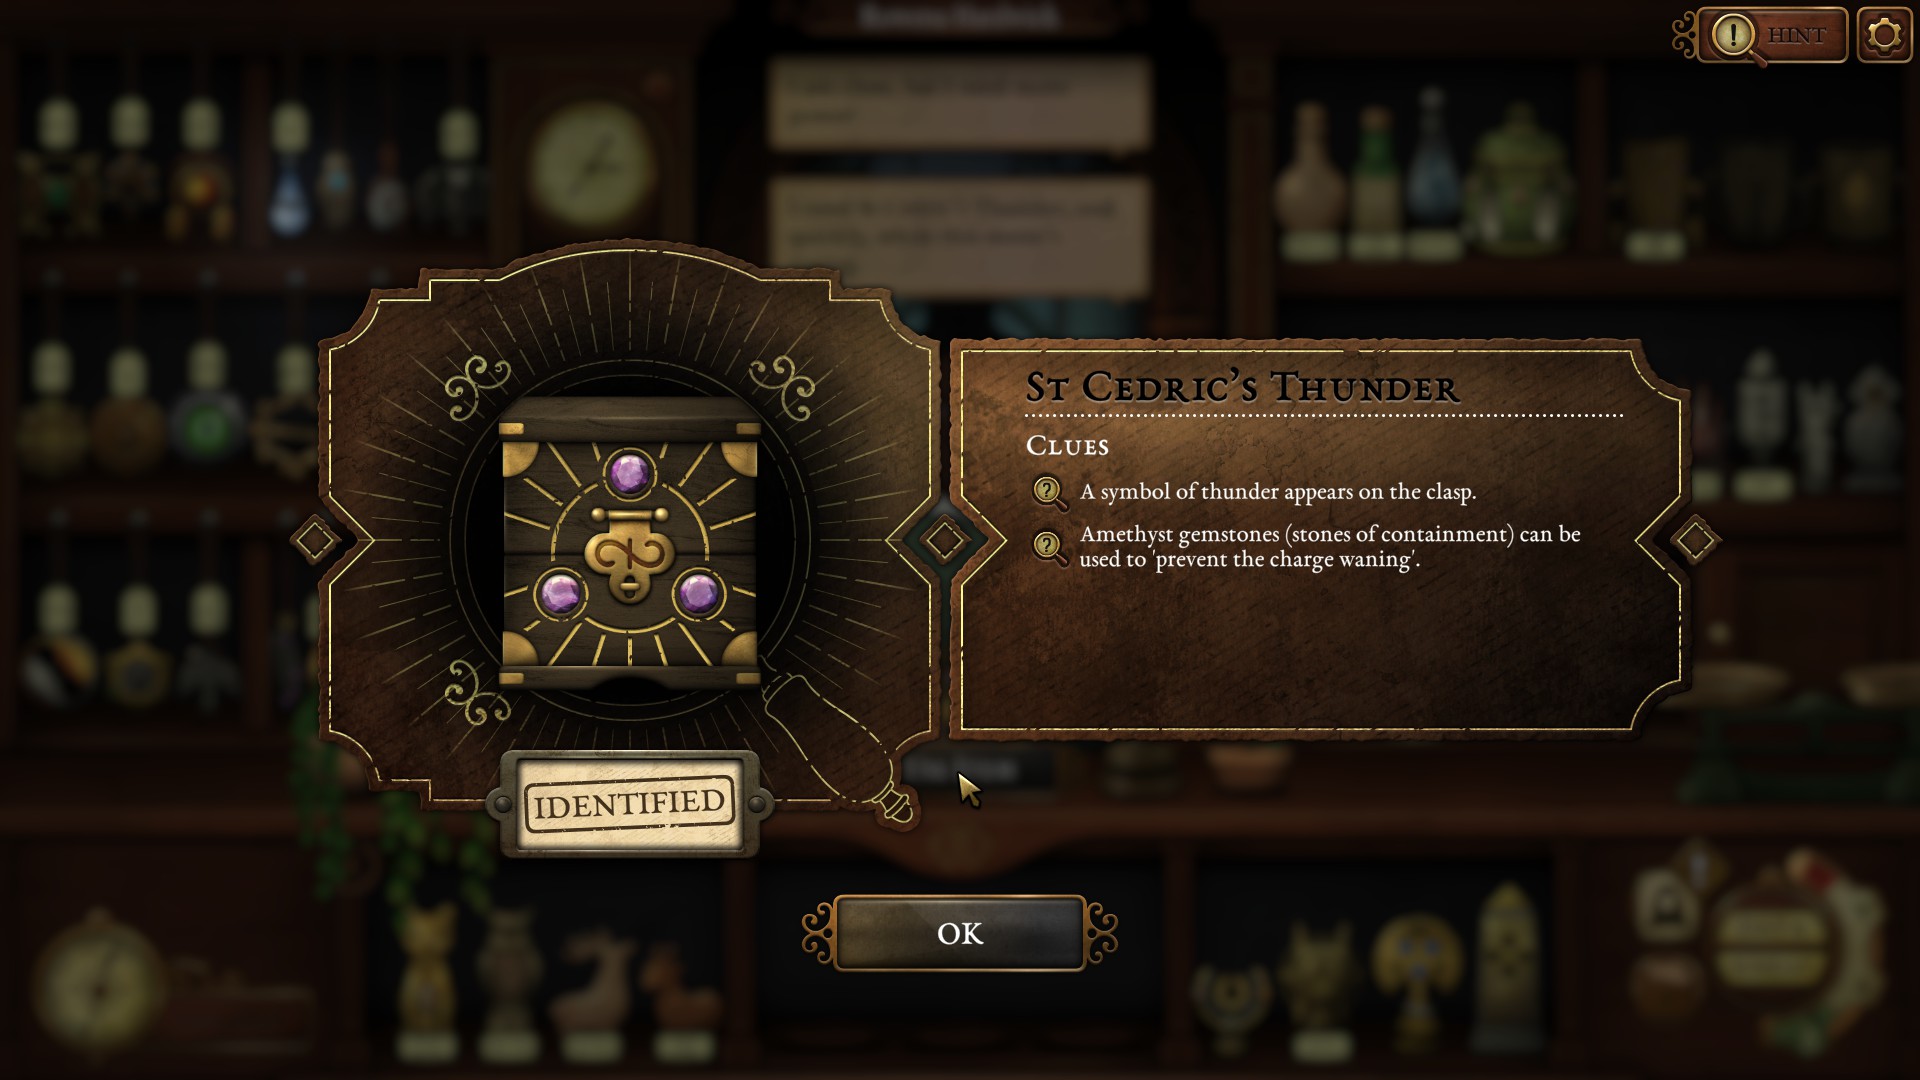
1. Notice that 3 of the pages in the book have Xs (not sure if there is anything hinting at this or if you just need to spot this yourself)
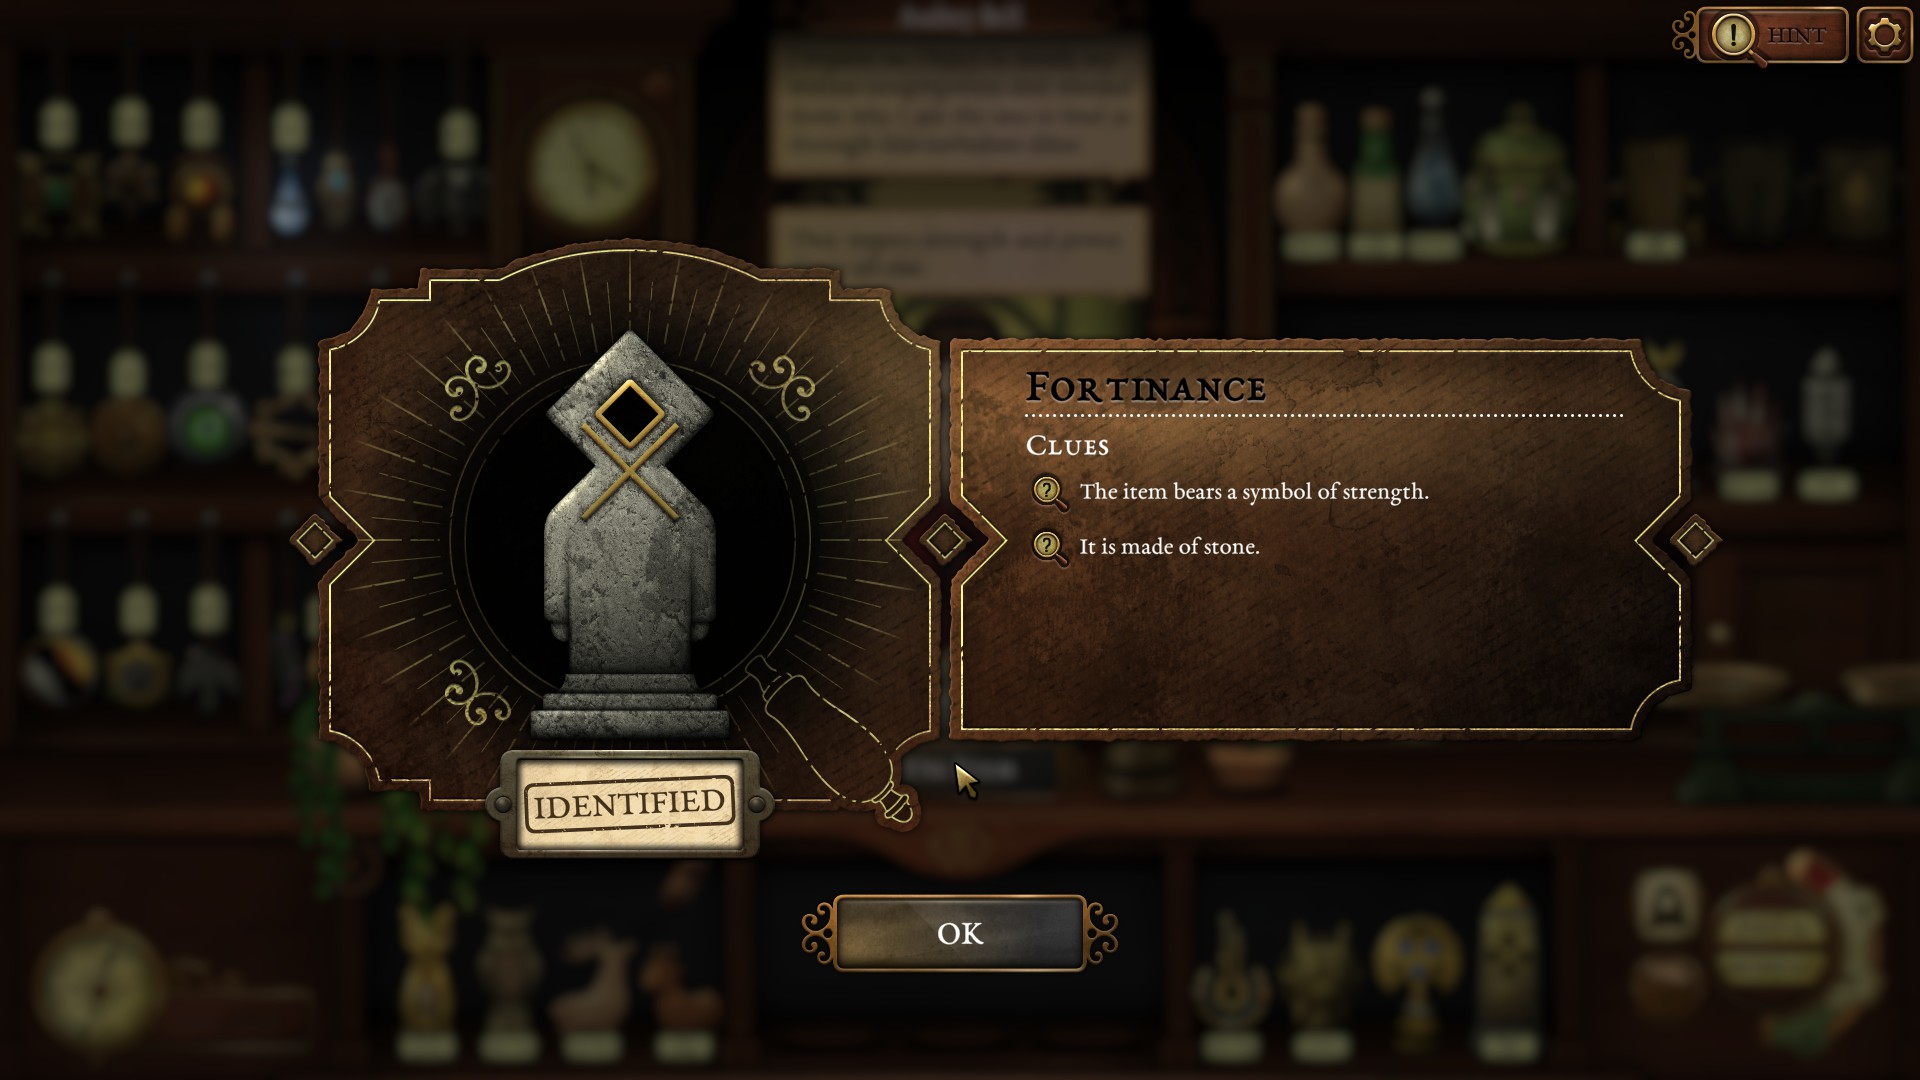
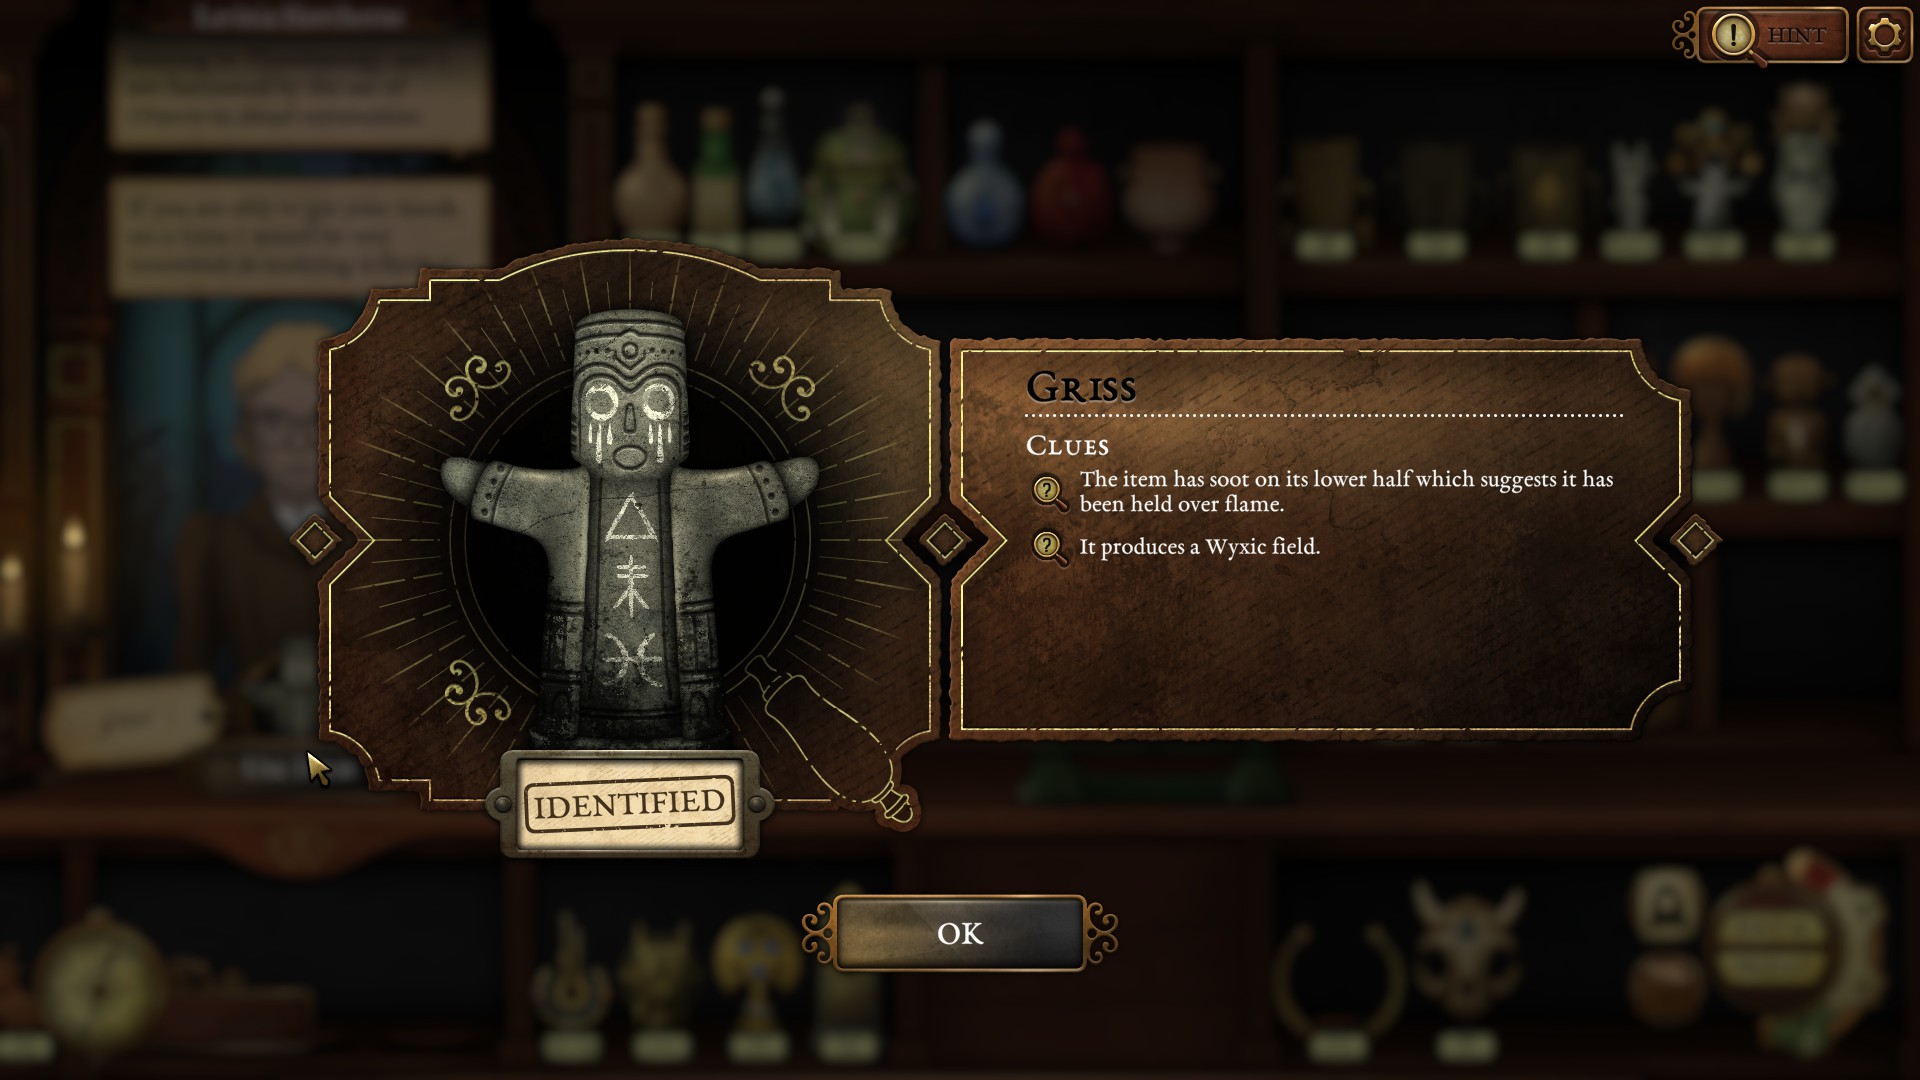
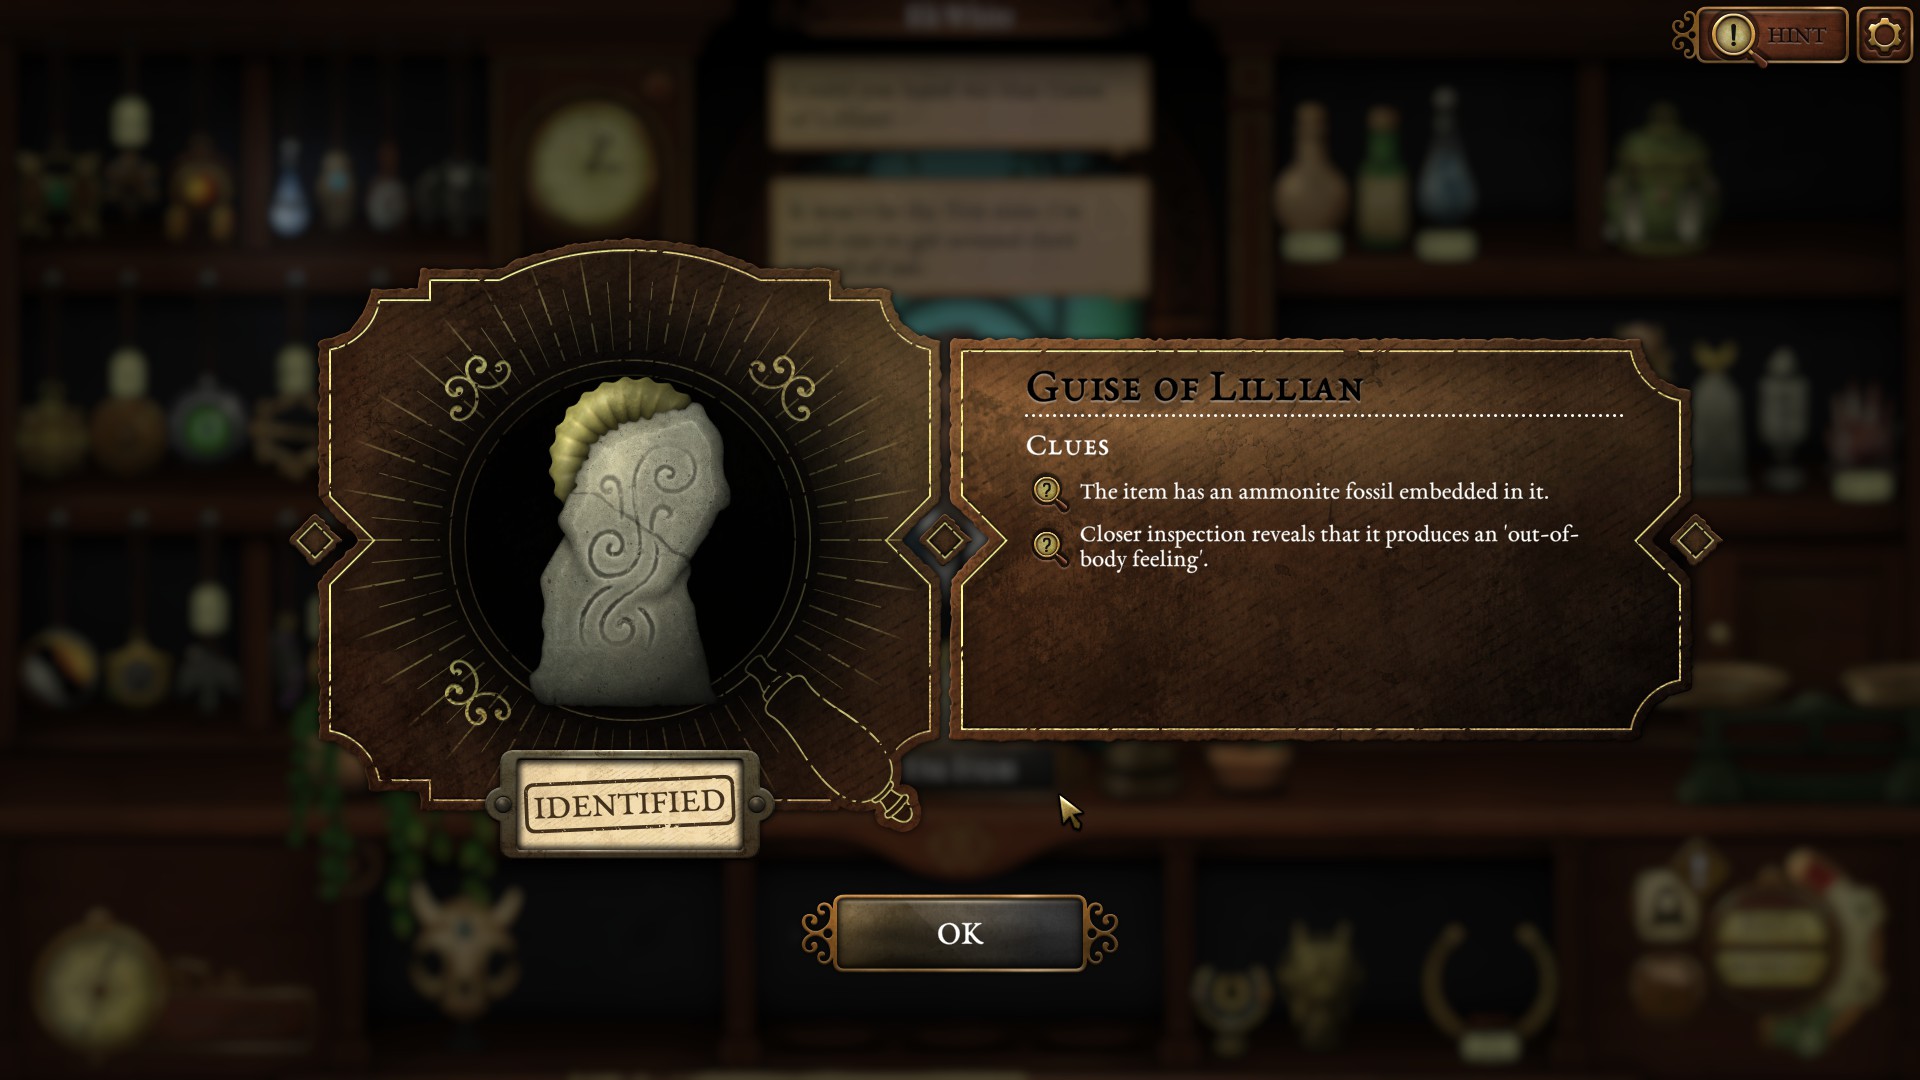
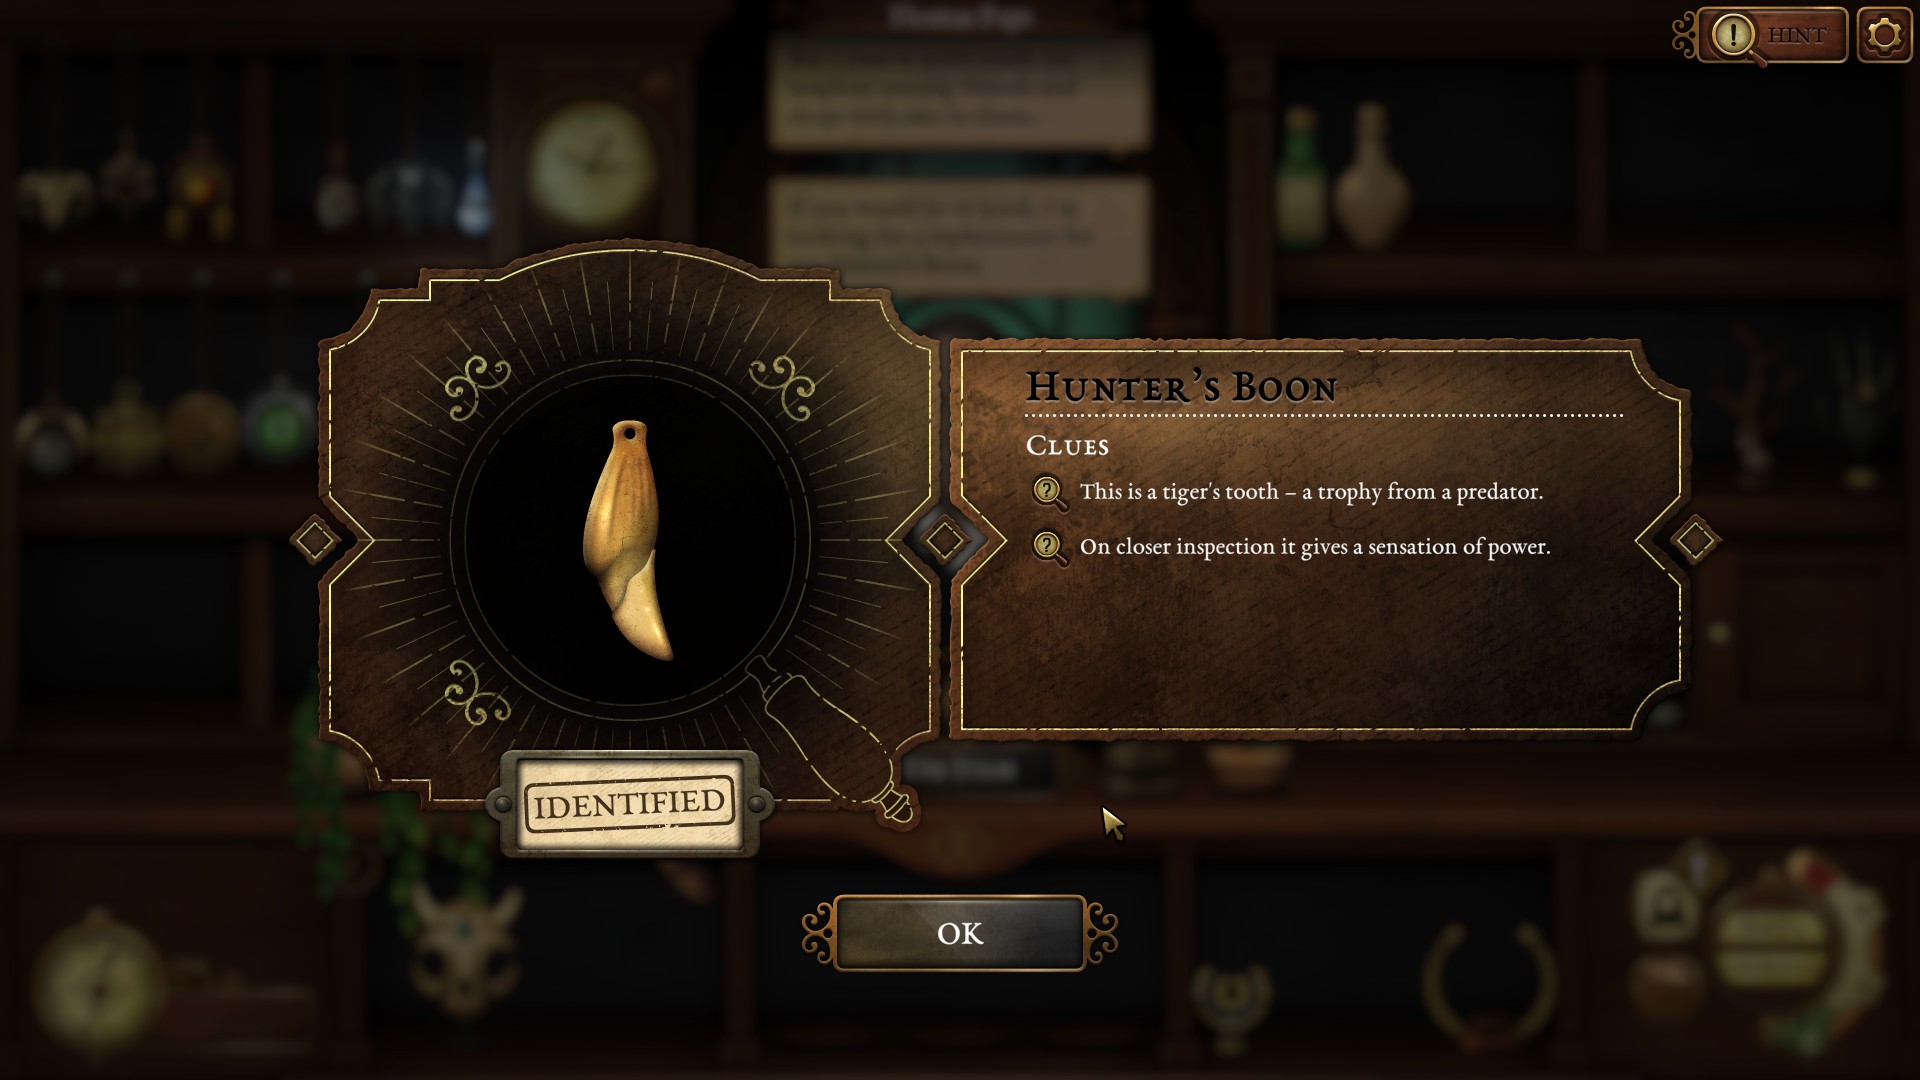
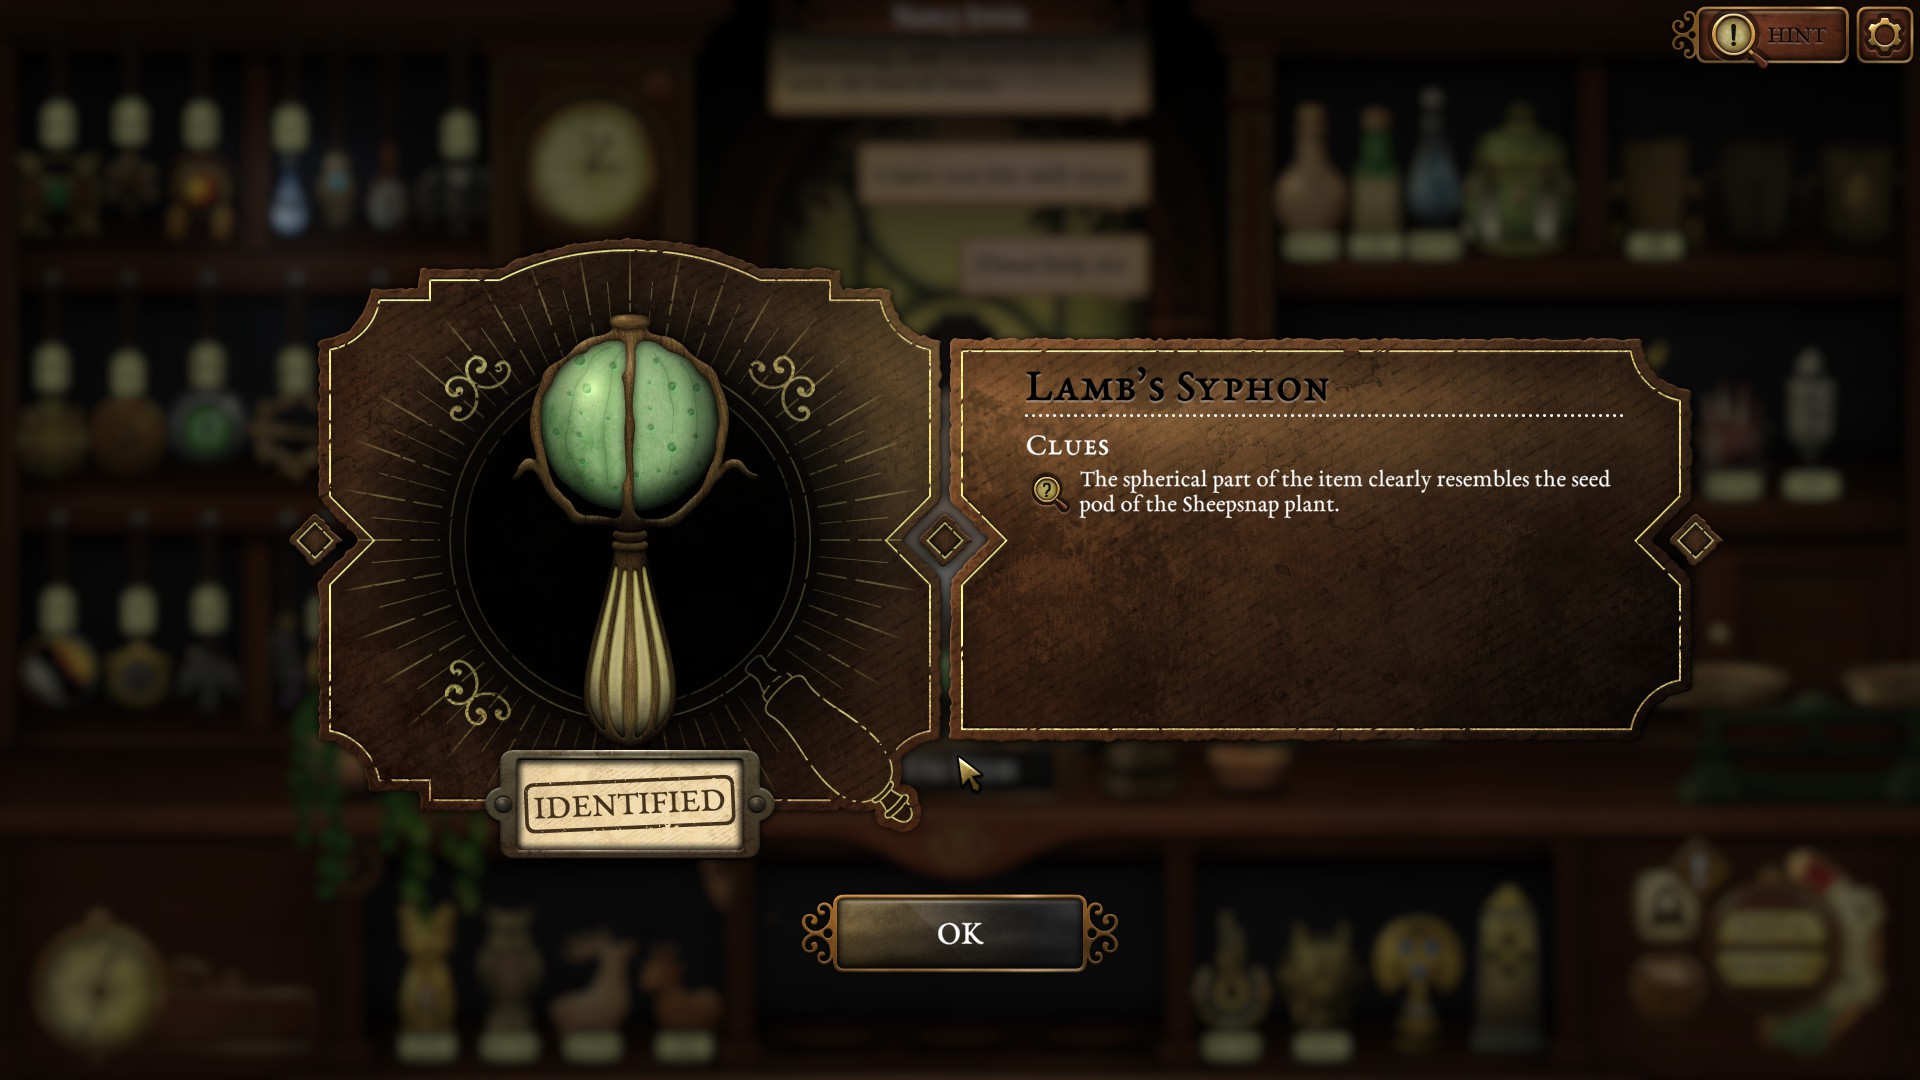
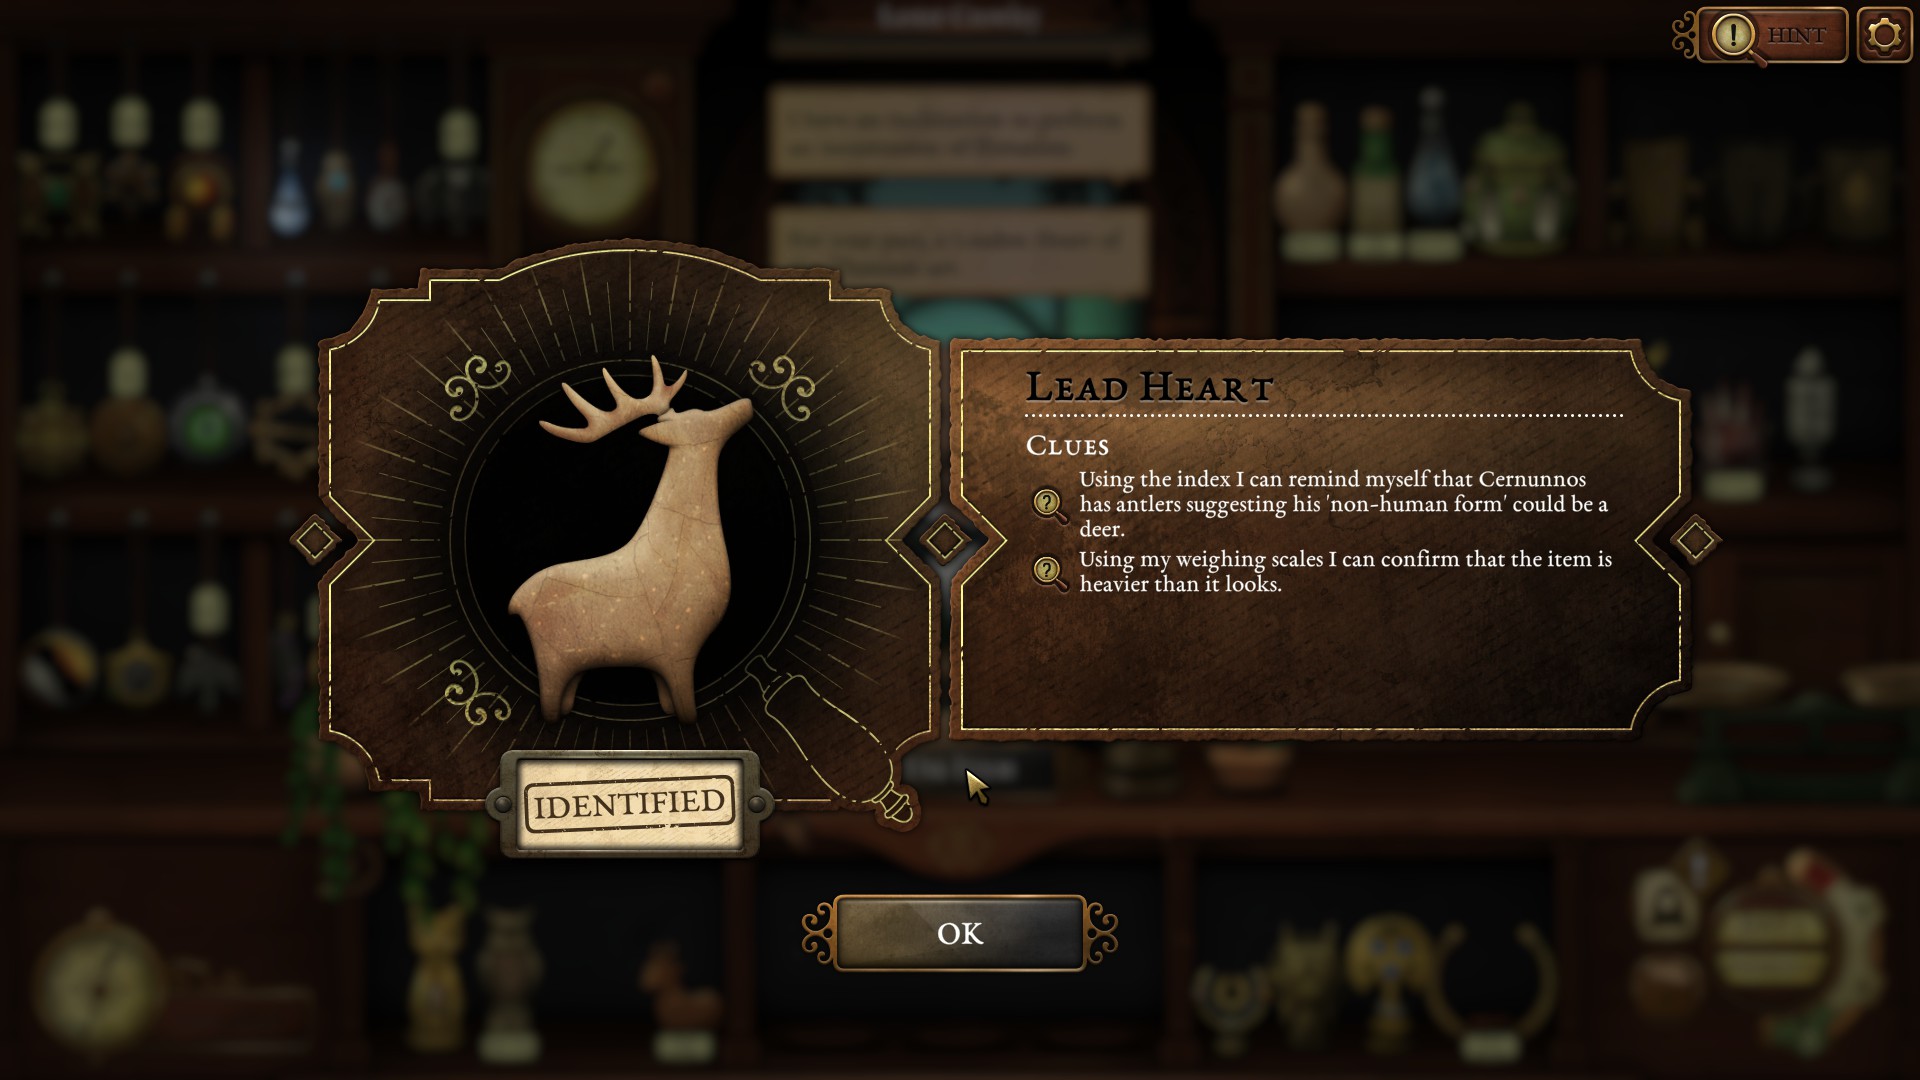
2. Activate the plinth puzzle using those 3 artifacts
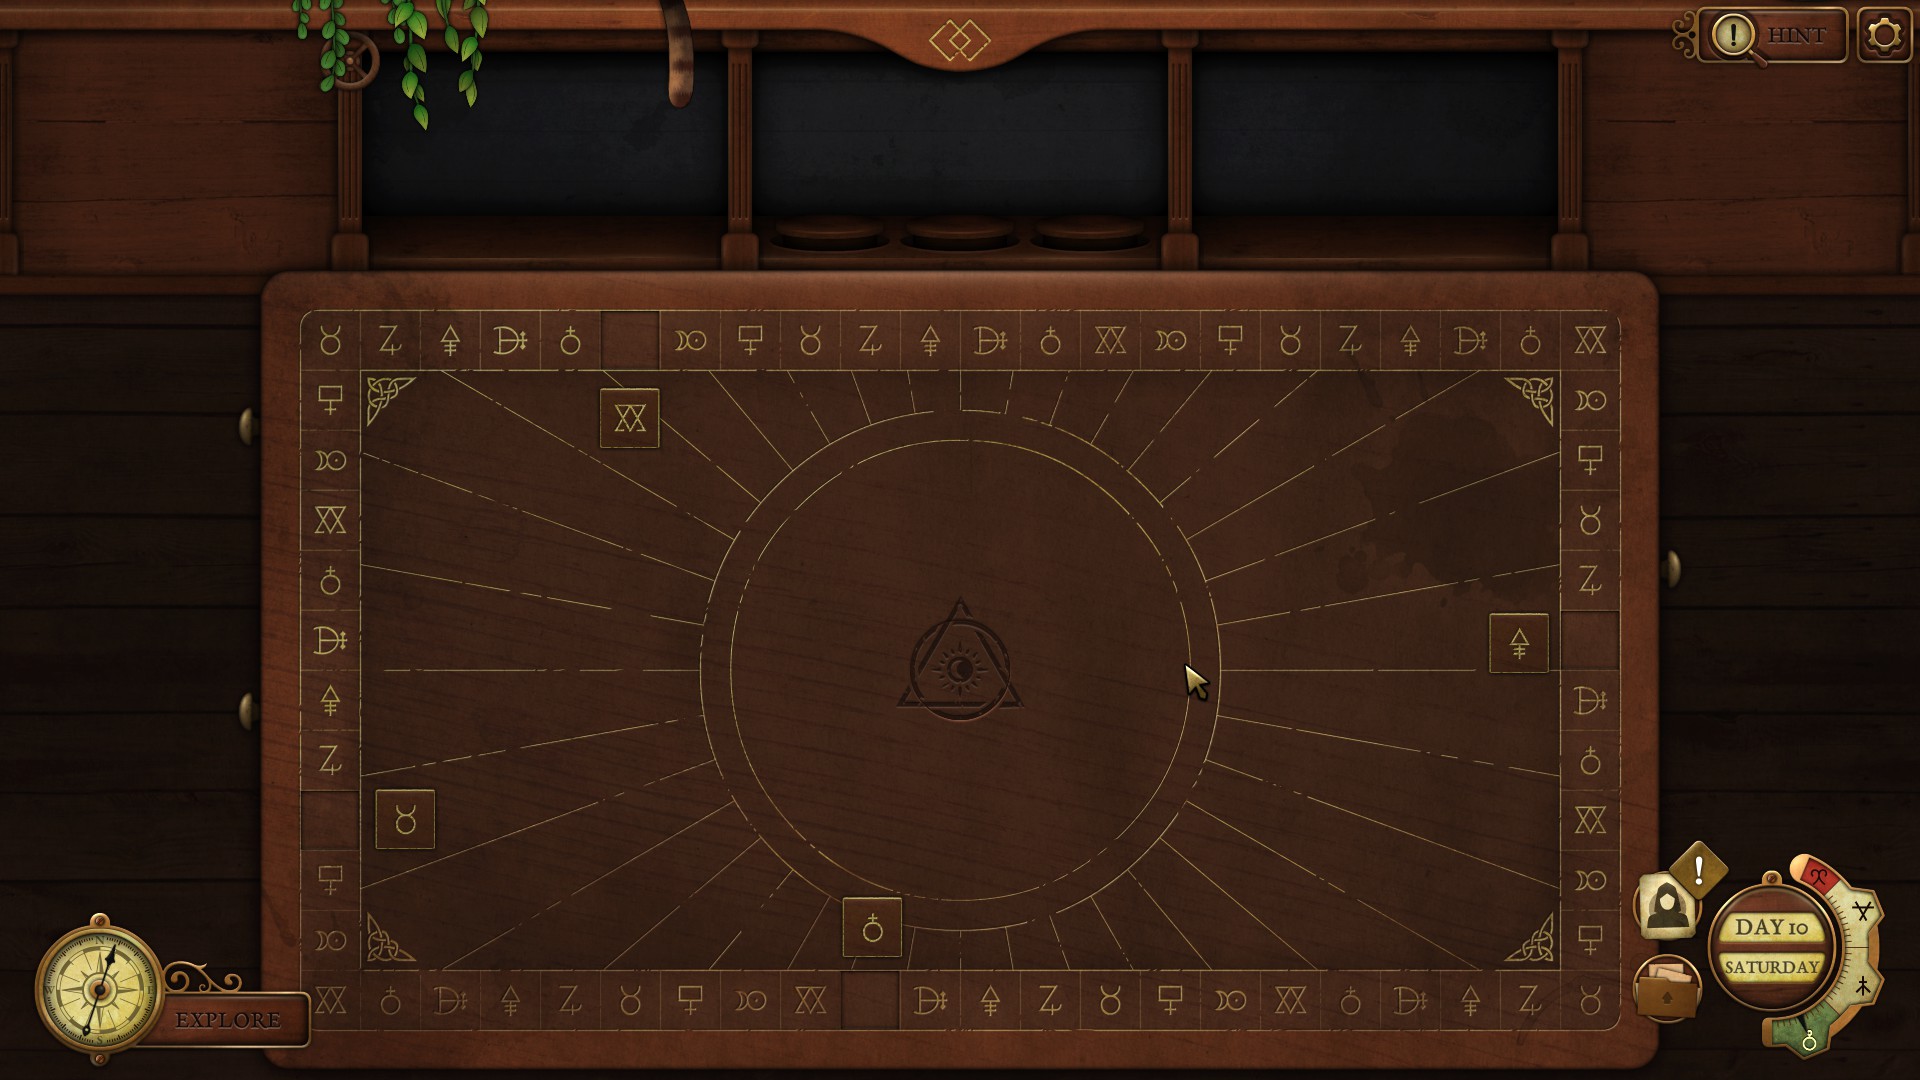
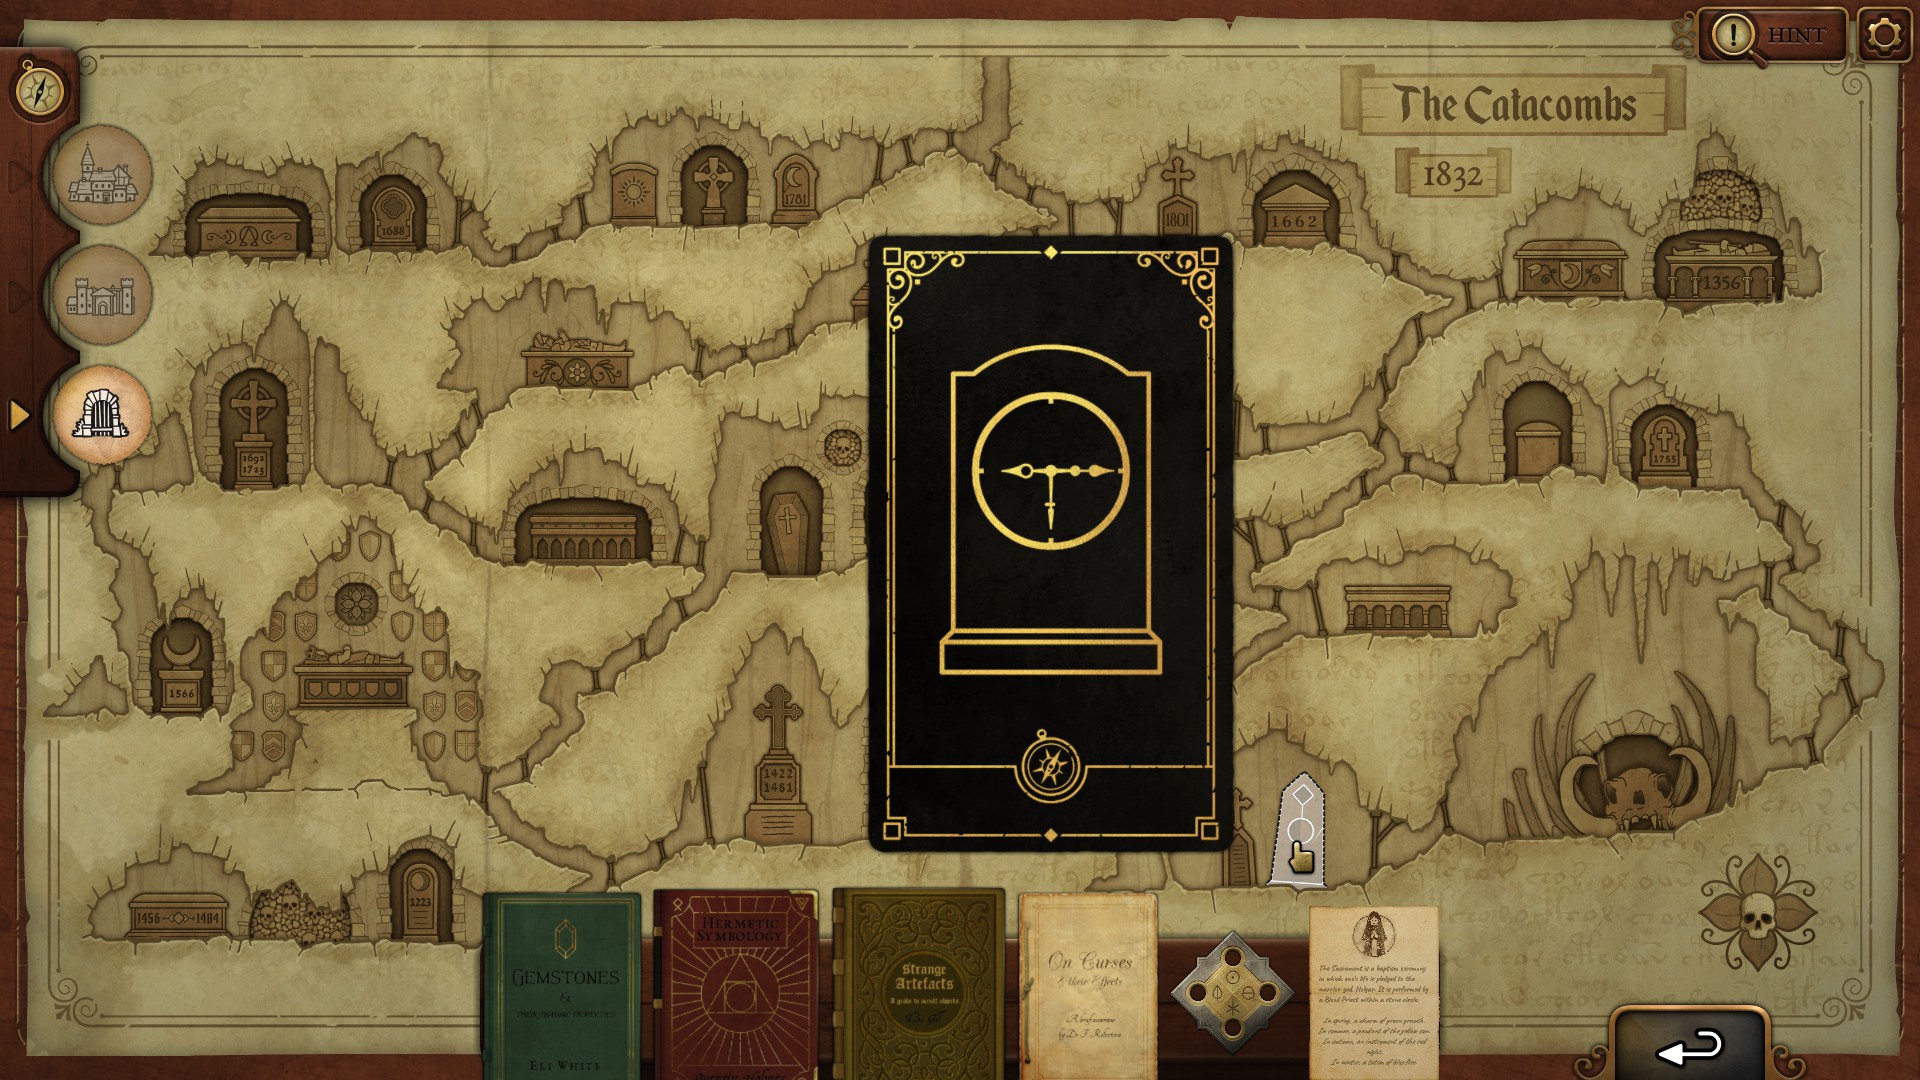
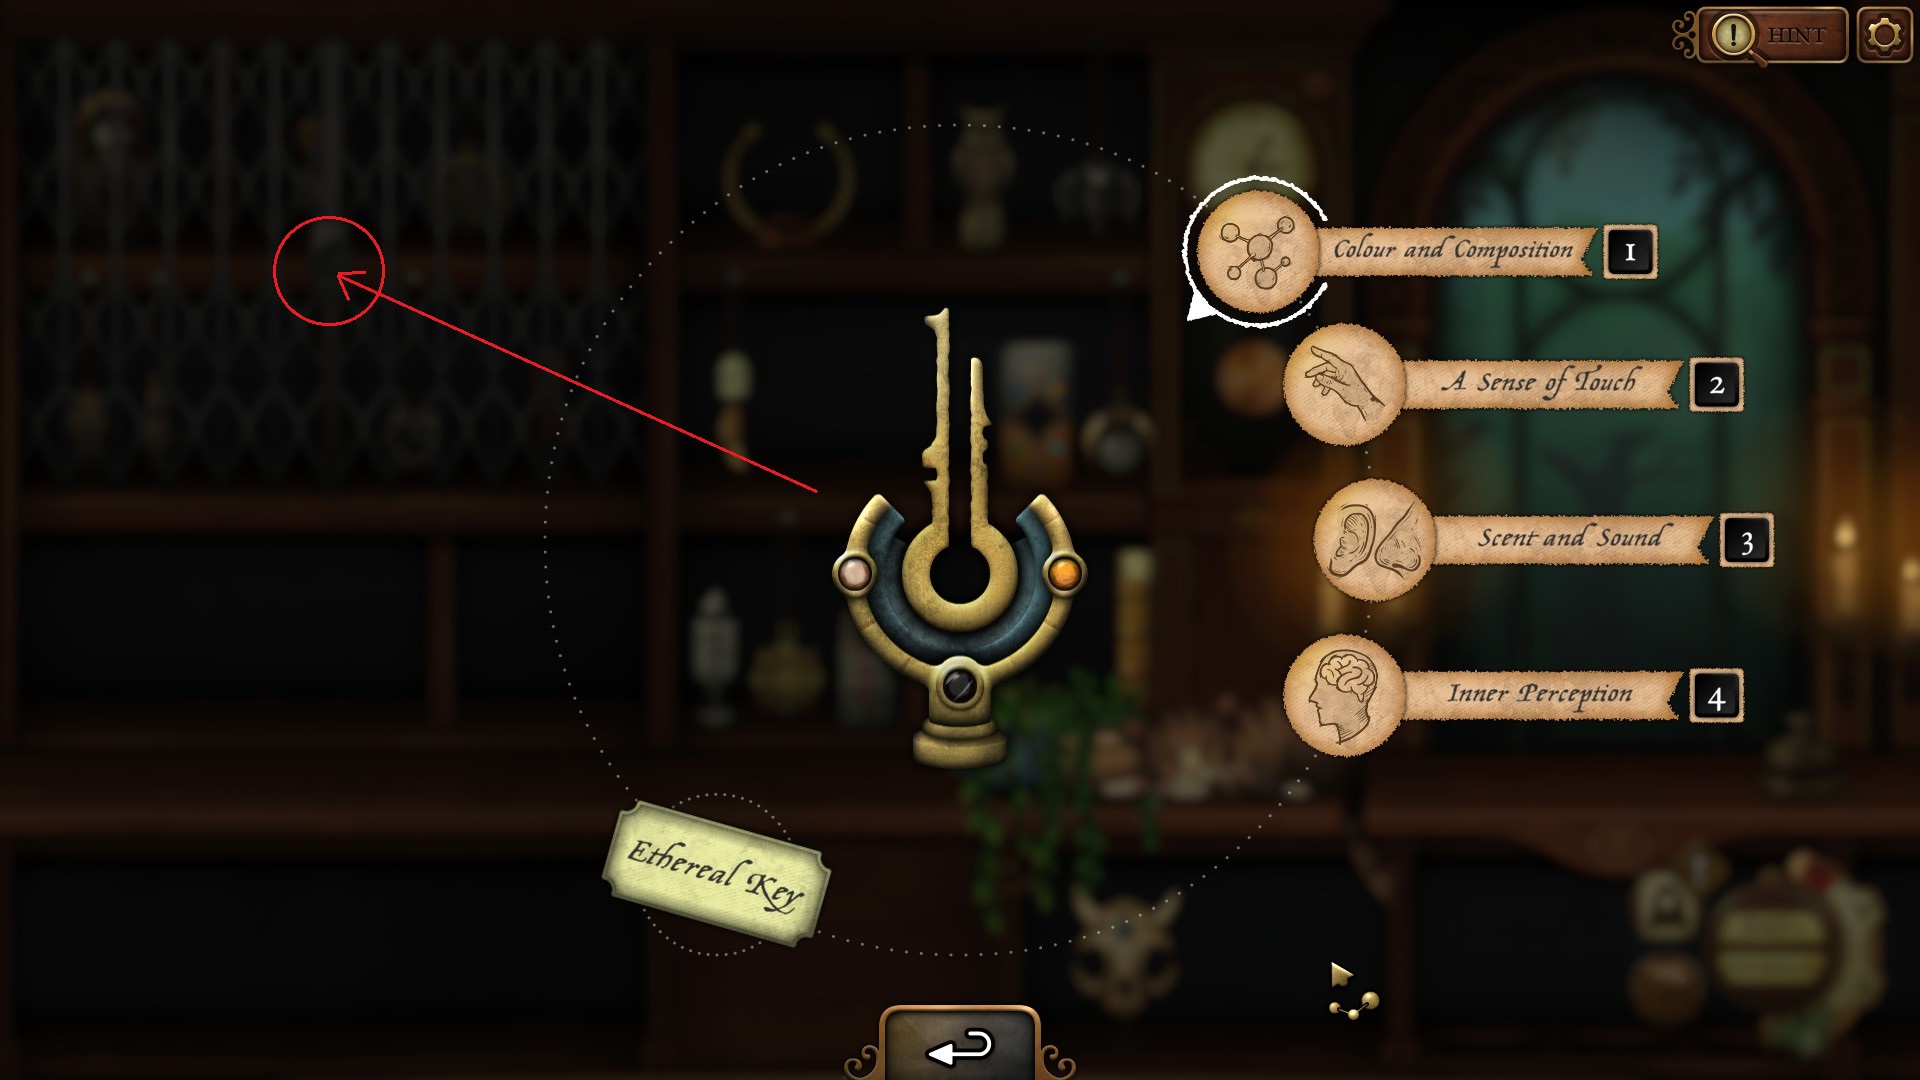
3. Solve the clock puzzle
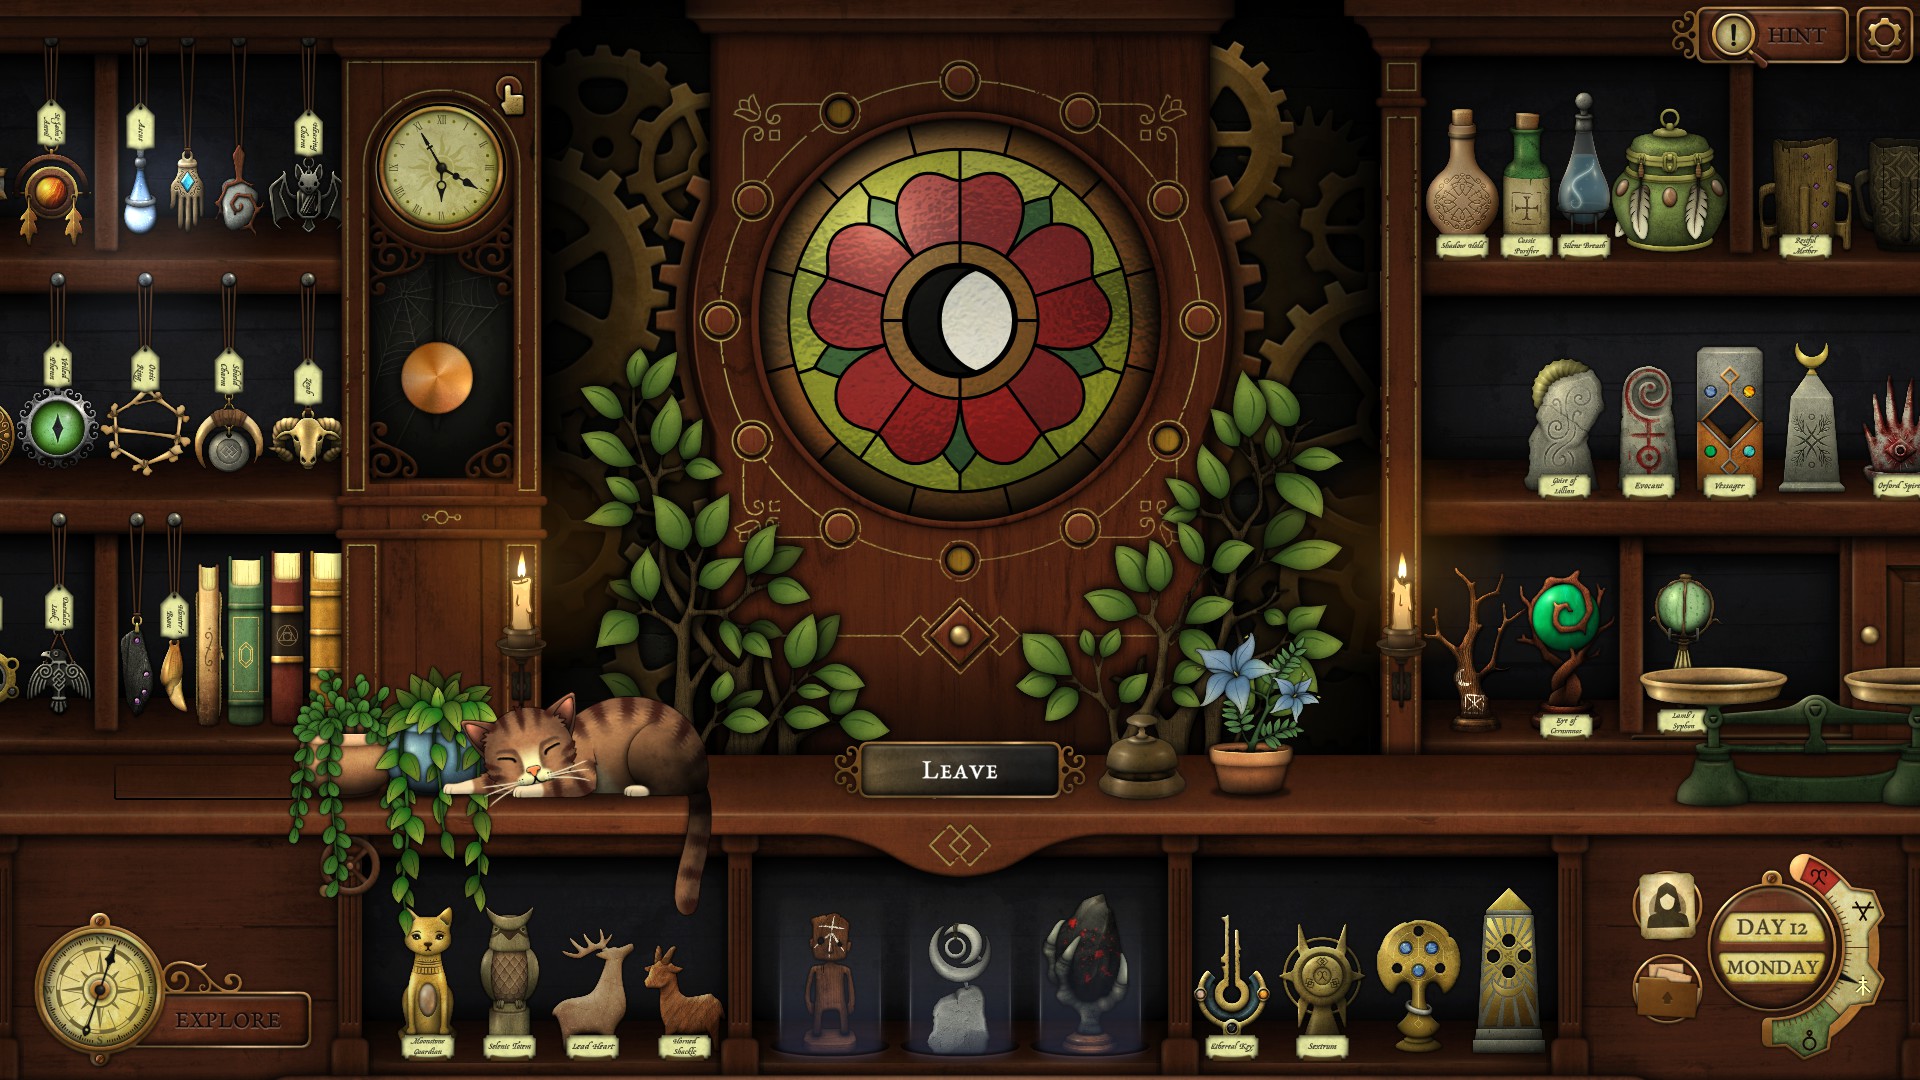
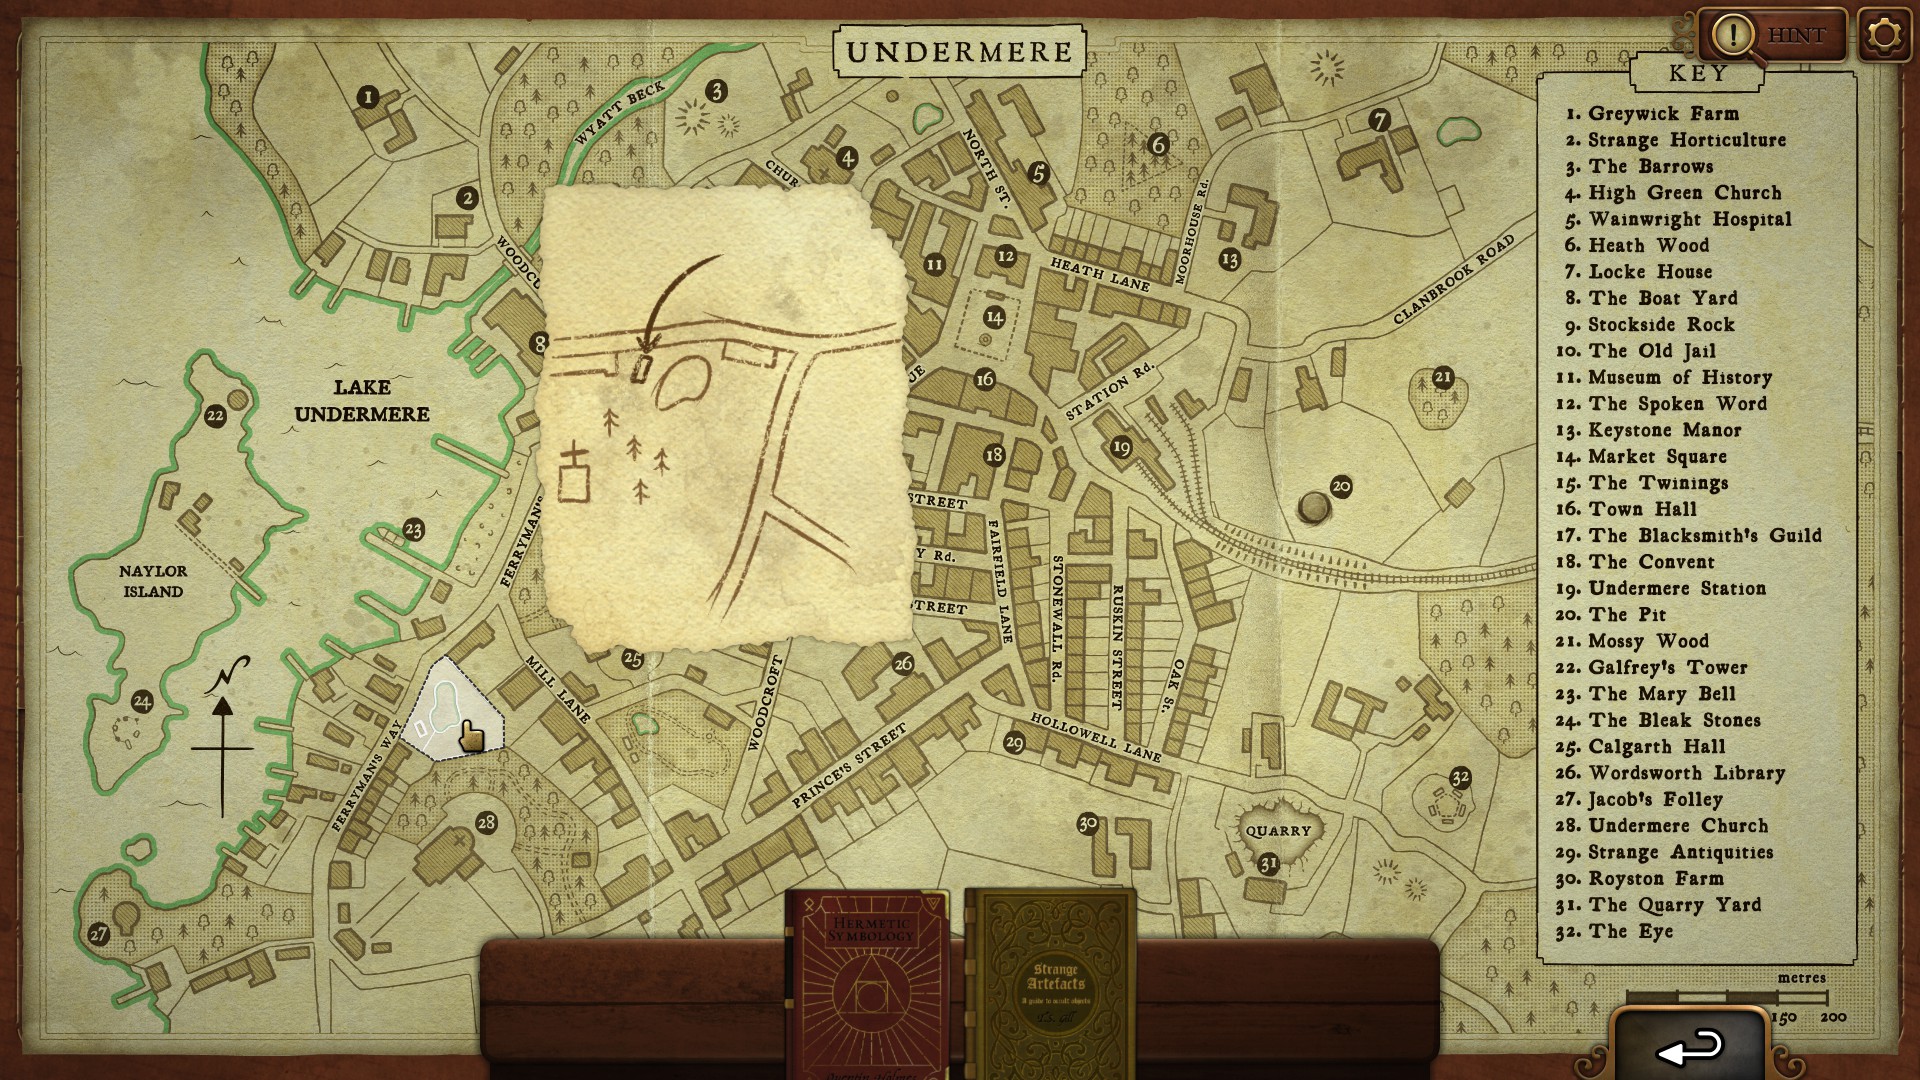
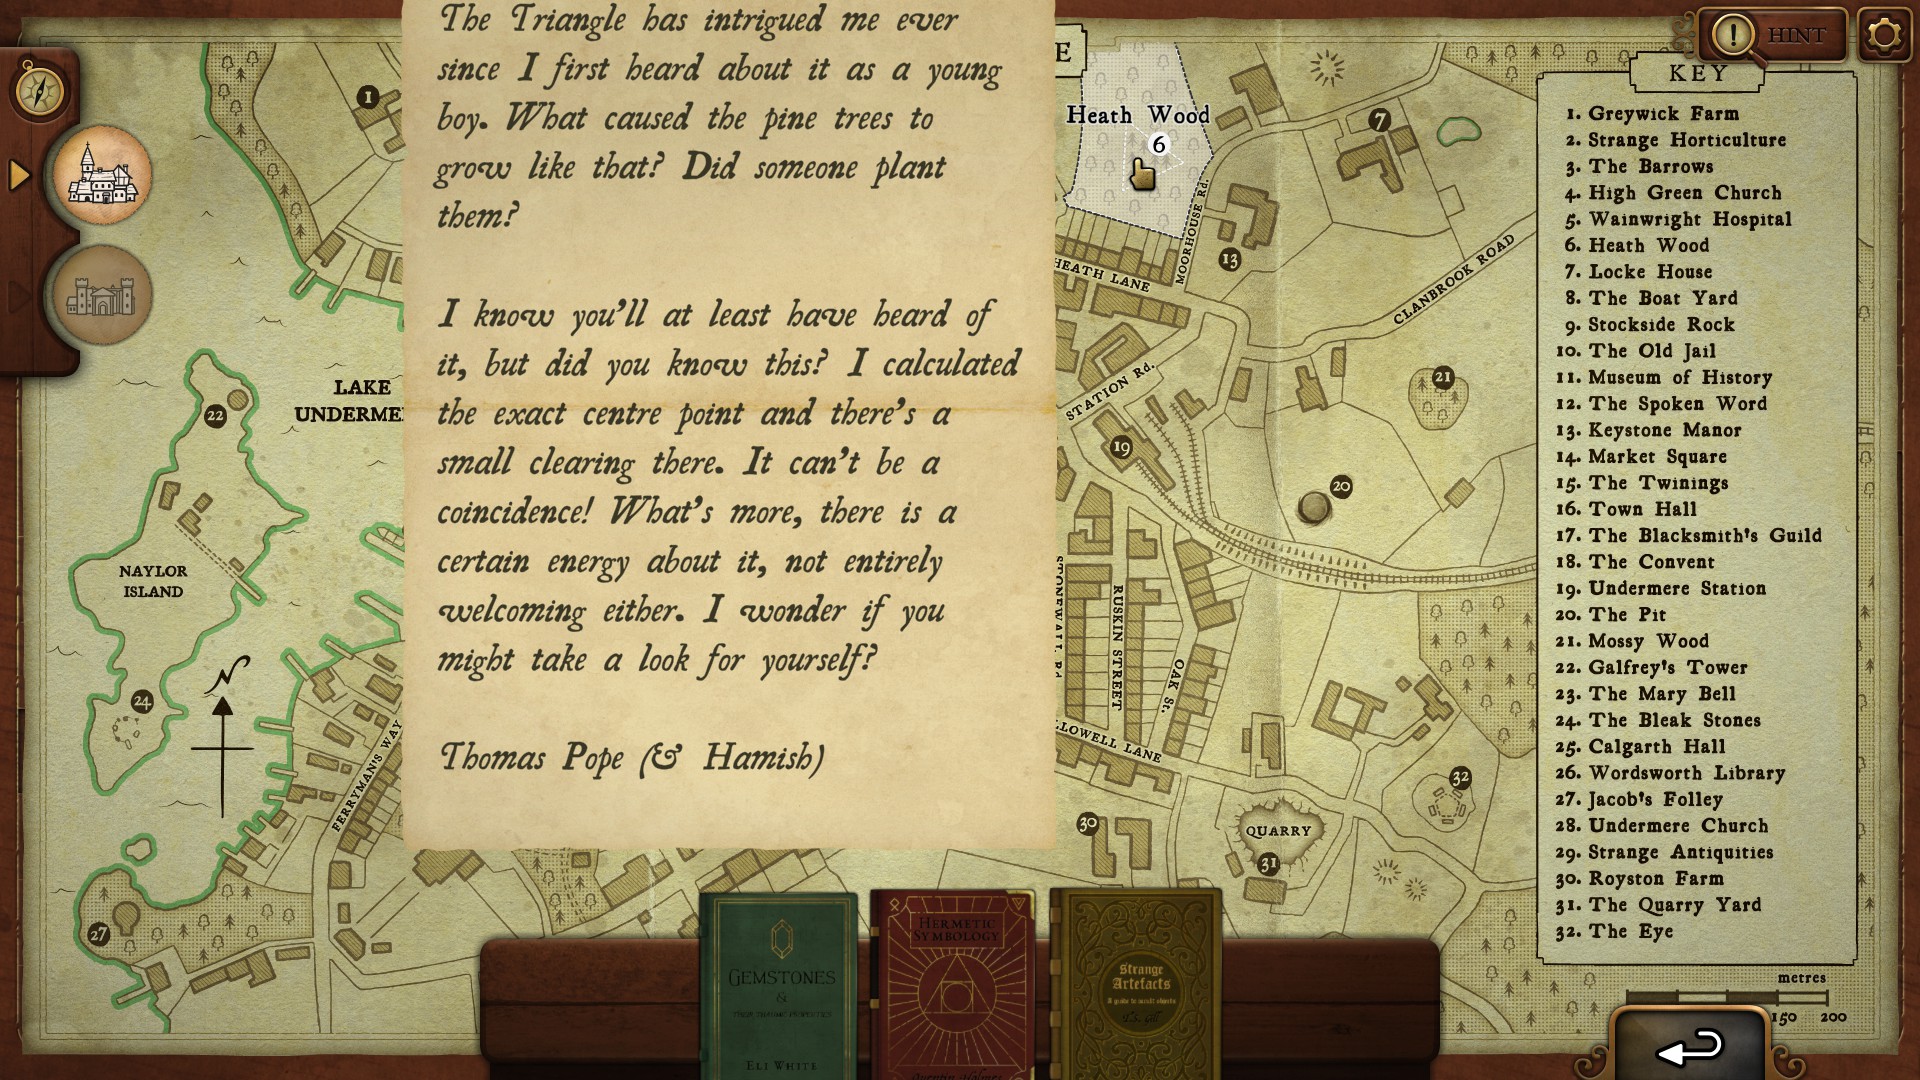
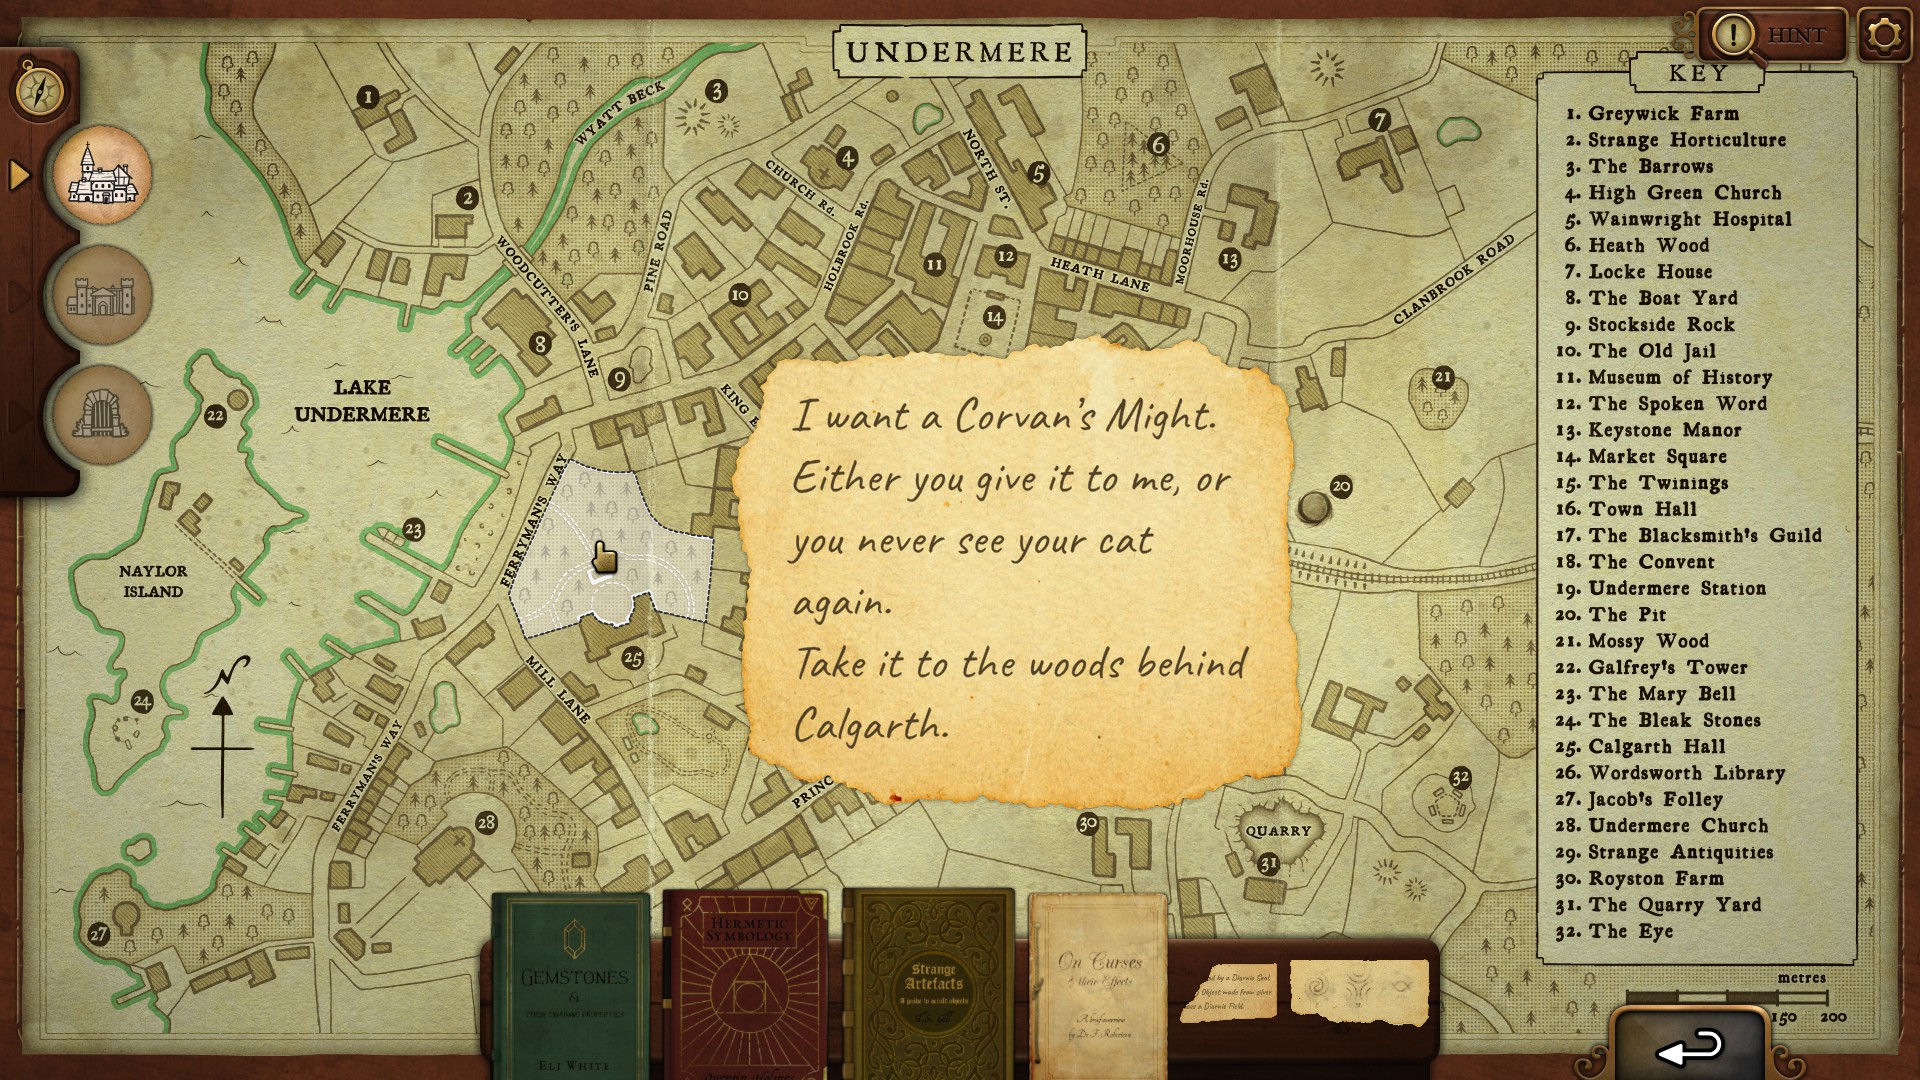
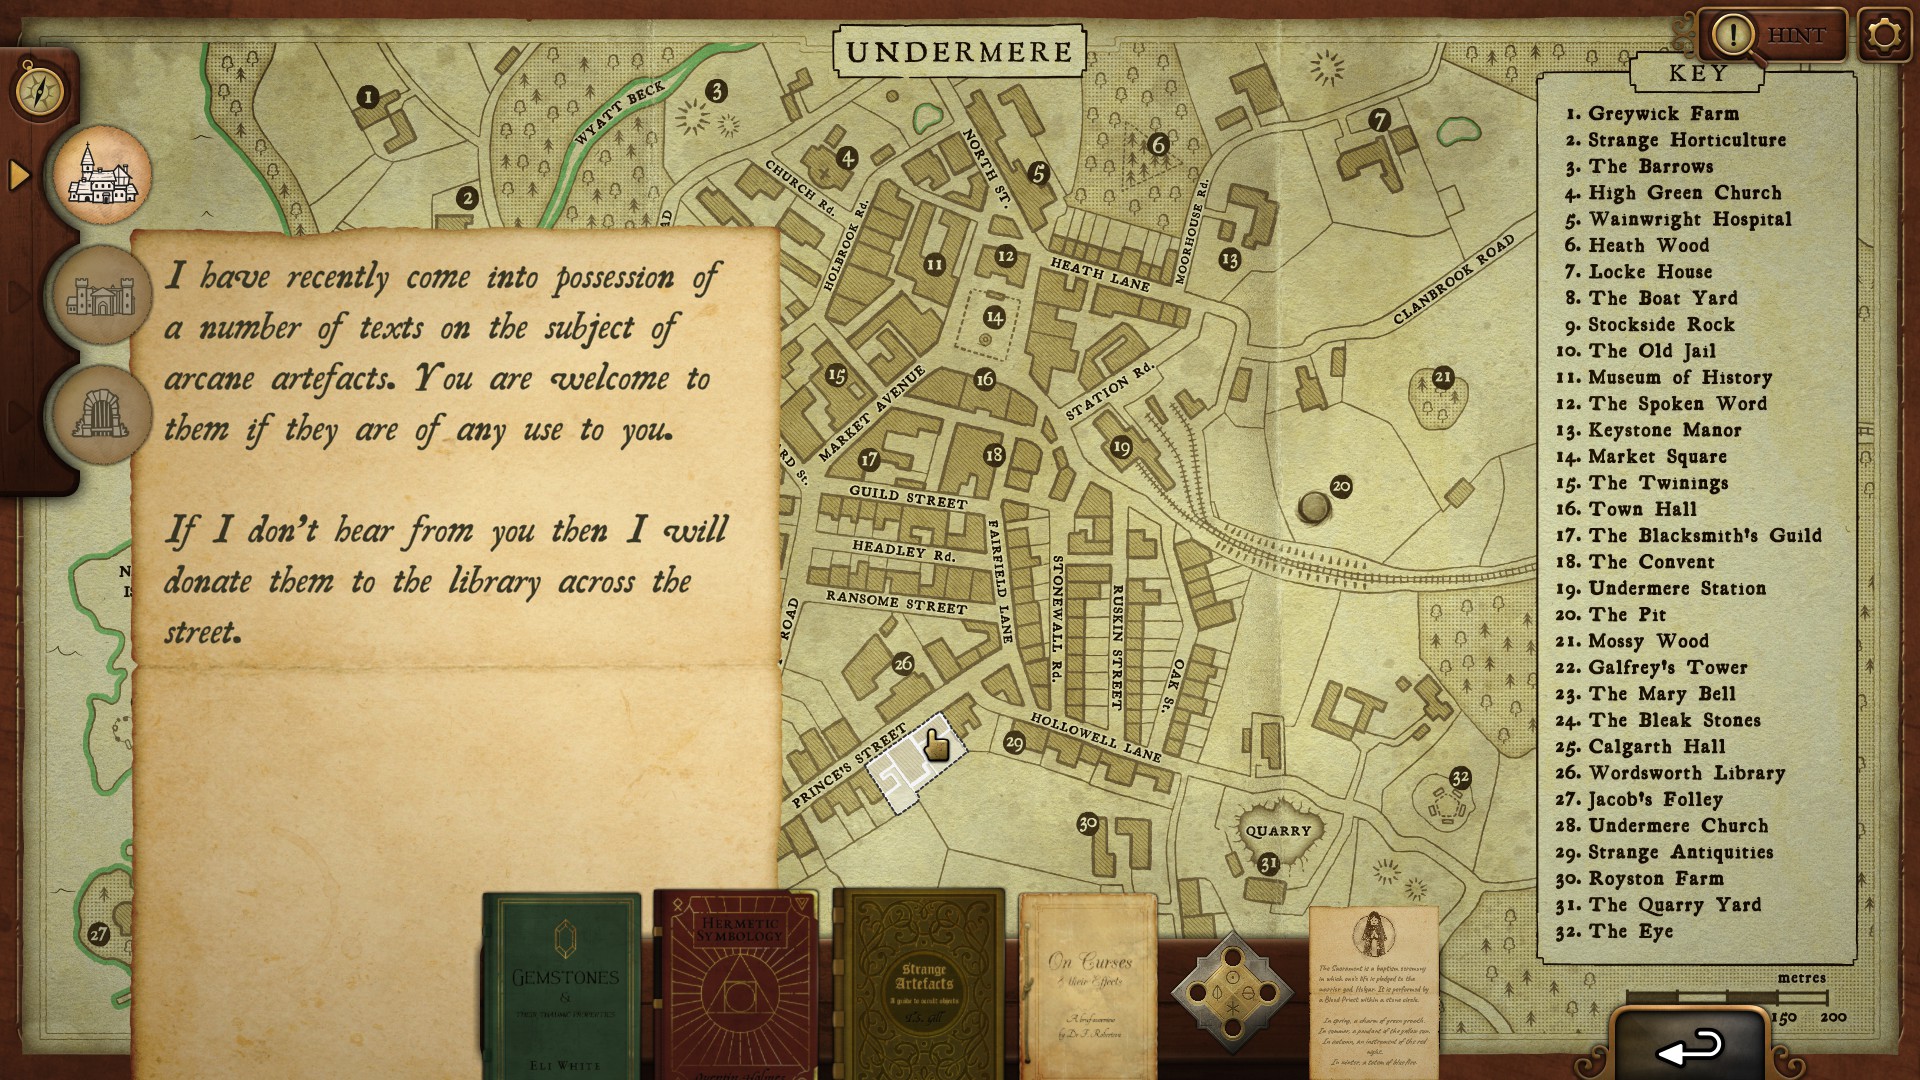
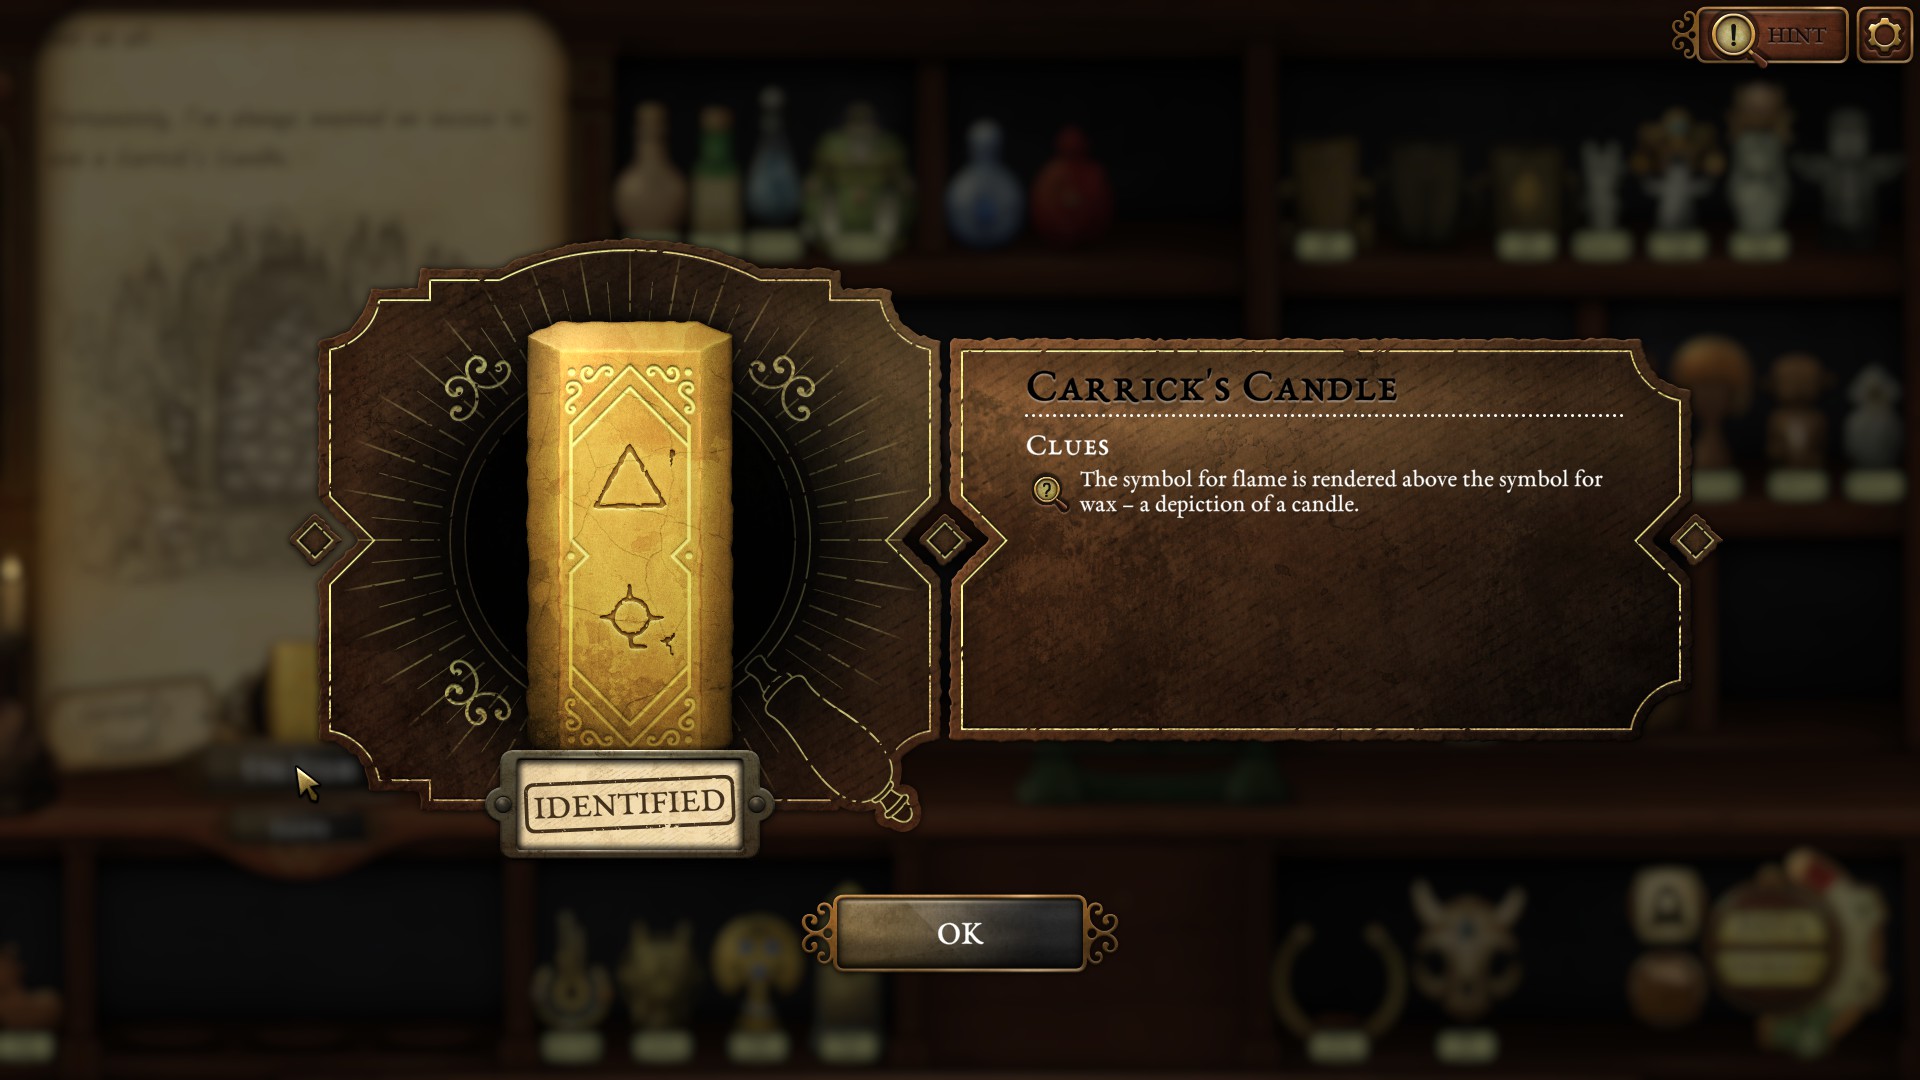
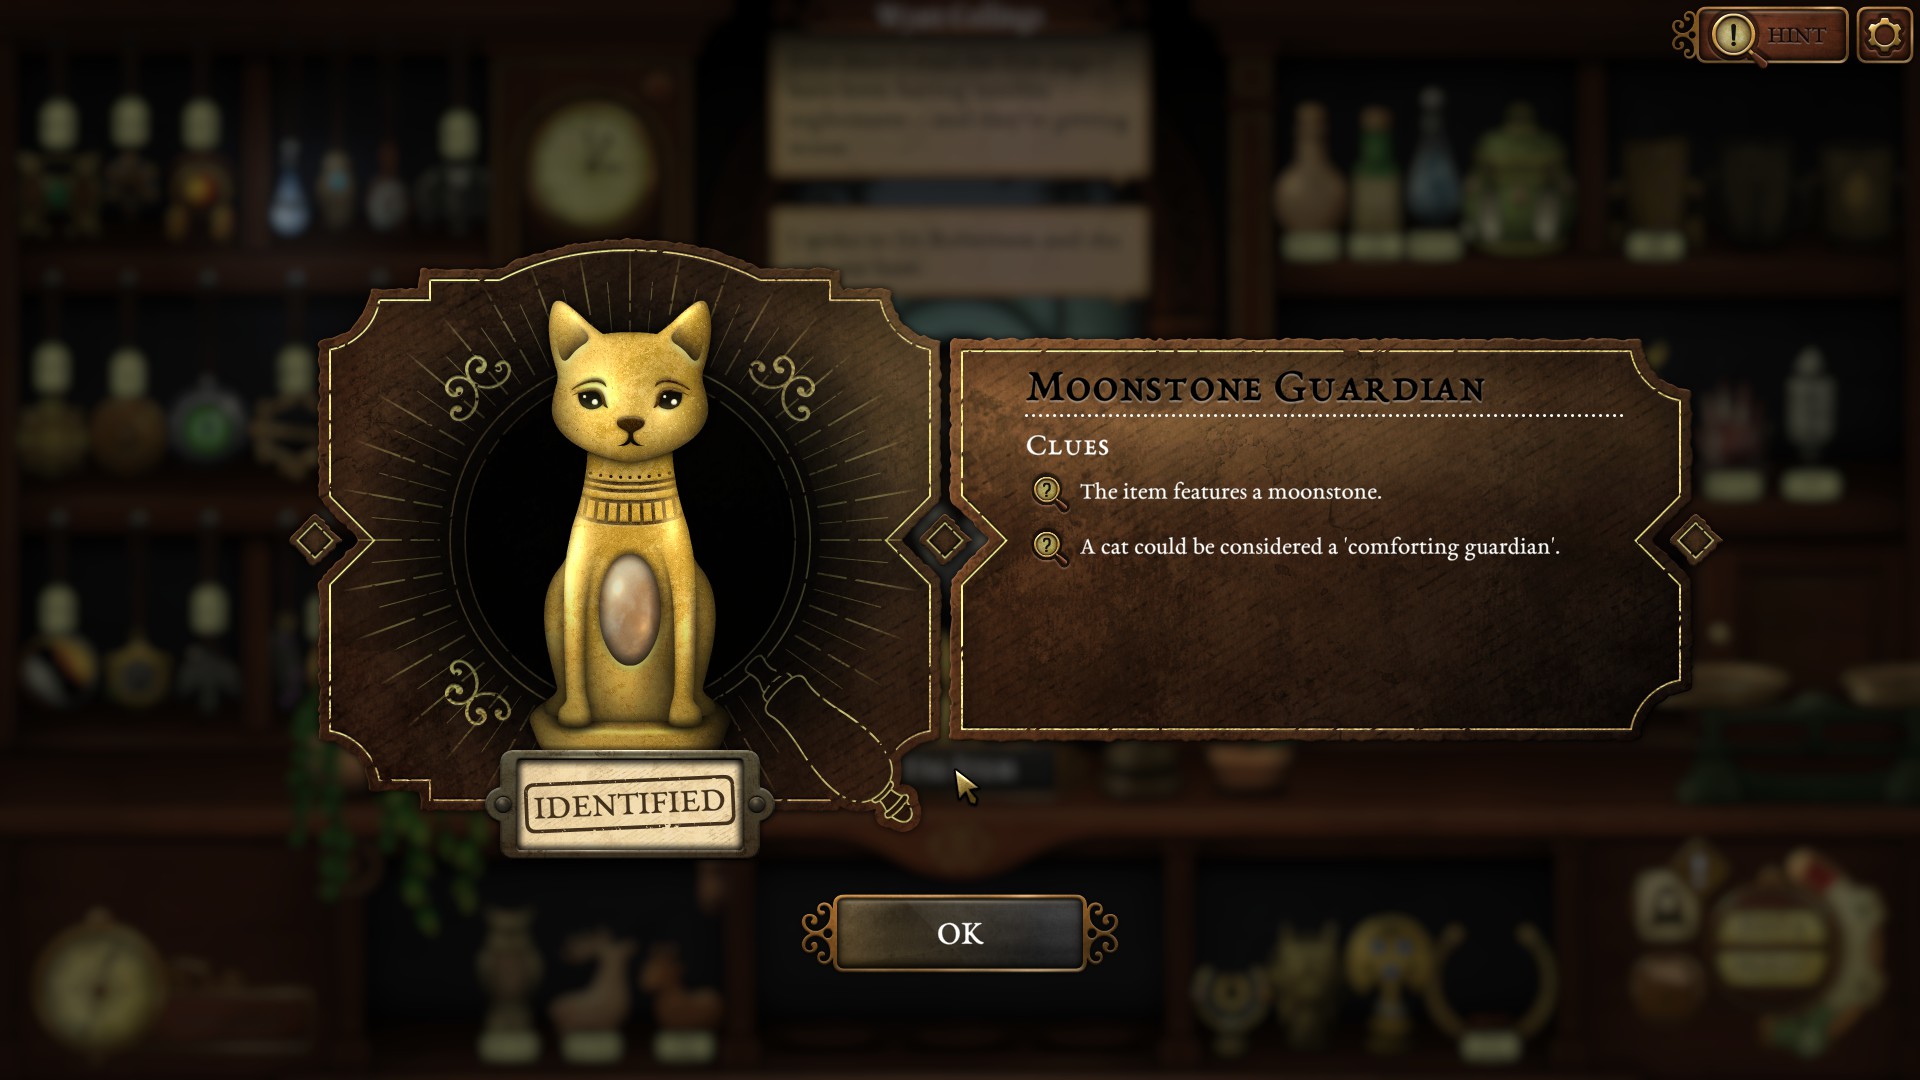
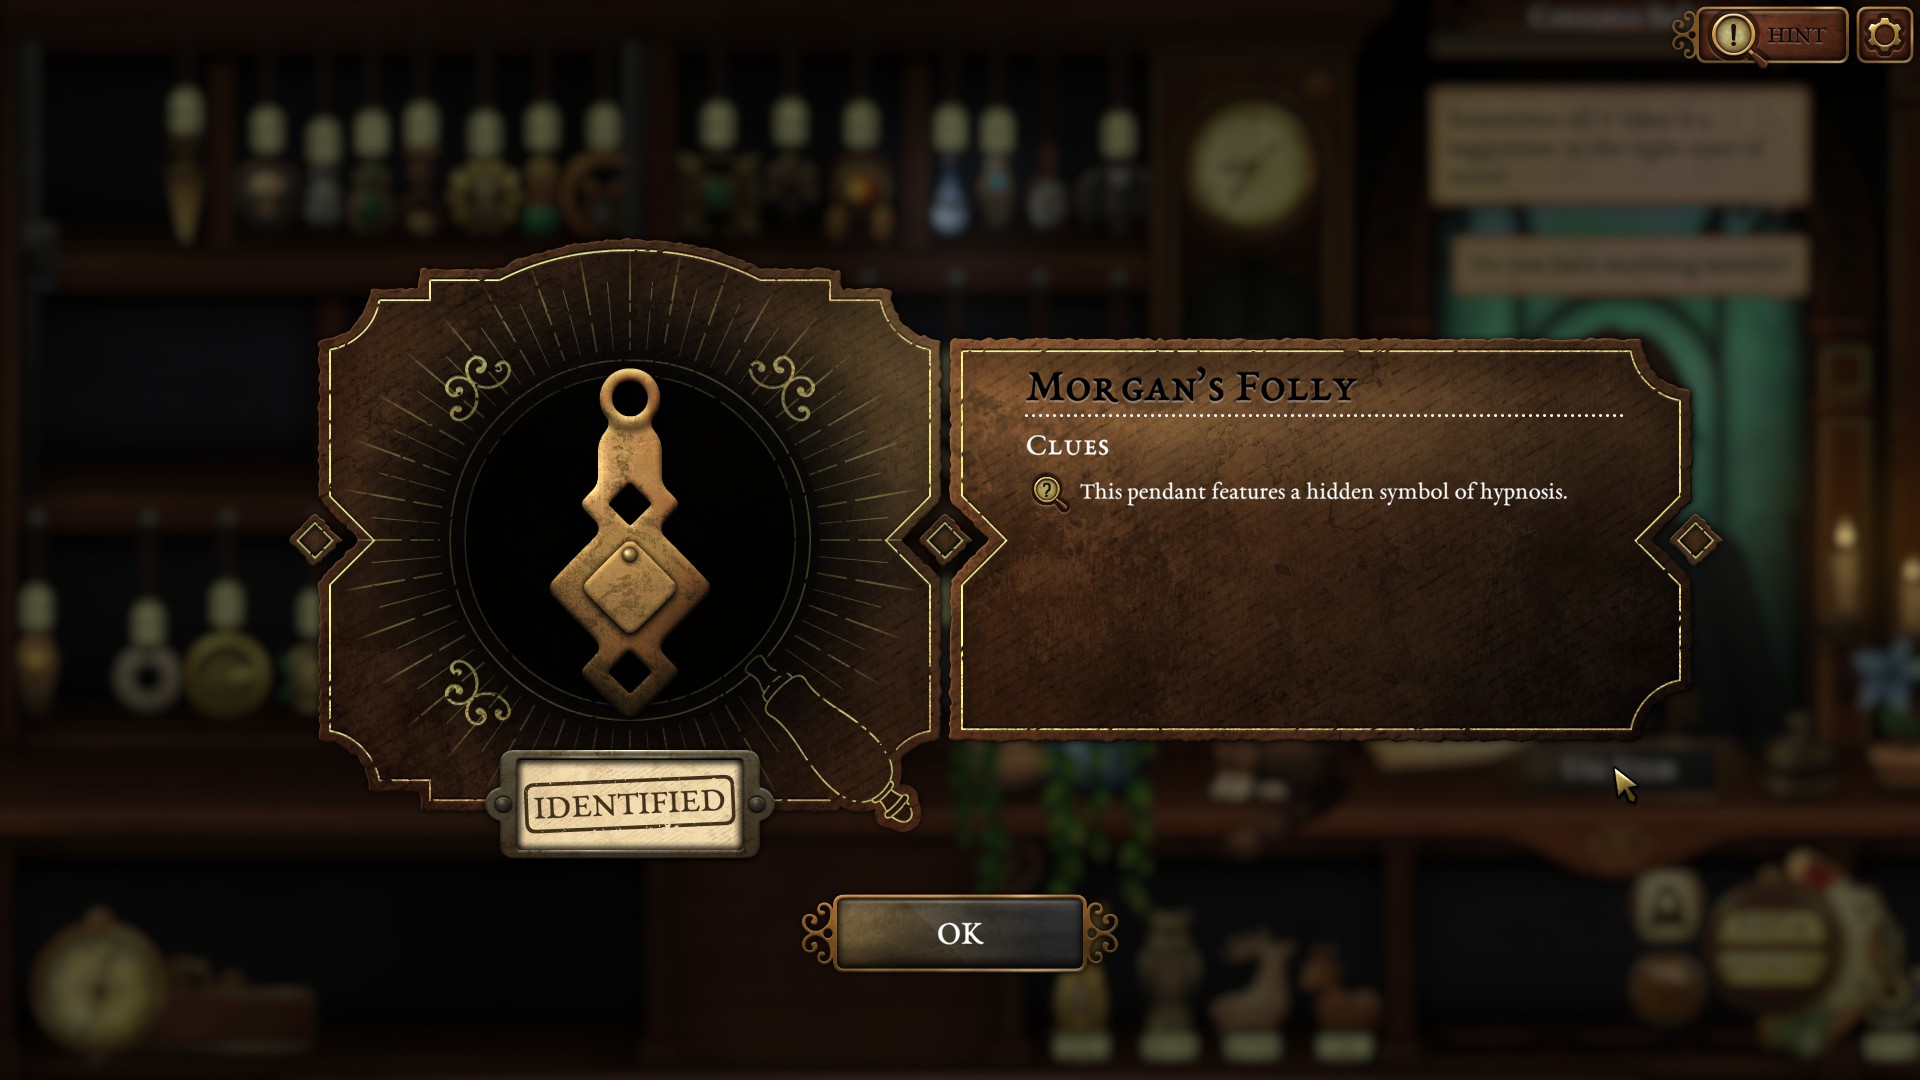
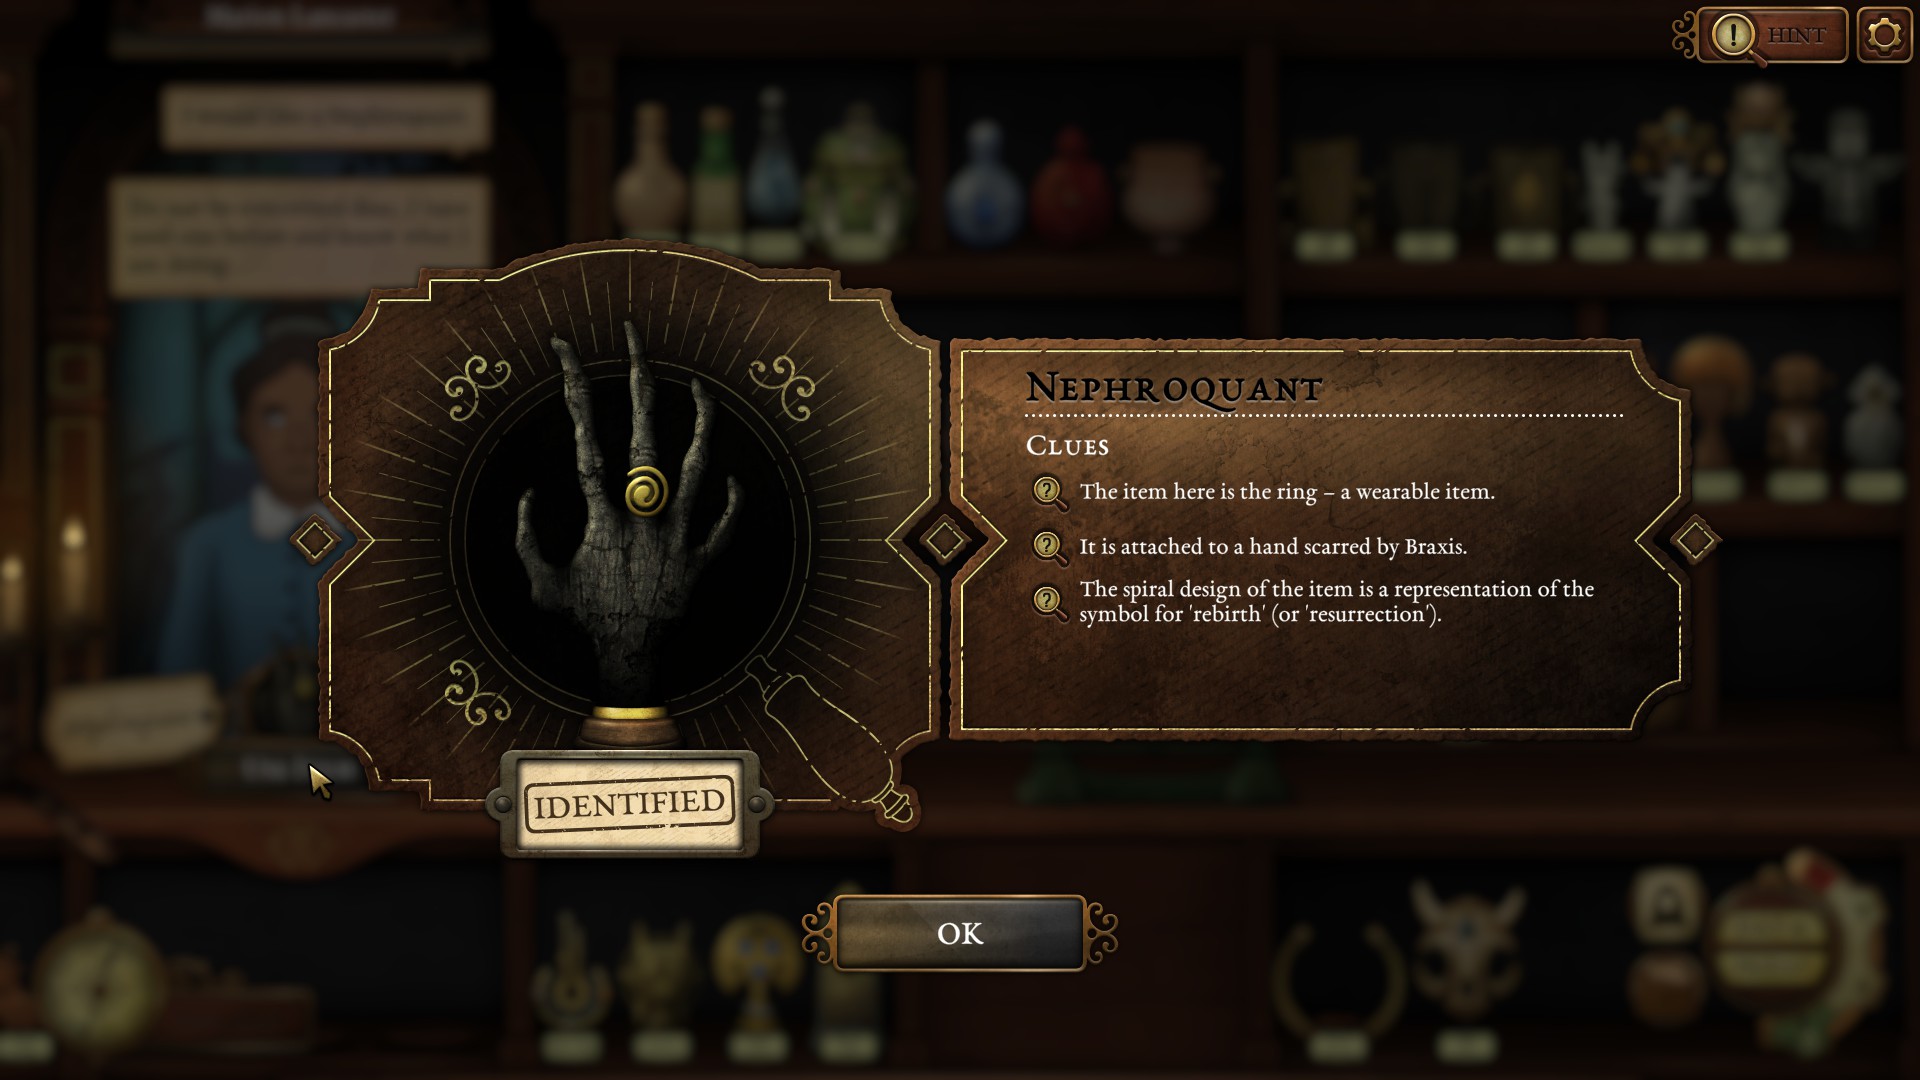
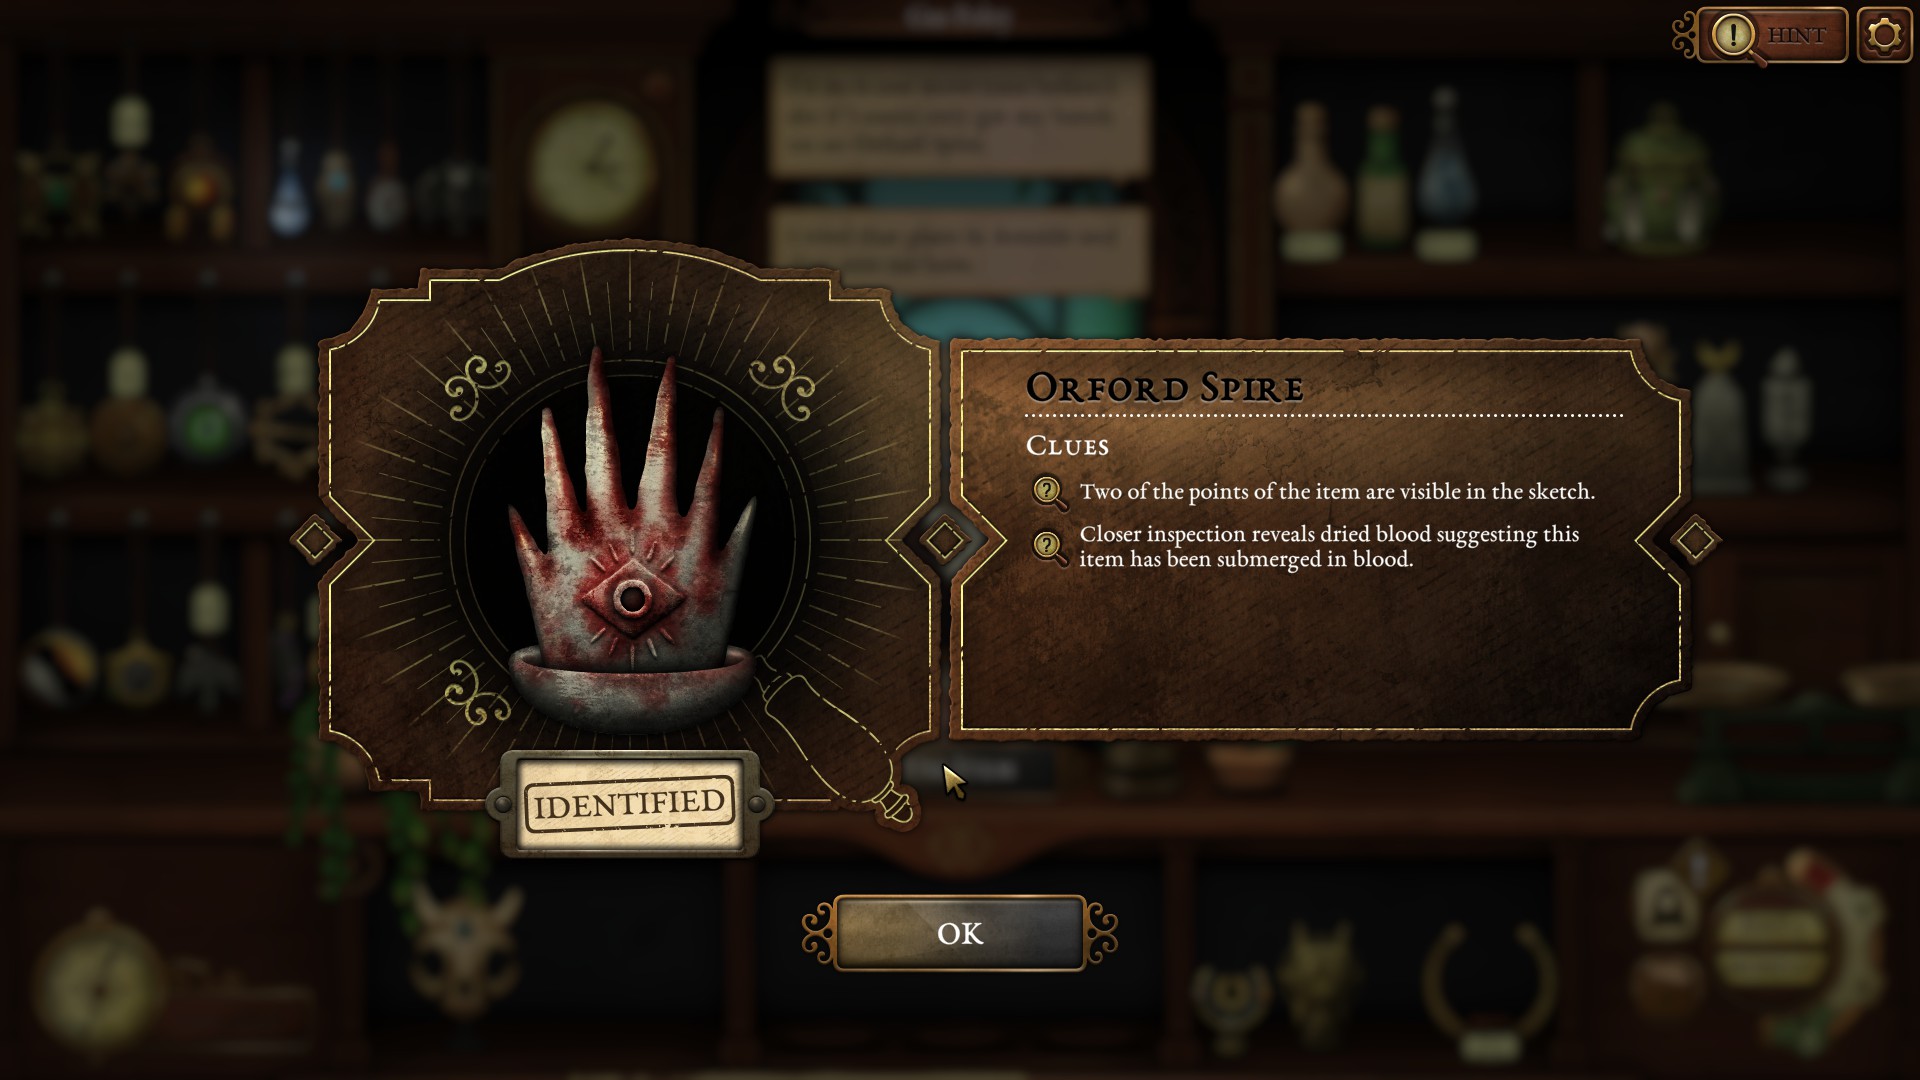
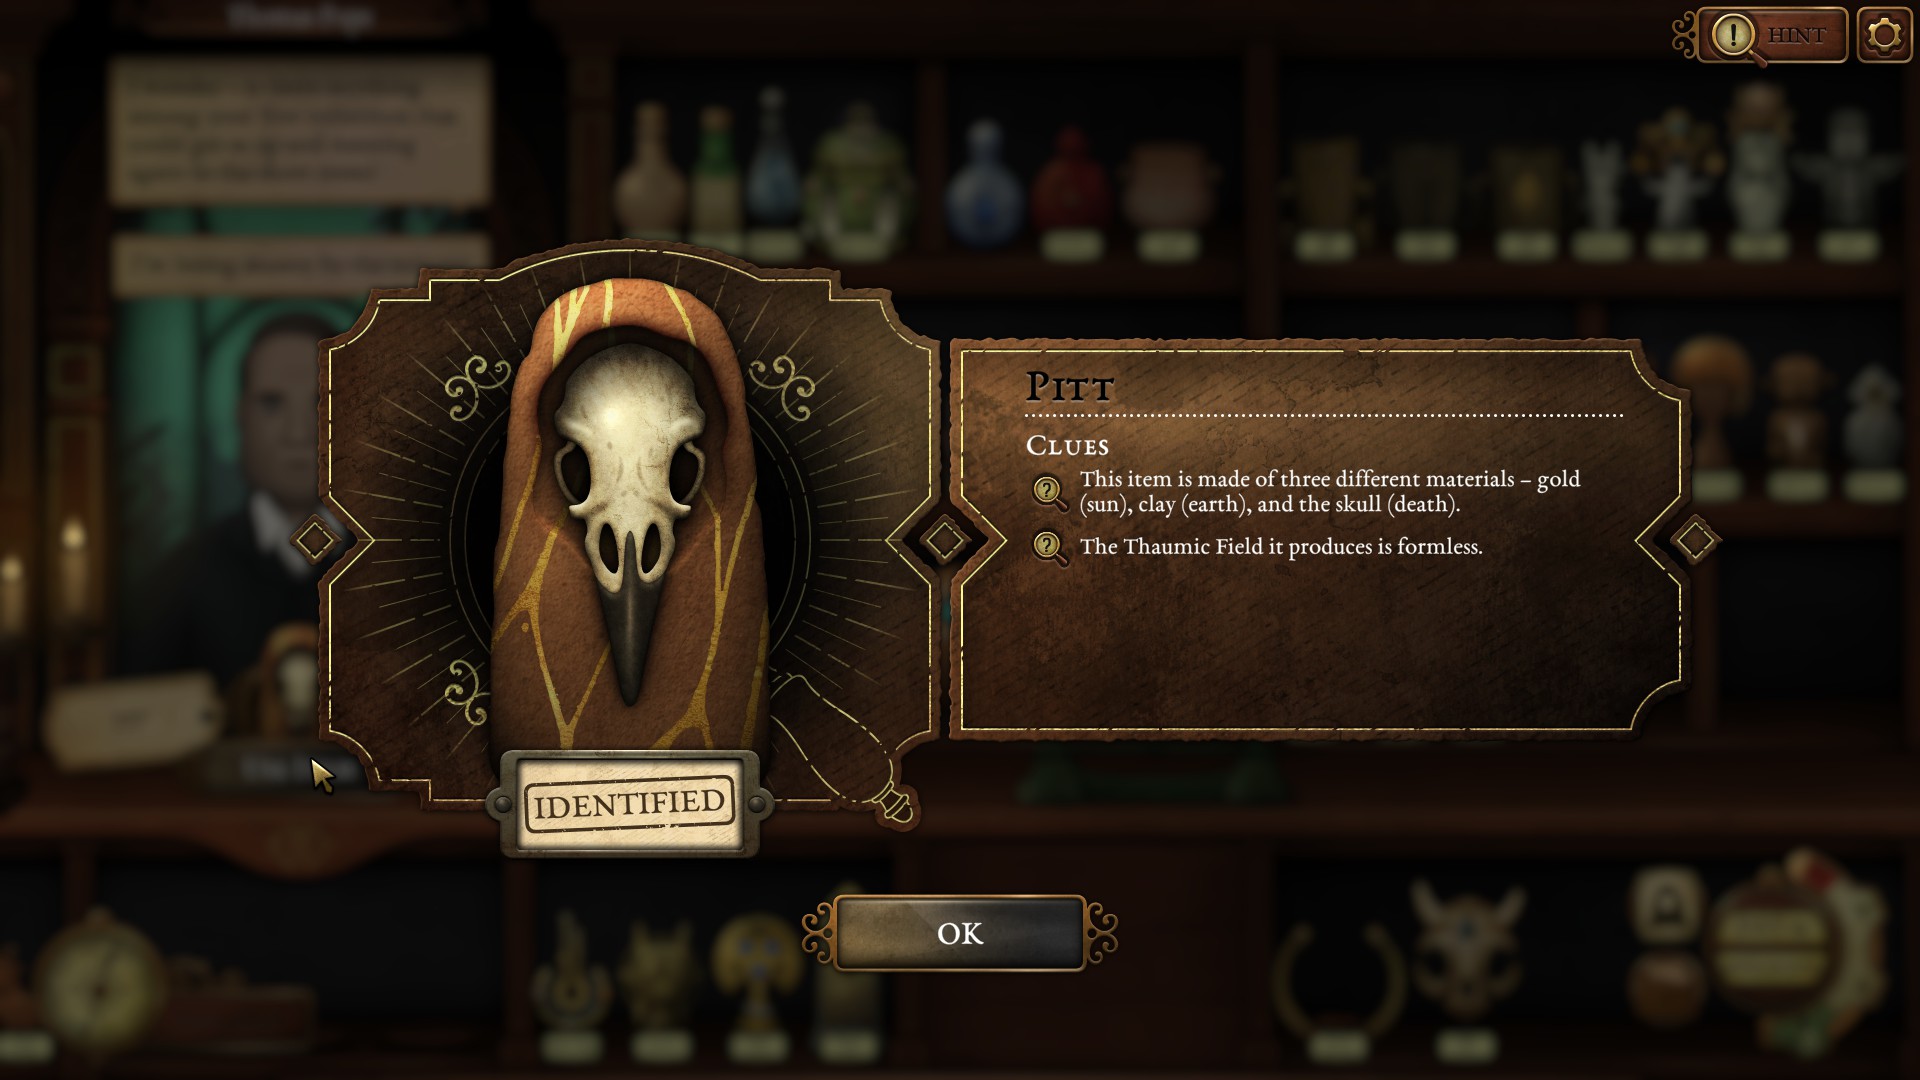
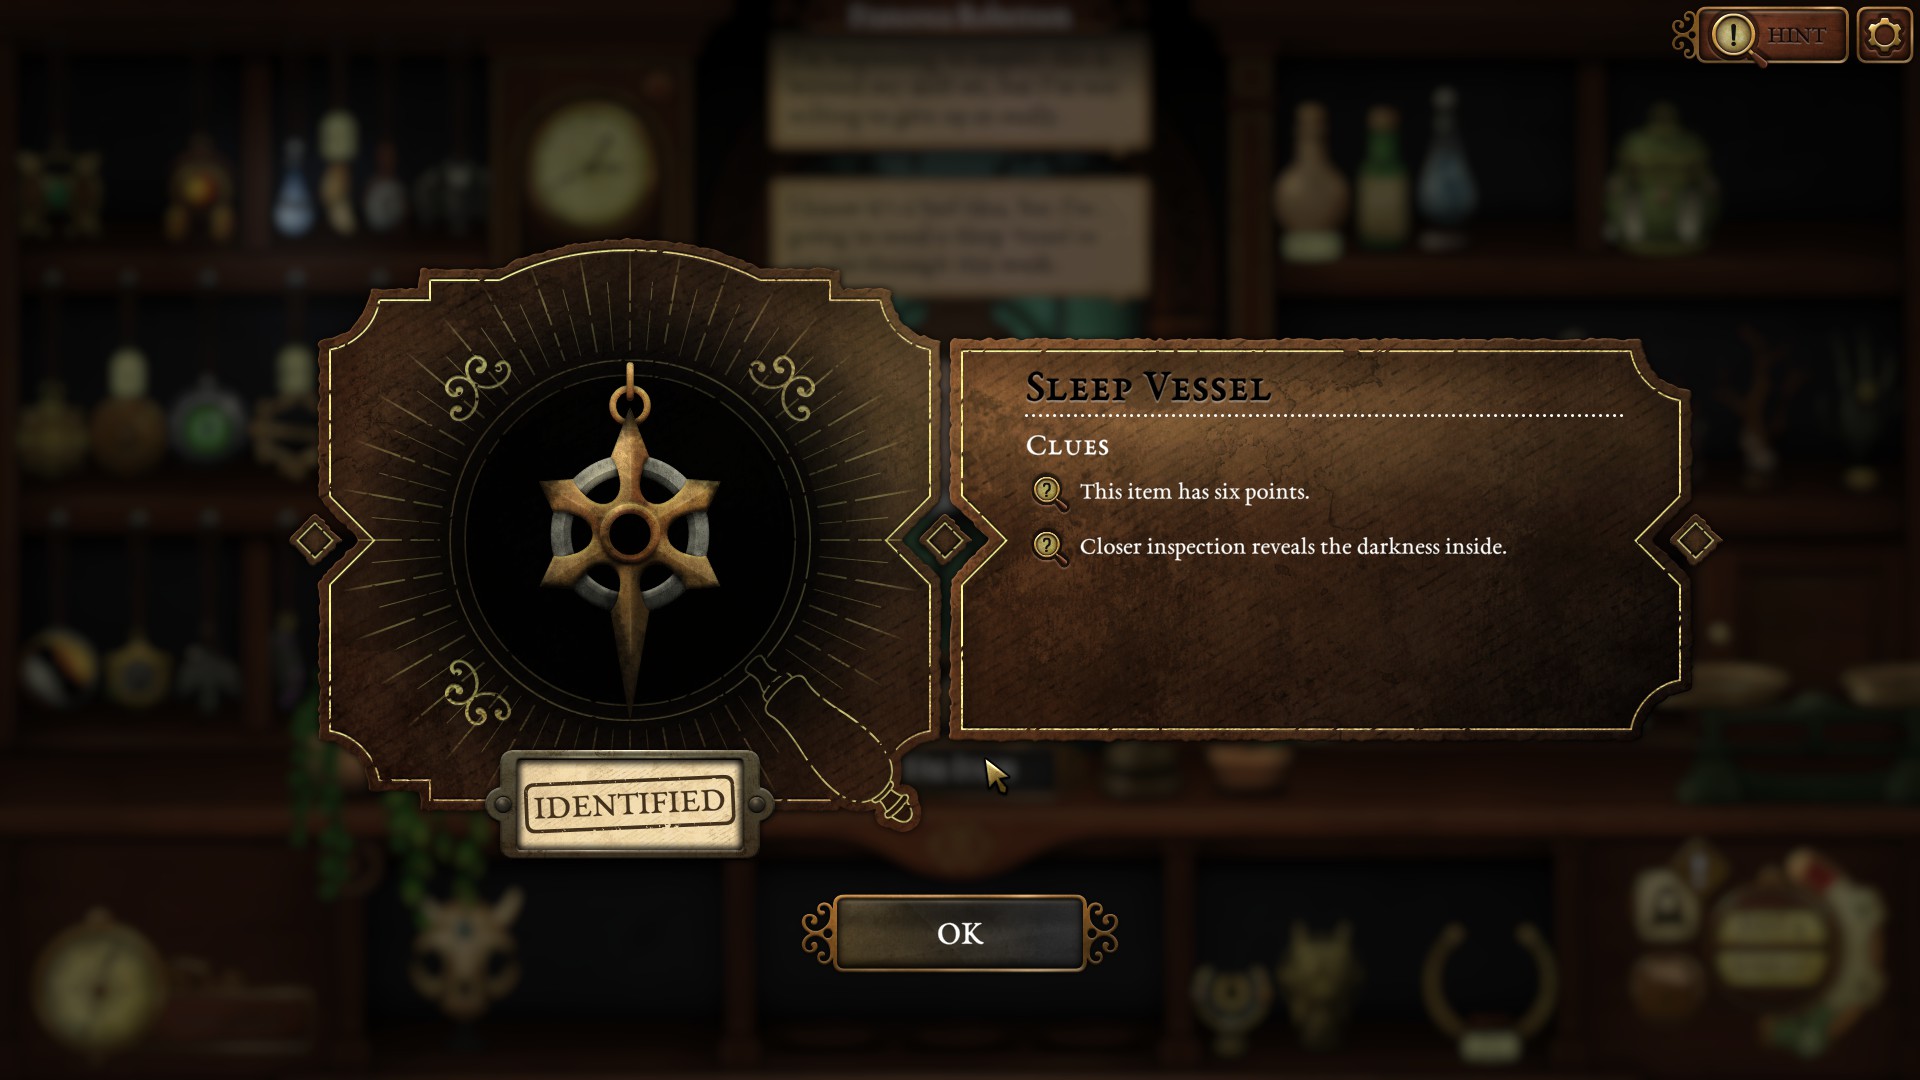
4. The heart of the shop has a symbol of a triangle+circle in the middle of the 3 item slots. This is the hint for the grave you need to go to.
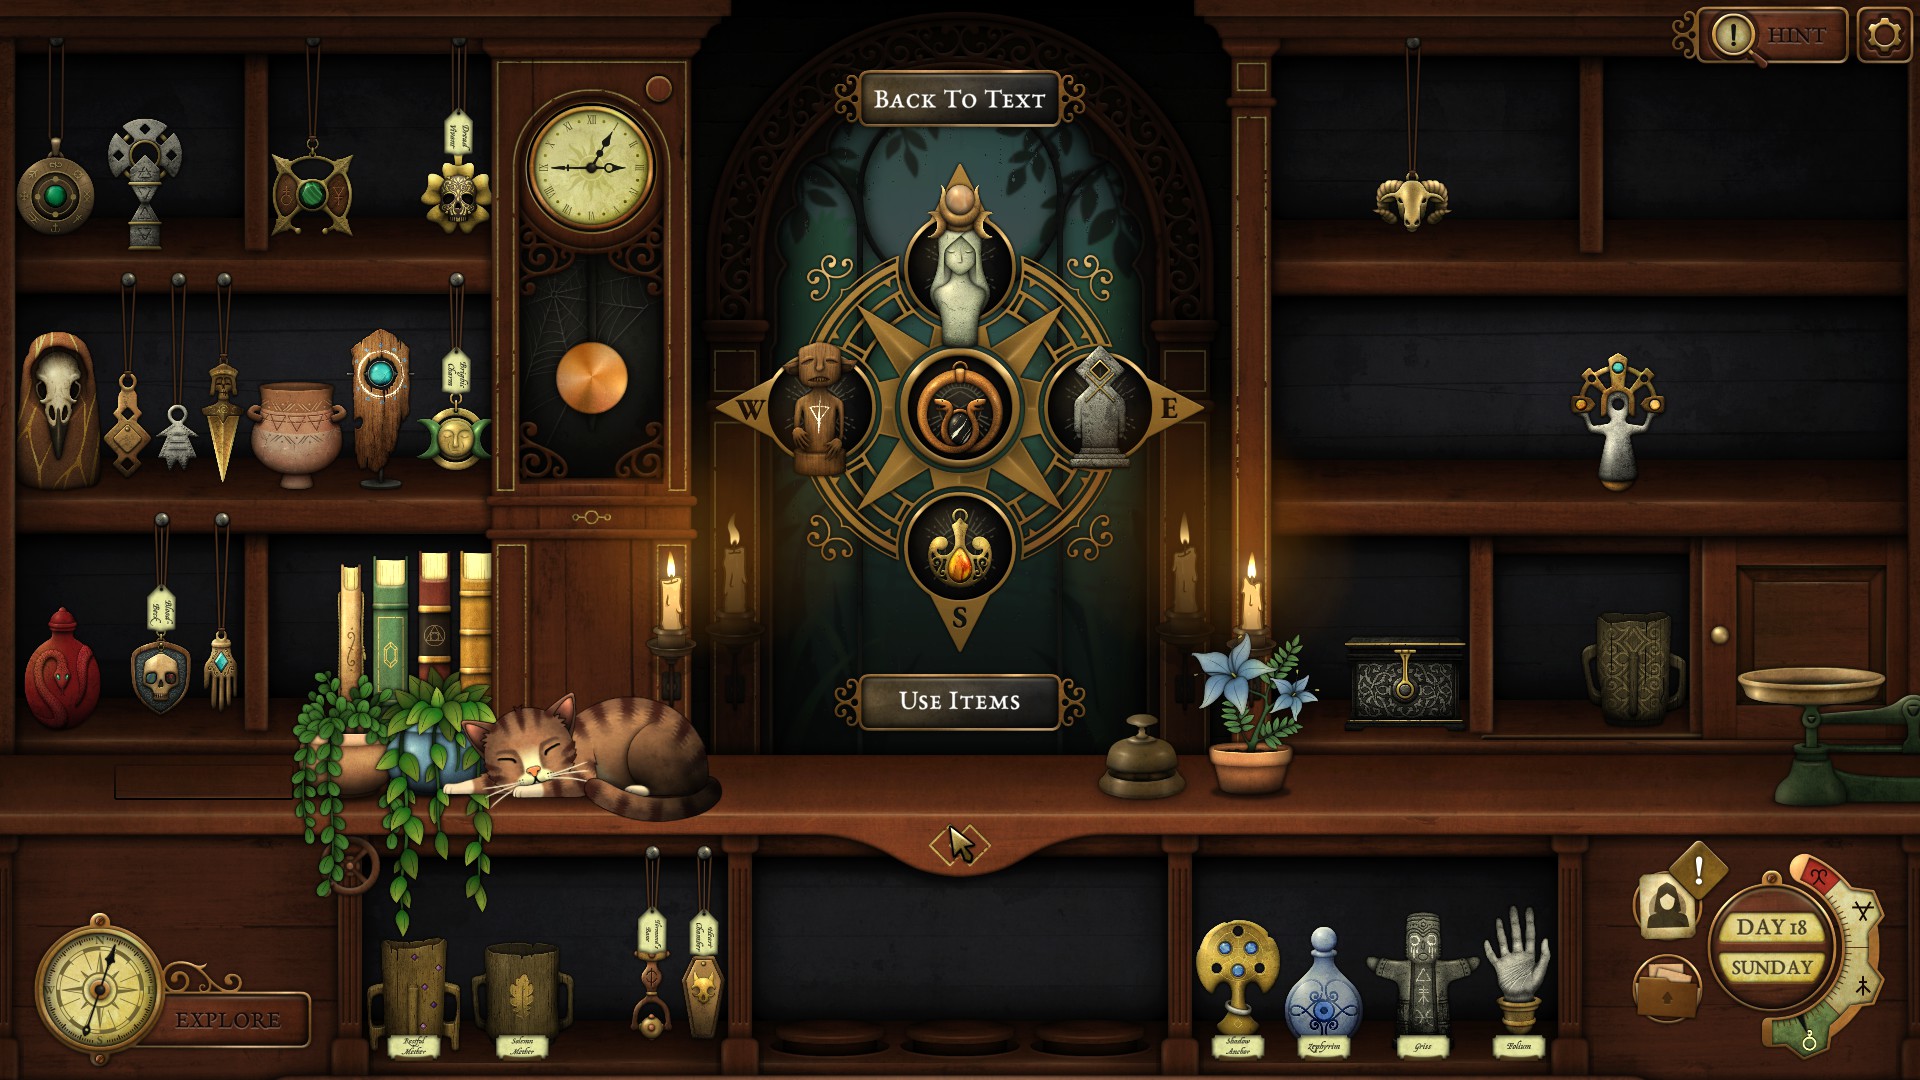
5. Go to the grave with the triangle+circle and use Carrick's candle
6. Use the 3 items hinted to by the message at the grave
Solomaher  [作者] 9 月 20 日 上午 8:56 
Hmm, I don't think you need Spirit Vault to solve any of the Tarot cards, but anyway you can fill it on day 13 after receiving a letter from Barton.