BLADESTORM: Nightmare

BLADESTORM: Nightmare

73 个评价
General Guide to Bladestorm
由 SotiCoto 制作
This is a rather niche title. That is to say it went mostly unnoticed outside of Japan.
A direct consequence of this is that there is comparatively little information available on it for anyone wanting to play now.
I was intending to make a detailed achievement guide, but some of the achievements appeared to be bugged... so I figured I'd just make a more general guide instead.
9
3
4
2
   
奖励
收藏
已收藏
取消收藏
Introduction / Title Screen stuff.
Okay.
Firstly... yes, this is a Koei-Tecmo game, but if you expect something like Dynasty Warriors... well, it isn't that. It is a bit more strategy oriented, but you'll find that out pretty quickly once you get into the game.
THAT SAID, there are some basic similarities between this and Dynasty Warriors... including the division between Story Mode / Free Mode, the Gallery of stuff to unlock, the rather over-the-top character designs, the atrocious voice-acting and having a rather bad PC port.

Before I continue, I was helped through this game by stuff written years ago by NicholiGinavaef on trueachievements.com, and a little by another called Darthchewee, though a lot of it I have clarified in more detail since honestly, the info that was there was a bit minimalist. Still, I appreciate it and am crediting it right here.

ANYWAY... on the title screen...


... you have Story Mode, Free Mode, Edit Mode, Gallery, Options and Quit.... as you can no doubt see.

Story Mode
Story Mode is split into two separate campaigns: the original Hundred Years' War scenario (roughly based on a historical war between Britain and France), and the Nightmare expansion (complete fantasy scenario). It doesn't particularly matter which order you do the two in, or even go back and forth between them freely if you like, but HYW (Hundred Years' War) is the easier (and far longer) of the two.
For either, you play a CAW Mercenary. That is to say you can put together your own character from various parts and customise them to look however you please (like in the Dynasty Warriors Empires games), and then use that character in any of the gameplay modes. Character progress is tied to the character themselves and not any particular save file... so you can't lose nor regress any character progress as long as the game saves.

Free Mode
Free Mode just lets you replay unique stages you unlocked in Story Mode (both campaigns) once you've played them there. You can't do anything with it at the start. Some things can be unlocked in Free Mode (like stage rankings), but generally it is better to do things in Story Mode.

Edit Mode
What is titled "Edit Mode" isn't really a "mode" as such. It is just the management screen for your custom mercenaries... but it also serves another important function.
There are four buttons once you get in here:

Mercenary is where you create and edit your custom mercenary characters. Make at least 4, since that is how many you will be able to control by end-game. There is an achievement for making 10 though.
Station is the most important part of Edit Mode. It is where you effectively send away your Mercenaries to earn money and items for you passively. I'll try to detail a bit more about this later. You need active Internet for this.
Visitors shows you other players' mercenaries that can show up in your warzones. You need active Internet for this too.
Quit Game is a bit misleading. It won't quit out of the game entirely, but just exits Edit Mode. Pressing B on the controller does nothing to exit, so you'll have to select "Quit Game" to exit back to the title screen.

Gallery
The Gallery is what you'd expect if you're used to Koei-Tecmo games. It details characters, cutscenes, pre-rendered FMV "movies" and play records. There will be "???" in place of things you haven't witnessed in-game yet, and "NEW" on things you haven't watched in the Gallery yet.

Options
Okay so every game has Options / Settings... or almost every game. But some things probably need clarifying here since they're awkwardly worded.

Overhead Display and Action Display in particular aren't immediately clear when you start playing.
You should probably have them set the way I do... but just in case you want to choose for yourself...
Overhead Display indicates the icon / name indicator above the squads in-game. i.e. If you have it switched on, you can see instantly whether the squad in front of you is an enemy or ally, what type they are, and whether or not they're defending a base. If you have it set to "Yes" you can see those things, and if set to "No" then you can't. I don't know what "Chance Encounters only" does, but I doubt it matters.
Action Display is most of the HUD. If you have it set to "Only in battle" then it will fade out when you're just running around and only pop up with certain button commands or when you're in combat directly. This includes the Minimap. If you have it set to "Always" then obviously it is always visible.
Sally Point is a setting that takes effect before you start a battle. It determines whether the game decides starting positions for your mercenaries or not (except the leader / main mercenary, whose position is always placed). "Manual" means you have to personally assign the starting location of your 2nd through 4th character before every battle. "Together" means all the mercenaries are put in the same base at the start of the battle by default. "Separate" means the mercenaries are stationed at different bases if possible, and often with different default goals. You can change the locations manually before battles, but I find having this set to "Separate" is most convenient.
Use Monster Troops is an option you only unlock after completing the Nightmare scenario, and lets you utilise monster squads in the HYW scenario too.

Most of the other options are straightforward.
The voice acting is kinda bad as usual for KT games, but since it is set in a war between England and France I prefer to have it set to English. Pick what you like for any of them really.
The Controls and Graphics settings are kinda like you'd expect for any other game.
Just remember to press Start (or whatever the "Setting Complete" option is on keyboard) when you're done to save your settings, rather than quitting without saving them.

And back on the title screen...

Quit
Quit does exactly what you'd expect it to do: It closes the game.
Just keep in mind that "Quit Game" anywhere else in the game doesn't do that, but simply means "Go back to the previous screen". The title screen is the only place where "Quit" actually means what it says.


Basic Controls
Default Controls (for Microsoft Controller)
  • Left Analog (tilt)) = Move Mercenary / controlled squad
    • Left Analog (click) = Change Minimap (3 modes)
  • Right Analog (tilt) = Move Camera
    • Right Analog (click) = Centre Camera
  • A = Confirm / Take control of squad / Cancel ranged shooting mode.
  • B = Red Skill (press or hold depending on skill)
  • X = Blue Skill (press or hold depending on skill)
  • Y = Yellow Skill (press or hold depending on skill)
  • RB = Basic Attack (press or hold, either works)
  • RT (hold) = Get squad into formation / Army formation & controls.
    • RT+A (press outside Army mode) = Form Army (when another controlled character within range)
    • RT+A (press in Army mode) = Coordinated Attack
    • RT+B (hold in Army mode) = Disband Army
    • LT+RT (press together in Army mode) = Switch Army Leader
  • LB (hold) = Pennan Selection (replaces skills on screen)
    • LB+X = Use Blue Pennan
    • LB+Y = Use Yellow Pennan
    • LB+B = Use Red Pennan
  • RT (hold) = Squad Selection (replaces skills on screen)
    • RT+X = Spawn Blue Squad
    • RT+Y = Spawn Yellow Squad
    • RT+B = Spawn Red Squad
  • D-Pad (press) = Character Select
  • D-Pad (hold) = Issue Orders to Character
    • Up = Char 1 / Leader
    • Left = Char 2
    • Right = Char 3
    • Down = Char 4
  • Start = Pause Menu
  • Back = Squad type screen

For the record, I'm using Idarion's controller button prompts (https://psteamcommunity.yuanyoumao.com/sharedfiles/filedetails/?id=715993012), so expect things to look different on your screen if you don't have it. Regardless, even if you see keyboard prompts, the controller buttons work fine. I covered them all above.
If you're using a Playstation pad, the controls should be the ones in the same position as on the Microsoft pad... but I don't know what those are since I don't use PS controllers.

The Tutorial is pretty detailed and should cover everything, but just in case, I'll reiterate a few things here:

HUD Stuff / Combat


You'll usually start off in a squad, but not in the tutorial.
To take control of a squad, go up to the leader (with an icon over them) and press A when the icon is close enough to flash. Your mercenary name in the lower left will then change to the squad name.
The game EXPECTS you to switch squads regularly.

RB lets you attack stuff. Specially, holding it down will make your troops run out and auto-attack any nearby enemies.
TIP: Holding down the attack button out of combat can make you run a little faster for infantry squads too, though since target-finding is automated you may lose control upon approaching enemies.
X, Y and B are skills that differ with each squad (even different squads of the same type). Even if you have keyboard indicators, the colours match the colours of Xbox controller buttons, so it should be clear which is which. Skills have a cooldown time (little yellow bar over the skill name after use) that gets shorter when you upgrade that squad type on the character progression screen. Some skills are button-press type, some are button-hold type, and some work like regular attacks but with special properties.
Pennans and backup squads (max 9 of each, and they're consumed per use) are chosen via holding down LB or LT respectively and pressing the same buttons you do for skills.
WARNING: Sometimes when you spawn a squad with LT+(button), it may spawn with less than the maximum number of troops. Make sure to always summon new squads in wide, open places to prevent that happening.
Note: RT on its own, when held, prompts your troops to get into strict formation (as opposed to the loose dithering they do when it isn't held). Tapping it is also handy for resetting troop animations.

Okay, so... the title-drop.

BLADESTORM mode is when that little bar below your health fills up from beating up enemies (or bashing into deer), and once it overfills, the word BLADESTORM! flashes across the screen... and your squad becomes fast and invulnerable for the duration of the effect. Simple enough.
It is like Musou mode in other KT games... sorta.
WARNING: Enemy commanders can activate Bladestorm Mode too. They will make a comment when it happens. Stay WELL away from them until it expires.

There is another thing the game will prompt you about: Forming "Armies".
It just means combining 2 or more of your controlled characters into one composite squad.
If you stand near one of your other characters, a green/blue swirly thing appears between the two:

When that happens, hold RT and press A to combine the two. You can then use the same combo to do a special attack with the whole army against given targets.
To cancel out of an Army, hold RT and B for a few seconds.
TIP: To control which character leads an Army, press LT+RT in Army mode.

Another thing I note the game did NOT bother to mention is that there are THREE minimaps that you can cycle through by clicking the Left Analog Stick:

The default one is useful enough, but the game snatches control of it away a lot, and you can't stop it doing that.
The second (close) one is useful for finding hidden squads or navigating city streets.
The third (expanded) one is super useful for taking back control and knowing where the hell you're going at any given time when the regular one is snatched away.


... Okay... so onto the war stuff.

"We must move swiffly!"
Battle Preparation
Pre-Battle Screen
Welcome to the contract preparation screen.
And for those of you who play Dynasty Warriors, this should look fairly familiar...


So take a look at the map on the right...

Red Flags = English-controlled bases.
Blue Flags = French-controlled bases.
Crossed Swords = Offensive Objectives
Shield = Defensive Objectives (not on this screenshot)
Little gate with a coloured arrow coming out of it = Permanent spawn points for the force of that colour.
Numbers over each base = Number of defenders you have to kill to summon the Base Commander.

It will either say ENGLAND or FRANCE in the relevant colour in the top right corner of the screen if you forget at any point which side you're fighting for.

Under that it shows the Contract Period. That is how many days you have to win the battle. If it says "Indefinite" then the battle will continue day after day until you win or lose. Otherwise you fail the contract if you don't manage all the objectives by the end of the Contract Period.

The Contract Description on the left is... kinda unimportant. I mean the map is more informative.

The buttons are where it gets interesting.

Deploy: The button that gets you to the fighting, after an additional screen. The additional screen is determining where you want your characters to start the stage and what their starting commands are... but that only becomes fully available once you've unlocked a second character.
I'll get to all this in a moment...

Status: This is where all your preparation stuff happens IF you didn't do it in the pub before choosing the contract. It is exactly the same either way. I'll cover that stuff later in the character section.

Unit Info: Lets you know about all the other squad commanders on the battlefield for both sides. Useful to know. Does NOT contain non-combatants like Merchants or Villagers in this game though... so be careful.

Retreat: Once you get all the jokes about the French surrendering out of your system, you'll want to avoid this button. It defaults the contract and quits the battle. The game tracks how many times you've done it too.

System: Lets you SAVE the game, change the SETTINGS and... quit out to the main menu if you want (not sure if this counts as a retreat).

Anyway... you'll want to DEPLOY at this point...

Deploy Screen
I've taken a screenshot from a different battle for this one...

So, as you should be able to see, once you can field multiple mercenaries, you're able to set their starting position in any Allied Base or Spawn Point (those gates with red / blue arrows at the edges of the map) by pressing A with the relevant officer highlighted. That will then set their little face icon on the map to the right.
You can also set their target with X to bring up 5 lists of targets:

In order, the lists are:
Contract Targets (crossed swords), Enemy Bases (flag with E), Enemy Commanders (head with E), Allied Bases (flag without E), Allied Commanders (head without E).
TIP: You can also press X on the Target screen to pick a target directly on the map if you're sick of trying to find the right place in the lists.

While you can select the starting location of characters AND their target, you CANNOT choose what route they opt to take (indicated by the green line with arrows moving along it). Some of them are frankly insane, and you're better off manually controlling them:


Selecting targets is also possible in the pause menu mid-battle.
You will definitely have to get familiar with using that.

TIP: You can also issue commands to your mercenaries in battle by holding down their direction on the D-Pad, then pressing the direction corresponding to the command. You can issue directives to the character you control this way too.
Just don't forget that this is done in real-time, so you could be wasting valuable seconds.
Bases & Battle Objectives
Right... so once you've got the fighting stuff down, the next part is dealing with the battle as a whole...

Taking Bases
It is simple enough, especially if you've played any of the Dynasty Warriors Empires games.
Each base (allied and enemy) has a number over it. That number indicates how many Defenders have to be beaten to bring out the Base Commander. And one the Base Commander is beaten, that base is taken over by the opposing force. You have to do this a lot throughout the game. Enemy forces will do it too, so keep that in mind.

Now, when you approach an enemy base (technically true of allied bases too), you will see some of the squad icons have shields around them. These are Defenders:

So if the number above the base on the mini-map says 3/3, you need to beat 3 Defenders. If it says 5/8, you have to beat another 5 Defenders, and so on.
The snag that the game neglects to mention is that the number of Defenders clearly visible in any given base usually does NOT match up with the number you need in order to take the base. Here are a few things to keep in mind:

#1. Enemy squads appear when you're sufficiently far away from them. This includes Defenders. If you clear out all the visible Defenders in a Base and move away (or just circle around the Base if it is big enough), more will spawn where you were before.
#2. Sometimes squads hide in stupid places. You can use the 2nd (close range) minimap to find them if necessary.
#3. Castle type bases (i.e. Medium ones) can sometimes spawn Archer Defenders up on the battlements that can rain down arrows (and insults) on you. If you're using an Archer / Rifle squad yourself then you can retaliate against them and shoot them down. BUT if you're only using melee squads, there is nothing you can do about them.


It is also worth noting that every time a base is taken, it reduces the Defender count of every adjacent opposing base by 1.

ANYWAY... once you're done with Defenders, the Base Commander will spawn inside the base.
For most bases... that is to say Small (Village) and Medium (Castle) type bases, the Base Commander is some toff-looking dude in fancy clothing who is a bit tankier than the average squad leader. Kill him and the base is yours.


However for Large / Citadel (City) type bases, the Base Commander is a heavily armoured tank with a "Break Gauge" (the shield) that you have to smash before you can deal any actual damage to his health bar.

As the tutorial explains, you can do more damage to his armour when the yellow glowy circle is around him. It also said something about armies, but I wasn't listening, and the armoured Commanders aren't so tough anyway.

Anyhow... once you've killed the Commander, the base is yours. The colour changes to your colour and a bunch of loot appears for you on the emblem where the Commander used to be.

TIP: If any of your troops got killed in battle, standing on the emblem in an allied base will resurrect them over time up to full capacity.


Objectives
i.e. What you need to win a battle.
It is quite simple: If a base has Crossed Swords or a Shield over it, you need to own it. Shield bases started under control of your side, while Swords bases started under control of the enemy, but it doesn't really matter what the icon is. You need all of them.

When all of them belong to your army, the battle is over. Contract Fulfilled.

Note: The AI can take bases, and will give priority to objective bases over others. If you're trying to rack up a good score or complete side-missions, this can be a pain in the arse. Make sure to tell your other mercenaries to hold off if they're likely to complete the contract too early.


Scoring
Just one more thing.
There are two scores of your performance in battle that will be counted by the game.
One is your ranking. A measure of your general score against other participants for that Day.

It isn't difficult to get to the 1st spot. Just kill more dudes and take more bases than anyone else. The AI is usually a walkover.
There ARE some subquests (including an infamous one with Magnus) that involve being Number 1 on a particular day... (and that infamous one requires NOT finishing the battle on the first day).
Ranking Points get added to your Fame Level.

The OTHER scoring factor only happens after the Battle / Contract is complete, and grades you on your performance in the battle. Your best grade is recorded for fixed battles (though not one-off HYW scuffles).
It scores you based on Clear Time, Total Kills, Total Officer Kills, and Total Bases Captured.... and this one is FAR more of a pain in the arse to do than the officer rankings.


... Yes... that Clear Time says 1 Minute. Yes I cheated that.

Anyway. Chances are that if you rush immediately to take Objectives on the battlefield, you'll get an S grade for Clear Time, but screw up the others.... so I'll try to explain:

Clear Time is usually pretty generous, but if you take more than one day, you'll typically lose the S Grade. It counts over multiple days.
Total Kills is straightforward. The game doesn't show you the number as you go, but the score is a pretty good estimate. Make sure your score is over 3000 and your Total Kills should usually be fine.
Total Officer Kills is VERY misleading. It is actually increased by taking over bases, and not defeating enemy officers. The officers are nice, but just focus on taking bases.
Total Bases Captured is moderately straightforward. S is Villages, M is Castles, L is Cities. The bigger the base, the more it is worth.

Note: You can get an overall S grade if you get something like SASA or BSSS... but anything lower and you'll likely drop a grade. Don't spend more than one full day grinding bases / kills if you want an S Grade.

TIP: The value of your individual grades is somewhat proportional to the total amount of enemy territory at the start of the battle. But you'll have a far easier time getting S grades if the enemy forces occupy most of the map at the start.

Status Screen
This is something you can see in the Tavern in the HYW campaign, or the general screen between battles in the Nightmare campaign... OR on the preparation screen before Battles.
You can look at some parts of it during a battle, but generally can't change any of it then.


Now, some of this stuff needs explaining since it isn't super intuitive.
The Squad button is where most of the good stuff takes place. I'll get to that very shortly.
Resources is Pennons and Available Squads. i.e. Consumables assigned. The stuff on the right of the screen. Note: While character progress carries over between game modes, Free Mode saves its own Resources assignment separate from Story Mode.
Squad Leaders is a section for checking all the officers available to you. You can make edits to them there like you can in the Squad section, but it isn't focused on the ones you are actually using... so much as ones you have available (including unlocked NPCs).
Inventory is just for checking the items you have (including quest stuff and knick-knacks) without doing anything to them.

Click the Squad button then select one of your characters and click on them to get into their Squad Status screen:

Listed here you will find a bunch of detail about their current set-up.

Books, somewhat unintuitively, is all about the different squads your character is able to lead and their ability levels for all of them.
Current Squad is the squad the character will start Battles with by default. It also dictates the weapon they have equipped on this Squad Status screen. Precise wording there. Pay attention.
Equipment is the weapon and armour the character has currently equipped... More details later.

Books

I have to clarify some things here because this is NOT obvious.
A BOOK, within the context of this game, is a general Weapon / Squad Type... e.g. Knives, Rapiers, Swords, Horses, etc.
A PAGE is one level down from the Book, and enables different Squad Types within the greater Book type to be commanded. e.g. Sword, Sword & Shield, Two Handed Sword, Two Handed Exotic, Double Swords... in the Swords book.
And below that, the SQUADS themselves sometimes have different variants controlled by a single page. e.g. Assassin & Rogue Ninja are both squads using the Double Swords (misleading name) page from the Knives Book.

Each Book in the Books section has an upgrade screen for the Book itself (applicable to all Pages and Squads under it)...

... and a separate upgrade tab for every Page of that Book you have unlocked:


Now... you may have noticed that little SP thing floating around on all the other Status screens in the upper right, now in the lower left. It stands for Skill Points, and is used for purchasing all the upgrades.

Keep in mind though that the Level of the Book can be raised through gameplay. i.e. Get experience, level up. The OTHER factors can only be raised with SP... so using SP directly for Levelling should be low priority.

So... the factors on the Book status main screen are as follows (and note: any given book will only have a few of these. None of them have all):

Attack : (Max: 10) Raising this makes the squad deal more damage.
Defense : (Max: 10) Raising this makes the squad take less damage from enemies.
Movement : (Max: 5) Raising this makes the squad run faster.
Spirit : (Max: 5) Raising this reduces Skill cooldown time for the squad.
Inventory : (Max: 10) Raising this increases the stock of ammunition for ranged attacks.
Endurance : (Max: 5) I believe raising this makes the squad less susceptible to flinch / knockdown.
Leadership : (Max: 10, except for Elephants) Raising this increases the maximum troop-count of the squad. This is my personal #2 priority.
Research : (Max: 10) Raising this increases SP gain with the squad and can unlock other factors at particular levels. This should usually be the #1 priority.

And of course at the bottom it says Level Up ... as an alternative to levelling through combat.

Meanwhile, each Page (whether locked or unlocked) has its own tab in the Book, and on those tabs you can upgrade the three individual skills for each Page (which will upgrade every Squad associated with that page, but not the same skills on other Pages. e.g. upgrading Charge for Blade cavalry won't upgrade Charge for Spear Cavalry).
I would advise upgrading Book Attributes before Skill levels.
TIP: Another thing you might have noticed is that you can edit equipment against each Page on this tab too. It isn't just there for show. Get into the habit of paying attention to this.

Current Squad
Quick one.
The Current Squad screen is for selecting the squad you start Battles with.
You can obviously change squads in the middle of battle... and the squad you end a day with will be the one you start the next day with... but the Current Squad screen gives you a free Squad to start with. If you pick a good one, you might never need to change.
Note: This selection is NOT limited by the mercenary squads you have hired for backup in the Tavern. It is the full selection of every one you have the correct Page to command.

There are a few things to see here against the squads, but you'll notice on the right there is a little Book icon followed by the name of the Book that Squad is controlled by... as well as a weapon icon a little to the right that indicates (subtly) the Page that controls the Squad.
The "Special" indicated can't really be checked anywhere and doesn't seem to have a huge impact on battle... but that and appearance seem to be the only clear differences between Squads of the same Page (e.g. Mongol Mounted Bowman has "Mobility Guard" while regular Mounted Bowman has "Avoid Direct Attacks").
The Troops number updates with the Leadership rank the character has for the relevant book (and yes, the "50" is me cheating again, since the normal max for cavalry types is 20).

Equipment
A bit tricky, this.

This section is split into Armour (just called "Equipment" again) and Weapons.
The four armour slots are Helmet, Body, Gauntlets and Boots. A character wears the same armour regardless of what squad they lead. One set for all circumstances.
Weapon, however, is set differently for each Page of each Book. The one shown here is only for the Current Squad. You will need to set other weapons for different Squads you might want to use IN ADVANCE. It makes a significant difference.


LEVELLING
Put this in Caps because it is a big deal.

I cannot stress this enough...
Level in Bladestorm is EVERYTHING.

The devs clearly made some whole jan-ken-bon system of particular Squad types being strong or weak against others... but much like in Pokémon, a mere 10-15 level difference can render all of those strengths and weaknesses irrelevant. For instance, Pike-wielders (Long Spear book) only have one purpose in life: to stop Cavalry... but all the Lv.10 Pikeys in the world won't be able to stop you if you have levelled your Horses book up to 40.

So... things to keep in mind:

Level is set for each Book
Any two Squads under the same Book will share the same level when controlled by the player Mercenary. Levelling up with a Sword & Shield Squad will increase the power of your Two Handed Exotic Squads and vice versa. Some Squads are going to be able to level up faster than others in the same Book, so choose carefully.

Experience Gain is based on Combos
Yes, you heard that right. The more often a squad can attack in sequence to rank up that delicious Combo meter, the faster they gain experience... and the faster they level up.
The Rapier Book and its Double Swords Page in particular are utter monsters for this. Expect Rapiers to level up to 99 faster than you could possibly stop it. Conversely, weapons that hit hard but not very often are a huge pain in the ar$e to level up and might be better left to SP.

Some Attacks DO NOT raise the Combo Meter
This one was an utter b!tch to learn. Cavalry Charge in particular does not raise the Combo Meter. Same for Griffins. Neither does simply running things over on horseback or elephant. And since they don't raise the Combo Meter, they don't give you Experience either. These things are therefore an absolute nightmare (no pun intended) to level up effectively.
Direct weapon attacks (RB) should always raise Combo Meter though, even if everything else fails. But if you want to just rampage about on horseback, trampling everyone else into the dirt, don't expect to level up from it.

SP applies across all Books
What I'm getting at is that you can farm SP with a Squad you're comfortable with and then spend it to level up Books that are ordinarily difficult to raise (or that you just don't want to play as) if you so want. My previous statement about prioritising SP for attributes and skills before Level still applies though. Lots of dullard guides suggest levelling several Books up equally in tandem. I recommend the opposite: Grossly overlevel the Book you're best at using, and then use it to farm SP to spend on other Books once you have it maxed out.
TIP: Don't forget to level up your other Mercenaries with SP too. If you focus too much on your Leader, you might find yourself in a tricky situation when you have to switch characters mid-battle.

Enemy Level Scales with Star Difficulty
Just be careful. It is far better to be overlevelled than underlevelled. Do NOT take on any Red-Star stages without a level 99 Squad.
And since level 99 is the cap, don't expect to simply steamroll enemies in such stages the way most of the rest of the game can be wrecked.
However, with the strongest equipment and the right Squad at level 99, even the last stage of the Nightmare campaign on Hard can be beaten without too much trouble.


Recommended Squads
I am not going to review every Squad in the game. No way, no how.
I'm not going to even review every Page nor Book in the game either.

And if you have had difference experiences to me then fine. We all have our things we're best at. This section in particular is just my personal opinion.

So without further ado... my recommendations.


Mongol Mounted Bowman
Book: Horsebows
Page: Bow
Alternate Squad: Mounted Bowman
Unlocked: HYW Campaign (mid)
Special: Mobility Guard
Reason: These guys are THE fastest Squad in the game. Bar none. Supreme swifflers. And my personal favourite.
They're a little more difficult to control than regular cavalry, but there is nothing they can't wreck with horrifying ease... a fact which is backed up by actual history. All the ranged capabilities of a regular Bow squad (not quite the range of Longbow) but ludicrously mobile too.
They're not quite as tanky as Lancers, and not available from the beginning either. But once you unlock the Horsebows book, I would recommend equipping this Squad, maxing it out, and using it for the rest of the game. It is utterly god-tier.
Despite what South Park might have you believe though, they can't break down city walls...


Dark Griffon
Book: Griffons
Page: Dark Griffon
Alternate Squad: Griffon (different page)
Unlocked: Nightmare Campaign
Special: Ability Guard
Reason: Speed + Widespread destruction. My 2nd favourite squad.
Griffons are about the same speed as Horses (not quite as fast as the Horsebows). Both types get the Charge skill too. On the downside, they don't annihilate infantry simply by riding over it the way ground-based cavalry does. But on the upside, a Griffon's Charge skill covers its entire wingspan. Griffons are much bigger than horses, and you get the same number of them.
Dark Griffons in particular also get the Chaos Gazer (ranged AoE) and Raptor Wing (PBAoE) skills, which are frankly just ridiculous. Line up all your Griffons and just Charge across the battlefield, and everything dies.
As a bonus, you don't need to wield a weapon.
On the downside, you need to complete the Nightmare Campaign to get the Dark Griffon page. Regular Griffons are okay, but rely on the Charge skill more (which doesn't get Experience).


Dragoon
Book: Explosives
Page: Hand Cannon
Alternate Squad: Hand Cannon
Unlocked: HYW Campaign (late)
Special: NONE
Reason: Remember when I said the Mongolians can't break down city walls? These guys can.
The Explosives book is, to some extent, a slower but more powerful alternative to the Bows book. The Hand Cannon category in particular is a fun one to use as their skills can destroy the doors and breakable walls of City type bases the same way siege weapons do.
You know every time some NPC prattles on about needing to surround a city and set up siege weapons to break in, thus wasting days of time just sitting around? Just pull out a Dragoon squad. One shot... and a door is open. Then you can just switch back to whatever you like (i.e. Goddămn Mongorians!) and rampage through the city.
Engineers can also break into Cities, but they're not nearly as convenient about it as Dragoons / Hand Cannons. Incidentally, I picked Dragoon over Hand Cannon because the armour looks cooler, but there really is no functional difference.


Rogue Ninja
Book: Knives
Page: Double Swords
Alternate Squad: Assassin
Unlocked: HYW Campaign (mid)
Special: Avoid All Status Problems
Reason: Fastest infantry in the game. Can't really compare to fully boosted cavalry, but unlike most other squads without animal companions, these guys aren't painfully slow.
They ARE however painfully flimsy. Do NOT leave uncontrolled AI characters in charge of your squad of ninjas or they will die like mayflies.
But on the upside, their Knife Throw skill has ridiculously long range on flat terrain, AND they're immune to all status ailments, AND they attack silly-fast. You can take down a lot of enemy squads before they even notice you're there.


Spear Horseman
Book: Horses
Page: Spear
Alternate Squad: Mamluk
Unlocked: From the beginning
Special: NONE
Reason: A good squad to start the game with. Just about everything in the Horses Book is a solid choice, but I tended to opt for these guys before I had unlocked any better horseback options. They're a bit worse at melee than the sword-users, but have a ranged Javelin skill that makes up for it, like a poor man's Mongolian squad.
Also don't ask why I don't use Mamluk since those ones have a Special. I just prefer the way regular Spear Horsemen look.
Also worth noting: There are a lot of different Spears in the game. The weapon options for Lancers are far less.


Dual Fencer
Book: Rapiers
Page: Double Swords
Alternate Squad: Lady Fencer (different page)
Unlocked: HYW Campaign (mid)
Special: Ability Guard
Reason: Tiddy-plate....
... Okay no. There is one basic reason to use these girls. It involves running up to an enemy squad and holding RB, then watching them tear the enemy to shreds like a swarm of hornets while the Experience bar repeatedly goes DING DING DING and levels up. They gain levels FAST. So they're an easy choice if you don't have the patience for levelling up anything else to 99 in the early game.


Samurai
Book: Swords
Page: Two Handed Exotic
Alternate Squad: Tuareg
Unlocked: HYW Campaign (mid)
Special: Avoid Direct Attacks
Reason: A lot of folk seem to swear by the Two Handed Sword page. I'd personally say these guys are better, though good weapons are a tad harder to procure. The main reason is that the usual two-handed X-skill, Sword Wave, is vertical... while the Samurai get the ironically named Sky Slicer, which is horizontal and hugs the terrain. Basically a full squad of Samurai using Sky Slicer will kill anything it hits from medium range, just about. Won't even have chance to close to melee. Plus these guys are pretty tanky so they survive well.
On the downside... they're slow. REALLY slow. Painfully slow. Can't swiffle at all. Put me out of my damned misery slow. Best used to guard defensive positions.


Lady Lancer
Book: Horses
Page: Lance
Alternate Squad: Too damned many.
Unlocked: HYW Campaign (early)
Special: Ability Guard
Reason: Tiddy plate again...
For real this time. There are plenty of Lancer squads available, so given the choice I go for the ladies. That is my only real reason. I don't actually USE this squad personally much, but it is a very reliable option for leaving my other characters with. Lancer squads are tanky and fast, which is a very good combo... but they don't gain experience easily since they rely heavily on Charge, so they're best levelled manually (and since AI characters don't level fast anyway, there is nothing lost leaving them with these guys).


Okay... that is about all I care to mention for now...
... Besides that my mercenary's voice selection has screwed with my vocabulary.
Cries of "We must move swiffly!" and "Now is the time for porridge!" have now become my madness mantra. Just use MMH for maximum swiffliness.


HUNDRED YEARS' WAR (Part 1) [Basics, Story & Request Battles]
Basics
The HYW scenario consists of Major Story Battles, Minor Story Battles, Request Battles, Special Battles and trivial contracts. There is no obvious distinction between most of these, but I'll try to explain...
The Major, Minor, Request and Special battles are all marked with a clear exclamation mark in the contract list. If there is no exclamation mark, then what you're looking at is just a trivial contract and they serve as padding.

Another identifying feature of all these battles is that your Leader's starting position on Day 1 is locked and can't be moved. If you can move your Leader Mercenary's starting spot on Day 1, you're just playing a filler battle.

After every battle you will generally unlock one event in the Tavern. You may have multiple events queued, but since you can only unlock one at a time, it is important to pad out your playthrough with trivial contract battles.
Exclamation marks over the Gossip section are indicative of events.


Just to clarify, the events take multiple forms and you should learn to recognise them as some things in this campaign are missable.

#1. Instant Cutscene upon entering the Tavern. Almost always related to Story Battles you just unlocked or just completed. Counts as one event.
#2. New Gossip with an exclamation mark. View the Gossip (top item) to progress the event.
#3. Request Contract. No new Gossip. Top Gossip item is a generic, unvoiced one about some squad or other. Complete the Request to progress.
#4. Event Queue Empty. No new Gossip. Top Gossip item is a voiced event about random nonsense between unnamed NPCs. This usually means you have to complete a Story quest in the Contract list to unlock more Events.

Ideally, every step of the way in the Hundred Years' War campaign, you should be trying to pad out your playthrough via random contract battles (alternating sides) until you hit that Event Queue Empty state.


Story Battles
Story Battles in general are identifiable in the Contract List in the following ways:
Exclamation Mark
Period: Indefinite
No Request


Story Battles are announced by a new Gossip item declaring the start of the battle.
Story Battles also begin and end with a cutscene.
One Story Battle, the Battle of Nantes, also has a rather obscure cutscene in the middle, but I'll get to that later.

Major Story Battles always follow in the same order and are the key stepping stones of the HYW story. Completing one will raise your mercenary's maximum Fame Level and unlock new gear options with the Merchant. Typically there will be both an English and French option depending on which faction you wish to side with. They are as follows:
Battle near Odon / Battle near Epaignes (tutorial)
Battle of Crécy
Battle of Poitiers
Battle of Orléans
Battle of Agincourt / Battle of Bordeaux

As far as I've been able to determine, which one you pick doesn't matter up until the Battle of Orléans, which is the determining point for whether you're ultimately siding with the English or French. It is THE most important place in the campaign to make a permanent manual save.


So again... the Battle of Orléans is THE point of no return.
You WILL need to play through the game on both the English and French side to unlock everything, and to get certain achievements you will need to do it WITH THE SAME CHARACTER... so it is worth keeping that Battle of Orléans save.

Minor Story Battles are similar to Major Story Battles, but they don't necessarily come in the same order every time. Also you will have to do both English and French minor story battles regardless of which faction you favour. Some of them are tied to unlocking particular characters (e.g. Hal, Arthur de Richemont).
As with Major Story Battles, I would advise stalling Minor Story Battles (i.e. doing trivial contracts) until you're sure you have emptied the event queue. You can sometimes stack up multiple of them at a time.
If you have both a Major and Minor Story Battles waiting to go, progress the Minor ones first (identifiable by NOT being one of the Major ones listed above).


Request Battles
Okay, this has to be noted here... Sometimes you will get regular contracts (the filler kind) with Requests against them. Usually some additional objective you can fulfil during the battle to get more money.
I'm not talking about those. Request Battles are unique contracts that are added to Free Mode like the Story Battles are, and unfortunately they are extremely easy to screw up. They're typically tied to one or other NPC character's sub-plots and are required to unlock those characters for use.
They are identifiable by the following features:
Exclamation Mark
Request
(usually from a named NPC, but not always)


Additionally, you can typically tell when a Request Battle has spawned because there will be no new Gossip, and all the Gossip items shown will be NON-VOICED and generic. Again I stress that if the top Gossip item is voiced, that is a different situation entirely (i.e. no events queued).

Before you undertake a Request Battle, I recommend saving the game. You get one shot at the battle, and you must successfully complete the extra request conditions for it to progress. Failure to do so could terminate the character sub-plot.
ALSO note that it is far easier to S-Grade these requests in Story Mode than in Free Mode, since they're all amped up to full star difficulty in Free Mode.

Once you choose to undertake a Request Battle and get to the preparation screen, you can press RB to switch objective from the main battle objective (something generic) to the special request objective. These can also be seen on the main pause menu during the battle.

TIP: Any of your controllable characters can complete request objectives as long as you are controlling them at the time (even if it doesn't make sense, like delivering a letter). Set up your extra mercenaries near request objectives and switch to them to get the request completed faster.

Incidentally, if anyone captures the main battle objective bases before you have finished with request objectives, the request counts as failed. Try to avoid this. Especially make sure to control your own Mercenaries and keep them away from the battle objectives.

When the request objectives are completed, you can check on the pause screen. The word COMPLETED should be across the map in gold under the request objectives tab:


Just as a special mention, a few Request Battles are escort quests and involve following a slow-moving NPC about the map while they walk to specific locations and trigger ambushes.

These are huge time-wasters, BUT with one exception, you can assign your AI characters to guard the NPC while you take nearby enemy bases or grind for Grade bonuses.

TIP: Escort quest NPCs move faster when you're not near them, and request ambush enemies only spawn when you get close, so it is safe to leave them alone for a bit and switch character to one of the guards when they stop moving on the map.
HUNDRED YEARS' WAR (Part 2) [Special Battles & Rumours]
(Continued)

Special Battles
These ones are a bit different. I honestly don't know the exact conditions for unlocking them... but I believe it has something to do with completing both England and France storylines with the same character (reloading from the Battle of Orléans save after completing one)
Assuming you have been super thorough in playing through the Hundred Years' War, doing enough random contracts for England and France, unlocking all the characters and events along the way and finally completing the last Story battle and seeing the end-credits... some time into the post-game, you should get an event from the Barkeep which triggers a Diary entry in the Rumors section called "The Hundred Years Legend"...


This event unlocks the beginning of the Special Battles... which are obnoxious as all hell.
They are identified by the following features:
Exclamation Mark
Name: Special Battle
Conditions: "Fight until the time limit."
Difficulty: 4 Red Stars


There is one for each faction at each battlefield location, so 8 for England, 8 for France, 16 in total.
Each one is recorded separately in Free Mode. Each one requires you survive for 5 days, that means at least 50 minutes per battle with no chance of a shortcut. Also you can only get one at a time, it won't change until you complete it, and which one shows up is random. You can get ones you have already completed... which, given how long they are, is a horrible nuisance.

Now, the fastest legitimate way to obtain them all is a little complicated.
If you get back to the Tavern after a battle and the Special Battle awaiting you there is one you already completed, you can exit out to the Title Screen and then reload the last (Auto saved) file, and the SB in the Contract List will be reset. BUT it won't reset again if you exit out and reload. It remains at the second value.
SO... to get a bit more variety, you have to make a save right towards the end of a SB. Like in the last 10 seconds or so.
Now, if you reload that save and complete the battle, it will then reset the next SB to a different value. And it will have made another autosave, so if you still find a SB you've completed again, you can reload that.
Therefore... the fastest way to reset is to alternate between loading the interrim save from the end of the last battle... and reloading the autosave generated from completing it.

Obviously expect this to take longer and longer the more of them you complete.
I honestly wouldn't bother unless you're chasing the achievements (some of which are insufferably grindy).


Rumours and Tricky Unlockables
I'm only making a separate section for this because a lot of things have changed in the game since its original versions, so a lot of the information out there is no longer applicable. There are quite a few things it is rather difficult to unlock and may cause trouble elsewhere.

The Battlefield Hunter
I got this one easily enough just through playing normally, but depending on your play-style you might not get it without trying for it.
Somewhat early on in the story you will get some event about some legendary whatever who hunted down every enemy officer on the battlefield.
SO... if you go and do so yourself in any battle... i.e. personally defeat every enemy officer on the list... you will unlock an event where some guy in the tavern comments on it. And it rewards you with a bonus to rare event proc rate or suchlike.
It is so easy to get that I didn't think of mentioning it at first, but I remember the bonus is a useful thing to get early.

The Treasure Hunter
i.e. Selling art.
You might have noticed that you often find vases and paintings and stuff on the battlefield and you can sell them to the merchant. That is good. Just keep doing that.
Eventually some fancy noble with a round helm shows up and makes some vague complaint about art going missing or somesuch. Following that there are another two events where he thanks you for selling art back to the Merchant, which is a lot more clear than his initial complaint.
Once you have sold LOADS of artwork items to the Merchant (especially the painting called "The Fabled City", which sells for 3000 a time) , the noble guy will give you a Rabbit's Foot, which makes it easier to get rare loot in battles.

TIP: There is a recurring request against random contracts involving "Stolen Art". That isn't directly involved in this sub-plot, but it is a way to get extra rare artwork to sell.

Chariots
While most of the HYW Books unlock through regular gameplay (picked up from City Bases) or purchase from the Merchant, there is one that requires a specific sub-plot followed to its conclusion.
Christine de Pizan is a character on the French side, and progressing her sub-plot requires I believe at least 30 French contracts (just to begin with).

After her first appearance, she will begin to give you Request Battles where you have to find first the right kind of wood, then the right kind of iron, then an escort quest where you accompany her to find the right kind of sulphur. After that she wants some help testing out cannons.
In the original Bladestorm I believe she was responsible for unlocking the Explosives (i.e. Guns) book, or possibly Engineers... I'm not sure which... but NOW finishing her questline will unlock the Chariots book.

The Legendary Warriors
Simple enough to proc the starting event. Another event in the Tavern where three guys sitting around a table talk about three masters called "Silver Sword", "Silver Spear" and "Silver Bow".
This leads to three separate events you can trigger if you have over 70% Growth in the Swords, Spears and Bows books respectively. At least I believe it is 70%... but it helps to get them as high as possible.
NOTE: Pages from the Nightmare Campaign can also contribute to the Growth percentages of these books, and it is impossible to reach 100% without them. You might want to progress Nightmare and collect Goblin and Skeleton pages before finishing off HYW. I personally didn't manage to get all the Legendary Warriors to trigger until I'd collected a few Nightmare pages.
In each case, once you have enough Growth in the required Books, you will get an event where the Silver whatever shows up and gifts you a powerful weapon from their specialty.

The War Avatar 1 : Engineers
Prerequisite: all three Legendary Warriors events.
So, after you encounter all three of the Silver masters and get their special weapons, you unlock an event with a Mongolian-looking guy called the Avatar of War, and he gives you the Engineering Book... then tells you to go off and practice with it.


HUNDRED YEARS' WAR (Part 3) [Rumours continued]
(continued)

The Future Direction of War : Adaga & Mongolian Firespear Pages
Prerequisite for Completion: All Books Unlocked
An event should trigger fairly early in the game where you see two guys at a table arguing over war strategies or somesuch. The guy with horns on his helm argues that it is about defeating every type of soldier out there, while the guy with the plume in his helmet claims it is about leading every type of soldier.
Unsurprisingly, you have to do both of these things.
If you go and check your Diary then go to the Data section at the end, you can see your Type Usage on the first tab and KO Report on the second tab (RB to switch). Ideally you need every entry to have a number higher than 0.0% to count.


Three things in particular need to be noted here:
#1. You only have to use / defeat each Book once. Not every single Page / Squad type... which would be impossible since this sub-plot unlocks two Pages.
#2. Nightmare Books don't count... so you don't need to worry about Ghosts, Griffons, Giants nor Dragons.
#3. As far as I'm aware, these count across all playthroughs with the character and possible across all characters you've used. I've managed to trigger these events early because I met the requirements in previous playthroughs of the campaign.

Anyhow... Defeating every type of soldier should be easy enough just through progressing through the Hundred Years' War, as sooner or later everything will begin spawning, including Elephants, Chariots, Engineers, Magicians, etc. When you have completed that, the guy with the horn helmet will show up and ask for your notes. LEND HIM YOUR NOTES. Very important. Then a bit later you will get another event with him and he will give you the Adaga Page for the Spears Book.

More difficult, however, is the other one. Leading every type of Soldier requires that you have every Book unlocked. That means you must have completed Christine de Pizan's sub-plot to unlock Chariots on at least one playthrough, and also have met the Avatar of War to unlock the Engineering book on at least one playthrough... as well as unlocking all the others through gameplay or purchase.
Assuming you have done that though, just make sure to play with a Squad from each Book at least once each and get a few kills with said Squad (it doesn't count as used if you don't score any points with it).
Following that, you will get a similar event with the fruity-looking guy with a plume in his helmet who, like his counterpart, wants to borrow your notes. Again, you MUST lend him your notes to progress this. Then you will unlock another event shortly after where he will give you the Mongolian Firespears Page for the Explosives Book.


The Aegis Shield
Sometimes you will get random broken shield items on the battlefield with names like "Aegis's Agony" and "Aegis's Fall". Sooner or later you will get an event where some generic peasant-looking guy asks you for them. Give them to him. Once you have collected all of them, he will give you back the completed Aegis shield... which is the best shield in the game. In fact it might be worth exploiting the save system to get multiple copies of it. You can't use it with Lancers though, since that is a different shield type.

Gemstones / The Entrepreneur / A Breath of Calm
This one isn't too difficult to do, but there is a lot to it, so it can get complicated.
There are twelve special gemstones with pretentious names in the game. 10 of them you get through looting in random battles. The last two are a little more involved.
One directly connects to the Entrepreneur sub-plot. That guy who shows up asking for you to invest money in him and keeps asking for more. As long as you keep lending him money through to the end of his sub-plot, he will eventually claim to have lost it all, but will give you ... I believe it was the Diamond of Purity in exchange.
The last one... I think it was the Ruby of Passion, but I could be wrong... is given to you by Shakti (the Indian "witch" lady with the revealing outfit) at the end of her character sub-plot.
Once you have all 12 gemstones, the Merchant will give you a discount on all future purchases. Yeah, that is all.

The War Avatar 2 : Muramasa
Prerequisite: First War Avatar encounter, All Books Mastered
So... remember this guy? Well, he told you to learn Engineering and then come back to him. It isn't entirely clear what he wants though.
According to what I've read online, you need to have the Engineering Book Growth at 100% and every other HYW Book at least to 70% ... but I didn't trust that and dealt with all the Nightmare content first, and came back with 100% Growth on ALL Books. That is to save every single Page unlocked for every Book and everything upgraded on my main character. You'll have to test for yourself if you want to be sure.
But in any case, once you have met all the requirements, the Avatar of War will show up again and gift you glorious nippon steel, folded infinity times and able to cut through mountains or whatever. i.e. Muramasa. Strongest single-handed sword in the game (one stronger than Excalibur).


John Hawkwood
Prerequisites: Post-Game, Magnus's sub-plot, high fame
Assuming you have been doing the Hundred Years' War correctly, completed the storyline (either side) and seen the credits, this should be the last entry in the People section of your Diary, and one of the last characters to unlock for use. To get him, you will need to have completed Magnus's Request Battle where he wants to compete with you to see who is the best. I believe you will have an easier time triggering Hawkwood if you beat Magnus... which means NOT FINISHING THE BATTLE ON DAY 1. You have to finish Day 1 in 1st place. Then do what you like. Magnus will be wrecked. Then you will get another event from Magnus saying he still wants to beat John Hawkwood and become number one. At this point I started singing a certain Lazy Town song whenever I encountered Magnus on the battlefield just to rub his face in how outclassed he is...
... but I digress...
After doing a bunch of random contracts in post-game and building up fame, you should trigger this guy's starting event. He looks Spanish, sounds American... he is John Hawkwood:

... Yeah, there are far too many Johns in this game. I guess Japan doesn't know any other English names.

Anyway... he shows up and issues a challenge to you. Find him out on the field of battle and defeat him. That is what he wants, and that is what you must do. You will have to do another battle to get another Magnus event to trigger where he gets all sour grapes over Hawkwood issuing you the challenge.
From then on, he has a chance of randomly showing up on the enemy list in any given battle you do. It might take a few tries, but every time you start a battle, check the participants list to see if John Hawkwood is around... then make a bee-line to him and beat him bloody. He'll be level 75, but that isn't a problem if you're at level 99. Wipe the floor with him like he is Magnus 2.

After you've done that... you get ANOTHER cutscene where he congratulates you, declares A Winner Is You, and leaves you his janky pixel-sword.
After that, there is one more Magnus event and then Hawkwood is yours:


Sorry Magnus, but We Are Number One.
NIGHTMARE (Part 1) [Character Unlocks]
So yeah... the Nightmare Campaign is the later and shorter of the two campaigns in this game.
FAR less grindy than Hundred Years' War if you know what you're doing. Much more straightforward... except for a few small parts I'll get to shortly.
This one takes the historical setting of France in the Hundred Years' War... and then fills it with monsters and fantasy stuff. Characters die. There is no 10 minute time-limit on stages any more. No "NIGHTFALL". You can take your time... to some extent.
There is no Tavern either. You have to select to go to the Status menu between stages or the game will just dump you from one fight into the next.

There are 9 Chapters to it in total. That means 9 stages, increasing in difficulty as they progress. There are also three difficulty settings you can select for each of the stages: Easy, Normal, Hard.

No matter which you pick, the last chapter goes right up to 5 Red Star difficulty, so playing it on Hard is a bit hellish even at level 99. Most enemies will be in the 90s themselves.

Still, you don't need my help just to complete the stages. That is the easy bit. What I intend to cover pertains more to unlockables / achievements. Specifically Characters & Monster Pages.

Throughout the Nightmare Campaign you will unlock various old friends from the HYW campaign for use in future (or past) stages. A lot of them unlock automatically as you progress, but some of them have special conditions that you will probably need to be told about.

The OTHER thing, which is probably more to your interest... are the new Books / Pages.
The Nightmare Campaign adds four new Monster Books to the roster of weapons you collected in the HYW, as well as a bunch of Pages for existing Books enabling you to command Monster Squads.
The Books themselves are unlocked through progressing the campaign, but additional Pages must be unlocked through grinding out Base Commanders (obviously you need the Book unlocked before getting Pages for it). BUT I'll get into more detail on that soon enough.


Character Unlocks
I'll title each of the character unlocks first with the CHAPTER they're unlocked in, and then the name. Specifically you will get notifications about the ones you've unlocked after returning to the Status / Prep screen after the battle (you need to win the battle too). Don't worry if you miss any of them the first time. You can repeat stages as often as you need to unlock them all... which is just as well, as the conditions for some of them to trigger are buggy...
Also I apologise in advance for all the screenshots being full of Mongolian Mounted Archers. I'm fully aware the legitimate in-game cap on them is 20... but I prefer riding around with 50 of them because there is never enough swiffle and I've already completed the game so I can cheat as much as I want. Consequence: horses everywhere.

Ch.1 : Christine de Pizan
Stage: A Meeting at Gascony
Make sure to rescue Christine from the monsters attacking her outside Toulouse... and she should make a comment about wanting to capture a monster for study. If she doesn't make the comment, the rest of this won't work.

Now, you need to make your way down to the base called Hosta in the southwest corner of the map and take that base. It doesn't matter if you do it before or after taking Toulouse.

After you have captured Hosta and defeated the Cyclops there, Magnus will make a remark about finding something, and you'll get a monster horn.

After that, make your way back to where Christine de Pizan is (assuming she is still alive). She will make a comment on the horn and confiscate it. That is enough to unlock her.


Ch.1 : John Chandos
Stage: A Meeting at Gascony
After you have captured Toulouse and rescued the officers around it, Nĕga-Joan will declare "Eradicate the Human Scum" and unlock the rest of the bases on the map.
Your final mission objective is the city of Bayonne in the northwest... and you might notice that Edward, the Black Prince and John Chandos appear on the potential target list, though there is no sign of them. Move towards Bayonne, maybe take a few bases south of it, and eventually that strange green line that seemed to be pointing nowhere will point further south into the Pyrenees part of the map (the mountains). Follow the green line and you will find Edward and his lapdog Chandos, and the latter covered in red glowies.

You have to kill Edward WITHOUT harming John Chandos.
Once you have done so, Chandos will come to his senses and join your side.

He should also comment about an amulet. That will become relevant later.


Ch.2 : Yoshimasa
Stage: Alliance at Aquitaine
You may have noticed Yoshimasa was in the first stage, but can't be "unlocked" there. That is done here, and it is fairly simple if you know what you're doing.
West of Castillon (the first battle objective) there are two bases called Rauzan and Gironde. You must take them IN THAT ORDER before taking Castillon.

Make sure your allies do NOT take either of the bases before you get to them, as it can mess this up.
Anyhow, once you take Rauzan, Magnus will comment on a dropped sword.
After that, quickly go to Gironde and you will find Yoshimasa there. So just take the base and give him his sword back. That unlocks him.


Ch.2 : Iamarl
Stage: Alliance at Aquitaine
After taking Castillon you will be told to take bases to the north. There are three markers to the northeast, and I would advise going to the northwest most one and taking that.
After taking the base a peasant will shout about monsters appearing on all sides. From here, you need to make your way quickly up to the northwest side of the map, to a currently unmarked base called Saintes on the far west side.
When Gilles de Rais and La Hire appear as reinforcements after the Third Monster Wave, it will also spawn Iamarl in Saintes, and Edward on the enemy side outside the nearby base of Cognac.

Iamarl and Edward will come together and start fighting. Get close but don't join in the fight immediately. Iamarl will comment that she can't turn her blade on her lord. Another important comment. The screen will mention her confusion. That is your prompt to wreck Edward.

Magnus, as usual, tries to take the credit for figuring out that Edward is still a fake (remember Chandos)... and Iamarl thanks you for rescuing her. Iamarl Unlocked.


NIGHTMARE (Part 2) [Character Unlocks]
(continued)

Ch.3 : William
Stage: Previously in Brittany
This requires a little preparation, as you need to bring Magnus with you in one of your controllable slots. I would STRONGLY recommend putting him on a Mounted Horseman or MMH squad and giving him a load of training if you have the SP for it, as they're the fastest squad in the game... but you might not be as impatient as I am. Prepare for a slog otherwise.

Also note you can't use monsters on this stage unless you've already completed Nightmare and activated the setting.
Now your destination for Magnus is a Cyclops base in the North called Morvan... so set him to go that way from the start. You might want to set your main character off towards Vannes for the other unlock on this stage to get both quickly.

Now, swiffle loserboy Magnus over to Morvan and you'll find William being mobbed by cyclopes.
Take the base with Magnus and he'll give some rousing speech about something or other.

Coward unlocked.


Ch.3 : Naran
Stage: Previously in Brittany
Now, I said before to send your main mercenary off towards Vannes.
It is time to rescue the most annoying NPC in the game, who brings shame to Mongolians everywhere: Naran.

Same basic routine as William. Swiffle into the base, hear Naran crying for help like a little b!tch, and Philippa with him rightly chastising him for being pathetic. Take the base.
Naran will thank you, and based Philippa will shame him for being an utter failure of a Mongolian.

Failure unlocked.


Ch.4 : Philippa
Stage: Turmoil in Auvergne
This one is really easy. Just nip on up to Le Chauchet a little north of your starting position.

You'll find Philippa riding around and the Duke of Bedford nearby being a complete skeev... so once the two of them are done chatting, wreck Bedford. Philippa will thank you and join you. Easy.

Based Ladyknight Unlocked.


Ch.4 : Shakti
Stage: Turmoil in Auvergne
Just a little further. Same basic routine as the last. Shakti is being accused of witchcraft yet again up in the middle-North base called Etroussat... so you have to swiffle up there and save her.

Bit of a slog, but we've got worse coming next. Beat up the villagers and take Etroussat and Shakti will join you after some excuses and stuff.

Rhymes-with-Witch unlocked.


Ch.4 : Henry Percy
Stage: Turmoil in Auvergne
You have to beat up HP three times. That is what you must do. He first spawns near Gergovie on the East side of the map a little after the battle starts.

Swiffle over there, listen to him putting on airs, then wreck him... Note: you really must wait for his dialogue to trigger or you might break the sequence. This tends to be the rule with all characters (in fact for a lot of dialogue triggers in Koei-Tecmo games in general).

Then you wait. Try your best not to let any of your mercenaries take battle objectives in the meanwhile, and stay the hell away from Philippe le Bon. Eventually Henry Percy will respawn down in the South-East corner near Le Besset, so try to be there in advance.

Beat him up a second time and then head up to the North-East. Eventually HP will respawn again a little north of Les Charles.

Beat him up a third and final time, and he is yours. HP Unlocked.


Ch.5 : Richard Beaucamp
Stage: Showdown, Ile-de-France
Another one requiring preparation. You have to bring Hal with you as a controlled character like you did with Magnus in Ch.3. More SP may be required to ensure he isn't slow.

You might want to prep your main mercenary to go after Georges too while you're at it, to juggle two requests at once.
Anyhow, Hal has to personally defeat Richard Beaucamp on 3 separate occasions, and each time he has to trigger the dialogue first or it breaks the chain. Make absolutely sure your squad doesn't accidentally murderise Richard before you get close enough to trigger the dialogue each time.
The first time is up near Valois.

After you've beaten him up with Hal, he should withdraw. Keep Hal stationed where he is. A little later Richard will re-appear near his previous position, by the gate to the east.

Head over there again with Hal, let them chatter, and then KO Richard again.
He will eventually reappear again a third time in the same spot (convenient), and for some reason he usually starts moving to the north (not so convenient) so repeat the process a third time. If you kept Hal with his default squad, this can result in an annoying game of chase, so make sure you're faster than Richard. And trigger his dialogue before your squad kill him (my horses nearly screwed this up).

He will withdraw again. After Paris is conquered, Richard will appear a fourth time on the enemy side, but a scene will trigger and he will switch sides. Richard unlocked.


Ch.5 : Georges & Marc
Stage: Showdown, Ile-de-France
Okay, so while all that stuff with Richard was going on, you can be dealing with Georges elsewhere. He starts off in the base called André west of Paris.

Once you've nipped over there and got close to him, he'll go on about a bounty on your head and try to take it. Classic Georges. Kick his ar$e for the first time.

So a little later on, Georges will respawn up North of his original position over the river, and immediately start making his way back towards you. Go meet up with him and destroy him a second time.

Unlike with Richard, the game isn't so fussy about you defeating him before he even opens his mouth (yay).
The next time Georges appears, it is over by Meaux, very close to where you are / were fighting Richard with Hal. And since Hal should still be in the area, you might as well let him do the honours this time.

Okay... one more time. Georges appears right up in the Northmost part of the map, and this time Marc comes along with him. Time to go ruin their day, and hope Paris doesn't get taken first.
Once you have defeated Georges (and Marc) for the fourth time, that counts for unlocking them.

NIGHTMARE (Part 3) [Character Unlocks]
(continued)

Ch.6 : Fastolf & Talbot
Stage: The Battle of Normandy
Johns #2 and #3 out of the 4 Johns in this game are unlocked on this stage. You should probably keep any spare mercenaries in your control guarding Prince Edward to ensure he doesn't die while you're off chasing other characters, as the stage fails if he dies.
You have to complete the first objective and take the base at Russy and trigger the gate cutscene. John Talbot and John Fastolf will group up by the gate while Edward tries to retreat and gets cut off by Něga-Joan.
Around this time, Fastolf announces his departure. This is what you're waiting for:

Once the dialogue is played out, make sure you're standing near Talbot and he'll ask if you're also guarding. This will trigger another chain of comments and Talbot will leave to the North-East to find Fastolf.

Do not follow him just yet.
A little while later, Fastolf will reappear on the map, and Talbot has to reach him first, so just stay away and let him do that (because NPCs move faster when outside camera range, as mentioned earlier).
Once John Talbot reaches the gate in the North-East corner of the map (where Fastolf is), then go up there and meet with them to trigger more dialogue.

Beat up the enemies to rescue them, and you have unlocked the Johns Fastolf & Talbot.


Ch.6 : Karen
Stage: The Battle of Normandy
Another thing that can kick off on this stage after the gate cutscene is Karen's little diversion.
Go and take control of a weapon base a little South-East of the gate called Esquay.

At some point after you capturing Esquay, Karen will make a remark about a merchant's carriage, and start making her way East towards the city of Rouen.

You need to make sure Karen makes it to Rouen safely and quickly by clearing out the bases along her path, and weakening Rouen too (but don't capture it yet). Once Karen goes inside Rouen and reaches the centre, follow her in and kill the Dragon boss.

Once it is taken and Karen is near the Merchant, she will make another comment, and you've unlocked her.


Ch.7 : You Ji
Stage: Gamble in Flanders
This has to be noted: you will have to do this stage twice. You need Arthur de Richemont as a controlled character, BUT you only unlock Arthur de Richemont AFTER completing this stage. No matter anyway, since you will likely have to grind this stage more later anyway.
At the start of the stage, switch control to Arthur and move over towards You Ji until they engage in dialogue.

After the dialogue kicks off, you just need to capture the bases to the South-East of Ghent in order to execute the diversion. You probably won't need to capture all of them, and you don't have to do it with Arthur (so keep him guarding You Ji for convenience and fight with your main). Just watch for the message that the diversion is successful.

After that, conquer Ghent, then switch back to Arthur and go over to You Ji for another chat to unlock him.


Ch.8 : Bertrand du Guesclin & Jean
Stage: Upheavel in Champagne
First, assign your spare mercenaries to guard Magnus.
Second, go and rescue Edward from Donrémy as the game suggests. You can rescue others along the way if you want, but it isn't essential. Beat up the shadow dragon at Donrémy, get the cutscene, then start towards the North-West. Your target is the Giant base of Vauchamps.

You should clear a path to Vauchamps, taking the camps along the route, since Bertrand the manchild will be heading in that direction to help some Townsman and you need him to get there swiffly and safely. You will see the dialogue pop up, but don't really need to pay attention to it.
Make sure your mercenaries are still following Magnus (he has to be kept alive), since they tend to get stuck at Donrémy.
Just go over to Vauchamps again once Bertrand and Jean are inside, and you will get another round of dialogue to unlock them.


Ch.8 : John Hawkwood
Stage: Upheavel in Champagne
If all goes well, you will probably see Hawkwood show up around the time you're heading back to meet up with Bertrand.

He has appeared in Luzancy a little to the south of Vauchamps over the river. So go meet up with him and help him out.

Once you're done beating up the Dragons in the base and conquering Luzancy, Hawkwood will comment on your abilities and join up with you. Legend Unlocked.


Final Character : Peasant Joan
The last character you can unlock for the Nightmare campaign isn't unlocked IN the Nightmare campaign at all. You have to beat both the England and France storylines of the Hundred Years' War (and save afterwards). If you have met those conditions, you will unlock them for Nightmare after completing the Nightmare story as well.


OKAY...
So that is the tricky character unlocks out of the way... onto the Books / Pages.


NIGHTMARE (Part 4) [Monster Books / Pages]
(sorta continued)

Books
This is the easy bit. There are four new Books in the Nightmare campaign, and you can unlock them for use in the HYW campaign (and Ch3 of Nightmare) after completing Nightmare in its entirety.
The Nightmare Books are unlocked automatically by progressing through the Nightmare campaign.

You get Ghosts after Chapter 1.
You get Griffons after Chapter 2.
You get Giants after Chapter 5.
You get Dragons after Chapter 7.

However, getting these four Books is just the start. There are additional Pages to unlock...

Pages
Okay. Once you've got the relevant Books, there are a bunch of other Monster Pages to unlock as well, and you get them by defeating big Base Commanders of the relevant type with the "Break Gauge" shield in Bases with Big Flags.
Upon defeating any one of these strong Commanders who you don't yet have all the pages for, there is a CHANCE of a Red Chest dropping from the Commander's body itself (not the Base loot)... and the odds of getting one are rather low, so prepare to grind.
I believe playing Nightmare stages on Hard difficulty increases the odds of a good drop. It is worth a try in any case.

The Pages are as follows:
Book
Page
Obtained from
Rapiers
Skeletons
Skeleton High Base Commander
Swords
Goblins
Goblin High Base Commander
Swords
Skeletons
Skeleton High Base Commander
Spears
Skeletons
Skeleton High Base Commander
Halberds
Skeletons
Skeleton High Base Commander
Axes
Goblins
Goblin High Base Commander
Clubs
Goblins
Goblin High Base Commander
Bows
Goblins
Goblin High Base Commander
Bows
Skeletons
Skeleton High Base Commander
Magic
Goblins
Goblin High Base Commander
Ghosts
Undead
Gained With Book
Ghosts
Death Magic
Liche High Base Commander
Griffons
Griffon
Gained With Book
Griffons
Dark Griffon
Unlock all usable Nightmare characters
Giants
One Eyed Giant
Gained With Book
Giants
Muscled Giant
Giant High Base Commander
Dragons
Dragon
Gained With Book
Dragons
Silver Dragon
Silver Dragon High Base Commander
Dragons
Shadow Dragon
Shadow Dragon High Base Commander

If you already followed my guidance regarding unlocking characters, you should have gained the Dark Griffon Page along with the Darkness Slayer achievement when unlocking the final character in Nightmare.

Note: the extra Pages for the new Monster Books have to be gained from defeating the specific monster type Commander. You can't get the Death Magic (i.e. Liche) Page by defeating a Death Commander. It explicitly has to be a Liche Commander... and so on.
HOWEVER... I believe the Goblin and Skeleton High Base Commanders can drop any of their respective species' pages. So a Goblin boss with a Sword can potentially drop the Bow Page... and so on.
In any case, I would recommend leaving the Goblins and Skeletons for last, as you will probably get a few of their Pages while trying to farm the others.

Specific Grind Spots

For the Death Magic Page of the Ghosts (or Spirits) Book, I would recommend Chapter 7: Gamble in Flanders. This is one of the trickiest pages to get because Liche forts are kinda rare... but there is a guaranteed one on Chapter 7 that spawns after you take Ghent (the first city).
The game will make an Autosave after you take Ghent... and you will want to use that.
After taking Ghent, rush up immediately to the Northmost Base on the map as depicted below.

Once there, defeat the Base Commander, and if they drop a Red Chest then pick it up and continue the stage. If they don't, then exit to the Title Screen and reload from the last Autosave to repeat the process.

Note that most bases with a Cyclops Flag over them in Chapter 7 and Chapter 8 are going to be Giant Bases (as opposed to Cyclops Bases, which are found more in earlier Chapters). So those are also a good spot to grind for the Muscled Giant Page.

Chapter 8: Upheaval in Champagne is also a great place to find Silver Dragon and Shadow Dragon Bases, and therefore their respective Pages.
On the below, I marked Giant Bases in Red and Dragon Bases in Yellow, in case it wasn't obvious. Also the little Spear icons you see in other bases are Skeletons... so there are those too.

Note that you gain access to a few of these Bases before rescuing Edward and freeing Joan in this Chapter, but they revert to enemy forces after doing so, so you get two chances of a Page from those Bases. BE CAREFUL though, since this stage fails if Magnus is defeated.

You can also get quite a few things from Chapter 9... but since that is the toughest fight in the game AND ends with a lengthy boss fight and the ending credits, it isn't the best choice for farming.

Anyhow, if you've filled up the Ghosts, Giants, Griffons and Dragons, that should only leave the assorted Goblin and Skeleton Pages to get... and the best place for those is Chapter 3: Previously in Brittany.
I have marked what Goblin Bases look like in Green and Skeleton Bases in Blue.

Their positions aren't fixed (or rather Goblins and Skeletons are switched around sometimes), but there are always some Goblin and some Skeleton bases.
Things to note:
#1. You should leave some of your Mercenaries to guard Joan. Her death means failure for this stage, though I've not seen it happen much.
#2. If Joan conquers Nantes on her own (or with your mercenaries), the stage finishes. You might not be able to conquer all the Goblin and Skeleton bases before the stage is complete, so prioritise what you need most.
#3. Getting too near the city of Rennes will ruin the diversion plan and place Joan in allegedly increased danger (though you should have someone else guarding her)... BUT it always has a Skeleton or Goblin boss that will be lost if you simply let La Hire and Gilles de Rais take it... so get in there and conquer it yourself.


Okay...
So... um... that should suffice for advice on this topic.
If you have any questions, I guess you could ask after the guide.


Achievements (Part 1) [Easier Stuff]
Right... this is the meat of the matter, though I covered a lot of the detail in earlier sections, so you'll probably have to go back and look at those for reference.
Best get started...

One-Off / Easy Stuff


Simple enough. Create a Mercenary for the Mercenary 1st Step achievement, then make another 9 of them in Edit Mode for the Successful Mercenary one. Bit of a waste, since 4 is more than enough for the entire game.


Silly easy. Storm of Blades will unlock automatically playing through the game. Probably in the tutorial. An inevitable consequence of dealing damage to enemies.


I got the Not a Scratch cheevo in the tutorial because I was playing with a Shortbow Squad. Just open fire on an enemy squad or two from a distance. Problem solved.


I covered forming an Army in the combat basics section. You can do it in the tutorial. Just get close to Magnus and press RT+A for the Friend and Ally cheevo, and press RT+A again near an enemy squad for the Grand Command cheevo. Otherwise you'll have to wait until you unlock other mercenaries.


Another automatic one for taking a city. Any city (big flag) counts for Destroyer of Walls. It will happen eventually. Not sure if the tutorial boss counts, but it doesn't really matter either way.


The easy way to get Like the Wind is to prep two bases with two controlled characters by defeating all the Defenders in each, then just kill the Base Commander of the first base, switch command to the character in the second base, and kill the Base Commander there too. Can probably be done in the tutorial, but you'll most likely have it by the end of the game anyway.


This is where being able to go quickly is helpful, though you don't need to go THAT quickly. Easiest to do in Normandy. Just take over all the bases as quickly as you can in a Story Battle (meaning Indefinite contract duration), and you should get Capture King before the end of the first day. Mop-Up Complete will come when you've conquered the last base, which should be the objective. Contrary to the description, you only have to do this on one map in the HYW campaign, not all of them.


Rapiers. Rapiers are the key to both of these achievements. As previously noted, Combo-count = Experience. Just take out a Dual Fencers Squad out for a stroll and hold down RB near a big crowd, and you'll get Relentless once the combo count goes over 1000. It might take a few tries, but it isn't difficult (especially with a weaker weapon). Keep doing that for an entire battle or so and you'll hit level 99 and get Master of One in no time. Other Books don't have nearly as easy a time as Rapiers do.


You will get the Book of Dreams with the first battle of the Nightmare Campaign... or after the battle. I forget which. Doesn't matter much, since you will need to complete it anyway.


You might get Winged Fiend's Bane without trying, but I didn't. The only enemies it can trigger against are Griffons and Dark Griffons, and it is easiest with Dark Griffons since they like flying up into the air to dive-bomb. Your best bet is to go to Chapter 6 of the Nightmare Campaign and go around with a Bows / Horsebows / Explosives (i.e. Guns) Squad and shoot at Dark Griffons when they fly up high. You need to kill the enemy with the Squad Marker over their head while they're up in the air for it to count.


To get Army Complete, you just need to finish either of the two Campaigns. Both HYW and Nightmare let you command 4 Mercenaries once you get to post-game.


Okay, you need a few things before you can get Ravage and Destroy: You need to have completed either of the two Campaigns so you can use 4 Mercenaries at once. You need to unlock one of the Goblin pages in the Nightmare Campaign from any of the Books that have Goblins pages and get the Leadership stat up to 10. That will let you field squads of 50 Goblins at once. You need to do this with all 4 of your Mercenaries, so they can each lead 50 Goblins.
Then you need to start a Battle with all your Mercenaries grouped into an Army on the preparation screen so you have 200 Goblins in the Army. Then just enter the battle, find any old target and RT+A them to mob them with your 200 Goblins.


Proof of Achievement is the easiest S-Grade related achievement. I covered grading far earlier in this guide. You'll get at least one S without trying, probably.

Get the Numbers Up

I got the Nightmare Sword achievement in one battle, the first time I took a squad of Griffons out. It isn't too tough to get over 6000 kills in a single battle if you have a very fast-moving, fast-hitting squad, and Griffons are exactly that. Dark Griffons even moreso. But this cheevo only requires you get it overall, so it doesn't matter what monsters you use.


You should get Rich and Powerful while progressing through the Hundred Years' War normally. Just sell all the artwork you find, do a lot of requests, etc. Anything to earn money. It'll pop eventually.


Yeah, these two can take a while. You need to use 500 Pennans for Banner Lord and summon 500 hired Squads for Great Employer. They will unlock on their own if you use Pennans and hire Squads a lot, but if you don't tend to do that, then you will have to waste time and money just spamming them at every given opportunity. Don't forget you can take 27 of each to every battle.

Achievements (Part 2) [Campaign Grind]
(continued)

Hundred Years' War

You get the Mercenary General achievement for simply completing the Hundred Years' War Campaign. This is without any of the grind that some of the other cheevos require.


Getting the Beloved Leader achievement requires being careful to pad out your HYW playthrough a lot and follow many sub-plots through to their conclusions. However, getting Leader of Men requires doing so perfectly with ALL the character sub-plots. This ties into other achievements too, so you'll want to be as thorough as possible.
In the HYW Status Screen, go to the Squad Leader list. You will need to have the following visible and available for you to command:
England
France
Mercenary
Edward, the Black Prince
Joan of Arc
William
Hal
Betrand du Guesclin
Georges
John Chandos
Philippe le Bon
Marc
Richard Beauchamp
Arthur de Richemont
Magnus
John Talbot
La Hire
Yoshimasa
John Fastolf
Gilles De Rais
Naran
Henry Percy
Christine de Pizan
Shakti
Iamarl
Jean
Diane
Branwyn
Marie
Karen
Philippa
You Ji
John Hawkwood
King of England
King of France
Joan of Arc (demonic)
Joan of Arc (peasant)
Most of these are dealt with the same way, so go back to the Hundred Years' War section and re-read if you need to be reminded. Basically though, you just need to check the Gossip section after every battle, do Request Battles whenever they show up and complete the requests in them flawlessly, and delay Story Battles until your Event Queue is empty.
If you haven't got Hal + Richard or are missing Arthur de Richemont + You Ji, you probably didn't do enough English or French contracts respectively. Make sure you do plenty for BOTH sides regardless of which faction story you're following. You need ALL the characters AT ONCE on the same save-file to get Leader of Men.
The last few are... John Hawkwood, who I covered in the Hundred Years' War section (unlock him in post-game), Peasant Joan, who you unlock by completing both the English and French storylines for the HYW campaign, and Něga-Joan, who you might not need at all for the cheevo, but requires completing the Nightmare Campaign.


These ones are a pain. In case it wasn't clear, the Historian cheevo refers to the Story column within the Story List in the Diary (so "Story" twice), while the Rumors cheevo is the same but for the Rumors section of the Story List in the Diary (so "Story" then "Rumors").
Completing the Story column will go hand in hand with getting all the characters unlocked (minus the two special Joan variants), so if you got the Leader of Men cheevo then you should have Historian too.
As for the Rumors section, I covered that in detail in the Hundred Years' War section of this guide.
Once you have both of those achievements, you will also get the 100 Years War achievement.
Just for reference, once you first encounter John Hawkwood, you should get a Star by the People section of the Diary to indicate completion. Once you have finished the Story and Rumors tabs of the Story section in the Diary, you will get a Star there too, as well as a Star against the Diary itself to indicate completion.

Nightmare


There is one achievement for every chapter in the Nightmare Campaign. And they're named after the chapters themselves, so I shouldn't need to detail them here. Just complete the campaign and you'll have all of these.


The Demon Fighter and Darkness Slayer achievements are what most of the section on the Nightmare Campaign was dedicated to. Go check back there. You will know you have it if you have the Dark Griffons page in the Griffons Book.
Also make sure that after you unlock Peasant Joan in the Hundred Years' War for completing both storylines, you load back into Nightmare to unlock her there too, since she definitely counts.
Achievements (Part 3) [The Worst Offenders]
(continued)

Both Campaign / Character Grind


You get Witness to History by unlocking all the Movies and Scenes for the Gallery.
The Movies are easy. Just complete both Campaigns for that.
The Scenes are a bit more tricky though. Every single Story Battle starts with a scene and ends with a scene (in both Campaigns). Sometimes you get scenes when you come back to the Tavern during the HYW. Getting this achievement goes hand in hand with 100% completing the HYW Diary though, so if you got those stars in the Diary, you probably got this achievement too, assuming you have also completed Nightmare.
If you didn't though, the offender is most probably the Battle of Nantes... i.e. the last English Story Battle for Hal and Richard Beauchamp (though you can get it on the French route too as long as you have done enough English contracts). See, this Battle has THREE events. One at the start, one at the end, and one for following behind Hal at the start and going over the bridge after he does.

It is called Awakened, and is between The Doubting Beast and The Wind Flees, The Mountain Endures on the Event List.
In any case, if you're missing any of these, feel free to ask. I can't promise I will get back to you, but I might.


The description for the Under My Control achievement is misleading. You need every Page for every Book in the game unlocked. Both the Hundred Years' War ones AND the Nightmare Monster Pages. So the Chariots (from Christine), the Engineers (from Avatar of War), the Adaga and Mongolian Firespears (from the two direction-of-war guys), The Scythe & Shield (from Shakti), all the pages you get from combat in the HYW and purchase from the Merchant, as well as the tiresome grind for all the Goblins and Skeletons pages in the Nightmare Campaign, plus the Liches, Giants, Dark Griffons, Silver Dragons and Shadow Dragons. The works. All of it.
Once you have got the last page and saved, this achievement will be yours.


These ones are a bit of a problem. You can S-Grade them in Free Mode once you have unlocked them, but you should probably try to do so in Story Mode first.
Well, Nightmare Hero isn't so bad since the Nightmare Campaign only has 9 Chapters, and it counts if you play them on Easy, so not a major issue.
The really horrible one is 100 Years Hero.
To get the 100 Years Hero... you need the following all at S-Grade:
  • 22 English Story Battles
  • 22 French Story Battles
  • 15 English Request Battles
  • 13 French Request Battles
  • 8 English Special Battles
  • 8 French Special Battles
Now, I went over all the types earlier.
You will at least have all the Story and Request Battles available if you were super thorough about completing the Hundred Years' War and unlocked all the characters + completed the diary, as well as doing Nightmare. It is recommended that you get the S Grades for the Request Battles during Story Mode though, as they're considerably amped up in difficulty in Free Mode, which particularly makes protecting NPCs during escort quests a nuisance.
Then there are the Special Battles I mentioned in the HYW section. 16 of them in total. Getting the S Grade for those isn't so bad if you're at 100% Growth, level 99, and able to consistently wreck shop in 4-Red-Star battlefields. It is just making sure you have unlocked them all that is a pain.
And once you have all the S Grades for both the Hundred Years' War and Nightmare, only then will you unlock Master of Fields.
As a bonus, the Master of Fields cheevo will give you a bunch of the rarest gear in the game. 4 copies of each... which should help towards the next, and easily the most horrible cheevos in the game...


Ugh... this did my head in. The good news is that you don't need all the weapons.
The bad news is that you need all the male armour in the game for Armor Collector, and all the female armour in the game for Costume Collector, and have no means of checking in-game what you're missing. The worse news is that these achievements are bugged to hell, so they might not trigger even if you DO have all the armour in the game.
Anyway... I shall list what you should have...
... and take note: The items form Black, Regular and Gold variants of armour sets (in that order), so I'm grouping them together into those sets for ease:

Armor Collector
Headwear
Bodywear
Armwear
Legwear
Hard Leather
Hard Glove
Hard Leather Boots
Soft Leather
Leather Glove
Leather Boots
Alchemic Leather
Alchemic Glove
Alchemic Boots
Steel Casque
Steel Chain Mail
Steel Arm Chain
Heavy Leg-Guards
Chain Casque
Chain Mail
Arm Chain
Light Leg-Guards
Gold Casque
Gold Chain Mail
Gold Arm Chain
Brave Leg-Guards
Fine Bascinet
Steel Plate
Knight's Gauntlet
Scout Sabaton
Bascinet
Iron Plate
Gauntlet
Sabaton
Gold Bascinet
Relic Plate
Blessed Gauntlet
Holy Sabaton
Shade Armet
Midnight Armor
Midnight Guard
Star Greaves
Noble Armet
Paladin Armor
Paladin's Guard
Paladin Greaves
Saint George
Avalon Armor
Orichalcan Guard
Divine Greaves
Black Horn Helmet
Bear Hide
Black Serpent
Fur Leggings
Viking Helmet
Animal Hide
Sea Serpent
Hide Leggings
Gold Horn Helmet
Lion Hide
Gold Serpent
Viking Leggings
Dragon Horn
Leviathan Mail
Black Steel Fist
North Sea Boots
North Sea Horn
Viking Mail
Iron Fist
Viking Boots
Gjalarhorn
Einherjar
Thor's Fist
Sleipnir
Sable Crest
Sable Breastplate
Heavy Chain Gauntlet
Sable Shanks
Nanban Crest
Nanman Breastplate
Chain Gauntlet
Iron Shanks
Gold Crest
Gold Breastplate
Gold Chain Gauntlet
Gold Shanks
Moon Point
Shadow Suit
Black Demon
Brass Shin Guards
Snow Point
Radiant Suit
White Demon
Iron Shin Guards
First Light
Indra
Bishamonten
Iron Leg
Moonlight Hood
Battle Burnoose
Moon Bracer
Battle Shalwar
Desert Hood
Burnoose
Desert Bracer
Shalwar
Sunlight Hood
Hero's Burnoose
Apsu Bracer
Hero's Shalwar

(continued in next section...)
Achievements (Part 4) [Last of the Worst Offenders]
(continued)


Costume Collector
Headwear
Bodywear
Armwear
Legwear
Hard Leather
Hard Glove
Hard Leather Boots
Soft Leather
Leather Glove
Leather Boots
Alchemic Leather
Alchemic Glove
Alchemic Boots
Steel Sallet
Ebony Bustier
Ebony Bracer
Heavy Leg-Guards
Sallet
Armor Bustier
Bracer
Light Leg-Guards
Gold Sallet
Gold Bustier
Gold Bracer
Noble Leg-Guards
Fine Bascinet
Steel Cuirass
Knight's Gauntlet
Scout Leg
Bascinet
Cuirass
Gauntlet
Leg-Armor
Gold Bascinet
Relic Cuirass
Blessed Gauntlet
Holy Leg
Vivian Tiara
Scathach
Black Widow
Shadow Dancer
Angel's Tresses
Unicorn Armor
Snow White
Queen Greaves
Ave Maria
Gabriel's Armor
Golden Dawn
Savior's Advent
Raven Helmet
Heavy Coat
Shadow Ring
Steel Leg-Plate
Winged Helmet
Battle Coat
Guard Ring
Leg-Plate
Gold Wing
Gold Coat
Gold Ring
Gold Leg-Plate
Hugin and Munin
Brunhild
Fenrir's Bite
North Wind
Valkyrie Helmet
Valkyrie Armor
Platinum Ring
Valkyrie Flare
Hresvelgr
Valhalla
Draupnir
Urdarbrunnr
Black Peach
Sable Breastplate
Black Needles
Sable Shanks
Nanban Peach
Nanman Breastplate
White Needles
Iron Shanks
Golden Peach
Gold Breastplate
Gold Needles
Gold Shanks
Shadow Matrix
Polar Night
Sunset Meeting
Will o' the Wisp
Silver Sliver
Snow Princess
Frozen Snow
White Fox
Amaterasu
Konohana
Tsukuyomi
Lifeblood
Night Veil
Twilight Raks Sharki
New Moon
Shadow Step
Dancer's Veil
Raks Sharki
Dancer's Bracer
Dancer's Leg
Shining Veil
Maiden's Raks Sharki
Tiamat Guard
Maiden's Leg

So... how do you get them all?

Method #1 is the Merchant in both the Hundred Years' War and Nightmare Campaigns.
As you go through the Campaigns, you should be buying at least a few copies of every piece of armour you see, regardless of gender. If you're an achievement-hunter or 100%-completionist then this sort of thing should come naturally to you, but if you weren't doing it all along, you could have some trouble. Anyway, his stock changes a bit after each battle, and upgrades with each of the Major Story Battles (the ones that raise your Fame level)... so by post-game you should be able to buy everything he has for sale eventually (while grinding out those S Grade Special Battles, most likely).

Method #2 is loot drops during Battles. Again, the super long Special Battles are your friend here, and you should have been grabbing EVERY CHEST you saw drop... or at least the rare Red Chests. Take note as well that if you're online, you can find other players' Stationed Mercenaries in large Cities, near Gates, and randomly about the place in the Nightmare Campaign.

Method #3 is something I last mentioned right back near the start: The Station option in Edit Mode... Send out two of your Mercenaries and they can gather money and items passively while you're not playing the game... for varying amounts of time from 1 Hour up to 3 Days, real-time.
You also have to send them with an item, which dictates what level your Mercenary spawns at. The rarer the item, the higher the level, and the higher the chances that your Mercenary returns home undefeated. BUT if you're a nice player, you should always Station your Mercs with armour (not weapons) so you can help other players get these horrible achievements. Better yet, don't just dump armour you have 99 copies of due to every other Stationed Merc out there giving you copies. Try to give them less common ones you only have a few of, so every time someone beats your Mercenary, they can get multiple copies of that equipment, and use it on their Stationed Mercs in turn. Spread the gear.
ANYWAY... when your Mercenaries return from being Stationed, they get a random amount (scaled by the time they were away) of random rarity random loot that doesn't have much of anything to do with who or what they fought while Stationed. So you have to keep sending them out in the hopes they'll bring back things you don't have yet.
Also it was possible to cheat the Station system on the console versions of the game, but it is a bit tougher on PC. Anyway, I couldn't be bothered.

HOPEFULLY when you've got all the Male Armour or all the Female Armour (you need it all at the same time, as simply having owned it isn't enough), it'll proc the related achievement. If it doesn't, you might have to start selling and rebuying stacks of armour from the Merchant in the hopes of trying to push the cheevo through... or else SAM it if it absolutely isn't working.


Obviously the Bladestorm Achievement is for getting all Achievements in Bladestorm. This one can get bugged too. Just warning you now.

In any case... that is the end of the achievements... I think. I don't think I missed any.
... A Little Lesson in Trickery.
This one's going down in History... and possibly Fantasy.

Anyway...
You may have noticed at a few points in this guide that I had... for instance... 50 Mongolian Mounted Archers at once... or apparently took 1 Minute to complete a Battle.

I play about with Cheat Engine a lot.

Now see, I can't go sharing my tables with you. I'm not THAT good with Cheat Engine, and I'm not going to make it THAT easy for you... but... this game makes at least some things pretty easy.

I mean for instance.... if you got hold of the address Launch_EA.exe+16D9788 ... that's right, no Pointers for this one... just
Launch_EA.exe+16D9788 ... of type 2 Bytes ...

You might notice that it corresponds to the Time portion of your Battle Grade. And funnily enough, the subsequent 2 Byte portions of the code might correspond to other aspects of your grade...

Launch_EA.exe+16D978A might be Total Kills
Launch_EA.exe+16D978C might be Officer Kills
Launch_EA.exe+16D978E might be Small Bases
Launch_EA.exe+16D9790 might be Medium Bases
Launch_EA.exe+16D9792 might be Large Bases

So it could be... though it might not be... that you could gain a handy shortcut to all those annoying S Grades you want... by changing these numbers.

And since I'm feeling generous, I might well reveal another secret to you...
There may be something interesting at Launch_EA.exe+CB3380 (4 Bytes) ... which starts at 0 and works its way up to 36000 over the course of a day.
And there may also be something more interesting right next to it at Launch_EA.exe+CB3384 (also 4 Bytes) ... which goes up to 36001 over the course of a day, then keeps going up over subsequent days...

... and it got me thinking...
WHAT IF... you were doing Special Battles.... and you had all those nice Grade Values locked to high numbers (except the timer, which doesn't matter for Specials) ...
... and then on the preparation screen you just...
changed Launch_EA.exe+CB3380 to 35900 ... aaaand...
changed Launch_EA.exe+CB3384 to 1799004???


Well, you'll have to find out for yourself what that does.
Funny thing is there are a LOT of simple addresses in this game that don't require pointers at all. Things like the numbers of different items... including Pennans and hired Squads (which is why those numbers mysteriously never drop below 9 in any screenshot).

I'm not going to tell you how to get 50 Mongolian Mounted Archers in a squad though.
That one DOES require a pointer.
Only a one-offset pointer, but I still can't be ar$ed to tell you.


24 条留言
Morrigan 7 月 15 日 下午 8:54 
Do you know how to get xbox controller button prompts working for the game? I'm using an Xbox One controller, and it's not registering, and I'm not sure how to get it to work.
Matimus Prime 6 月 25 日 上午 9:54 
Sir, you are a gentleman and a legend
에베라겔 4 月 27 日 上午 10:47 
My squad only has 2 people. How can I increase it to 4 people in story mode?
Assume I have 400 Ping 3 月 1 日 上午 7:56 
Ok so I got a third merc and levelled to the 75-80 range and can confirm with a ASSS (Not an ass) that you can S rank the mission without bothering about the request in free play.

That should make all replays actually fairly easy later in the game.
If you mess up early, just focus on campaign and get your rank up.
Assume I have 400 Ping 2 月 22 日 上午 9:54 
Can you get an S rank if you just ignore the request in free play?
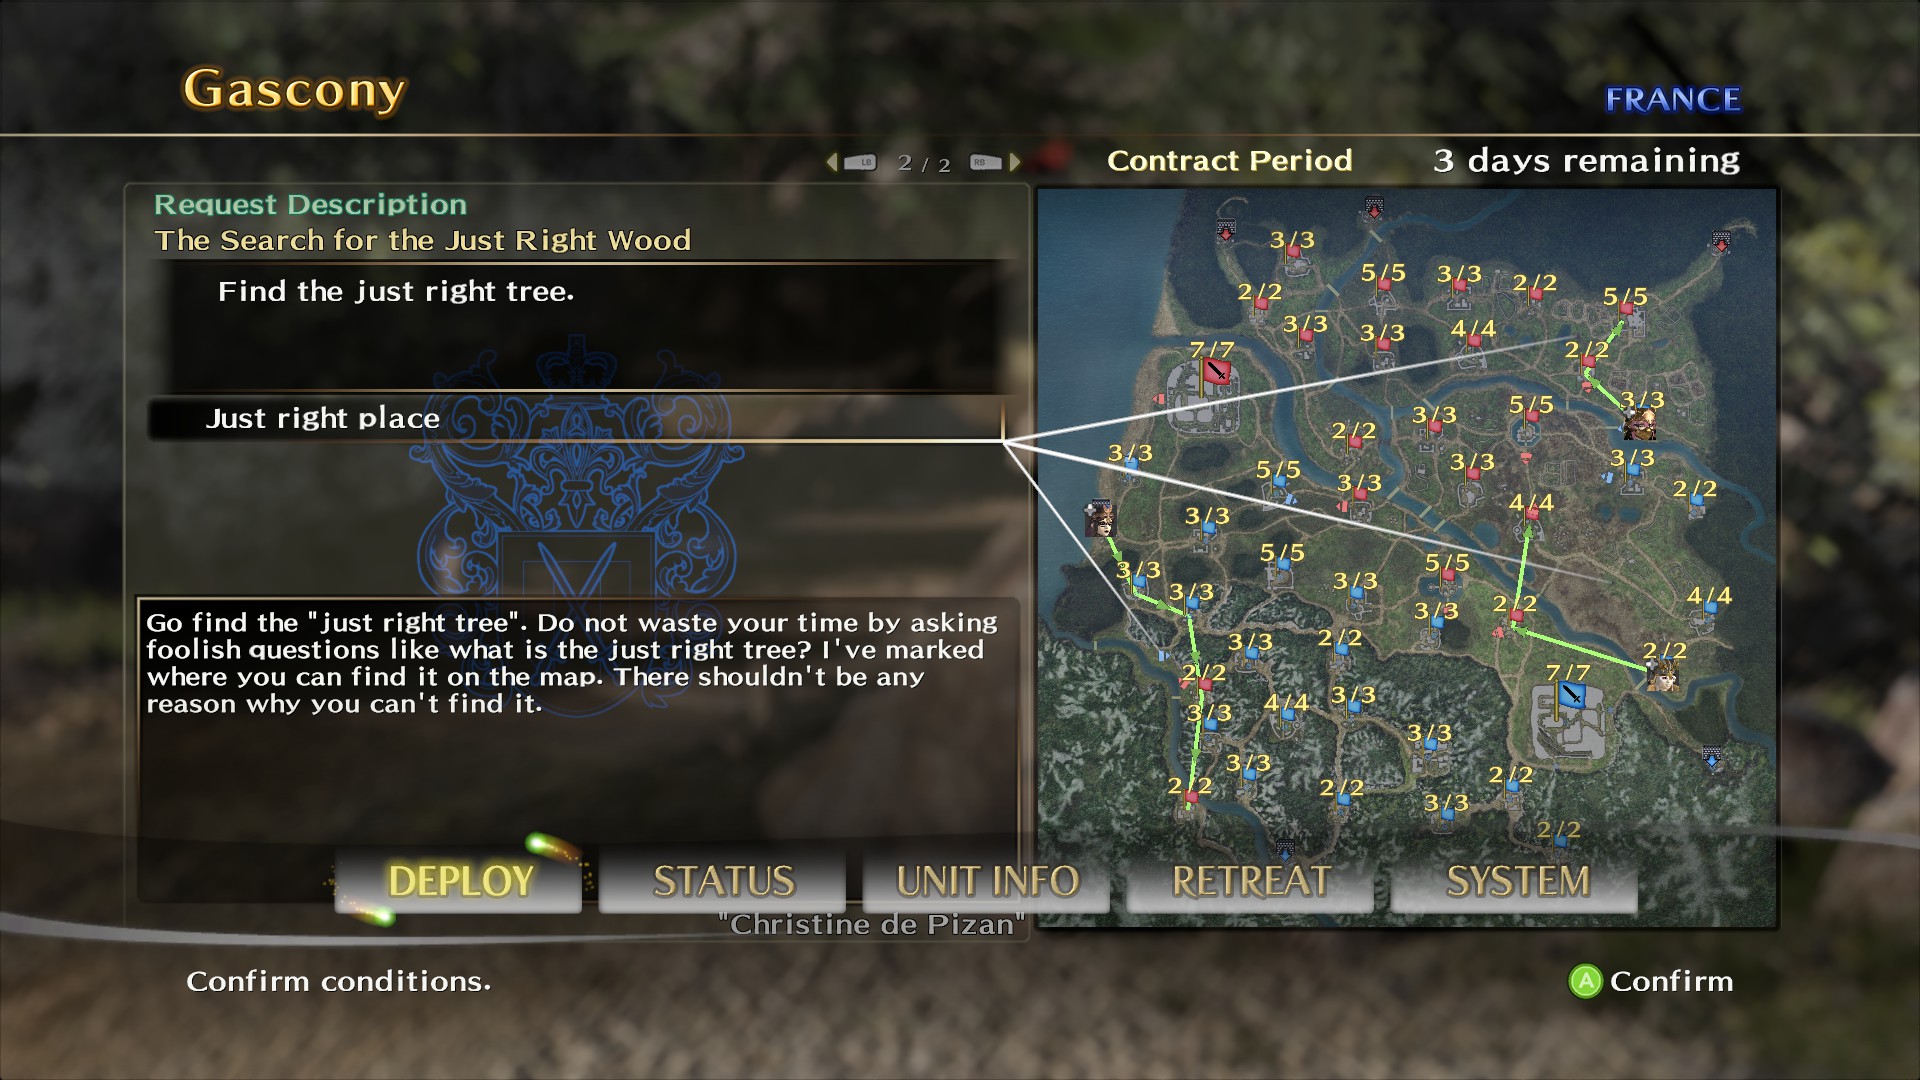
You can't ignore the request in story mode as it'll fail the sub-plot line but who's the say we care about that in free play?

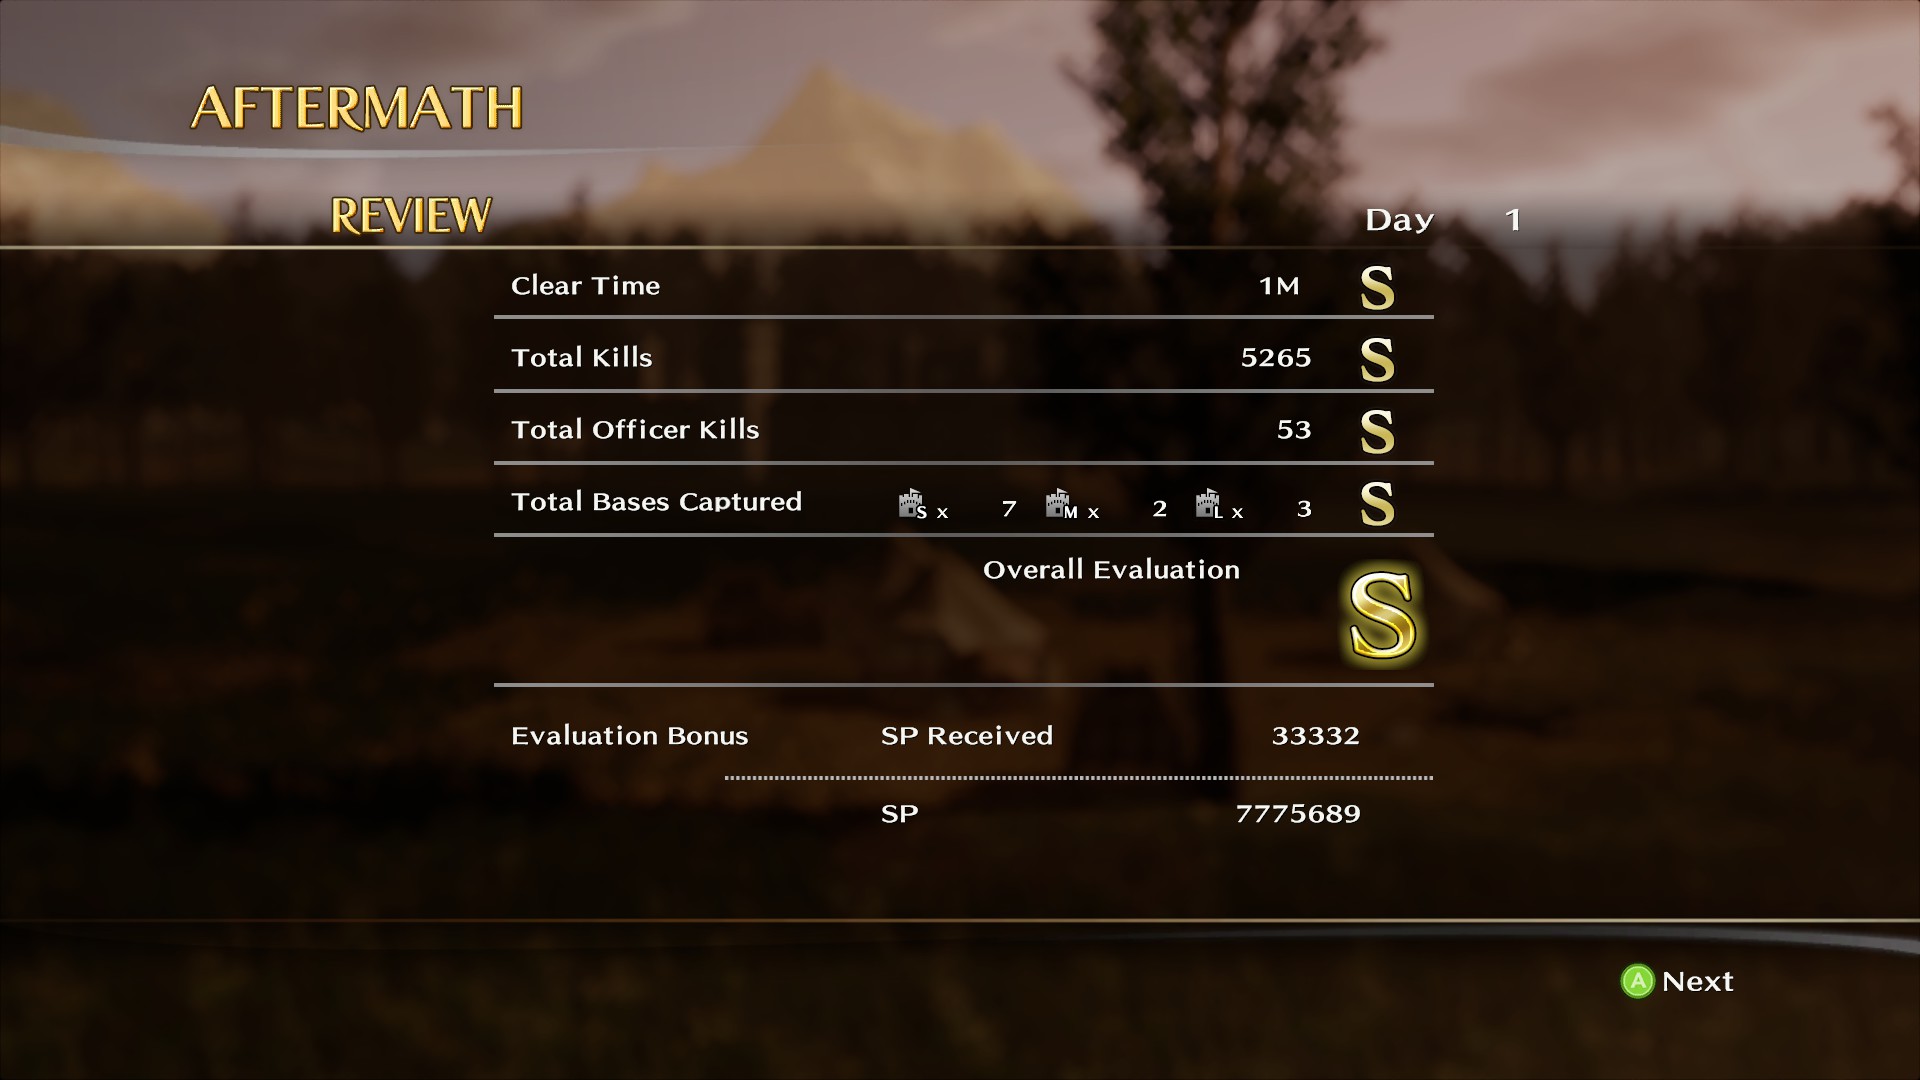
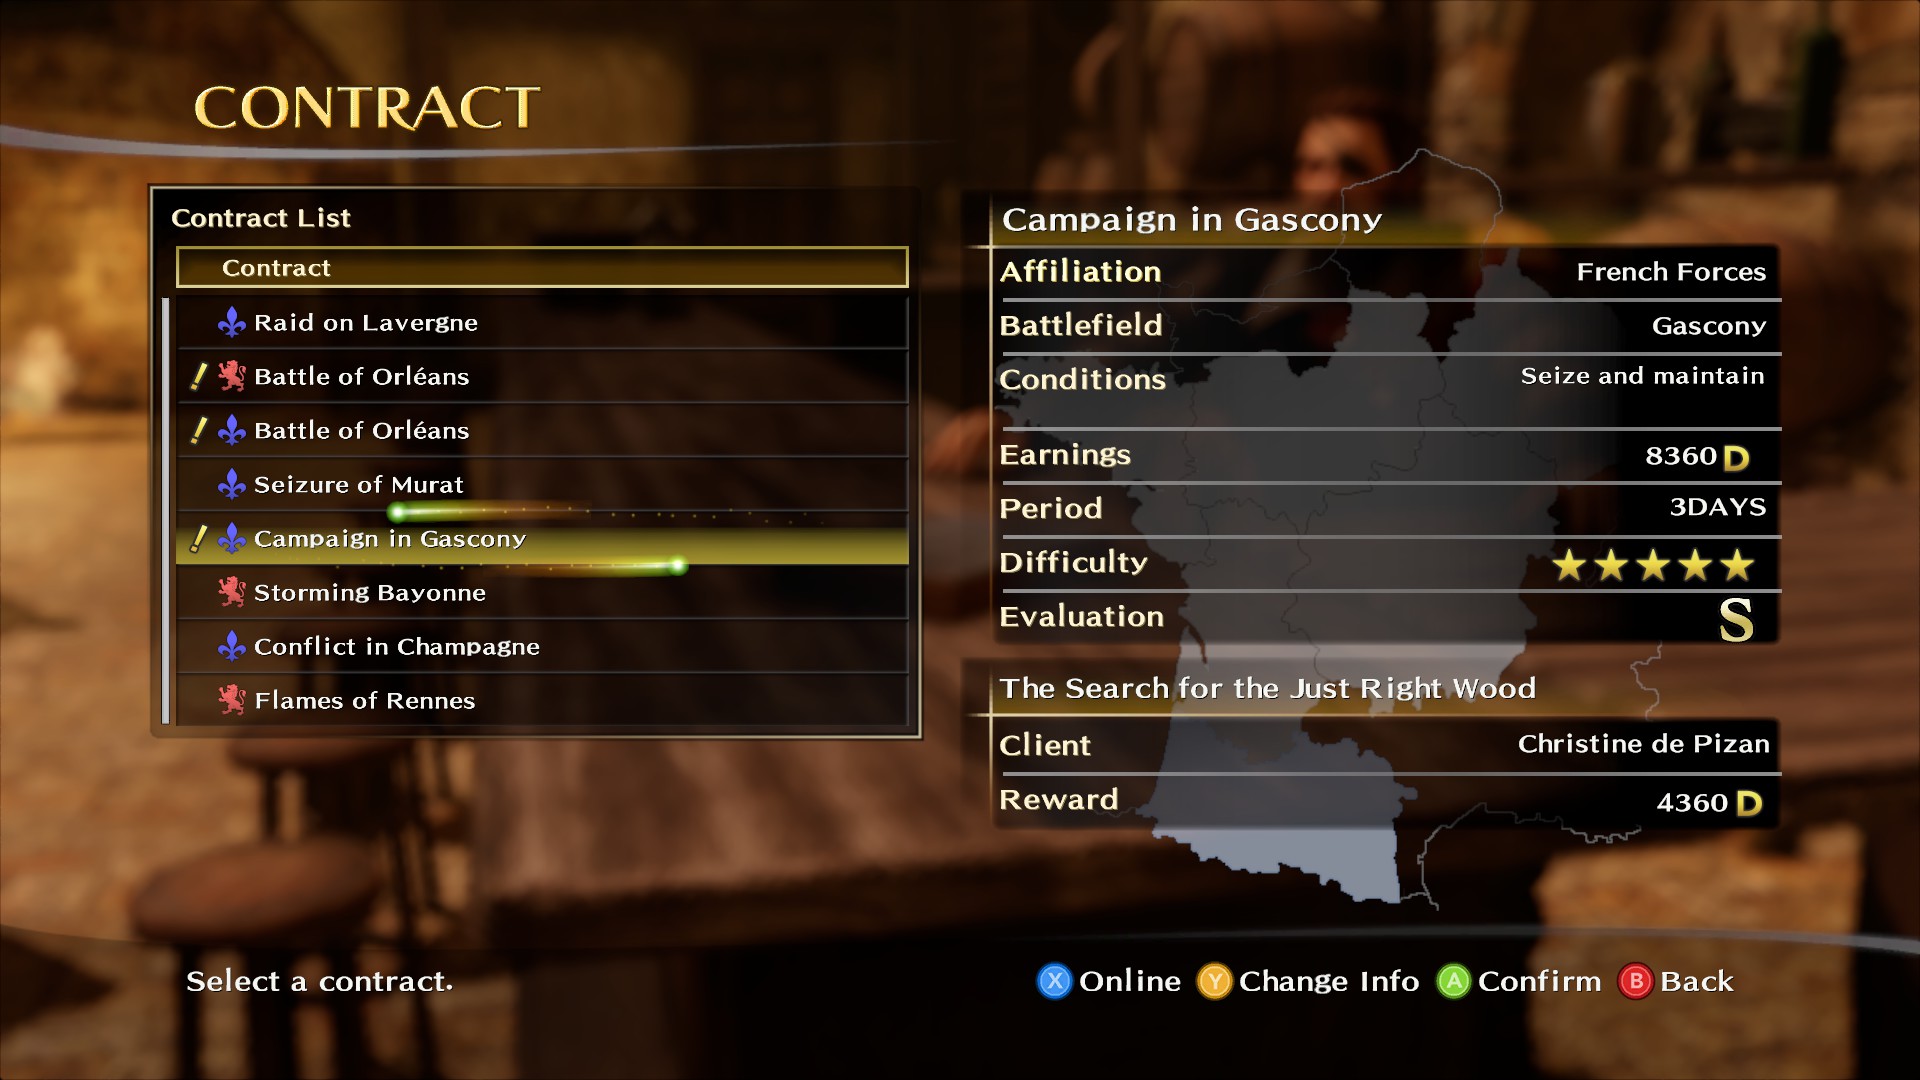
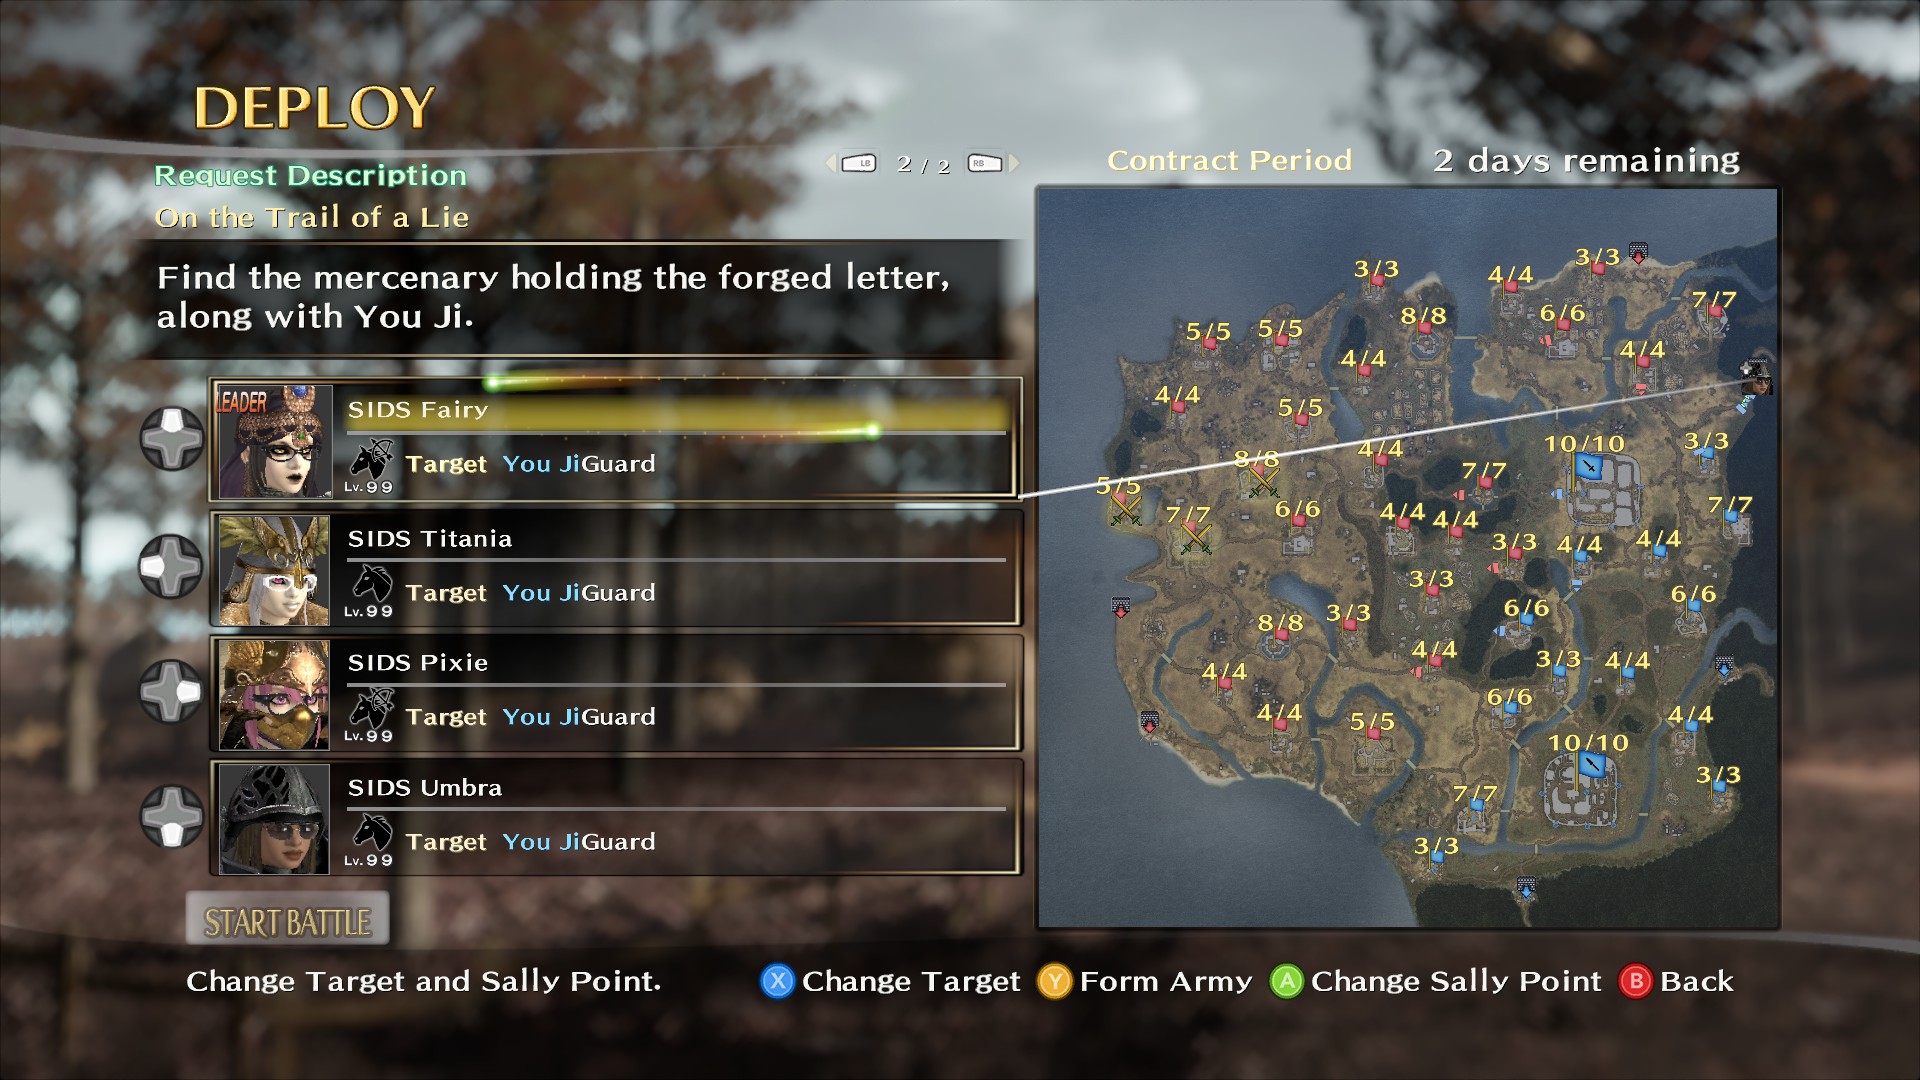
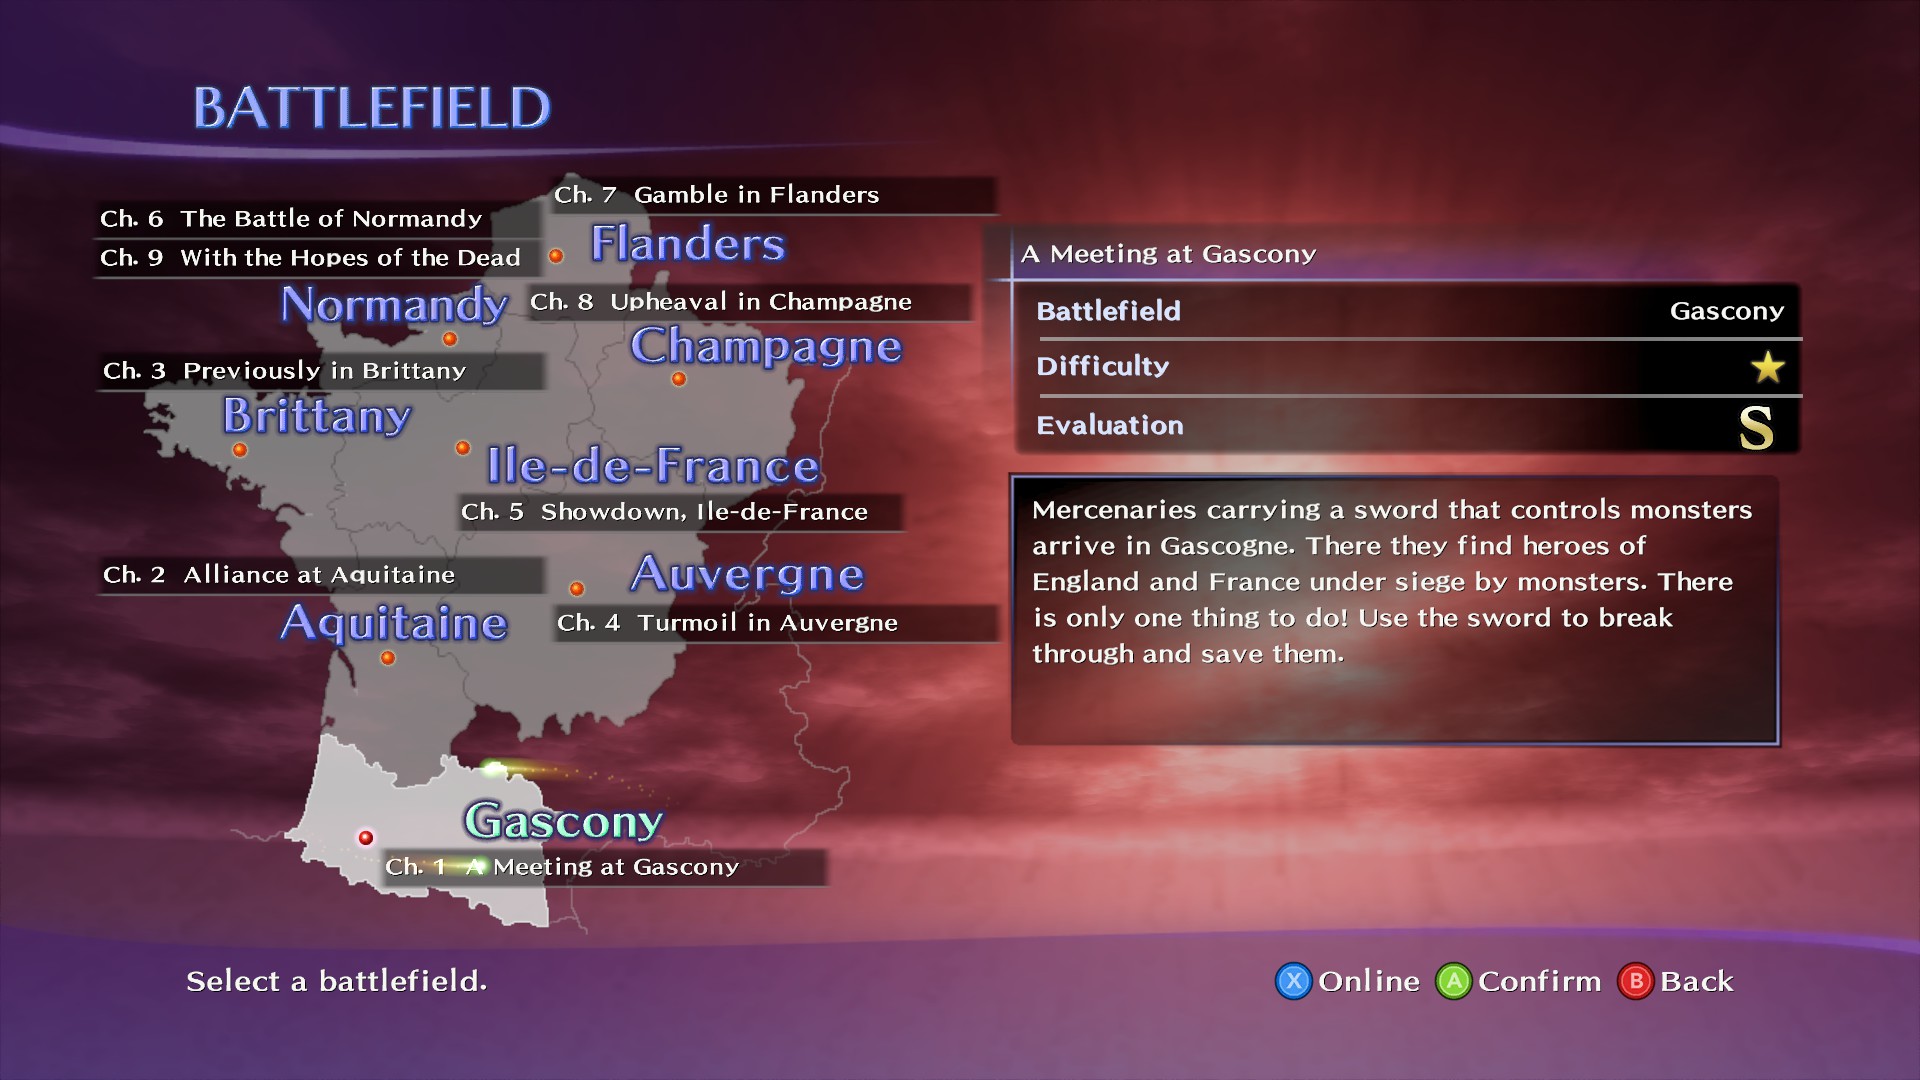
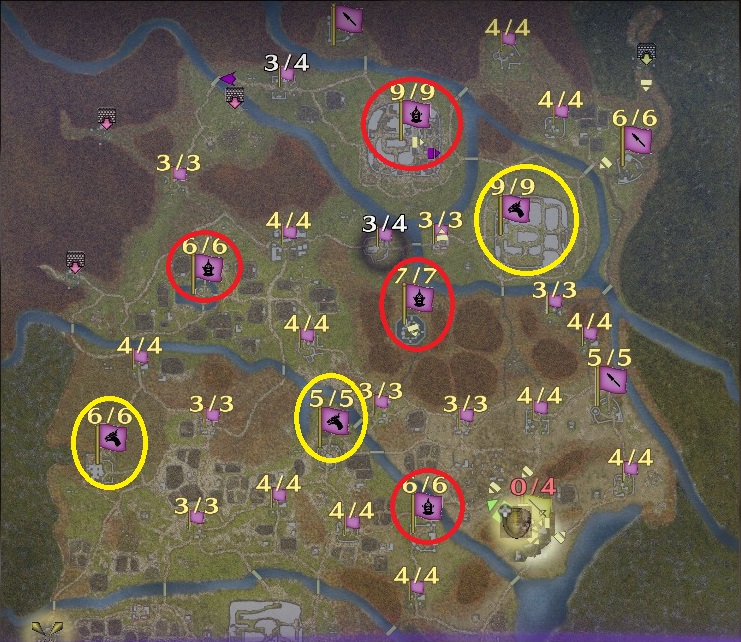
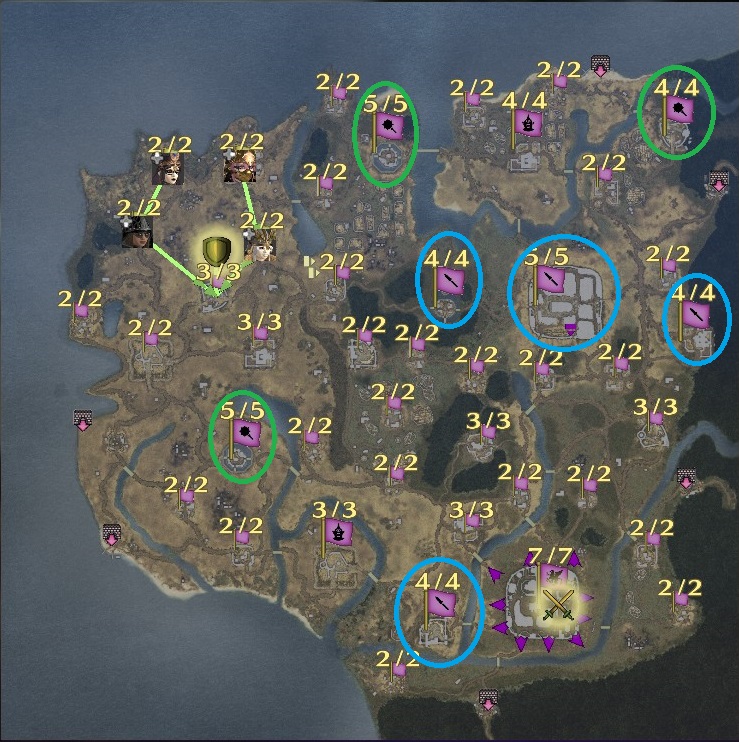
For example, there's a merchant escort quest. 2 Day Time Limit. I got an A rank in campaign...

To get ASSS you need to win within 8 minutes, kill 1600+ plus, kill 14 officers and 14 bases.

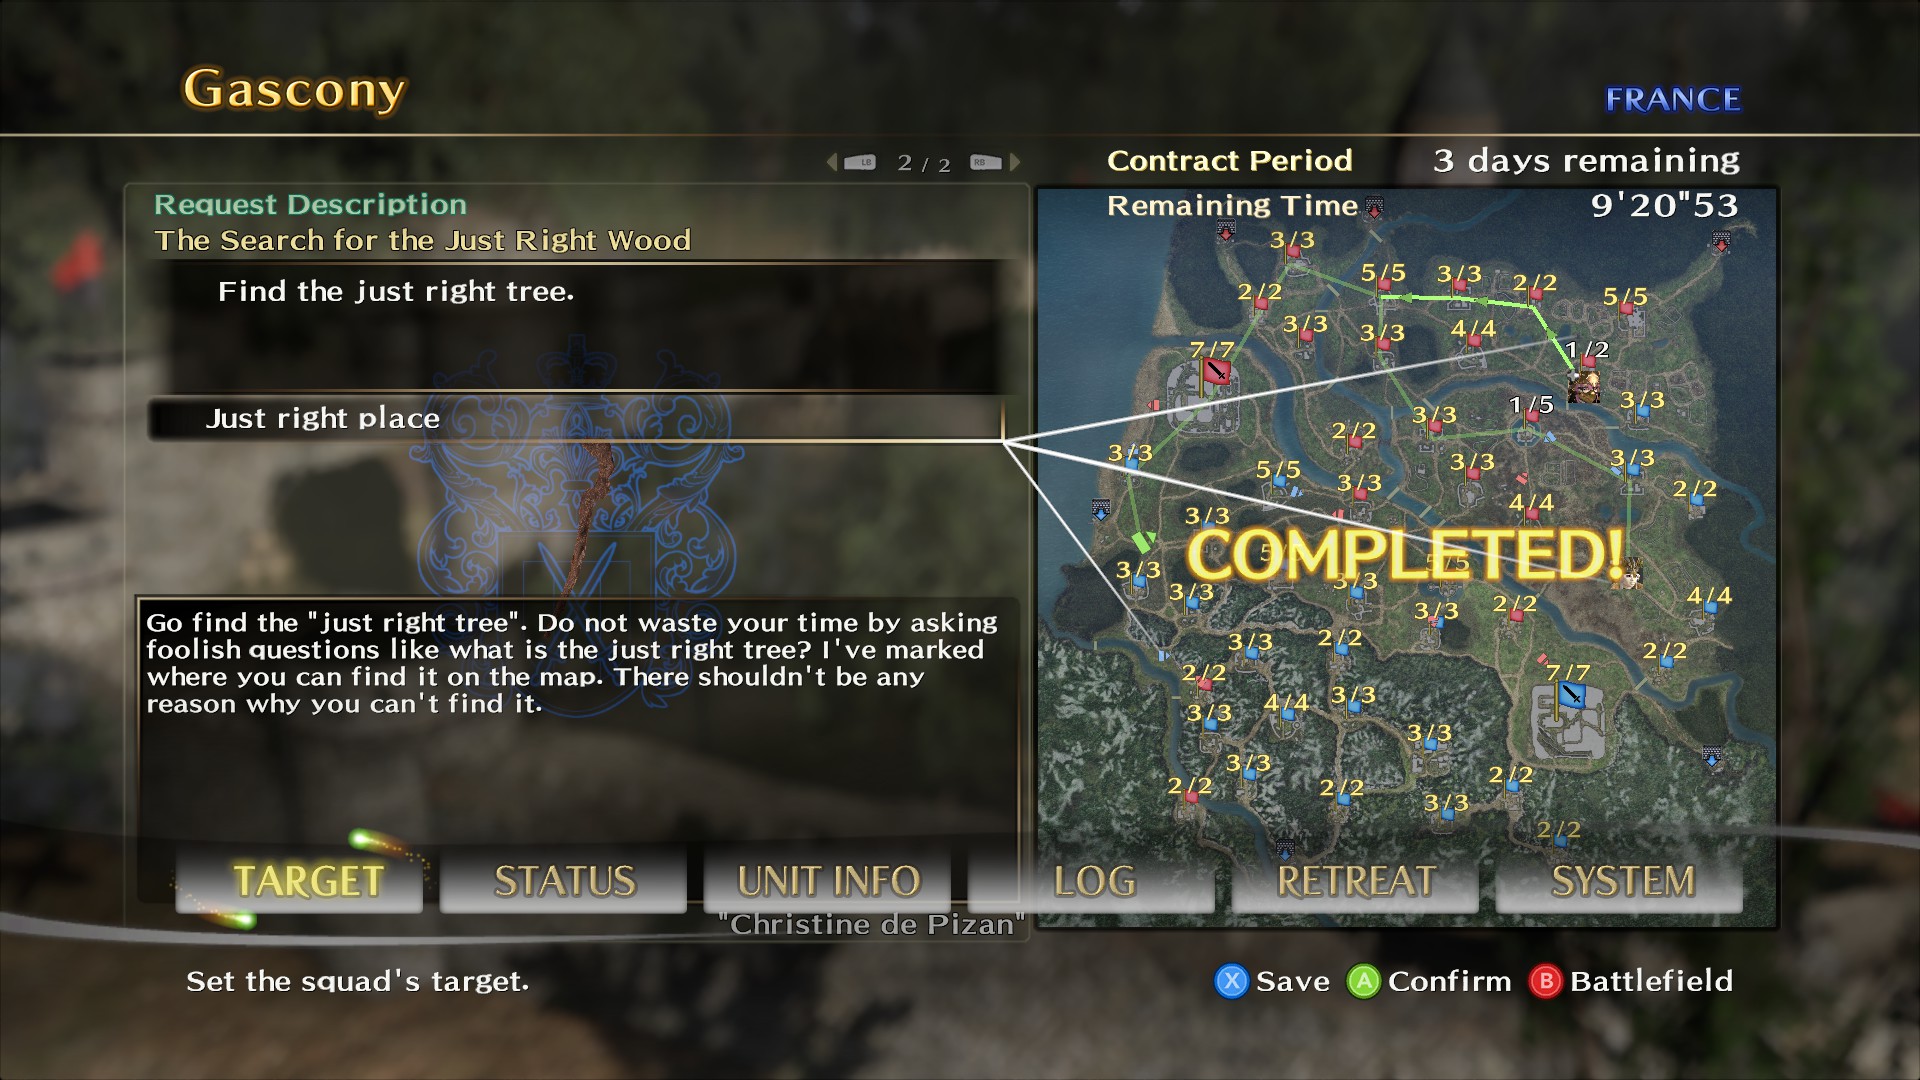
Best I got was BSSS with 9 minute clear time and it was still an A by abandoning quest.
I thought BSSS was an S still, does it round down?

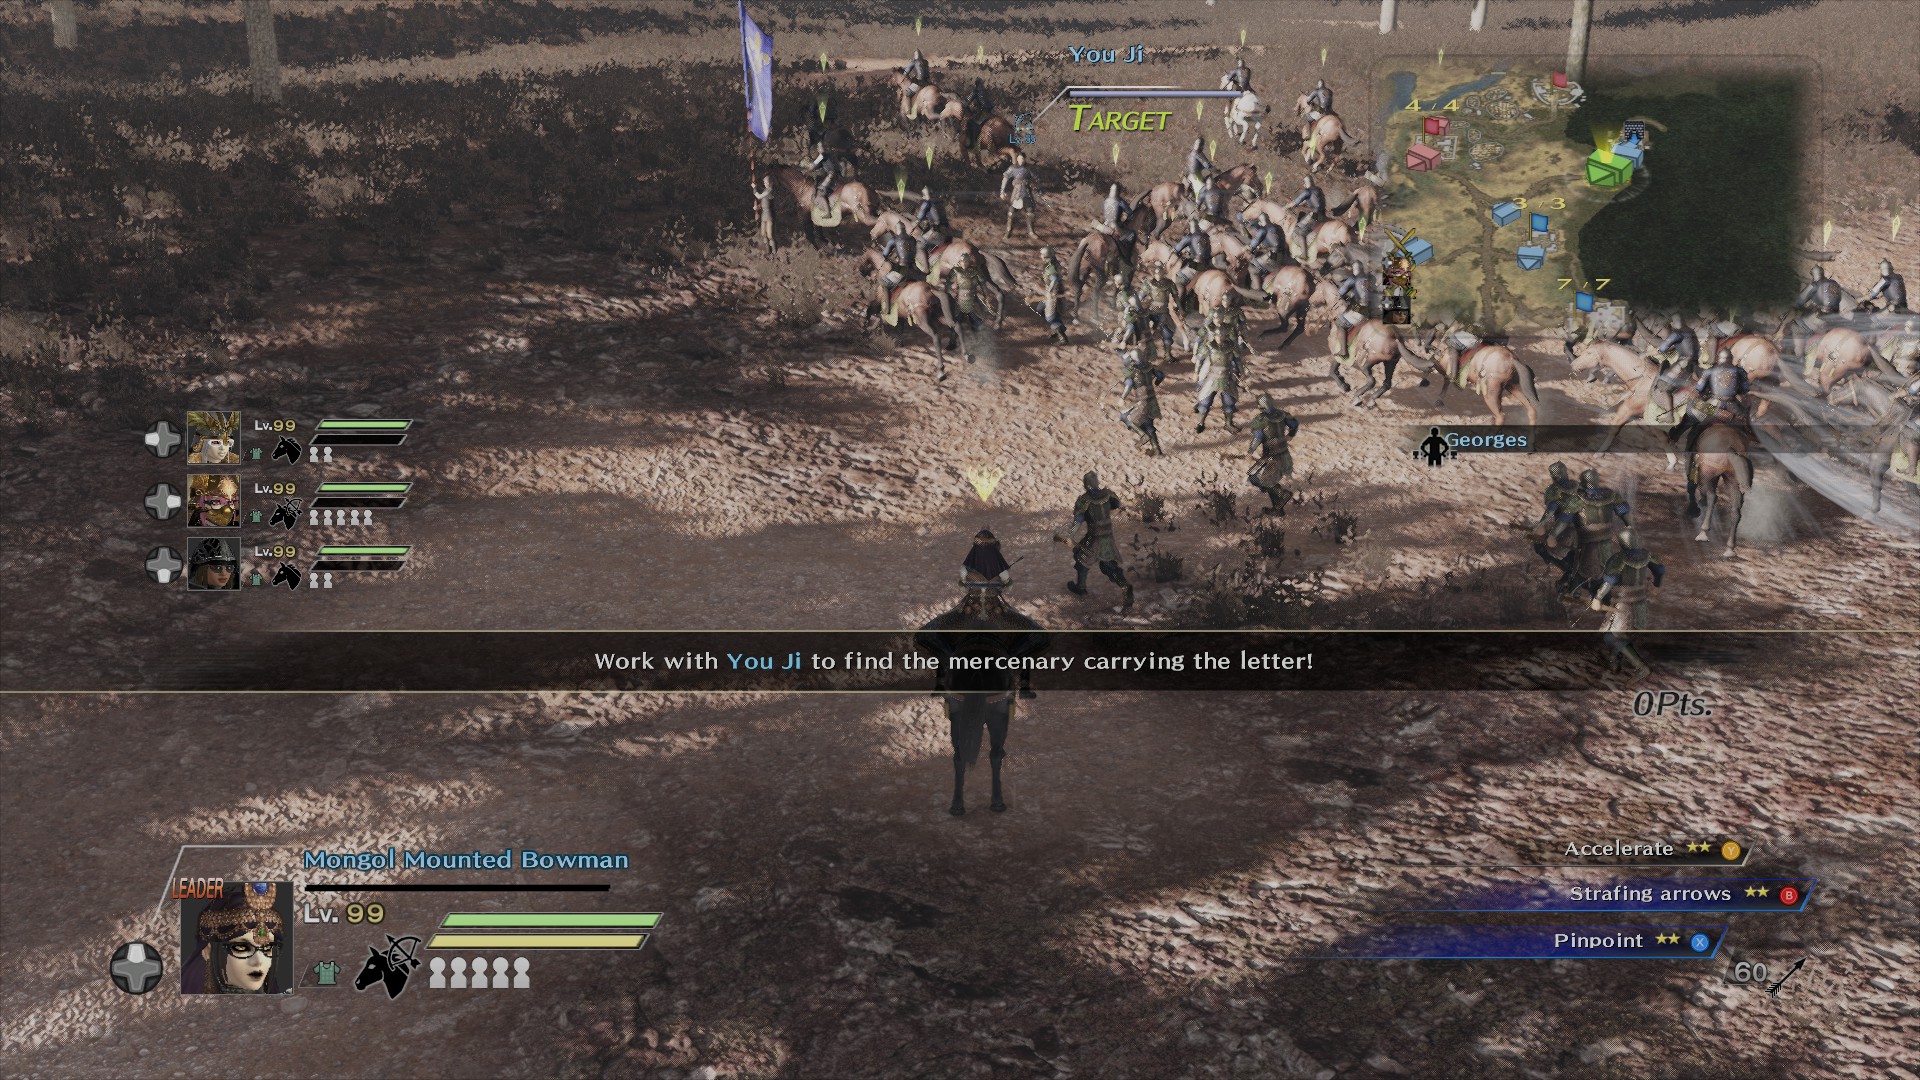
It's not impossible, I don't think. I only have 2 slots right now and neither me or my mercenaries are 99. It would be a breeze if it was since I could switch between and get the 15 easily and speed run the objective. Just curious is all if I need to do the quest because if so i'll need more than 2 slots I think.
AAAron 2 月 2 日 上午 11:01 
Bro damn how increase squad size ? :D
Mou bu 2024 年 12 月 29 日 上午 8:57 
Thanks for the guide!
PaulBr 2024 年 12 月 12 日 下午 1:02 
Thanks for the guide man, can always use more tips for this game.
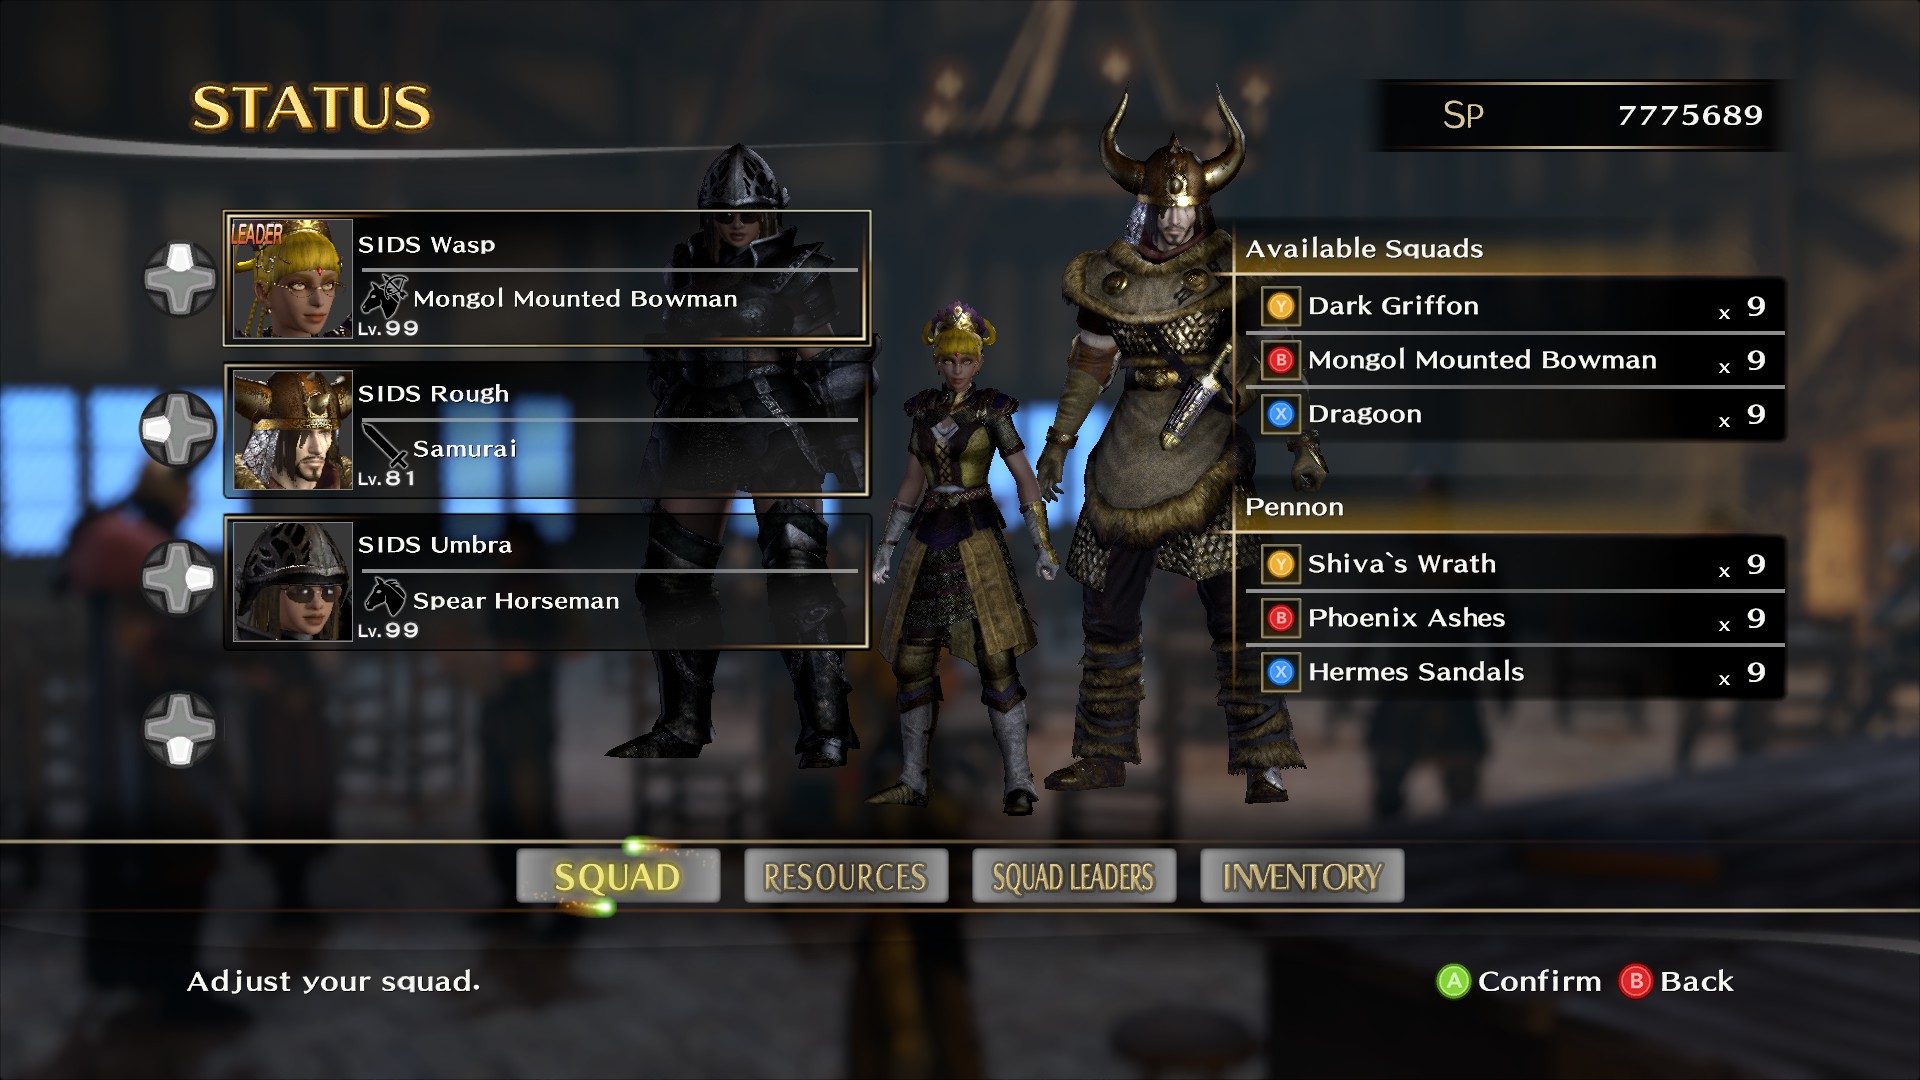
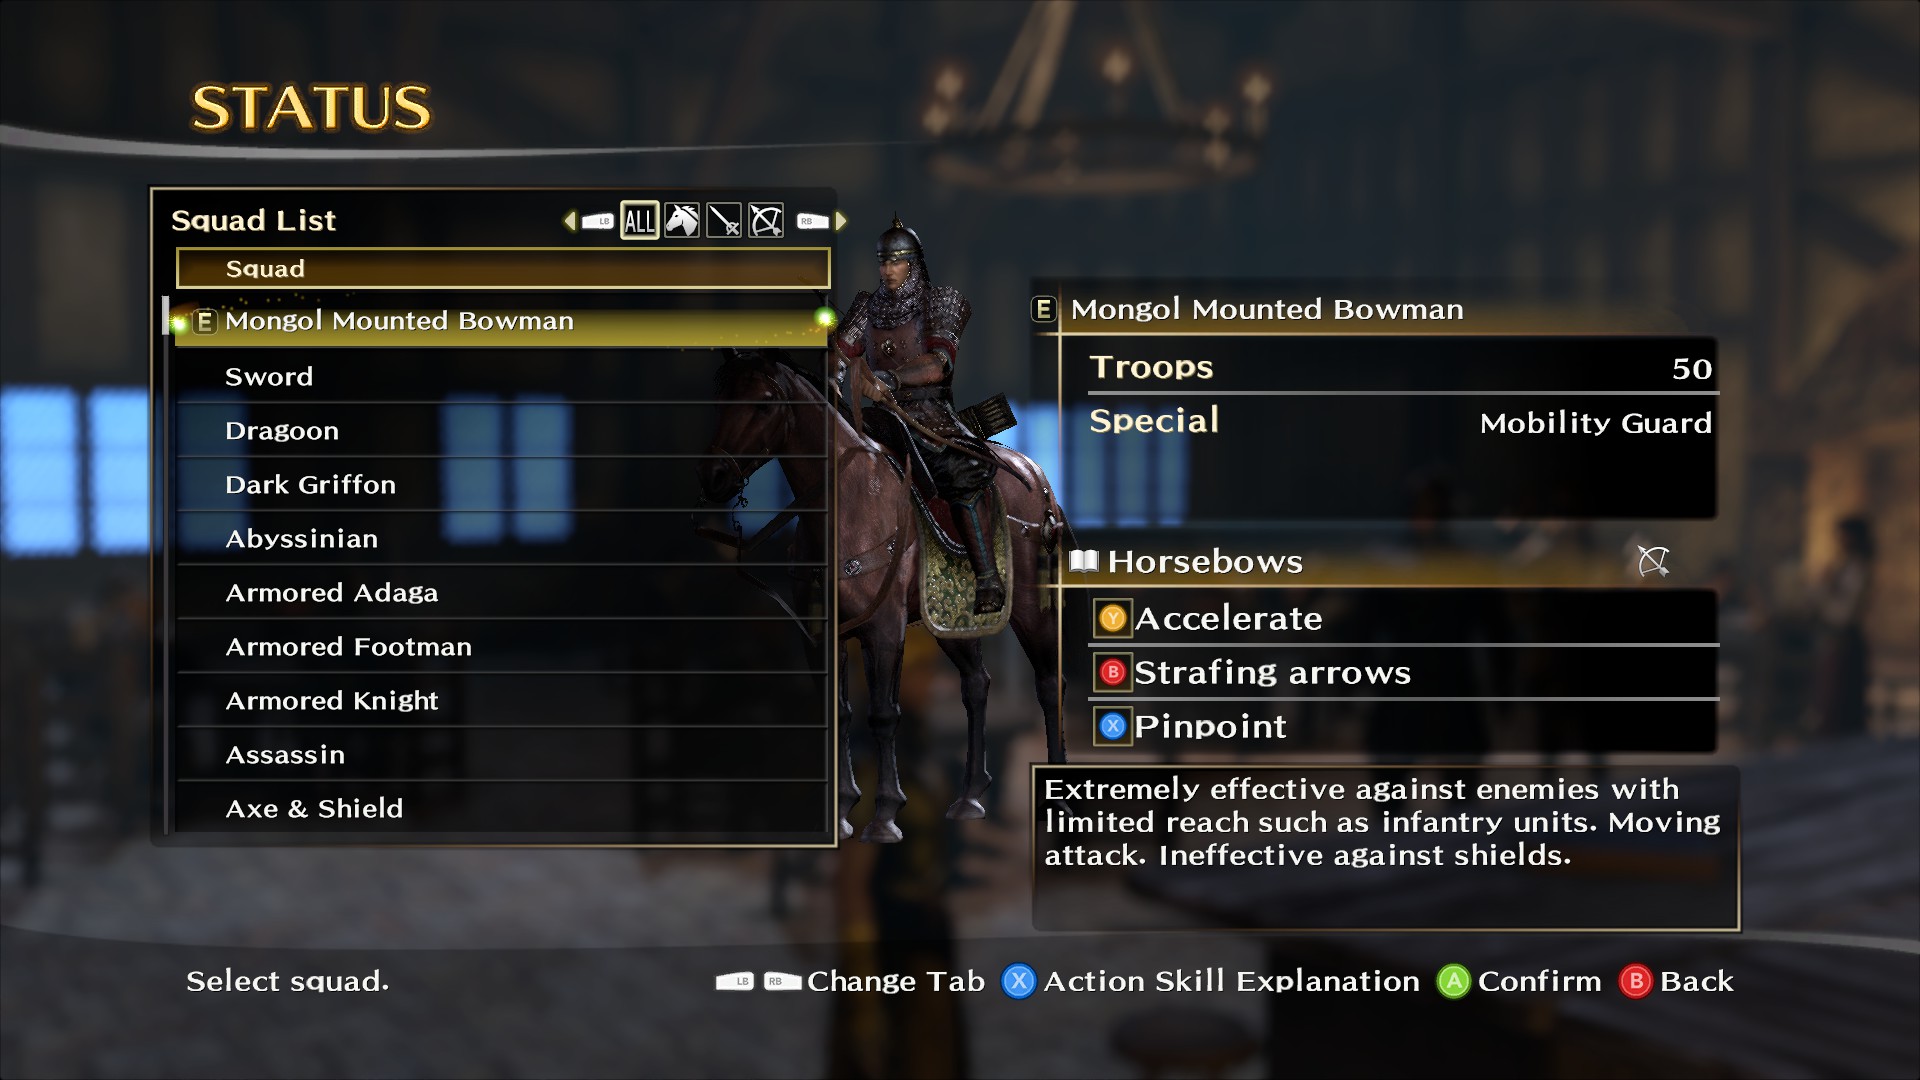
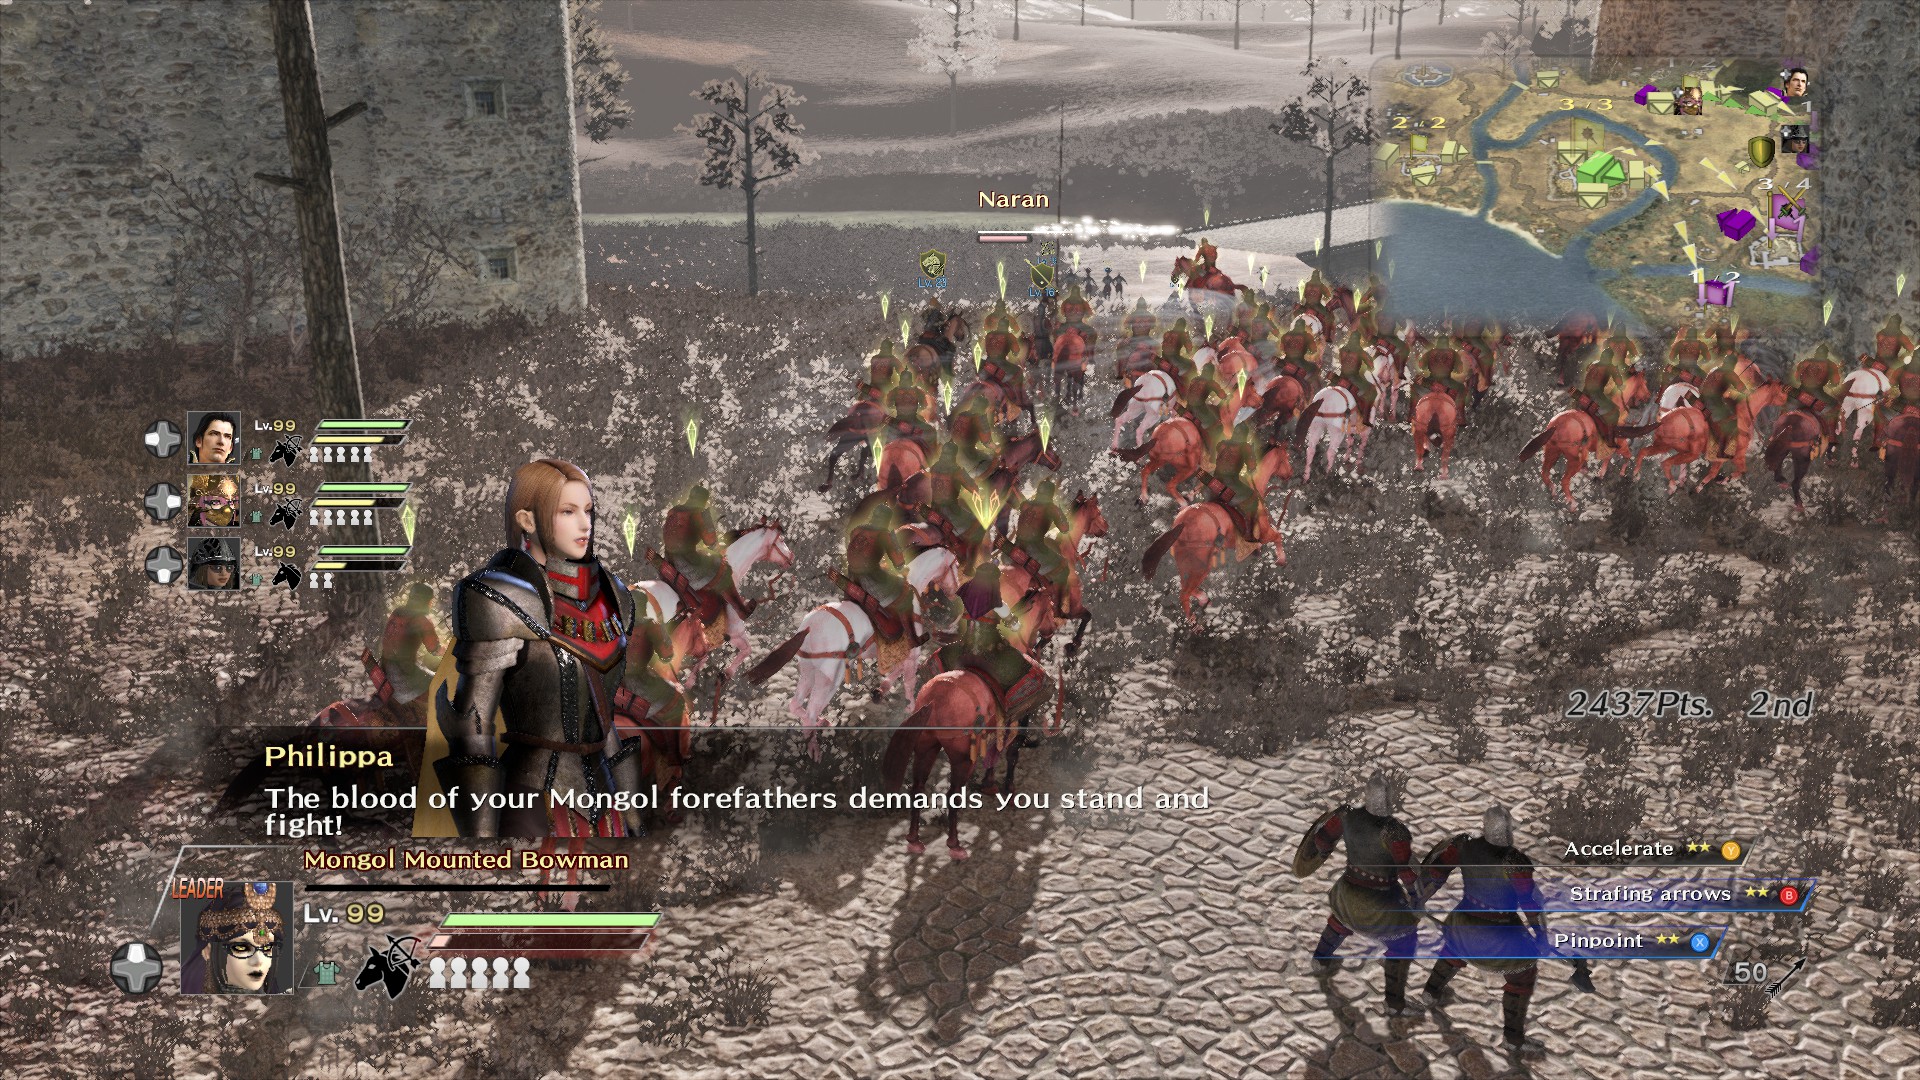
I'll say it now, as a recommended squad, for me it has been any Spear squad that can throw javelins, horse squad running to you? Javelin them, they're all dead now, squad that has advantage against your spears? Javelin, dead.
I've yet to find a squad that cannot be taken down by the javelin throw.
Mike Langlois 2024 年 11 月 20 日 下午 4:29 
I just wanna say thanks for this guide. I played the original and now working through this. Is there some way in game to see if Battlefield Hunter has been completed and the bonus given?