Act of Aggression

Act of Aggression

31 个评价
Cartel Instructional Guide
由 Viper Actual 制作
An introduction to the Cartel...
   
奖励
收藏
已收藏
取消收藏
01 - Introduction


Welcome to the Cartel, Commander!

As per company standard, all commanding officers in charge of military assets are to be given this instructional guide to aid them during both offensive and defensive operations.

The board frowns upon loss of company assets and as such it is recommended that you read this guide as it will surely help you gain a better view of our forces.
02 - Structures
The backbone of any Cartel commander is his or her base, without one it's near-impossible to run a proper operation.

As per company standard, military commanders have full access to both the Private Military and Black Ops branches, allowing you to field even the most experimental of units and structures.


Structure #01 - HQ:
Info: The HQ is the seat from which every cartel commander directs his forces.
From here you will build the rest of your base step-by-step while also developing powerful upgrades that will aid your military efforts.


(Refinery, Standard & Refinery with REM Module)
Structure #02 - Refinery:
Info: Without a refinery you have no hope of running a operation as they provide the neccessary resources to field units.

Cartel refineries have the added bonus of relying on the unmanned K-MAX helicopter for resource transportation, allowing commanders to build their refineries at great distance without gaining extra transport time.

Can be upgraded with cloaking and REM module.


Structure #03 - Extension Module:
Info: Used by cartel forces to both store resources and expand their base, the Extension Module or EM can operate with minimum maintenance as the robotic storing system automatically receives and organizes incoming resources delivered via air allowing commanders to focus on other matters.


(Barracks, Standard & Barracks with Prison Module)
Structure #04 - Barracks:
Info: Cartel Barracks are spartanic yet comfortable, at least that's what the recruitment broschure says.
Capable of housing mercenaries employed by commanders, the barracks can be modified to include a Prison Module capable of hosuing up to five POWs.

Using company attorneys, commanders can then choose to release POWs making them receive a steady stream om Aluminium.
(Don't ask how that works, our lawyers are just that good.)


Structure #05 - Vehicle Bay:
Info: Cartel commanders may choose to construct a Vehicle Bay, allowing them to field six basic vehicular units.


Structure #06 - Repair Center:
Info: Required to be built next to a Vehicle Bay, the Repair Center is capable of improving the basic Cartel vehicles while also having the ability to deploy mobile repair vehicles.


Structure #07 - Artillery Turret:
Info: Long-range artillery station effective against infantry and light vehicles, for safety reasons it can only be built next to a select few structures.

Can be modified to have increased range.


Structure #08 - Railgun Turret:
Info: Like the Artillery Turret, the Railgun Turret is required to be constructed next to a small selection of other cartel structures.

Can be upgraded with its own generator, allowing to remian operational should the general powersupply suddenly go offline.


Structure #09 - Tokamak Generator:
Info: The pinnacle of clean energy, the Tokamak allows Cartel commanders to have enough power for a large base or a smaller city.

Beware though, the technology used is highly volatile and any disruptions caused by gunfire or explosive ordnance is enough to destablize the generator. Avoid at all cost.


Structure #10 - Prototypes Bay:
Info: Used by the Cartel to field the more experimental prototype units, the Prototypes Bay can deploy several highly advanced vehicles.


Structure #11 - Helipad:
Info: Deploys and upgrades heliborne aircraft. Also used by members of the board during official and inofficial visits & inspections.


Structure #1 - Air Control Center:
Info: Cartel relies on the ACC for both deploying and detecting incoming high-altitude aircraft such as jet fighters and bombers.


Structure #1 - Stealth Lab:
Info: The Stealth Lab grants commanders access to various research projects that improves two, if not more, units.
03 - Ground Units
Cartel ground forces include a variety of mercenaries, repurposed military vehicles and dangerous prototypes.


Unit #01 - Contractor:
Info: Contractors are basic infantry units employed by the Cartel. Armed with Kriss Vector SMGs these soldiers will follow your every command as long as you make sure to keep their pockets filled.

Contractors can undergo extensive PsyOps training, allowing them to charge and seize vehicles occupied by the enemy.


Unit #02 - Viper:
Info: Using modernized M72 LAWs, these units will provide local AT-support to your forces.
Keep in mind that Vipers are more effective in short to medium-range battles.


Unit #03 - Grinch:
Info: Armed with the deadly IGLA-S, these soldiers will keep the skies clears as the rest of your forces push on.

Firing a particularly fast rocket, it is recommended to deploy these units in pairs as to counter enemy decoys.


Unit #04 - Shershen:
Info: A two-man team armed with a portable heavy rocket launcher, the Shershen units excel in taking out vehicles.
With a relatively long range, their only weakness is their lack to effectively counter charging infantry and enemy aircraft.

Several commanders have improved their Shershen units by adding a secondary rocket tube, increasing rate of fire.


Unit #05 - Punisher:
Info: The ironically named Punisher will heal friendly infantry on the field while punishing any enemies they come across.

Armed with a fast-firing grenade launcher, Punisher units are effective in short to mid-range battles.


Unit #06 - Vanguard:
Info: Equipped with the very best in personal cloaking, the Vanguard is a elite commando unit used by the Cartel to infilitrate enemy bases and to tackle infantry units unseen.

Capable of capturing both structures and enemy vehicles.


Unit #07 - Scorpio Light Tank:
Info: This lightly armored and very fast tank is capable of dishing out large amounts of damage with its railgun.

Commonly used by Cartel commanders to blitz enemy positions alongside Otomatics, this tank can outmaneuver the enemy before they even scramble to defend.

Can be outfitted with cloaking.


Unit #08 - Otomatic Mobile AA Gun:
Info: Like the Scorpio, this lightly armored and fast vehicle can be sued to blitz enemy positions however unlike the Scorpio the Otomatic is used to counter both enemy infantry and aircraft with its powerful flakgun.

Upgrades include updated weapons software, allowing the Otomatic to eliminate incoming aerial ordnance such as rockets making them good for defending bases and armies alike.


Unit #09 - Jackal Recon Vehicle:
Info: This repurposed British scout vehicle is used by Cartel commanders to snipe enemy infantry with its PHASR railgun.

Many commanders rely on this light and nimble vehicle for dealing with garrisoned forces, eliminating them while staying out of harm's way.

Can transport up to two soldiers and detect stealthed units.


Unit #10 - Amos:
Info: The Amos mortar carrier uses a double-barrel gun to fire away two mortar shells which then split into dozens of smaller shells.

Incredibly useful for countering enemy infantry and structures, the Amos can be refitted to fill a AT role instead (sacrificing its ability to destroy buildings).

As the Amos is very fast and relatively cheap, it can be used alongside Scorpios and Otomatics with great effect.


Unit #11 - Scout CGS:
Info: A fast armored car equipped with a cloaking device and a dual HMG, the Scout CGS (Cadillac Cage Scout) is used by the Cartel for reconnaisance and infilitration missions.

Some commanders are known for replacing the dual HMG with a flamethrower at the cost of range and the ability to remain cloaked but with added damage against garrisoned forces in particular.

Can transport up to four soldiers.


Unit #12 - Vextra APC:
Info: The Vextra is a extremely fast APC capable of outrunning even the fastest of aircraft.
Capable of transporting up to eight soldiers, the Vextra focuses more on fast transportation rather than fighting off the enemy.

Cartel commanders have used the Vextra to great effect in rapid assaults, transporting groups of infantry in and out of enemy territory in a moment's notice.


Unit #13 - Spectre:
Info: Based on the Swedish Strv 2000 design which never went into production, the Cartel procured the schematics and then modified it for their own use.

Equipped with cloaking and powerful railgun, the Spectre can easily tackle most ground units.

Upgrades include a 40mm cannon for dealing with infantry and aircraft as well as a better cloaking device, allowing the Spectre to remain cloaked while firing.


Unit #14 - Koalitsija Mobile Howitzer:
Info: This heavy howitzer is capable of erasing enemy forces from existance with ease.

While not particularly fast nor armored, the Koalitsija makes up for this more than enough with its high damage and large area of effect.


Unit #15 - LOSAT:
Info: This light drone vehicle is armed with both an LMG and a plethora of anti-tank rockets capable of shredding armored targets.

Use alongside other units for devastating results.
04 - Air & Advanced Units
Air Units


Unit #16 - K-MAX Recon:
Info: This dual-rotor unmanned & unarmed helicopter is equipped with advanced geological equipment allowing it to scout the location of resources.

While extremely fast, a few shots is all that is needed to take it out.


Unit #17 - K-MAX:
Info: Unlike its recon variant, the standard K-MAX is used by the Cartel for transpoting resources.
While just as weak as its recon variant, the board argues that the K-MAX should remain in service as it as by far more mobile than any other resource transport in the war.

Can be equipped with a cloaking system.


Unit #18 - Skycrane:
Info: This large Russian-made helicopter was used to transport large vehicles, heavy equipment and smaller buildings before it was retired.

The Cartel put it into service once more, using it to deliver construction materials and building modules.


Unit #19 - Superhind:
Info: Built by the Russians and modified by the Americans, the Superhind is a powerful attack helicopter/gunship capable of engaging enemy forces while also transporting and deploying up to ten solders.

In short, it's a real beast.


Unit #20 - Shadowhawk:
Info: Officially this helicopter never existed, should you ask the United States government.
Inofficially it did exist and was used to great effect, however, due to high development and maintenance cost it ultimately became another failed prototype.

Untill the board acquired the schematics, that is.

Equipped with a cloaking device this helicopter can transport ten combat-ready soldiers in and out without being seen.
Can be upgraded with two side-mounted GAU-19s.


Unit #21 - Comanche:
Info: Like the Shadowhawk, the Comanche was a project deemed far too pricey and far too ambitious.
The Cartel now uses it as their main attack helicopter for ambushing enemy forces.

Equipped with a cloaking device, beware though, it breaks upon engagement.


Unit #22 - X-32:
Info: Prototype light drone bomber used for engaging enemy forces, infantry in particular.
The X-32 will release a carpet of smaller bombs.

Can be equipped with AA-missiles for engaging hostile aircraft in the target location.


Unit #23 - Berkut:
Info: This Russian stelath jet is used by the Cartel to ambush enemy aircraft with its devastating arsenal of AA weapons before quickly re-cloaking.

A terrifying weapon to say the least.


Unit #24 - Valkyrie:
Info: A large bomber aircraft, the Valkyrie will literally turn any hostile forces and structures into dust.

Advanced Units


Unit #25 - Brem-80U:
Info: Used by Cartel forces to repair vehicles, both airborne and ground-based.
05 - Advanced Structures
Aside from the basic structures, all Cartel commanders also have a series of more advanced facilities at their disposal.
These include the powerful THOR Control Center, the ever-watching Skyguard and the Accelerator to name a few.


Advanced Structure #01 - THOR Control Center:
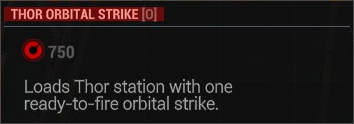
Info: Utilizing KEM (short for Kinetic Energy Missile) technology, this highly experimental uplink calls in orbital strikes on the enemies of the Cartel.

To fire the THOR, you first need to arm it with ammunition.


Due to the small area of effect, it is advised that Commanders choose their targets carefully as the THOR is more of a surgical strike weapon rather than a WMD.


Advanced Structure #02 - Underground Stock Market:
Info: The underground stock market allows commanders to gain rare earth metals without having to mine for it.

As REM is crucial for the operation of a THOR Control Center, it is recommened that commanders employ this structure in numbers to ensure a steady income.


Advanced Structure #03 - Rare Earth Extension Module:
Info: Modified extension module, used primarily for storing of REM in higher capacity.


Advanced Structure #04 - Accelerator:
Info: This experimental structure is now avalaible to all Cartel commanders. Providing a secondary powersource, this structure boosts the construction speed of nearby facilities.

Some commanders have begun modifying their accelerators, allowing them to cloak nearby buildings as well.
It is advised that commanders utilizing the cloak builds two accelerators, allowing them to cloak each other as well.


Advanced Structure #05 - Skyguard Turret:
Info: Living up to its name, the Skyguard is a experimental railgun used to intercept tactical ordnance such as nukes or other WMDs.

Capable of storing up to six ready-to-fire shots, the Skyguard can be upgraded to have a longer range.
06 - Tactical Advice
Advice #01 - Capturing POWs:
When attempting to capture POWs it is important to know that they will cease moving when your units approach.
Units capturing POWs are vulnerable when restraining of the subject.

Please make sure to frisk POWs, keep an eye on them at all times!

Advice #02 - Resource Management:
Every commander needs to know the basis of resource management on the battlefield;
- Make sure not to overload your resource network by performing too many construction orders as resources are delegated out to each project.
- Keep your transports safe, a broken supply line is sometimes the only thing needed for an army to collapse.

Advice #03 - Resource Scouting:
It is crucial that you scout out as many resource locations as possible at the beginning of the game, not being able to see possible deposits can ruin even the most grizzled tactician.

Advice #04 - Recon:
Keeping tabs on your enemy is as crucial as resource scouting, if you don't know where your enemy is or what they are doing then how will you be able to plan accordingly?

Advice #05 - Base Defenses:
While the best defense might be a good offense, having some spare units or turrets watching over your base is never bad.

Because as you may know a cornered enemy can be driven to desperate tactics.

Advice #06 - United Forces:
When deploying a group of different units to a location, make sure to hold down Ctrl (Control) while right-clicking.
This will make all the currently selected units travel at the same pace, removing the risk of having some of the faster units charge head-first without support.

Beware though, groups travelling as convoys make great targets for airstrikes.
07 - Help & Support
For beginners I recommend reading some of the other Steam guides (found below) as well as asking around on the AoA forums.

"AoA 101" by LupisVolk:

http://psteamcommunity.yuanyoumao.com/sharedfiles/filedetails/?id=483441204

"Getting started with Act of Aggression" by Amadeus:

http://psteamcommunity.yuanyoumao.com/sharedfiles/filedetails/?id=484270779

For additional help and support with the game, be sure to ask around on the Steam forums as well. There's tons of other players out there, ready to help answer any question you might have!

If you feel like this guide requires additional info, fixing/adding/removing of any kind, please leave a comment! I would appreciate it greatly.
Author's Thanks
Thank you for reading this guide, I hope that it has been of some use to you wether if you're a greenhorn or a seasoned veteran.
I'd like to pass on my gratitude to Eugen Systems for making this game, thank you guys/gals!

Huge thanks to my buddy Xieneus for the Cartel logo images and for the fancy banner!

Last but not least I'd like to thank my family for supporting me whenever I do some form of writing; despite how nerdy it might be. Love you guys!


// Leon A.K.A Viper123_SWE

33 条留言
SUPER-TANK 2023 年 5 月 4 日 下午 5:36 
CGS always loses its stealth when firing anyways
Sluxslol 2017 年 8 月 23 日 上午 7:25 
You losers dont even know a good guide when you see it, 9/11 will never forget
Viper Actual  [作者] 2015 年 9 月 9 日 下午 11:50 
@Enigmatic: I would but there's a limit on how many words and images the guide can have, even lower limit for each section.
@Raivek: Thanks, glad to hear.
Raivek 2015 年 9 月 9 日 上午 7:36 
Both your Cartel and Chimera guides were great, and really helpful! Thanks for taking the time to write them! I'm looking forward to the US Army guide.
Enigmatic 2015 年 9 月 4 日 下午 11:04 
add in hot keys and more information as you go
LupisVolk 2015 年 8 月 19 日 下午 10:47 
Yup Developers caved in for crying no skill babies.
Blackguard 2015 年 8 月 19 日 下午 4:51 
Spectre:
" as well as a better cloaking device, allowing the Spectre to reamin cloaked while firing"

"Lol, Not anymore!" says the dev team
Viper Actual  [作者] 2015 年 8 月 19 日 上午 10:54 
@Thetombomb: Like I've said before this is very basic, not sure what people expect from something described by the author as an introduction. There is also some tips for some of the units, incase you missed that.

Thanks for the comment and critisism though.
@aforbes55: Thanks for reading!
aforbes55 2015 年 8 月 18 日 下午 10:18 
Very well written and informative! Thanks
Thetombomb 2015 年 8 月 18 日 下午 3:06 
This was well put together for a manual and RP item.

That said, I agree with those before me in saying that it does not provide anything more than the game does. This guide is not useful in its current form. It only provides good screenshots and generic descriptions of the units.

Advice: Post some strategy for the units. Pros/Cons would be good too. General build order or what to focus on would also be good things to add.