Crime Simulator

Crime Simulator

30 个评价
[MID-WIP VERY SPOILERS] Criming 101 - Jobs, challenges, explanations, and stuff inbetween
由 Snowzard-Delta 和其他 1 人合作完成
A guide on how to do stuff in the game and (probably) succeed at it
2
   
奖励
收藏
已收藏
取消收藏
Stuff guides usually say before they actually start
THIS GUIDE IS NOT FINISHED AND IT MIGHT NOT EVER BE UNLESS I REMEMBER IT EXISTS PAST 3 DAYS AFTER I NEXT UPDATE IT

This guide is obviously not exhaustive, and there are a lot of things i haven't experienced or even unlocked yet. Ask questions at your own risk of receiving a "idk lol" answer.

Will there be funny questions in this section?

uhhhhhhhhhhhhhhhhhhhhhhhhhhhhh
Version history
v0.5 - Guide is now updated for 1.2 (sort of). Still working on Jobs, but added a section on stealing cars. I promise at some point that Item requests and Locations (the app) will be filled out as well - I need to stop charging head-first into areas and write everything down...
v0.4a - Started updating the guide again - filled out the rest of the missing prices in the Shop, filled out the missing H1 Jobs, and slowly updating everything to how it is in game version 1.21.
v0.40 - This guide is still active! With 1.2's release I will go back to update this guide a couple of times to add anything I missed, and my new collaborator will help me out with adding new stuff in as well.
v0.4 - Updated Skills and Gold Card section with a bit more text, and updated Gold Card section with more gold cards.
v0.3 - Still missing the H1 Jobs. Worked out a strategy for the 211 Job, added leaflet images to Skills and a couple more Skills in general.
v0.2a - Close to finishing up Jobs, just need to figure out a strategy for the 211 job and how to access the Texas Train Station Heist location.
v0.2 - Started adding leaflet images to Skills, and filling out the Gold Cards section.
v0.1 - Almost finished with the Shop section, filled up Skills with what i have unlocked.
v0 - Guide release, very extremely unfinished with very extremely volatile information which will be very extremely prone to change but the rest of the very extremely guide should be very extremely OK for now
-------------------------------
Tutorial
Before you get out into the world, it's probably a good idea to do the tutorial. It will teach you the basic skills you need to gain before you go out into the full game.

..That is, unless you've already played the demo, or Thief Sim 1/2 from the same game developer, in which case carry on past this section.

If you haven't already scrolled past, i'll condense everything that happens in the tutorial here.


When you first spawn in, the game will instruct you to use the pinboard located inside the truck. Use it, go to Rural St., don't change the spawn area - you will need to go to 106.


After spawning in, go straight to 106. Since you can't lockpick yet, you'll need to get in another way. There are 2 options here, either get the key from the table outside:


or just break in through the window:


After entering 106, the game will point you to the Basic Lockpicking skill leaflet. Grab it, and use it - it will immediately be consumed.


Go back to the truck and use the computer inside to order a Simple Lockpick. It will arrive by drone, just outside the truck.


Pick it up, go back to 106. Immediately crouch when you get there, since the NPC has spawned in the house now. With the Simple Lockpick in hand, get through either the door or the window, and get to the small lockbox in the corner of the house:


Use the Simple Lockpick on the lockbox, and grab the Wireless Headphones inside of them. You do not have to shut the door or relock the lock, so just gun it back to the truck and get back to the safehouse.


Back at the safehouse, drop off the loot into the box and pull the lever.


After that, the game will tell you to go back to the computer and access the newly unlocked Jobs. Go into them, and accept the Plant a package in the marked location job, since it's the only one unlocked.


Next, the game will unlock Item requests - ignore those for now, since they will only be useful once you're in an actual game. After that Locations will be unlocked - also only useful once you're in the actual game, and even then in my playthrough i've never bought any tips to use. The Locations menu does show you how much loot, VIP loot, and jobs you have left to steal/complete in the given location, and how many residents are in the location itself.


That's it for the tutorial! Now let's get into the actual game.
-------------------------------
Notes about playthrough in guide
  • For simplicity sake, all of my gameplay has been on Casual. Lowest cut, lowest risk, but you can easily complete a game loop on that difficulty and buy all the Furniture in the game.
  • To my knowledge, item pools do not reset unless you start a new game loop.
  • I have progressed a good amount into the game at the time of writing this guide - you will obviously not have everything unlocked like i do! Do not panic about that!
Safehouse, and why it's important
Every time you enter the game, or finish a day, you will be transported to the Safehouse. In here, you can practice every lockpick type, cracking safes, and using the glass knife. I recommend you practice lockpicking a couple times, since some locks can be right ♥♥♥♥♥♥♥♥ with how accurate you need to be with them. Later you can also buy additional furniture, which give you extra boosts for you and your friends.

Lockpicking practice

Here's what locks each of the lockers have and let you practice on:

  • Leftmost locker - simple lock, what you would need the Simple Lockpick Set for (Lockpicking lv.1/Basic)
  • Center locker - tumbler lock, what you would need the Bobby Pin for (Lockpicking lv.2/Advanced)
  • Rightmost locker - in my opinion, the most annoying lock, what you would need the Bobby Pin for (Lockpicking lv.3/Master)

The window allows you to practice the use of the Glass Knife. The motion is always down, right, down again.

The combo safe allows you to practice safecracking. This one is probably the most time-consuming one, and also the most annoying one since sometimes you can get numbers that are annoyingly far apart. A number can range anywhere from 0 to 99, and the combo inputting always goes clockwise, counterclockwise, clockwise. If you want a relatively easy way to bruteforce these types of locks, here's what i do:

  • Hold down LShift + D for as long as i can, until the game resets me, while paying attention at around what number the game reset me at. Let's say the game resets me at 79.
  • While holding down LShift + D, i get close to the point where the game reset me (usually 5-9 numbers apart), after which i let go of both keys.
  • Slowly (with JUST D) approach the remaining numbers, letting the game check if the number currently selected is correct (for around half a second).
  • After the game writes down the first number, hold down LShift + A until the game resets me again. Let's say it resets me at 51.
  • Since the combo got reset, i have to input 79 first again, before going back to around 55, at which point i let go of LShift, and slowly go through the numbers again until i get to 51. The game writes down the second number, and now i have the second part of the code, which is now 79-51-xx.
  • I repeat the LShift + D procedure again. Let's say the game resets me at 28.
  • Since the combo got reset, i have to input 79 first again, then 55 after that, before going back to around 25, at which point i let go of LShift, and slowly go through the numbers again until i get to 28. The game writes down the third number, and now the safe will unlock.

If you're okay with being a bit slower, you can easily save yourself a slot for more loot or a more useful tool with this technique.

Furniture

Furniture, as mentioned at the start of this section, can give you extra boosts for you and your friends. Here's what each of the furniture pieces you can get are, how many of them you can get, and what they let you do or give you:

  • Bed - 250C, x4 - +10 HP and Stamina limit per Bed, up to +40HP/Stamina
  • Shelf - 100C, x4 - More storage space, which you kind of don't need because you can get more useful things for that price.
  • Chest - 100C, x4 - If you have friends who like stealing things from you, you can get this and store anything you want in there. Otherwise completely useless.
  • Plant - 50C, x4 - Completely useless to my knowledge.
  • Re-usable First Aid Kit - 1500C, x1 - Very useful for its price, since it's a full heal at the safehouse for 10C.
  • Bookstand - 1000C, x1 - Increases XP gain by 20%. Get this as soon as you can!
  • Treadmill - 750C, x1, Steal 30 items - Increases sprint speed by 10%. Relatively useless, but could also mean life or death if you're being chased by anything.
  • Powerlifting Bench - 1000C, x1, Complete 10 jobs - Adds another inventory slot. Get this as soon as you can!
  • Hackerman's table - 2000C, x1, Complete 3 item requests - Extremely useful in general. Able to be infinitely used, making it better than the Hacking USB Stick present in the Shop.
  • Terminal - 1000C, x1 - This one is pretty confusing at first, however it allows you to retrieve items and tools lost in the Safehouse for free, and lets you refund 25% of the price of your lost tools if you die out in the field. Also lets you see your Furniture boosts, and exchange Credits for quota cash.
  • Milltary Receiver - 3000C, x1, Win at least 1 game loop - This one is pretty confusing to me, but once you buy it and place it near the computer in the truck, it has a 50% chance to reveal important items (presumably for Item Requests, or the VIP items; i haven't bought it yet) for you to steal back to the truck.
  • Repair Workbench - 5000C, x1, Gain at least 5000C within the game loop - EXTREMELY useful, allows you to repair any item to full durability, including the tools you buy from the Shop.
  • Radio - 200C, x1 - Useless unless you can't run YouTube alongside your game.
  • Voucher machine - 3000C, x1, Win at least 1 game loop - (i haven't bought this yet, no idea what it does; i presume from the description the vouchers spawn every time a quota is complete and have a chance to spawn in the field. they're one-time use boosts, which seems kinda... ehh? but it might be useful - get this last if you can)
  • Cloth closet - 1000C, x1 - Allows you to change how your character looks to others and to yourself. Otherwise useless.
  • Refund Chest - 2500C, x1, Complete 5 challenges - If you lose a game loop, any tools you place into this chest will have 75% of their value refunded to you. (not sure as what yet, i haven't failed with this chest active yet)
  • Weed-growing Rack - 5000C, x1 - Allows you to grow and sell weed. You need to have the Weed growing skill from the "Weedkeeper" leaflet before you can even use this!
-------------------------------
More about the usable Furniture in the Safehouse
Some Furniture is actually usable, and will help you go a long way. I've listed everything about what they do here, and how to use them, in order of most to least useful in my opinion. Any furniture you purchase stays with your save, regardless if you win or lose a game loop!

  • Hackerman's table
It allows you to unlock any locked electronic device. It seems like a huge investment in early-game initially, but the cost quickly returns itself with every locked electronic you find. You need to have Electronics lv.1/Basic unlocked to make use of this table! You can unlock any electronics (yes, plural! You can unlock several electronics at a time) you set down on the black mat next to the hacking tablet:


To unlock electronic devices after placing them down on the mat, you have to activate the table itself. The tablet screen will show a pattern you have to match consisiting of 3 shapes (they can repeat) - either a red square, or blue/yellow/green quartercircles. The pattern you have to match is always the top one, the bottom pattern will keep changing until you lock in a shape of it:


After matching all the shapes, all the devices currently present on the table will be unlocked and their value will be greatly increased.

  • Repair workbench
It allows you to repair any item, including your break-in tools. If you've been saving up Credits through the past quotas (you need 5000C for this), this is a good investment, since any repairs performed are free.

To use the workbench, place any item that's damaged (has a red fill going up from the bottom; obviously you can't see this with large items you can't carry in your inventory directly) onto the table:


and activate it. A minigame will appear in the center. You can fail it as many times as you can, to my knowledge, and items will not get destroyed if you fail too many times.


You will have to click the left mouse button when the arrow is lined up with the blue area of the minigame. 3 times in a row.


Afterwards, all of your items that were placed on the table will be fully fixed, with their full value returned.

  • Bookstand

This furniture gives your team a passive 20% XP boost. It requires no interaction, so put it in a place that it won't be in your way.

  • Bed

This furniture gives your team a passive +10/20/30/40HP and Stamina boost, depending on how many beds you have. It requires no interaction, so put it//them in a place that it/they won't be in your way.

  • Terminal

This allows you to retrieve items and tools that fell out of bounds in the Safehouse for free, returning them to the truck area, and lets you refund 25% of the price of your lost tools if you die out in the field. It also lets you see your active Furniture boosts, and exchange Credits for quota cash. The exchange rate really isn't worth it though, so unless you're REALLY strapped for quota cash and you have the Terminal, use the conversion function as an absolute last resort.

  • Powerlifting bench

This furniture gives your team a passive additional inventory slot (so if you had 5 slots, you will have 6). It requires no interaction, so put it in a place that it won't be in your way.

  • Re-usable first aid kit

While out on the field, you need to worry about your health. And while First Aid Kits aren't all that expensive to begin with (50C per), having a cheaper way to heal in the Safehouse is probably a good idea, especially with a 80% discount (10C per). I have no idea if you can put this within the truck, presumably not, so place this as close to where you respawn after you return to the Safehouse as possible.

  • Refund chest

If you fail games often, before failing the quota place all your tools into it. The cost of them will be refunded in 75% as... something, again i haven't bought this yet - i'll update this section once i know! It requires some interaction, so put it in a place that it won't be in your way, but can get to easily.

  • Military receiver

I don't have a complete idea on what this does yet - according to the description, it adds additional features on the radar and gives a 50% chance to display where important objects are on the radar. It has to be placed near the computer for it to work, but i have no idea how big the proximity of "near" is.

  • Voucher machine

Allows you to redeem the Vouchers for one-time powerups or random gifts. I have no idea what either of them are, so when i find out i will update this section as well.

  • Weed-growing rack

This allows you to grow and sell weed using Weed seeds. I haven't bought this yet, so when i get it i will update this section as well.

Anything almost fully useless is listed below here

  • Cloth closet

Allows you to change your appearance from a choice of 4 ski mask colors, 8 upper garment choices, 6 lower garment choices, 4 shoe choices, 5 "hats", 8 bag configurations and 11 viewmodel gloves. Obviously that last option won't appear for others. Otherwise, it requires no interaction, so put it in a place that it won't be in your way.

  • Chest

Unless you willingly host public lobbies, you don't need this. Storing items in the chest prevents other players from taking them, so you can for example store skill leaflets or VIP items as an "oh ♥♥♥♥" fund. Otherwise, it requires no interaction, so put it in a place that it won't be in your way.

  • Shelf

Same as the Chest, but takes up more space and doesn't prevent others from stealing items off your lobby. Otherwise, it requires no interaction, so put it in a place that it won't be in your way.

  • Radio

It's a radio. There.

  • Plant

This furniture gives your team a passive +1/2/3/4% CPU and GPU usage debuff. It is absolutely useless. It doesn't even look good, and the thought that plants needed to be furniture is both confusing and a laughable effort. It/They require(s) no interaction, so put it/them in a place everyone can ridicule you for spending 50/100/150/200C for these things because that's really not a good use of your money.
-------------------------------
Challenges (this section might be removed)
Challenges allow you to gain some extra Credits and XP for your team. They get pretty varied, and rewards are independent of difficulty (if this is not the case, PLEASE let me know).

Here's what i have encountered:
  • Complete the assignment with at least a day left - 250C, 25XP - Clear your quota with at least 1 day left (Safehouse cannot be in "Last day" mode).
  • Complete item requests - 250C - Complete (x) item requests. You can see what you need for each item request from the computer in the truck.
  • Steal an item worth over $500 - 250C, 15XP - The easiest way to complete this is to steal a (practically pristine) VIP item. The easiest ones in the early game to get would probably be the mountain bike from 107, the 1930s magazine from 103 (which is in the safe), or the gaming PC from 103 (2nd item cycle, you need to grab the full office PC set first for it to spawn).
  • Zip tie people - 500C, 25XP - This one is quite hard to do if you can't buy zipties from the Shop, since you have to find these randomly in the world if you don't, and they spawn very rarely. I wouldn't bother with this.
  • Break windows without being seen - 500C, 10XP - For this one, i would head over to 107 since it's got 3 windows neatly in a row, and if the guard is out front this becomes a breeze. Note: This challenge fails if you're spotted even once.
  • Unlock electronics - 250C - There's a couple of ways to complete this one, but most importantly you need a locked electronic TO unlock.This does NOT complete with the Electronics lv.2/Advanced skill procing.
  • Unlock / hack security keypads - 250C, 10XP - Easiest one to complete this is at 107, in the small shed in the back. Open the locker with the notebook (Simple Lockpick Set, Lockpicking lv.1/Basic), check the code, punch it in.
  • Complete jobs without being seen - 500C, 25XP - If you have jobs to do that say "unseen", you were probably going to do so anyway. Note: This challenge fails if you're spotted even once.

Since i've already beaten the game once, i also have seen the following challenges as well:
  • Deliver 2x the required quota - Ability Voucher - This stings if you're late into a game loop, since it's quite difficult to get a multiple of 11.5k quota, especially if you robbed the same map multiple times in a game loop.
  • Steal items, unseen - Gift Voucher - Note: This challenge fails if you're spotted even once.
  • Steal an item worth over $500 - Gift Voucher - Refer to the same challenge that's above.
Jobs
Jobs are a quick way to get closer to your quota. By default you can only accept up to 3 jobs, although you can increase that limit if you gain World levels after a game loop. Below are all the jobs listed that you can do (that i've unlocked, so far). You need to complete all the jobs in a category before you unlock the next one:

Easy
  • Destroy the lamp - 104, 100$ - If you can sneak into the backyard of 104, the lamp is in the corner of the bedroom. You can punch it down, use a crowbar or baseball bat to destroy it and you will immediately receive the reward. Note that this will make a lot of noise, so after you break it, hide outside, wait for the owner to leave the bedroom area again, then get out of there. Having Agility lv.1 will make this much easier since you can immediately leave through the vines in the background after breaking the lamp.
  • Destroy the bathroom mirror - 102, 150$ - The window to the bathroom at 102 is the only one that doesn't require a Glass Knife. Get in there, spot the mirror, punch it down, use a crowbar or baseball bat to destroy it and you will immediately receive the reward. Get out through the same window you came in through afterwards.
  • Destroy the garden gnomes - 105, 250$ - Three garden gnomes will be marked out in 105. Get in there through either the front or back entrances, punch it down, use a crowbar or baseball bat to destroy it and you will immediately receive the reward.
  • Plant a package in the marked location - 106, 100$ - A package will spawn outside the front of 106. Grab it, and head around the back. If you have the Glass Knife, use it on the bathroom window, otherwise use the window in the back then enter the bathroom that way. Get inside, and drop the package off on top of the dryer. You will immediately receive the reward.

Medium
  • Put Tom to sleep using AC Gas - 104, Golden Card Box - Obviously the NPC has to be inside 104, and you have to have the AC Gas item handy. The AC unit is in the backyard.
  • Cause Luke to walk onto a banana peel - 101, Golden Card Box - This one can be a bit tricky, as there are two NPCs inside of 101. The one you want is shown on the photo - balding, grey-beared man. I'd advise putting a banana peel on the way down to the basement (careful not to slip yourself, it will kill you) - he sometimes goes down there. Of course the issue with that is that the OTHER NPC can ALSO go down to the basement, but that's i figured would be the best idea, since he paths from the bedroom to the basement and back.
  • Plant a package in the marked location, unseen - 101, 250$ - I recommend doing this one alongside the one previously described. Make sure you have a clear shot to the basement - i went in through the front door (Simple Lockpicking Set, Lockpicking lv.1/Basic) since that's the shortest path.
  • Disarm trap - 107, 250$ - If you're looking at 107 from the garage door side, the one you want is the second unit from the RIGHT. Go around back, open the window with a Glass Knife when it's clear, and BE CAREFUL when you go in - the trap you need to disarm is right at your feet. The "disarm" part will be by the right shelf.
  • Disable the security keypad - 107, 250$, 25 XP - If you were doing the Job listed just before this one, you were probably headed to 107 anyway. Before you enter the area, there's a camera up on a pole that you need to disable, linked to the keypad shown in the photo. The code for the keypad is always in the furthermost locker which is always locked (Simple Lockpicking Set, Lockpicking lv.1/Basic). Punch in the code and you'll get the reward.
  • Destroy or disable marked cameras - 201, 250$, 25 XP - This is the first job you get in the new area, Lakeside St.. The area costs 1500C if you haven't unlocked it already. There are 2 ways you can approach this - one is destroying the camera (you risk getting spotted by the camera before destroying it), and the other is disabling the keypad for it (requires Electronics lv.2/Advanced(? i forget) and Lockpicking lv.2/Advanced). I'll describe the approach with disabling the keypad here - go around the back of 201 with a Bobby Pin (Lockpicking lv.2/Advanced) handy and open the door. BE VERY CAREFUL OF THE NPC IN THERE, SHE WILL SPOT YOU BASICALLY INSTANTLY IF YOU OPEN THE DOOR DEAD ON! Lockpick the door open from the side instead! Wait for the NPC inside to leave and then sneak in - the keypad will be near a door frame leading into the cafe - break into it. You get 5 tries to remove all 4 fuses, so don't risk it if you have 1 try left - come back tomorrow if that's the case. You have 2 days to complete this job anyway. As soon as the camera is disabled, you will receive the reward.
  • Plant a package in the marked location, unseen - 204B, 500$, 25 XP - I would advise you to do this after 4AM hits, since around that time the NPC inside 204B is asleep. Avoid the NPCs from 204A that might come upstairs, since that will also fail the job if you don't place the package. The drop point for the package is inside the bedroom (closer door from the entrance of 204B).
  • Find and destroy the toilet - 210, 350$ - Go in through the backyard door of 210 (Simple Lockpicking Set, Lockpicking lv.1/Basic) and cut left. The toilet is inside the following room. After you break the toilet. hightail it out of there - the NPC of 210 is armed.
  • Destroy the marked table - 204A, 250$, 25 XP - I recommend stringing this job along with the job at 204B, doing this job SECOND. Luckily 204A's door only needs a Simple Lockpicking Set (Lockpicking lv.1/Basic), so if you get spotted after completing the 204B job, bust in there and break the table, then get the hell out.
  • Destroy or disable marked cameras - 103, 250$ - Back in the starting area. To disable the cameras in 103, you will have to get the code from the kitchen, at the opposite wall from that the keypad. Alternatively, there's some rocks around where the camera is, but that makes noise so i would only recommend this approach when you have less than a minute until you have to get back to the Safehouse and you're in panic mode to get everything sorted before you're kicked back to it.
  • Unlock marked windows, quietly - 103, 250$ - Two windows will be marked that you cannot open from inside anymore. Get the Glass Knife and slice open the marked windows - that's it.
  • Destroy the toilet and grill - 106, 500$, 10 XP - Back in the house from the tutorial, the grill and the toiler will be marked out. While the grill isn't much of a problem (it's outside), the toilet will alert the NPC, so if you have the Glass Knife on you, use that, break the grill, break the toilet, get out.
Jobs, ctd.
Hard
  • Plant a package in the marked location, unseen - 212, 500$, 25 XP - I would recommend leaving this for last, or at least until you unlock the Lockpicking lv.3/Master Skill. All the windows are alarmed, except for the garage window and the front door, which requires Lockpicking lv.3/Master and a Bobby pin. The dropoff is inside the pink room on the side.
  • Find and unlock the safe, unseen - 208, 500$, 25 XP - Just like in 212, all the windows have alarms on them. Go through the front door (Lockpicking lv.2/Advanced) or the back (Lockpicking lv.3/Master). The safe you need is upstairs, but before you go getting blindsided running directly into the alarm laser, go to the room directly ahead of you when you first walk up the stairs. Break into the panel on the left wall to disable the laser. Afterwards, you can go into the bedroom, and open the safe that's there.
  • Unlock the front door and both side windows, while remaining unseen - 210, 500$, 25 XP - Front door requires the Simple Lockpick Set (Lockpicking lv.1/Basic), windows require the Glass knife. Very easy to complete.
  • Knock out Marcus while remaining unseen - 211, 500$, 25 XP - The easiest way to complete this would be to get a Stun Gun and a Stun dart, costing you about 1150C... or, just 150C, if you knock out the guard at 209 and take the Stun Gun from him. Sneak up behind Marcus and shoot him with the Stun Gun.
  • Disabled 3 security keypads - H1, 1000$, 50 XP - There are some window and laser alarm keypads around the small "offices" and the warehouse area. Disable them like you would disable any other keypad. Note that the small "offices" have codes you can use to disable the keypads without breaking into them.
  • Destroy 5 wooden crates - H1, 750$, 25 XP - Destroying crates is loud, so wait until everyone is cleared out from the area, then destroy the crate with a crowbar. Obviously you can punch down the crates as usual but you might not have enough time to run away then.
  • Unlock the front door without triggering an alarm - 209, 750$, 50 XP - The front door has an alarm. Go in through the back door (break the camera), disable the keypanel that's immediately there. The door alarm security panel you need is at the far end of the store. After disabling the alarm, use a Bobby pin (Lockpicking lv.3/Master) to open the door. I would greatly recommend doing this alongside the job below, as the guard will be knocked out around the same time, giving you about 30 seconds to complete this. Otherwise it's not impossible, just annoying!
  • Make the guard flip on a banana, but remain unseen - 209, 750$ - The easiest time to set this up would be before 2AM. Buy a Banana, set it out around the back door where the guard walks out, and wait.
Shop
This is probably where you'll be spending most of your Credits, in order to buy equipment to take on your robbery sprees. I've listed out each of the items here (that i've unlocked) and what they do:

  • Crowbar - 100C - Useful for breaking open wood boxes in one hit, also useful for the Destroy (x) Jobs. You can technically knock out people with this, however it's faster to just punch them down or run away.
  • Baseball bat - 100C - Polar opposite of the Crowbar, since it can knock out NPCs very easily however it has a pretty low durability, so i wouldn't recommend it for destruction jobs.
  • Fire axe - 300C - unlocked as part of a World level reward -
  • First aid kit - 50C - Used to heal any injuries on yourself, or - if you're playing with others, reviving other dead players.
  • Simple lockpicking kit - 100C - Usable with Lockpicking lv.1/Basic locks. One of the three items i always take with me, to open basic locks, commonly found in Rural St, and sometimes in Lakeside St..
  • Bobby pin - 50C - Usable with Lockpicking lv.2/Advanced and Lockpicking lv.3/Master locks. As i have previously mentioned, i highly recommend practicing with this since bobby pins can get damaged much less than the Simple lockpicking kit. Locks that use this tool are commonly found in Lakeside St.. One of the three items i always take with me, to open more advanced locks.
  • Stethoscope - 200C - Only useful if you want to crack combo safes faster. If you want to speed up the process, this tool makes the correct number click louder.
  • Glass knife - 250C - Used to cut open windows for more ways in, if you don't have Lockpicking lv.3/Master unlocked yet. Always useful, and one of the three items i always take with me, to open up windows that can't be opened from either side or for a generally quick way in through the window if the front door is too dangerous (just be wary of the alarms).
  • Zip ties - 250C, unlocked as part of a World level reward - If you knock out an NPC, the Zip ties extend the timer before they call the police after they get back up by around 2-3 minutes. I would recommend taking these only if you have someone else who can knock out NPCs for you and you both rush into the area to clear it out. From what i've seen, they break after 2 uses.
  • Armor vest - 1000C - Prevents the police and guards from tazing you. Does not prevent bullets from dealing damage to you. On that note, what the ♥♥♥♥ else is a vest for then???
  • Blowtorch - 750C - Instantly opens combo safes. Also makes lots of noise, so after opening the safe get out from the area first before coming back for the loot if you were heard.
  • Car door drill - 5000C - Added as part of 1.2, the car door drill will allow you to open car doors for you to then steal them. It's probably a little more complex than just drilling the door open and driving away though, I still haven't bought and used this item yet
  • AC Sleep gas - 1000C - Useful for jobs that explicitly require the AC gas to be used, knocks out NPCs for about a minute. Can also knock YOU out if you didn't let the gas clear out first.
  • Ladder - 100C - Relatively useless, the only use i could see for this is if you want to go up a floor without going through the stairwell. Doesn't allow you to be spotted any less contrary to belief.
  • Banana - 100C - Only really used in Jobs. Knocks out one character (this includes players) for about 30 seconds (or kills a player, if they slip on it).
  • Remote hack tool - 2000C - Allows you to hack into code panels and/or cameras to disable them from a safe distance (up to 10m).
  • Hacking USB Stick - 300C - Don't buy this. Get the Hackerman table instead. Unlocks electronics, has limited uses.
  • Credit card stealer - 2000C - Allows you to get much more value out of Credit Cards/Red Credit Cards. Of course, after using the Credit card stealer on the credit cards, they are immediately consumed so save at least one of each type for the Item request for them.
  • Duocopter drone - 2000C - Allows you to scope out areas for loot and NPCs. Can be upgraded (upgrades unlock with World level). Useful if you want to find a specific VIP item, otherwise no idea what you would want to use the drone for.
  • Crossbow - 2500C - Can be loaded with different types of darts. Used to fire said darts.
  • Diversion dart - 50C - Use with Crossbow. Creates a loud noise, attracting NPCs who hear it to the location of the dart. Useful if you want to clear out an area of NPCs for s ahort time.
  • Sleep dart - 250C - Use with Crossbow. Puts any NPC that the dart hits to sleep for some time.
  • Hacking dart - 100C - Use with Crossbow. Remotely hacks code panels.
  • Thermal goggles - 2500C - Shows you the current location of NPCs when worn.
  • Stun gun - 1000C - Allows you to knock out NPCs. Uses Stun darts. Can also be obtained for free if you knock out the guard at the electronics store in Lakeside St.. Is non-lethal if used on NPCs, lethal if used on police officers or other players.
  • Stun dart - 150C - Used with the Stun gun.
  • Silenced pistol - 25000C - Allows you to permanently remove an NPC from the map for one night at a penalty (if it's a civillian). It's like PAYDAY's cleaner costs all over again...
  • 9x19mm (x7) - 2500C - Ammo for the Silenced pistol.
  • Invisibility tool - 10000C - Allows you to hide from NPCs at any location for about 60 seconds.
  • Scanner - 1200C, unlocked as part of a World level reward - Allows you to find where some items may be. Can be upgraded with some modules.
  • 'Skill leaflet' reward box (Level 1) - 500C - Good if you or a teammate is missing some Lv.1/Basic skills and have some backup money to blow. Unfortunately does not help with skill issue.
  • 'Skill leaflet' reward box (Level 2-3) - 1000C - Good if you or a teammate missing some Lv.2/Advanced skills and Lv.3/Master skills and have some backup money to blow. Unfortunately does not help with skill issue.
Item requests
WIP
Locations (the app)
WIP
-------------------------------
Skills
At the time of writing the guide, there are currently 22 skills a player can earn. Skills are unlocked permanently for a given character slot, and persist across game loops. I have unlocked all 22, but have not gotten all of the screenshots for the skill leaflets, and will update this when i can.

Strongman (Level 1)
Unlocked from leaflet: Strong #1
  • Additional item slot
  • Carry heavier items
  • Increased throw force
  • Increased (melee) attack damage

Strongman (Level 2)
Unlocked from leaflet: Strong #2
  • Additional item slot
  • Increased throw force
  • Increased (melee) attack damage

Perception (Level 1)
Unlocked from leaflet: Perception #1
  • Increased NPC highlight range by 3 meters
  • Increased NPC highlight time by 10 seconds
  • View people's current and next routine

Perception (Level 2)
Unlocked from leaflet: Perception #2
  • Increased NPC highlight range by 3 meters (up to 6m)


Basic lockpicking
Unlocked from leaflet: Basic lockpicking (#1) (go figure, this should be the first skill you unlock)
  • Unlock basic locks with a Lockpick Set

Advanced lockpicking
Unlocked from leaflet: Advanced lockpicking (#2)
  • Unlock advanced locks with a Bobby pin

Master lockpicking
Unlocked from leaflet: Master lockpicking (#3)
  • Unlock master locks with a Bobby pin
  • All locks are easier to open

Basic electronics
Unlocked from leaflet: Electronics #1
  • Break into simple keypads and security keypads by hand
  • Unlocks hacking tools

Advanced electronics
Unlocked from leaflet: Electronics #2
  • Break into advanced secuirty panels
  • 50% chance to unlock a locked electronic when picked up
  • Install upgrade modules (for the drone)
  • Disable window shutters by hand

Backpacker
Unlocked from leaflet: Backpacker (single level)
  • Additional item slot

Agility (Level 1)
Unlocked from leaflet: Agility #1
  • Run faster
  • Crouched move speed increased
  • Climb vines on fences

Stacking (Level 1)
Unlocked from leaflet: Stacker #1
  • Increase max stack by 1
How this works is probably the most confusing - it increases the carry stack of only SOME small items and tools by 1, the rest of the items that are bigger than the size of a tablet still only have a max stack of 1 item. This does not include the Glass knife, arguably one of the more useful tools in the game.

Stacking (Level 2)
Unlocked from leaflet: Stacker #2
  • Increase max stack by 1 (total of 2)
Still does not increase the stack size of items that are bigger than the size of a tablet.

Stealth (Level 1)
Unlocked from leaflet: Stealth #1
  • Your movement is quieter

Stealth (Level 2)
Unlocked from leaflet: Stealth #2
  • You're more difficult to spot

Reader

Unlocked from leaflet: Reader (single level)
  • KEEP SKILL LEAFLETS AFTER USING THEM

  • Increases player experience gain by 10%

Weed growing
Unlocked from leaflet: Weed keeper
  • Grow and sell weed
Gold cards
Gold cards are boosts that you can activate by depositing them into the loot crate, then sending it over. The effects of the card last until the end of the game loop. Undamaged cards are worth 500$. You can find them as part of some Jobs, Item requests, or as random spawns (higher difficulties have higher chances of spawning them, and you can upgrade this chance by increasing the World level after a game loop). Here's the Gold cards i have found so far; and what they do:

XP
Increases XP gain by 25% after activation.

Police
Removes the penalty for the cops getting called. Very useful.

Dollar
Increases loot value by 25% after activation.

Police car
Police cars are no longer able to spot you. Thanks Mycroft Jr.!

Camera
Cameras take longer to spot you. I don't know how much longer, really, since when I tried it the cameras still spotted me basically instantly. This is definitely wrong, though, and i'll have to do more testing when i get this card again.

Tazer
Guards armed with tazers will have worse aim, meaning it'll be more difficult for them to shoot you.

Diamond
Store prices are lowered by 25% upon activation.
Stealing cars
Update 1.2 added what's possibly the most convoluted system yet - stealing cars.


...Okay, obviously that's overselling it a little, but the point stands.

Before you can even think of robbing a car, you're going to need to acquire the newly added Car Theft skill leaflet:


This will allow you to rob any car you will find, regardless of map. I might be wrong about this - I haven't played in a minute after the update - but H1 does not have any cars to steal.

So, how do you steal a car?

It's pretty simple actually - once you obtain a Car door drill (5000C), you can start stealing cars. You only need the drill once, when getting into the car, and then never again. You'll need to hold the drill in your hand to activate this minigame:


I haven't found a quick, consistent strategy for the drill yet, but I would figure tapping your mouse button is going to be pretty consistent since you need to wait for a click to happen within the door for the minigame to complete. (it's somehow more annoying than the safecracking and the tumbler pin bobbypin minigame)

Now, after opening the door, you'll need to hotwire the car before you can actually drive it. You do not need the drill anymore at this point! The minigame is just guessing where each of the wires go into a socket:


To my knowledge, you aren't punished for getting your wires wrong, but you do need to get them all in the correct order before you can complete the minigame and drive the car. There are three wires you need to connect, and there are several ways to identify what wire goes where:
  • 1, 2, 3 - Order of wires needing to be plugged in. Usually revealed when you plug the first wire in correctly, and takes priority over ? markings.
  • ? - Correct socket, wrong wire. Displayed when a socket is used within the combination, but is in the wrong order. This can sometimes not appear, I've yet to figure out why, but I think it has to do something with the fact that the wires are still in the current combination like in the screenshot below.
  • X - Wrong socket. If you see this, don't plug anything into this socket.


Okay, so you drilled in the door and hotwired the car. But how do you drive the car? Simple - use the same key you use to pick up objects to steal. Obviously though the car will not start if it's fully broken down or missing all of its fuel:


For that, I would recommend keeping any and all Toolboxes, Gasoline Cans and Premium Gasoline cans around in your safehouse - and when you're planning to steal a car, take a Toolbox and a gas can with you. If you don't have any, look around on the map - surely someone's got some spare tools and gas you could "borrow" to get the car to run.

Do not throw away the tools you use! If at any point you crash, you're going to want to use the Toolbox to fix the car up again before selling it, and driving takes gas - so you're going to want to fill it back up too for maximum profit. Some cars (or, specifically, pickup trucks) allow you to put stuff in the back, and the items in it are also sold with the car, so cars can also act as a quick sale point out on the job - if you have tons of clutter in your truck after a spree, steal a pickup truck and load it up with items before selling it! Just remember to ACTUALLY sell the car, otherwise all your efforts will be for nothing!
-------------------------------
Credits
me - writing the whole thing
Stuff i forgot and/or i was wrong about and/or you asked about
What i forgot
Furniture stays after a game loop. Thanks Mycroft Jr.!
Police car card effect. Thanks Mycroft Jr.!
43 条留言
Snowzard-Delta  [作者] 10 月 7 日 下午 11:15 
The game has finally received the 1.2 update - this guide will receive a big update on it Soon(tm)!
KaoDremora 10 月 7 日 上午 11:36 
The Dollar gold card increases base cut by 5%
Snowzard-Delta  [作者] 10 月 6 日 下午 2:21 
Skill card Vouchers become useful after you complete a loop of the game - since that's when the Furniture you can use them with unlocks. They are used to unlock "once-per-game" abilities, but once you have them I'm 90% sure you keep them forever on your save.
dwarfsetsfire 10 月 5 日 上午 11:13 
what are skill card vouchers for?
Snowzard-Delta  [作者] 8 月 20 日 上午 6:16 
@ファル(FAL) Thank you for the input! As soon as the big new update comes up, I'm gonna get on Crime Sim to update this guide. I've recently switched savefiles from Normal to Completionist, so I have to unlock everything that I had again and then I'll go from there.
ファル(FAL) 8 月 19 日 下午 11:19 
Also for more info on the Military receiver which is SOO useful. like imagine a uav but for gold cards(color it's show up as GOLD), skill leaflet(color it's show up as BLUE), door keys(color it's show up as GRAY) and police(color it's show up as RED)(going of the key on the bottom right of the right monitor) BUT for some reason it actually lets you see the vouchers(they come up as PURPLE). Oh and the best thing about it, it lets you mark(LMB) and unmark(RMB) these DO show up on your hud(like the job request do). There is a max to the marks, 3 after which if you start marking new items it will unmark the first one you marked.
ファル(FAL) 8 月 19 日 下午 11:02 
Also, (NOT 100% CONFIRMED)
The texas train station heist plan item commonly spawn in 208 mckenzie's. I have found it 2 time inside the upstairs room closest to the stairs
ファル(FAL) 8 月 19 日 下午 11:02 
@Charizard-Delta hey didn't know if you planned on updating the anytime soon but i got some stuff not currently on the guide

Gold cards:
Ear decreased npc hearing by 20%
Swift increases credit bonus by 50% for completing assignments early
Silent make no noise while carrying heavy loot
Ruthless no penalty for attacking civilians
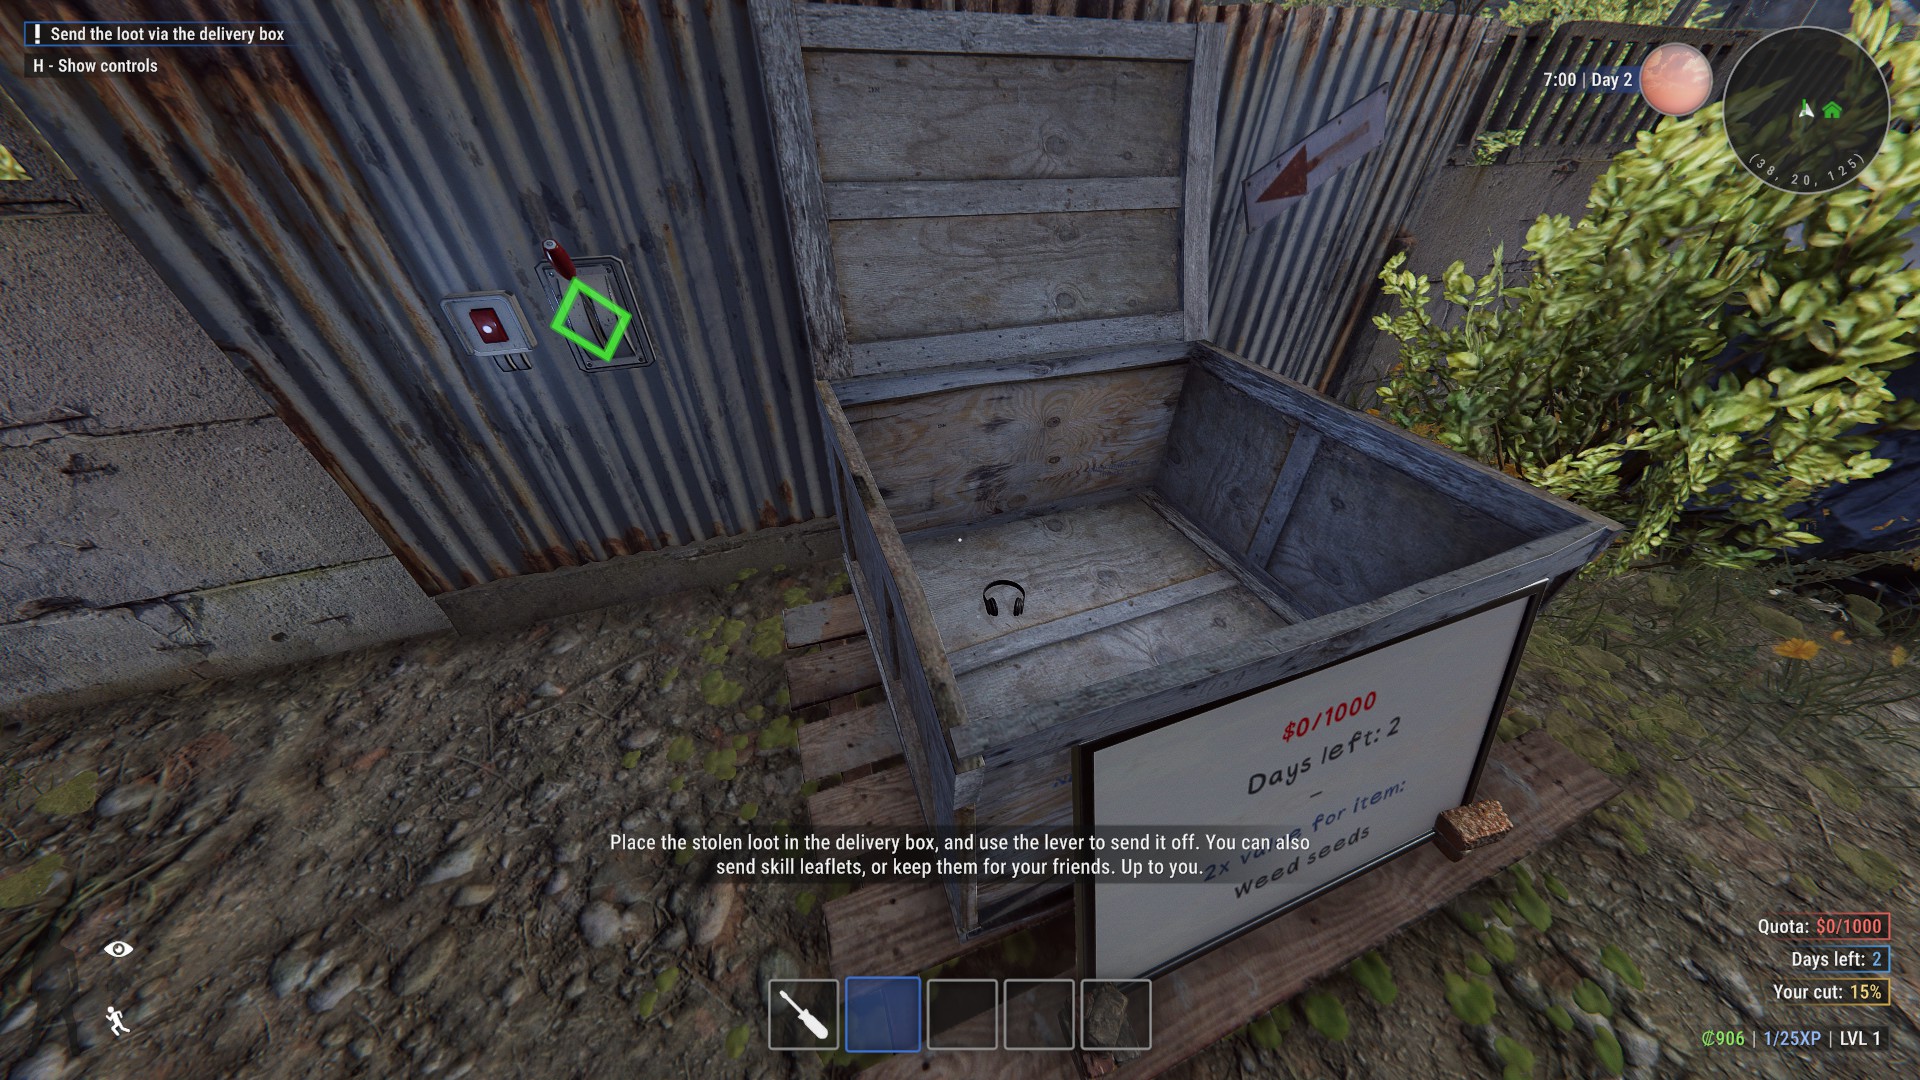
Fast delivery fast delivery is free and even quicker
Trap 75% chance not to trigger traps
Deadline 1+ to deadline days

Random active bonus(from the random bonus item request):
Creep increases crouched move speed by 10%
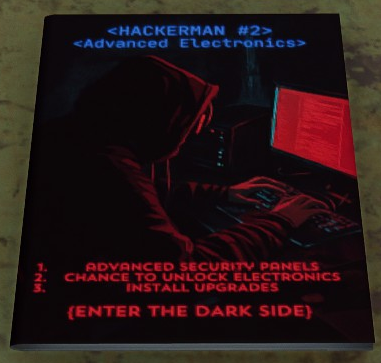
Skills:
Percept lvl 3
Increased npc highlight time by 10 seconds
detect nearby cameras automatically
detect alarms on door and windows
loot valve is uncovered
increased npc highlight range by 3 meters

Interrogator
Interrogate tied up people
find out code for safes and keypads
locate door and car keys

Currently loving this game so i'll try to figure out more
IndominusRexOfficial 8 月 12 日 下午 6:26 
i am lazy there is no way i can analze a game W guide Ur him
Snowzard-Delta  [作者] 7 月 23 日 上午 12:20 
I want to sincerely apologize for not updating this guide in a while - i just haven't had the time to play the game recently . Guide update is hopefully Soon(tm) though! :awswsebastian: