惊悚故事:异世迷境

惊悚故事:异世迷境

28 个评价
Creepy Tale: Some Other Place Walkthrough + All Achievements
由 cheesaru 制作
This is a typed English comprehensive walkthrough which details all achievements. Also provided are screenshots edited to highlight points of interest which are easy to miss in such dark scenery. My intention is to provide as clear of directions as possible, and to explain how to solve the puzzles in addition to the solutions. Spoiler tags are used for solutions and achievements.
2
   
奖励
收藏
已收藏
取消收藏
Introduction
Guess who's back...back again...
Hello again from the Creepy Tale 3 walkthrough. Here we are in some other place and I will be your English guide once more. No morality point system to keep up with this time, and you can select specific chapters to revisit! You don't know what you've got til it's gone, truly.

I built this guide from scratch, as well as captured and edited all screenshots myself. I hope it is helpful for other players who don't quite get the logic of this beautifully-made game, or miss the many obscured items needed for story progression. Achievements are noted with spoiler tags in the walkthrough, but you can also skip to the section "Achievement Index" for an uncensored full list.

Creepy Tale: Some Other Place uses auto-saving, so make sure you've cleared a room before exiting the game. The cutscenes are not skippable.

Legend for screenshots:
- RED for interact-able objects and where to put them
- BLUE for room transitions, hiding spots, and movements.
- YELLOW indicates where to use the ring ("artifact")

Chapter 1
PS4 Controls
Triangle: Inventory
X: Select item, interact
O: Cancel action
Start: Pause

PC Keyboard Controls
WASD or Arrow Keys: Move
E: Select item, interact
Q: Inventory
F: Use artifact ("ring")
Esc: Pause

Bait your rod and cast it into the water by pressing X. To reel in a fish, sync up the timing of the arrow spinning around and press X when it passes over the green section. Follow the creature who interrupted your fishing, and stop to call into the well if you wish.

Achievement "A rich catch": Successfully reel in three fish.

Achievement "Screamer": Call into all 7 wells in the game (unlocks in Chapter 8). See the Achievement Index for a list of their locations with screenshots.


Chapter 2
Pick up the fish that the creature dropped when picked up by the giant. Give the fish to creature on the pier and he will trade you an orange glowing stone. Insert the glowing stone into the cottage door, then enter.

Achievement "There's no turning back": Knock four times on the tree you came out of at the start of the chapter.


-------------------------------------------------------------------------------------------------------
Open the compartment on right-side bookcase and take the spherical wooden piece. Climb up the ladder and take the triangle wooden piece on the right-side bookcase, then grab the square wooden piece on the left-side shelf. Knock on the attic door and a fish will fall down onto the bed in the foreground. Climb back down the ladder and pick it up.


Go back to the puzzle near the entrance. Insert all three wooden pieces, lining up each shadow to the slot. When the latches shake, observe the one that remains still and press the corresponding shape. The sequence changes with every reset.


After completing the puzzle, the cupboard will open. Take the flint and move over to the fireplace on the opposite end of the room. Light the fire with the flint. Go over to the table by the window and look at the tree stump. There are three etched symbols which serve as hints for what to put in the cauldron. They are: a fruit, a fish, and a mushroom.


Exit the cottage and pick up the rotten fruit that fell off of the tree in the cutscene. Reenter the cottage and put both the fruit and fish into the cauldron. After this next cutscene, go back outside and pick a mushroom from the patch previously guarded by the mole creature.

-------------------------------------------------------------------------------------------------------
Return to the cottage and put the mushroom into the cauldron. The creature from the pier will rush in and drink the concoction, then fall asleep. Wake him up by knocking on the attic door again and he will toss you another glowing stone to access the roof.
-------------------------------------------------------------------------------------------

This next area is a bit confusing to navigate, so I have provided labeled pictures. Each step is numbered, and some steps are repeated in multiple pictures to better orient the player.

Tree puzzle: There are three height levels in the trees. The highest will be referred to as Level A, the middle is Level B, and the shortest is Level C. You begin on Level B.

1) Use the discolored section on the tree branch (referred to as "boost pad" from here onward) to be boosted up to Level A.

2) Go through the hole in the tree to the other side.

3) Move over to the broken ladder and jump down to Level C.

4) Jump over to the branch to your left.

5) Pull the lever to open a portal on Level A.

6) Jump back over to the branch on the right and go through the treehole.

7) Use the boost pad to Level A.

-------------------------------------------------------------------------------------------------------
8) Go through the treehole on your left.

9) Hop over to the left branch.

10) Enter the portal and a lever on Level B will unlock.

11) Move back over to the right branch and go through the treehole.

12) Hop over to the right tree branch.

13) Jump down to Level B.

14) Pull the lever to open a portal on Level C.

15) Jump down to Level C.

-------------------------------------------------------------------------------------------------------
16) Use the boost pad to Level A.

17) Go through the treehole on the left and enter the portal (see steps 8-10). Now you will emerge on Level C and the portal will close up behind you.

18) Hop over to the right branch.

19) Pull the lever and a bird from Level A will go into the portal. There is nowhere for it to exit yet, so it will knock on the wall in limbo until you find the relevant lever to release it.

-------------------------------------------------------------------------------------------------------
20) Hop back over to the left branch.

21) Use the boost pad up to Level A.

22) Go over to the broken ladder on the right and hop down to Level B.

23) Go through the treehole.

24) Hop over to the right branch.

25) Go through the treehole.

-------------------------------------------------------------------------------------------------------
26) Move over to the broken ladder on the right and jump down to Level C.

27) Pull the lever on the left and a portal will open on Level A for the bird to exit from.

28) Use the boost pad to Level B.

29) Go through the treehole.

30) Hop over to the left branch.

31) Jump down from the broken ladder, which disturbs a creature snoozing below in a leaf pile, who then tosses you a rotten fruit.

32) Pull the lever to open the left-side portal on Level A.

Achievement "Ornithologist": Clear the tree puzzle without killing the bird. Do this by luring it through the portal on level A of the first tree.

-------------------------------------------------------------------------------------------------------
33) Hop over to the right branch.

34) Use the boost pad to Level B.

35) Hop over to the left branch.

36) Go through the treehole.

37) Jump down from the broken ladder to Level C.

38) Hop over to the left branch.

39) Use the boost pad to Level A.

40) Enter the portal and emerge next to the bird on Level A.

41) Place the rotten fruit next to the bird. Oh no...

42) With the way to the exit clear, hop onto the left branch and go through the portal.


Try to continue on to the right. When the creature beckons you, go over to the well and it will send you off to some other place. ( W I N K )

Chapter 3


Go all the way left for a little extra scene if you want, then move all the way to the right. The engineer dwarf wants nothing to do with you, so don't listen to him and instead enter the mine using the ladder in the giant mouth.


Climb down the ladder and grab the coal to the left. Move right and pick up a mushroom from the glowing patch in the foreground. Note the lantern and exit the mine.

-------------------------------------------------------------------------------------------------------
Go back towards the well and stop at the weird head structure. Use the coal and mushroom, then interact with the left horn. Take the cooked mushroom back down into the mine and place it on the plate at the far right end of the tunnel.

-------------------------------------------------------------------------------------------------------
Take the dwarf lantern instructions from the sleeping miner. Use the pulley to move the harnessed miner up and left to the cracked rock above the dwarf by the lantern. After the accident, collect your inherited pickax and inspect the lantern.


Match the dials according to the instructions you picked up. R-2, G-7, B-8. Use the pickax on the nearest rock and do the timed button press minigame to unearth a gemstone. Take it and go back over to the far left end of the tunnel. Place the gemstone on the suspended cart, then use the pickax on the wall to wake up the dwarf. After he raises the the cart with the pulley, exit the mine.

Achievement "Alarm Clock": Wake up the sleeping dwarf in the mineshaft by striking the wall with the pickax three times. Kinda rude of you though, tbh...


With the engineer dwarf distracted, enter his large contraption. On the right side is a panel of four dials, each with a section of green. Press the gear in the middle and hold it down until the dials all point to the far right. Now you must press and hold the gear to move each dial one at a time. If you hold too long, it will reset. Cycle between each dial until they are all pointing to their green sections. There will be a cue when the puzzle is complete. Now just pull the nearby lever on the wall.


Oh no...Well, I suppose that mineshaft was an accident just waiting to happen. Use the pickax on the lock, take the dwarf energy module and insert it on the leftside panel. Inspect it and note the letters on the module. Flip the switches such that the dials point to the correct letter combinations: NR on the left dial (flip switches 1, 2, 4, and 7; MF on the right dial (flip switches 3 and 6). After setting each dial, press their corresponding buttons and set the N/M switch back to the middle. Afterwards, pull the lever on the leftside of the wall.


Now controlling the contraption, hold down X to charge up a jump, then release. Do this several times until the chapter ends.
Chapter 4


This is more of an interlude than a level. Charge up and release several jumps. Upon emerging from the wreckage, call into the nearby well and walk over to the giant. Help free the creature by repeatedly pressing X, then follow him back over to the well and be sent to...some...other...

Chapter 5


Another short chapter. Walk as far as you can to the right, then turn back around and talk to the swamp woman resting by the well. You may either solve the puzzle at the far right end of the area, or give the swamp woman a foot rub and she will solve the puzzle for you. The latter is far less time-consuming tbh.

Achievement "Unexpected": Pick up a button on the ground. It looks familiar...

The foot rub entails a short timed button press minigame.

-------------------------------------------------------------------------------------------------------
Puzzle solution: there are two parallel columns with six demon symbols. The symbols are the same on each side, albeit in a different descending order. You will only interact with the column on the left. when one of the symbols in the right-side column glows red, move the cursor over the matching symbol in the left-side column and press X. The time limit to select each symbol decreases until finally the tree branch is fully aglow.

This puzzle is more difficult than it seems and requires some tenacity and, perhaps, stubbornness to complete. The game reminds you that you could just go give the swamp woman a foot rub.

Achievement "Skillful Hands": Give the swamp woman a foot rub.
Chapter 6
Walk right-ward until you reach the dead kvarg stuck on a tree. Check its satchel bag for a creepy skull and examine it.

-------------------------------------------------------------------------------------------------------
Time to solve another puzzle. There are 3 characteristics to keep track of: 1) the switch on the forehead can be pushed in three directions (left, up, and right); 2) each direction of the switch is in a different colored section (white, black, and yellow); each direction is also labeled with a symbol (eyeball, antlers, and crescent moon). Activate the game with X and a tooth will sprout in the mouth. You must push the switch in the correct direction before the tooth retracts (it will shake as time runs out). When you input the correct direction, the tooth will stay and a new one will sprout. There are 8 teeth in total, and the order is randomized.

Hint: The correct switch input is which ever combination of color and symbol is NOT on the tooth. For example, a tooth that is yellow and has antlers means you should push the switch in the direction that is not yellow nor has antlers. The correct direction is left (white/eyeball).

-------------------------------------------------------------------------------------------------------
Achievement "Ancient technology": Unlocks when you complete the artifact puzzle.

Completing the skull puzzle rewards you with a ring, which you can use by pressing Square. As per the game's script: "this artifact brings nearby objects to life and lulls those outside of its reach to sleep." The name "artifact" doesn't really fit imo, so this guide will refer to it as the "ring." Go over to the tree with the kvarg and use the ring on the tree-like creature ("leshy") to activate it. In the reference screenshots, areas in which to use the ring are marked in yellow.

Achievement "Maggot Master": Use the ring in range of the dead leshy and the well.


While the leshy is away, use the ring on the glowing area of the ground to sprout a radish (the leshy will shut down).

-------------------------------------------------------------------------------------------------------
Move out of range of both the leshy and the radish and use the ring (the radish will change into a rotten radish). Go back over to the leshy and use the ring to reactivate it (the rotten radish will change into a tough radish).

-------------------------------------------------------------------------------------------------------
The leshy will uproot the tough radish and chuck it to the left. Go over to the dead leshy and use the ring to release the tough radish, then pick it up.

Achievement "Vegetable grower": Grow and pull out all three types of radishes (they must all be in your inventory).


Walk over to the stone troll at the far right end of the area and use the ring to wake him up. Give him the tough radish and he will move out of the way. Continue onward.

Achievement "Tribute": Offer all three types of radishes to the stone troll. Make sure to save the tough radish for last.

Chapter 7
Use the ring on the dead leshy and move over to the right. Wait by the head on the spike and, once the leshy is in range, use the ring to wake up the head.

Achievement "Melomaniac": Unlocks upon waking up the head on the spike.


Go on to the right and use the ring on the bridge twice to cross over. On the other side, continue right-ward until you reach a leshy chopping wood. Use the ring to wake up the leshy, move out of range of both the axe and leshy, then use the ring again. Move in range of the leshy (but not the axe) and use the ring once more. Now pick up the ancient axe. Go over to the right side of the big tree by the temple. Use the ancient axe on the patch of ground that is overgrown with roots and complete a short timed button press minigame to reveal a boost pad (as seen in Chapter 2).


When the leshy walks over the boost pad, it will be launched up to the big treetop. Once it paces to the left side (over the blood-streaked stump), use the ring to shut it down. Pick up the detached leshy arm on the ground.

-------------------------------------------------------------------------------------------------------
Use the ring on the boost pad while on it to reach the treetop. Cross over to the temple ledge and use the ring when you reach the center. With the temple open, cross the ledge back over to the big tree and jump down onto the blood-streaked stump. Use the leshy arm on the temple's opening, then reactivate and heal the leshy (use the ring twice).

Achievement "Necromancer": Use the ring twice on the leshy to fully resurrect it after obtaining its arm. It's the least you could do...

-------------------------------------------------------------------------------------------------------
Wait for the leshy to walk over the stone pressure plate, then use the ring out of range to shut it down. Wake up the head trapped inside the tree with the ring, if needed. Walk over to the left side of the temple and stand on the other pressure plate. Now freed, the head will fly into the temple.


Go back to the bridge you crossed before reaching the temple and use the ring on the head that was previously mounted on a spike. Follow the head over the bridge and watch it fly into the temple.


There's one more head to collect. Go all the way to the right, past where you found the ancient axe. Cross over dormant stone troll and use the ring to wake it up, as well as the head it is holding. After the head is released, move just out of range of the stone troll and use the ring on the head. Follow after it all the way back to the temple and enter.

Achievement "Parkour Man": While the stone troll is asleep and holding the disembodied head, hop onto its hand and use the ring.


Use the ring on the trio of heads to awaken them. Use the ring again and pick up the wand. Now you must conduct the choir. Only one head sings at a time, observe it closely to determine the order of their song parts. Hint: Focus on their blinking eyes.

Solution: Center, left, right, left (wait for it to stop singing), center, right (wait for it to stop singing), center, right, left (wait for it to stop singing), center.

Chapter 8: Part One
This chapter is long. So long, in fact, that it must be broken up into two sections for this guide. Part One covers the beginning until you leave through the astronomer's hidden passageway. Check Part Two for coverage of the rest of the chapter.
-------------------------------------------------------------------------------------------
Jump over the gap and move right-ward. Note the planet mobile and lock puzzle on the treehouse front door.


Continue to the right, using the logs for cover as you pass through the kvarg encampment. When you reach the campfire, use the ring in range of the berry bush on the right side. Pick up the crumpled paper the kvarg tossed behind him and go back to the kvargs by the trees.


Use the ring to bloom fruit on the left tree, then move to the right tree. Wait until the kvarg with the glass lens begins inspecting the ground underneath the fruit, then use the ring to bloom fruit on the right tree. Because the left tree is out of range, its fruit will shrivel and fall onto the kvarg's head. When he looks up, he will see the other kvarg reaching for the fruit on the right tree and go to join him. Pick up the dirty lens, then go back to the planet mobile.


Use the ring on the planet mobile, then inspect your newly acquired starry sky map. Each planet is labeled with a unique runic symbol. These symbols correspond with the lock on the treehouse front door. Your goal is to figure out the order and combination of symbols to activate on the lock. Once unlocked, enter the treehouse.

Hint: On the map, observe the distance of each of each planet relative to the center.

Puzzle solution: "X" rune (red/south), "Y" rune (yellow/northeast), "M" rune (orange/southwest), "C" rune (blue/east), "N" rune (purple/north)

-------------------------------------------------------------------------------------------------------
Climb the ladder and pick up a star pin. Move over to the pulley system on the left side of the room and interact with it to turn on the lamp that is hovering above the desk. Lower the lamp all the way, and note that the top of it lines up with a marked line on the wall labeled "1." Inspect the desk.


On the desk are papers with unique constellations on each page. Find the page with a butterfly and observe one of its illuminated star points. Go over to the globe on the opposite side of the room and examine it. Put a star pin on the globe on the same point as the page (in between the butterfly's antennae), then spin the globe. After it flies across the room, pick it up and check the desk for another star pin.

-------------------------------------------------------------------------------------------------------
Look at the papers again. On three of the pages is a number in the upper left corner. This is the height that you want to position the lamp so as to illuminate the star points. Refer to the line markings on the wall to the right of the lamp. For example, at height level 1, the butterfly constellation will shine one of its stars. The position of that star is where you will put the star pins on the globe.

With the pulley, set the next lamp height at level 5, then check the mushroom page on the desk. The star is shining at the bottom of the stem on the left side. Go back to the globe and put the star pin in the corresponding place. Put another star pin on the butterfly. Now exit the house.

Go all the way right to where you began the level. There is now a wanted poster stuck to the tree with a star pin. Examine the poster to take the pin, then go back into the house.


With the pulley, set the next lamp height at level 8, then check the coffin page on the desk. The star is shining on the left middle point. Go back to the globe and put the star pin in the corresponding place. With three pins on the globe, spin it and go upstairs to talk to the astronomer.


I guess he's not happy to see you. Give him the dirty lens and now he's happy to make you get more stuff. Go over to the tied up kvarg on the right side of the room and pick up the skull lying next to him. Exit the house.


Continue rightward until a skeleton arm prompts you for a trade. Hand over the skull and the arm will wave you through. Use the ring on the plant by the kvarg and see it grow berries, which the kvarg promptly eats. Continue sneaking to the right, using the ring to grow berries on a plant even closer to the cliff. Lead the kvarg to the far right plant and watch him fall off the cliff. Well, almost. Go back to the left until you get out from behind the log, then go back over to the cliff (no sneaking this time). Use the ring on the far right berry plant once more and the cliff will crumble further. Now you can pick up the knife and some berries. On the campfire spit, pick up a sooty handle and head back to the baby owlet at the start of the level.

-------------------------------------------------------------------------------------------------------
Feed the fragrant berries to the owlet and follow it over to the planet mobile. There, use the kvarg knife on the ground where the owlet is pecking at. Pick up an eyepiece and go back to the astronomer on the upper level of the house. Give him the dirty eyepiece and sooty handle.

Achievement "Games with death": Feed the owlet berries to revive it, then use the ring outside of the owlet's range to kill it again. Wow, how could you....

-------------------------------------------------------------------------------------------------------
When the kvarg confronts you, use the knife to defend yourself. Now use the ring on the astronomer, and check the telescope. Position the lens downward until you see a village of kvargs. Pan over and focus the lens on the various kvargs and finally a girl being held captive in a cage. Afterwards, use the secret passage that the astronomer opens for you (it's timed so don't wait around unless you want to sit through the astronomer's long process of opening the passage again. Unless...?)

Achievement "Slow": After the astronomer opens the secret passage, wait until it closes. Unfortunately that means sitting through his long process of opening the passage again.

-------------------------------------------------------------------------------------------
Continued in Part Two...
Chapter 8: Part Two
We're nearing the end. On the balcony are two devices. the one on the left is a drink maker and the one on the right is a weighing scale. Inspect the scale two times and observe the diagram.


Each constellation has a number and different shapes on the various star points. To solve the puzzle, you need to determine the numeric value of each shape. Start with the upper left constellation: all three points are star-shaped, and it is labeled 3 (the sum of all point values). star + star + star = 3, so a star shape has a value of 1. Now you can solve for the other shape values. My interpretation of them are "square rune" (upper right constellation), "blood droplet" (bottom left constellation), and "molecule" (bottom right constellation).

Shape values: star (yellow) = 1, square rune (green) = 3, blood droplet (red) = 2, molecule (blue) = 4


Go back over to the drink maker. Observe the symbols on the lever handles (blood droplet on the left, molecule on the right). Referring to your calculations, set each lever to the value of its shape, then press the fruit-labeled button in the the middle to pour the drink. Place the heavy, malt-scented mug onto the scale on the right, then climb down the ladder.


Go over to the skeleton arm and give it the knife. Pick up a skull on the ground, then use the ring to revive the kvarg on the right. Move back over to the left side of the skeleton arm and wait for the kvarg to pursue you. When he pauses by the skulls, use the skull when a symbol cue appears. Move to the right and use the ring on the well, then call into it. Go to the edge of the screen and press X button or E to exit the area.

Achievement "Recklessness": Use the ring on the defeated kvarg at the end of the chapter. Wth are you thinking bro??


Achievement "Screamer": Call into all 7 wells in the game. See the Achievement Index for a list of locations with screenshots.
Chapter 9
Go all the way to the left and use the ring to revive a big bug. Follow it back to where you started and use the ring on the ground to the right side of the caged creature. A mushroom will sprout and be immediately eaten by the creature. Go over to the right and pick a radish, then give it to the creature to distract it. Use the ring on the ground and pick the mushroom that sprouts. Move back over to the right and behind the aquarium to fish out an eyeball.

Achievement "Feeder": Offer the radish, mushroom, and eyeball to the caged creature.

-------------------------------------------------------------------------------------------------------
Using the bushes for cover, sneak right-ward until you get in range of the demon running on the wheel. Wait until the kvarg begins sharpening his knife, then use the ring on the wheel twice in a row. Pick up the nearby severed kvarg hand and follow the kvarg to the cauldron. Use the ring again to ignite the sparks. Pick up the bug fang that results from the assault.

-------------------------------------------------------------------------------------------------------
Move to the right and talk to the princess in the cage. Continue on til you reach the edge of the screen and press X to move over to a separate area.

Achievement "Healer": Use the ring on the caged princess.

Achievement "Dinner is Served!": Try to feed the eyeball or reeking mushroom to the princess lol.

Now in a plaza, there is a iron maiden structure with four statues (two on the left, two on the right). Use the ring near them for hints about what to offer them. Place the corresponding item on each statue. From left to right, statues labeled 1 through 4: statue 1 - bug fang, statue 2 - eyeball, statue 3 - reeking mushroom, statue 4 - severed kvarg hand.


Move to the right, past the sleeping kvarg, and pick up a pelt. Return to the sleeping kvarg and hang up the pelt, then pull the hand lever to light up the lantern. Light the lantern on the opposite side of the plaza and give up your ring to open the iron maiden. Check inside for a helmet, a magical bow and a quiver of arrows. Head right-ward and enter the tent for a pretty cool boss fight.

Achievement "Training": Shoot an arrow at the kvarg outside of the tent before you fight the monster.


Controls
X: Hold to aim, release to shoot arrows
Left Analog: Move side to side
Up: Jump
Down: Dodge roll

Phase 1: Your objective is to pierce seven of the monster's eyes with your bow and arrows. Move to the left and right sides of the arena and evade the monster's attacks. When the monster readies its claw, dodge roll out of the way; when it readies its scythe, jump over it. Beware of the acid it spews onto the middle of the area. Refer to the number of skulls in the top left corner of the screen to keep track of your health.

Phase 2: Now unarmed, wait for the monster to shake the arena and pick up the item that falls to the ground. No need to aim, just launch it at the monster. It has the same attacks but uses them more aggressively. After 7 hits, a much more effective spear will fall down. Pick it up and enjoy the cutscene.

Achievement "Missing the target": While fighting the monster with the archer's bow, miss at least three times.

Achievement "Berserk": Unlocks when you've defeated the monster and obtained the heavy key.


Take the heavy key all the back to the caged princess and use it to free her at last. Finally, sneak your way into the final chapter.
Chapter 10
This first section is an escort mission (but it's not bad, I promise!). Sneak behind the bushes without being seen by the kvargs. When the coast is clear, press Square to call over the princess.

-------------------------------------------------------------------------------------------------------
When you reach the surveillance head, wait for it to look away, then hide behind the log on the right. Pick up the club, wait for the head to turn away and the kvarg to leave, then use the heavy club to beat down the head and kick it. With the kvarg fully distracted, escort the princess to the boat and set sail.


The only things standing in the way of home are actually swimming. Just like the boss fight in Chapter 9, hold X to ready your harpoon, then release to hit the kvargs as they close in on the boat.


Congrats! You've completed Creepy Tale: Some Other Place. There is a post-credits epilogue cutscene to reward fans.

Achievement "The Fairy Tale Is Over": Complete the game.

Achievement "To be continued...": Watch the epilogue after the ending credits.

Achievement Index
Here is a list of all 25 achievements, categorized by the chapters they are unlocked. For detailed directions, refer back to the relevant section(s) of this guide.
________________________________________________________________

Chapter 1
  • Achievement "A rich catch": Successfully reel in three fish.

Chapter 2
  • Achievement "There's no turning back": Knock four times on the tree you came out of at the start of the chapter.

  • Achievement "Ornithologist": Clear the tree puzzle without killing the bird. Do this by luring it through the portal on level A of the first tree.

Chapter 3
  • Achievement "Alarm Clock": Wake up the sleeping dwarf in the mineshaft by striking the wall with the pickax three times. Kinda rude of you though, tbh...

Chapter 4
  • None

Chapter 5
  • Achievement "Unexpected": Pick up a button on the ground. It looks familiar...


  • Achievement "Skillful hands": Give the swamp woman a foot rub.

Chapter 6
  • Achievement "Ancient technology": Unlocks when you complete the artifact puzzle.

  • Achievement "Maggot Master": Use the ring in range of the dead leshy and the well.

  • Achievement "Vegetable grower": Grow and pull out all three types of radishes (they must all be in your inventory).

  • Achievement "Tribute": Offer all three types of radishes to the stone troll. Make sure to save the tough radish for last.

Chapter 7
  • Achievement "Maggot Master": Use the ring in range of the dead leshy and the well.

  • Achievement "Parkour Man" - While the stone troll is asleep and holding the the disembodied head, hop onto its hand and use the ring.

  • Achievement "Necromancer": Use the ring twice on the leshy to fully resurrect it after obtaining its arm. It's the least you could do...

Chapter 8
  • Achievement "Games with death": Feed the owlet berries to revive it, then use the ring outside of the owlet's range to kill it again. Wow, how could you....

  • Achievement "Slow": After the astronomer opens the secret passage, wait until it closes. Unfortunately that means sitting through his long process of opening the passage again.

  • Achievement "Recklessness": Use the ring on the defeated kvarg at the end of the chapter. Wth are you thinking bro??

  • Achievement "Screamer": Call into all 7 wells in the game. Refer to the screenshots below to find them in Ch. 1, Ch. 2, Ch. 3, Ch. 4, Ch. 5, Ch. 6, and Ch. 8.


Chapter 9
  • Achievement "Healer": Use the ring on the caged princess.

  • Achievement "Feeder": Offer the radish, reeking mushroom, and eyeball to the caged creature.

  • Achievement "Dinner is Served!": Try to feed the eyeball or reeking mushroom to the princess lol.

  • Achievement "Training": Shoot an arrow at the kvarg outside of the tent before you fight the monster.

  • Achievement "Missing the target": While fighting the monster with the archer's bow, miss at least three times.

  • Achievement "Berserk": Unlocks when you've defeated the monster and obtained the heavy key.

Chapter 10
  • Achievement "The Fairy Tale Is Over": Complete the game.

  • Achievement "To be continued...": Watch the epilogue after the ending credits.
Conclusion
Thanks so much for reading, and I hope you greatly enjoyed the game! Comment below any questions, corrections, or other feedback. See you in the next Creepy Tale...
7 条留言
meowth.to.fakt 9 月 9 日 下午 10:43 
@cheesaru I tried doing what you advised me and it worked. Thank you!
cheesaru  [作者] 9 月 4 日 下午 4:47 
@meowth.to.fakt I just replayed the level and it looks like you have to press the interact button when the little walking icon pops up at the right-side edge of the screen. I have updated the guide with that detail and otherwise I hope it isn't a bug so that you can complete the game!

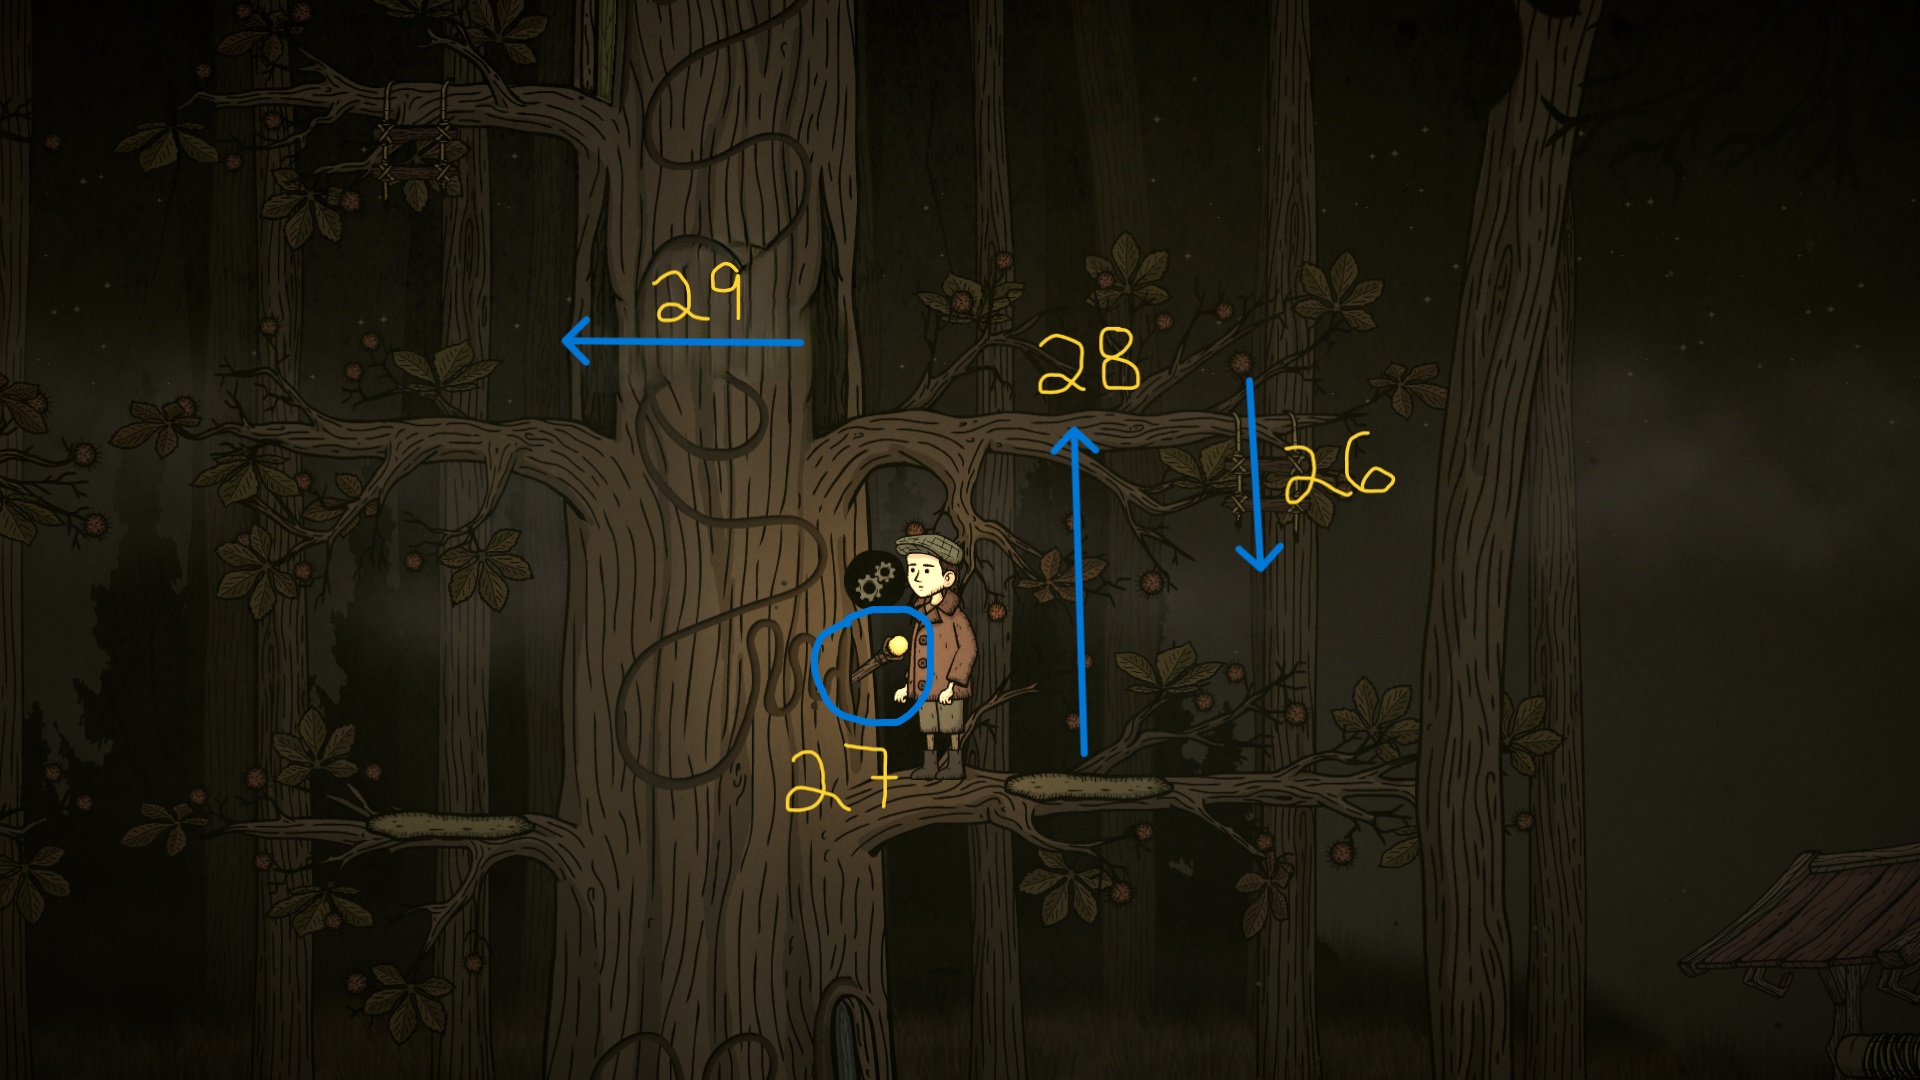
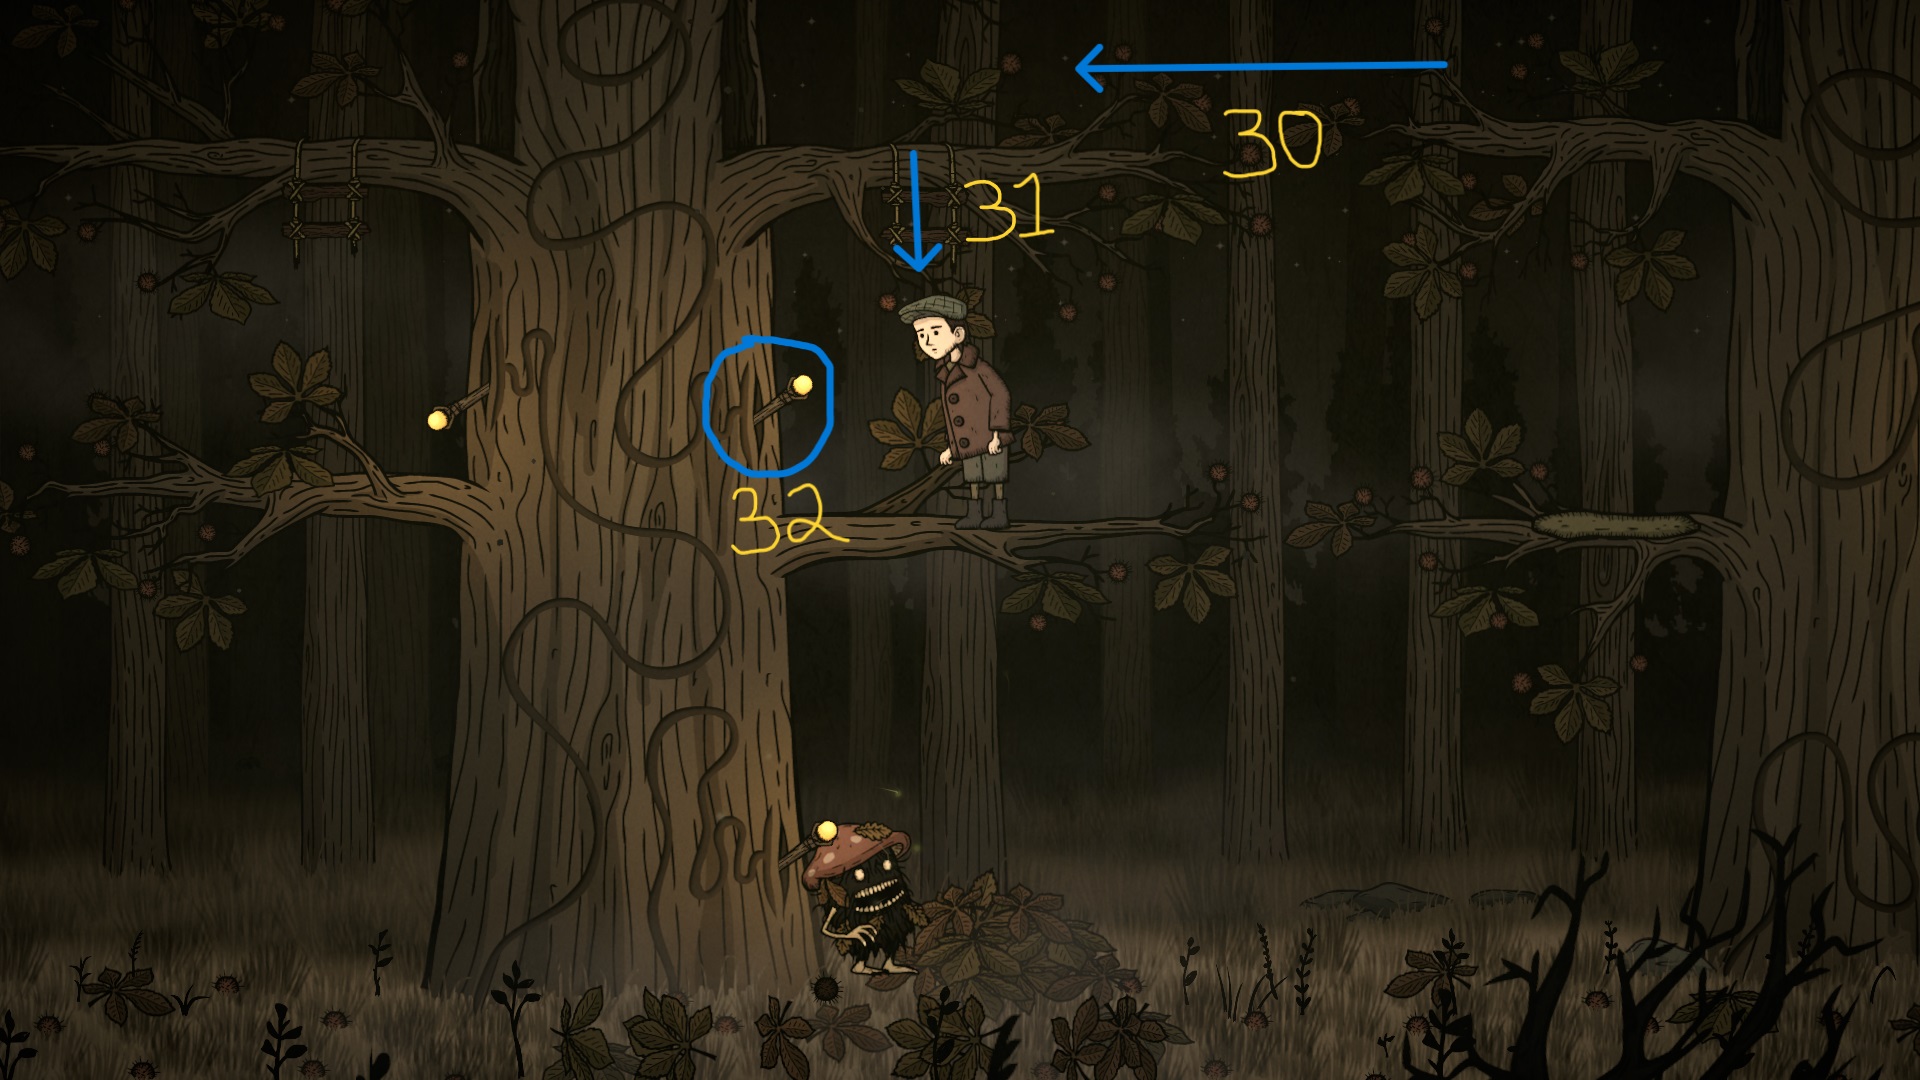
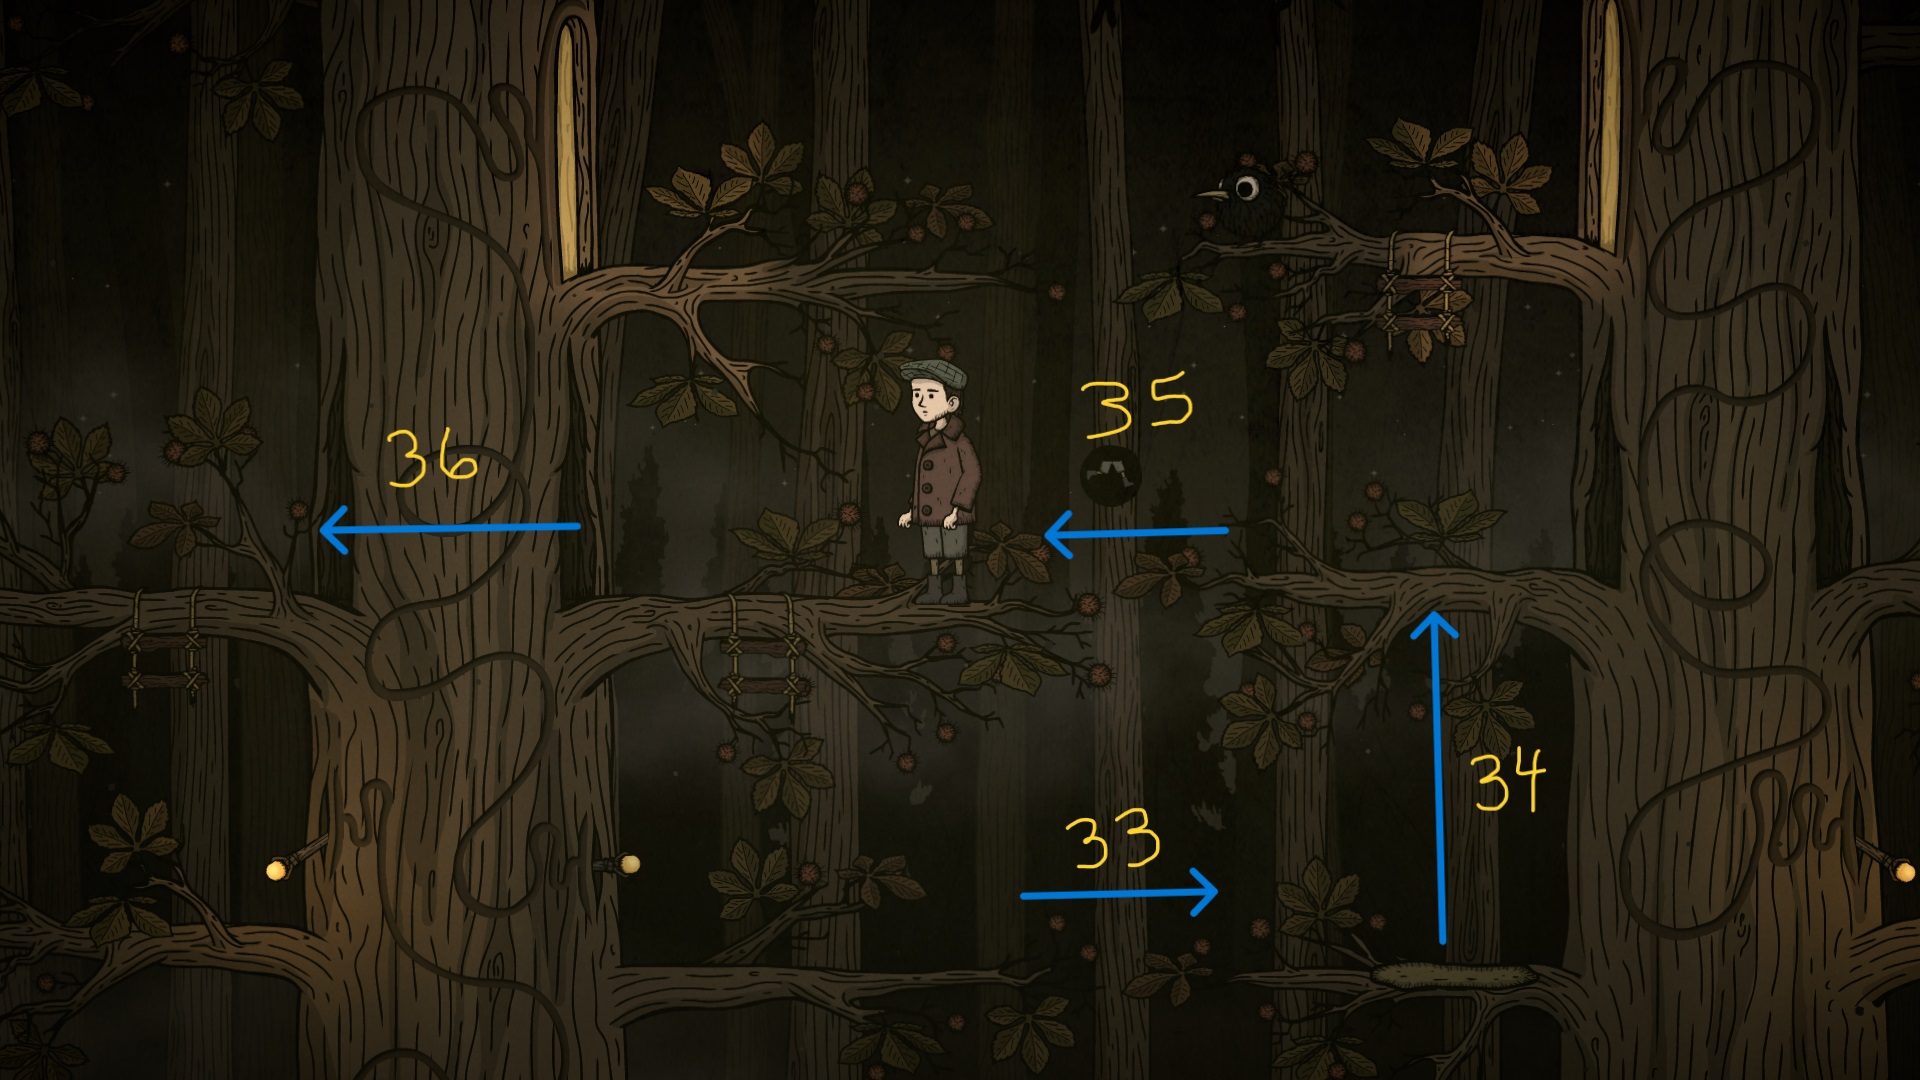
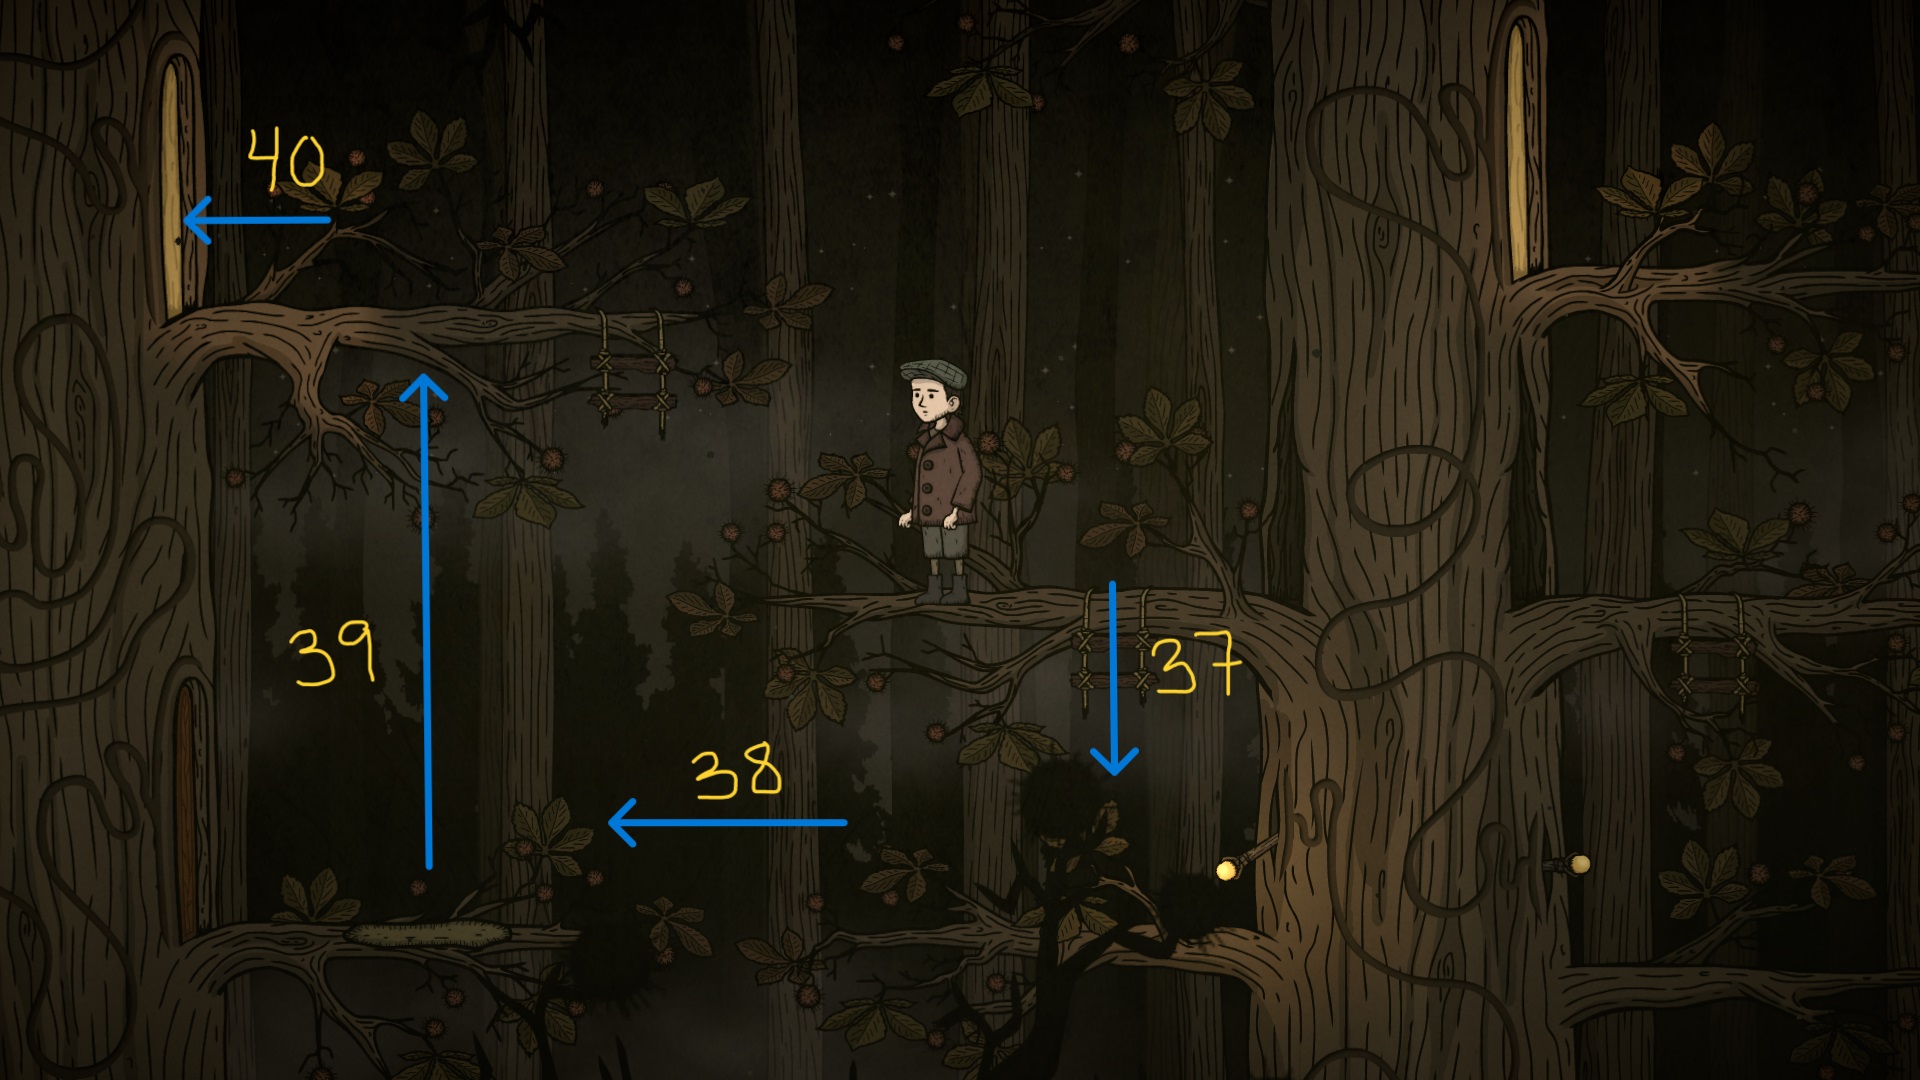
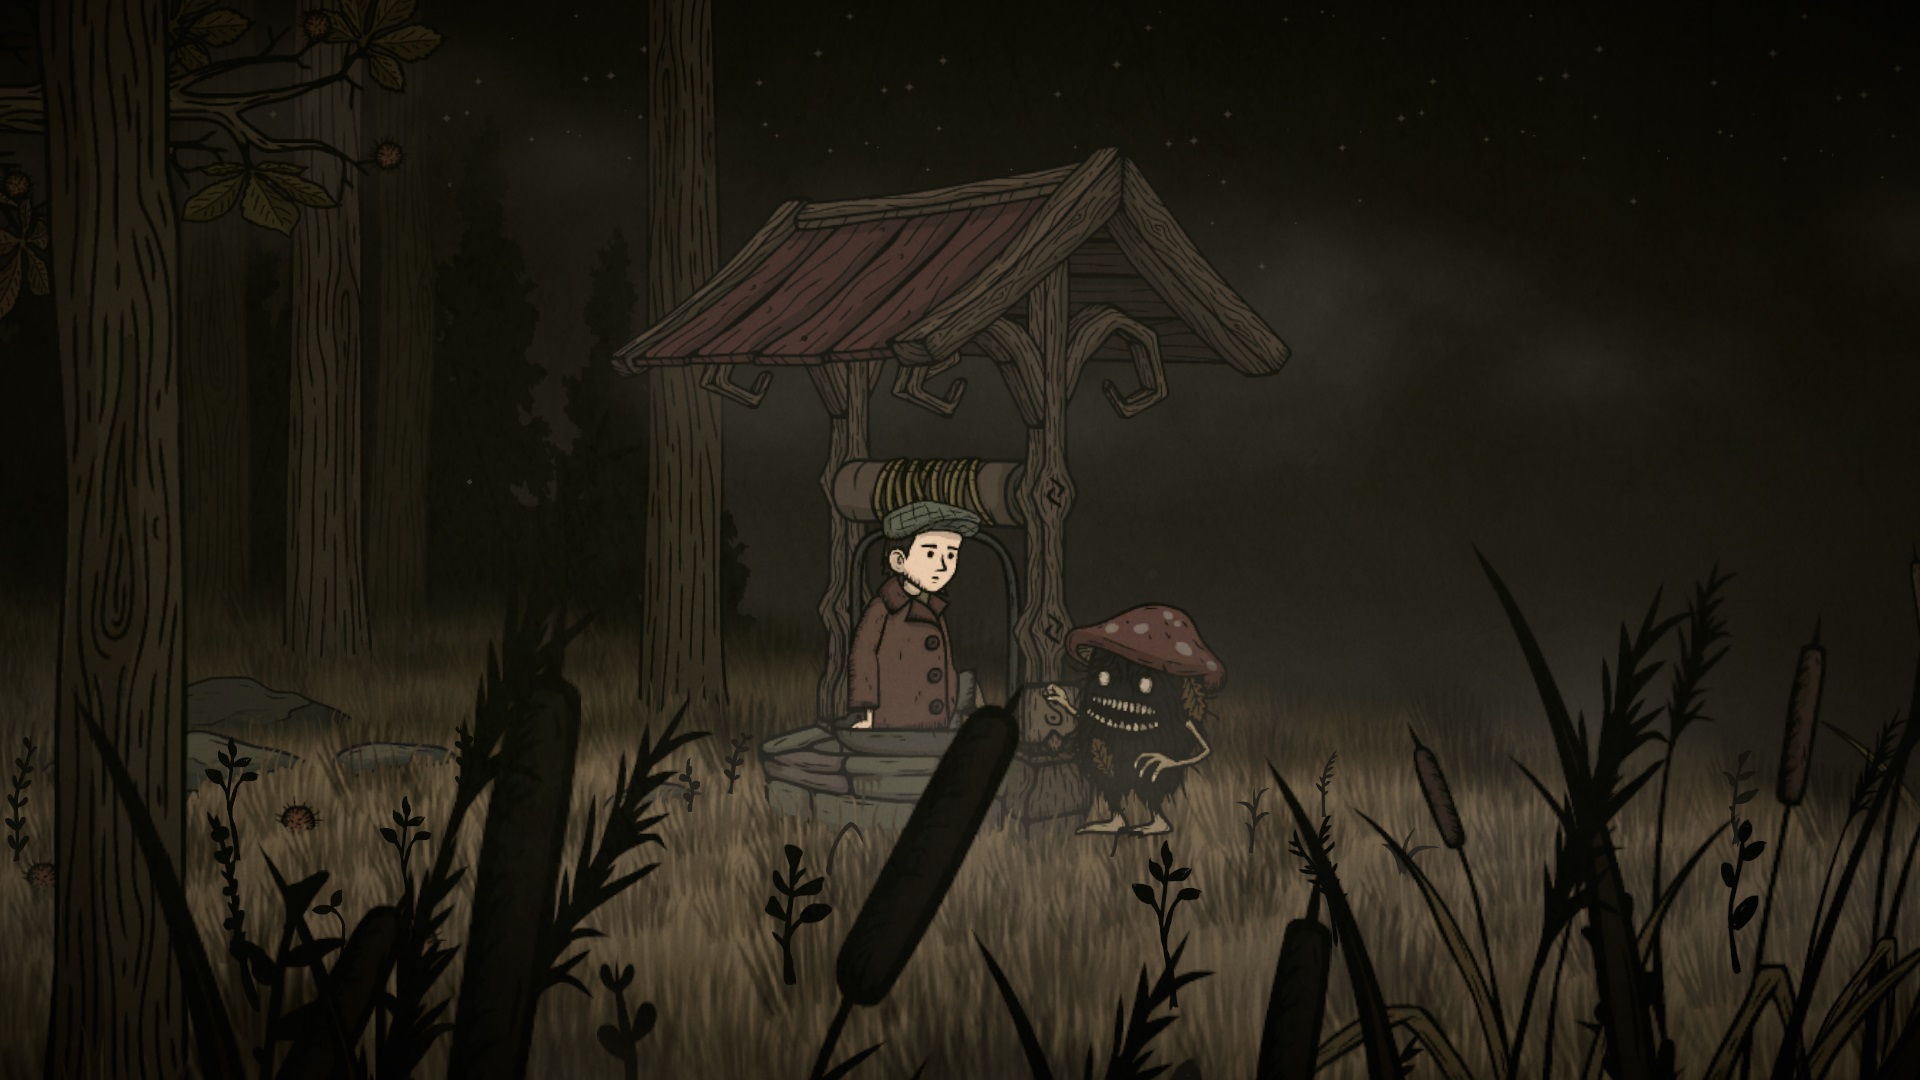
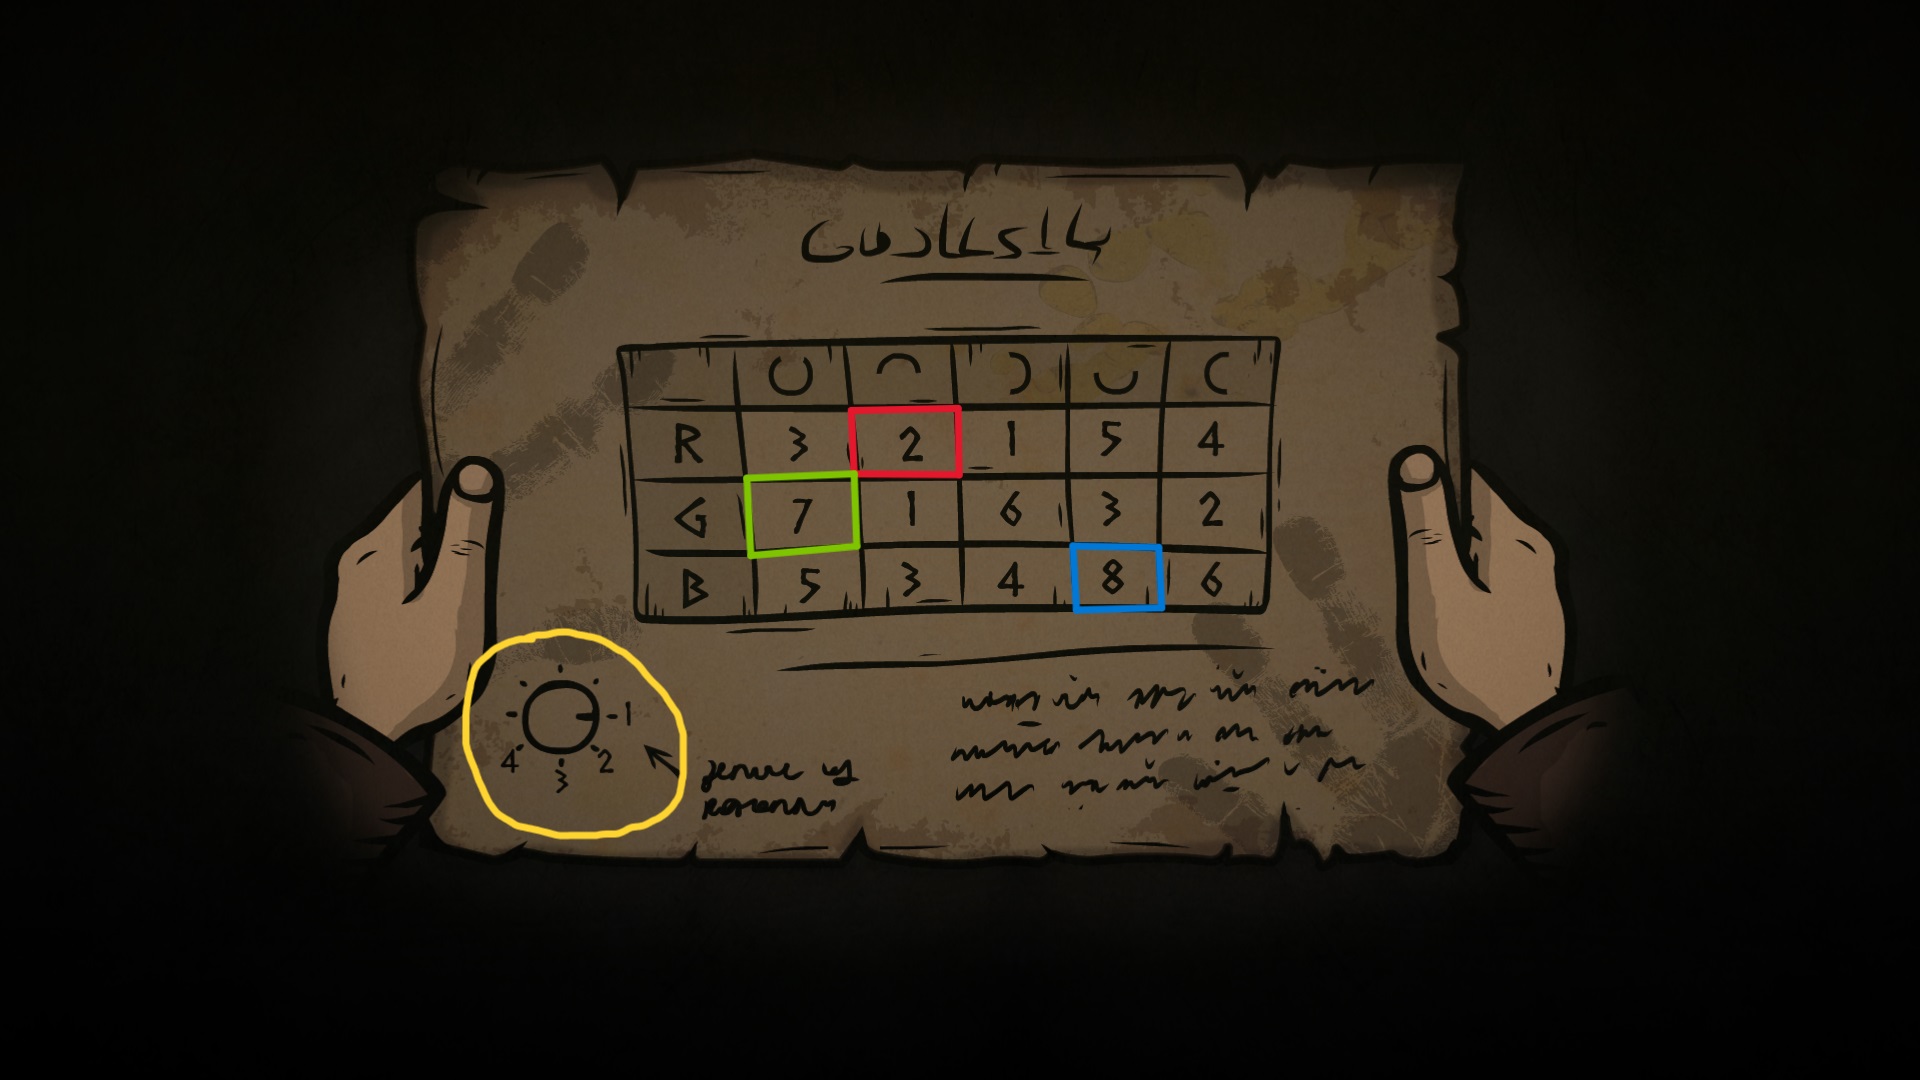
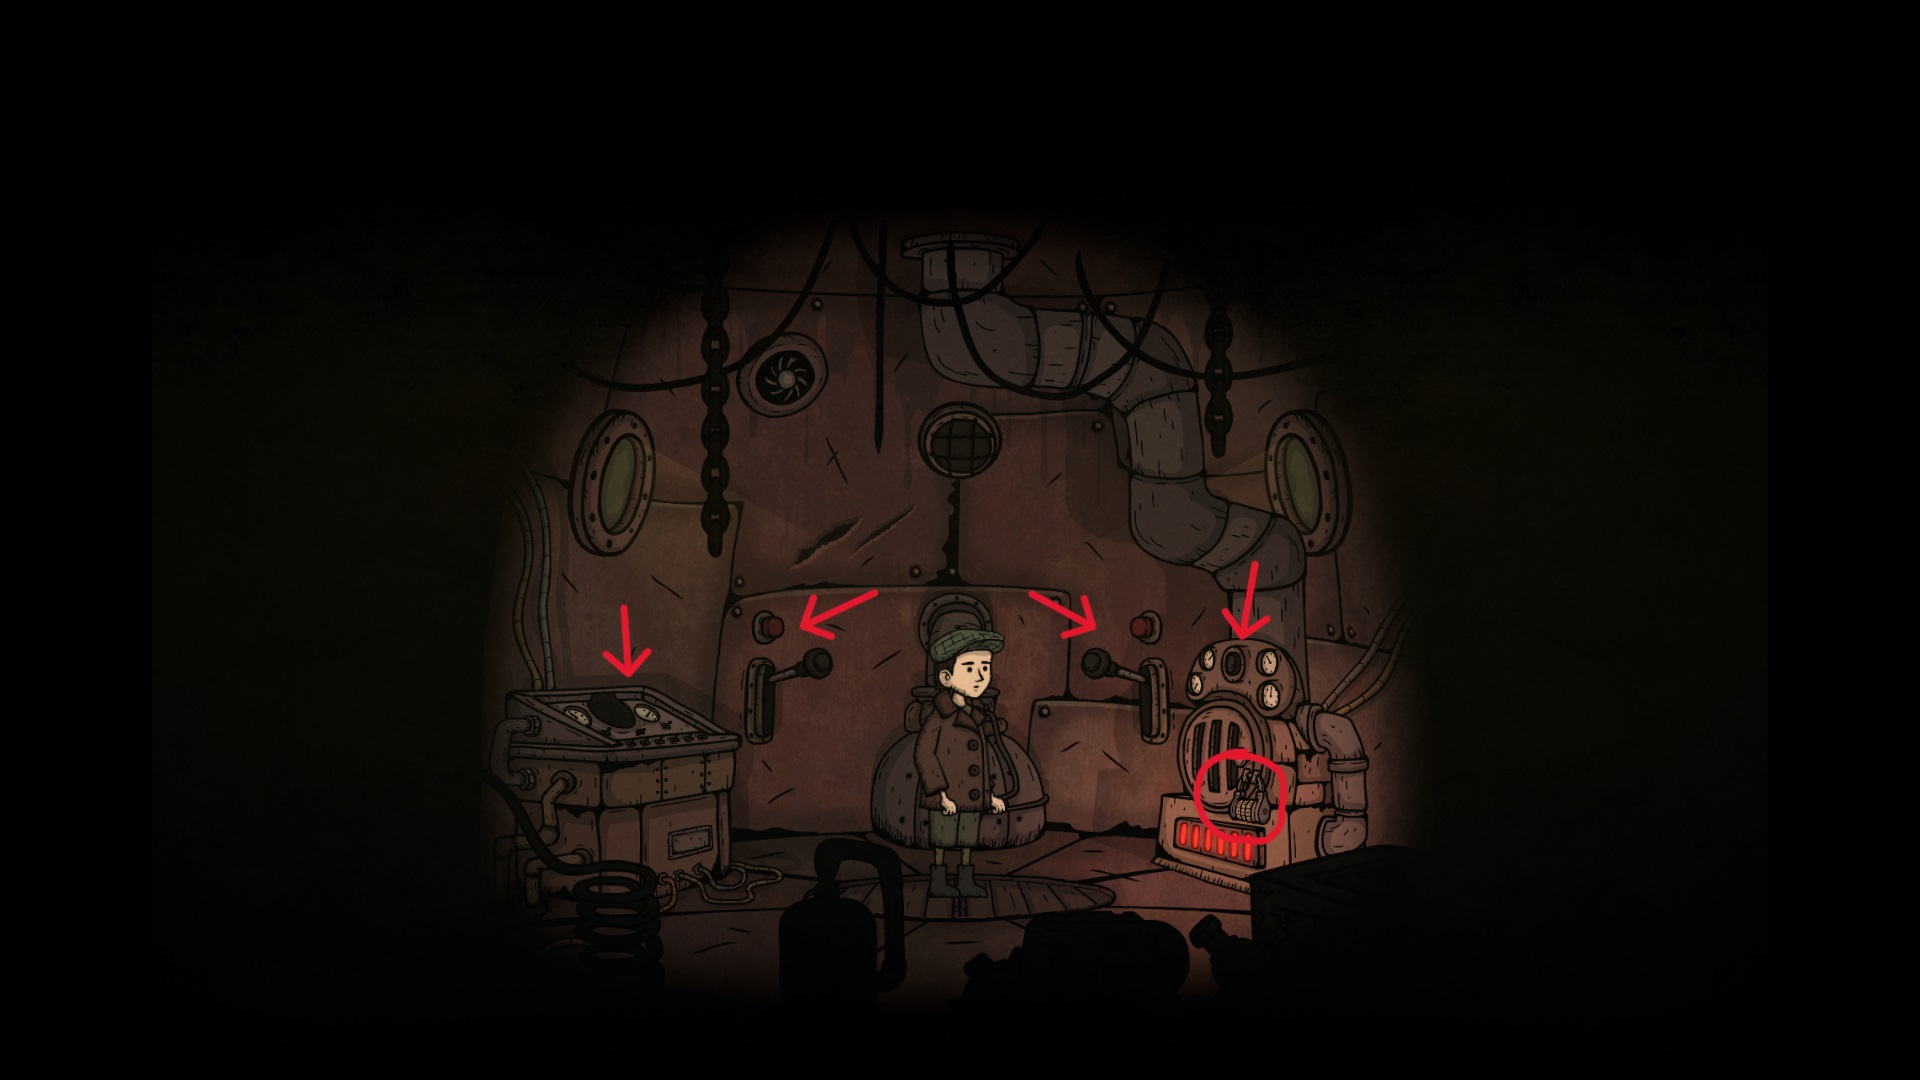
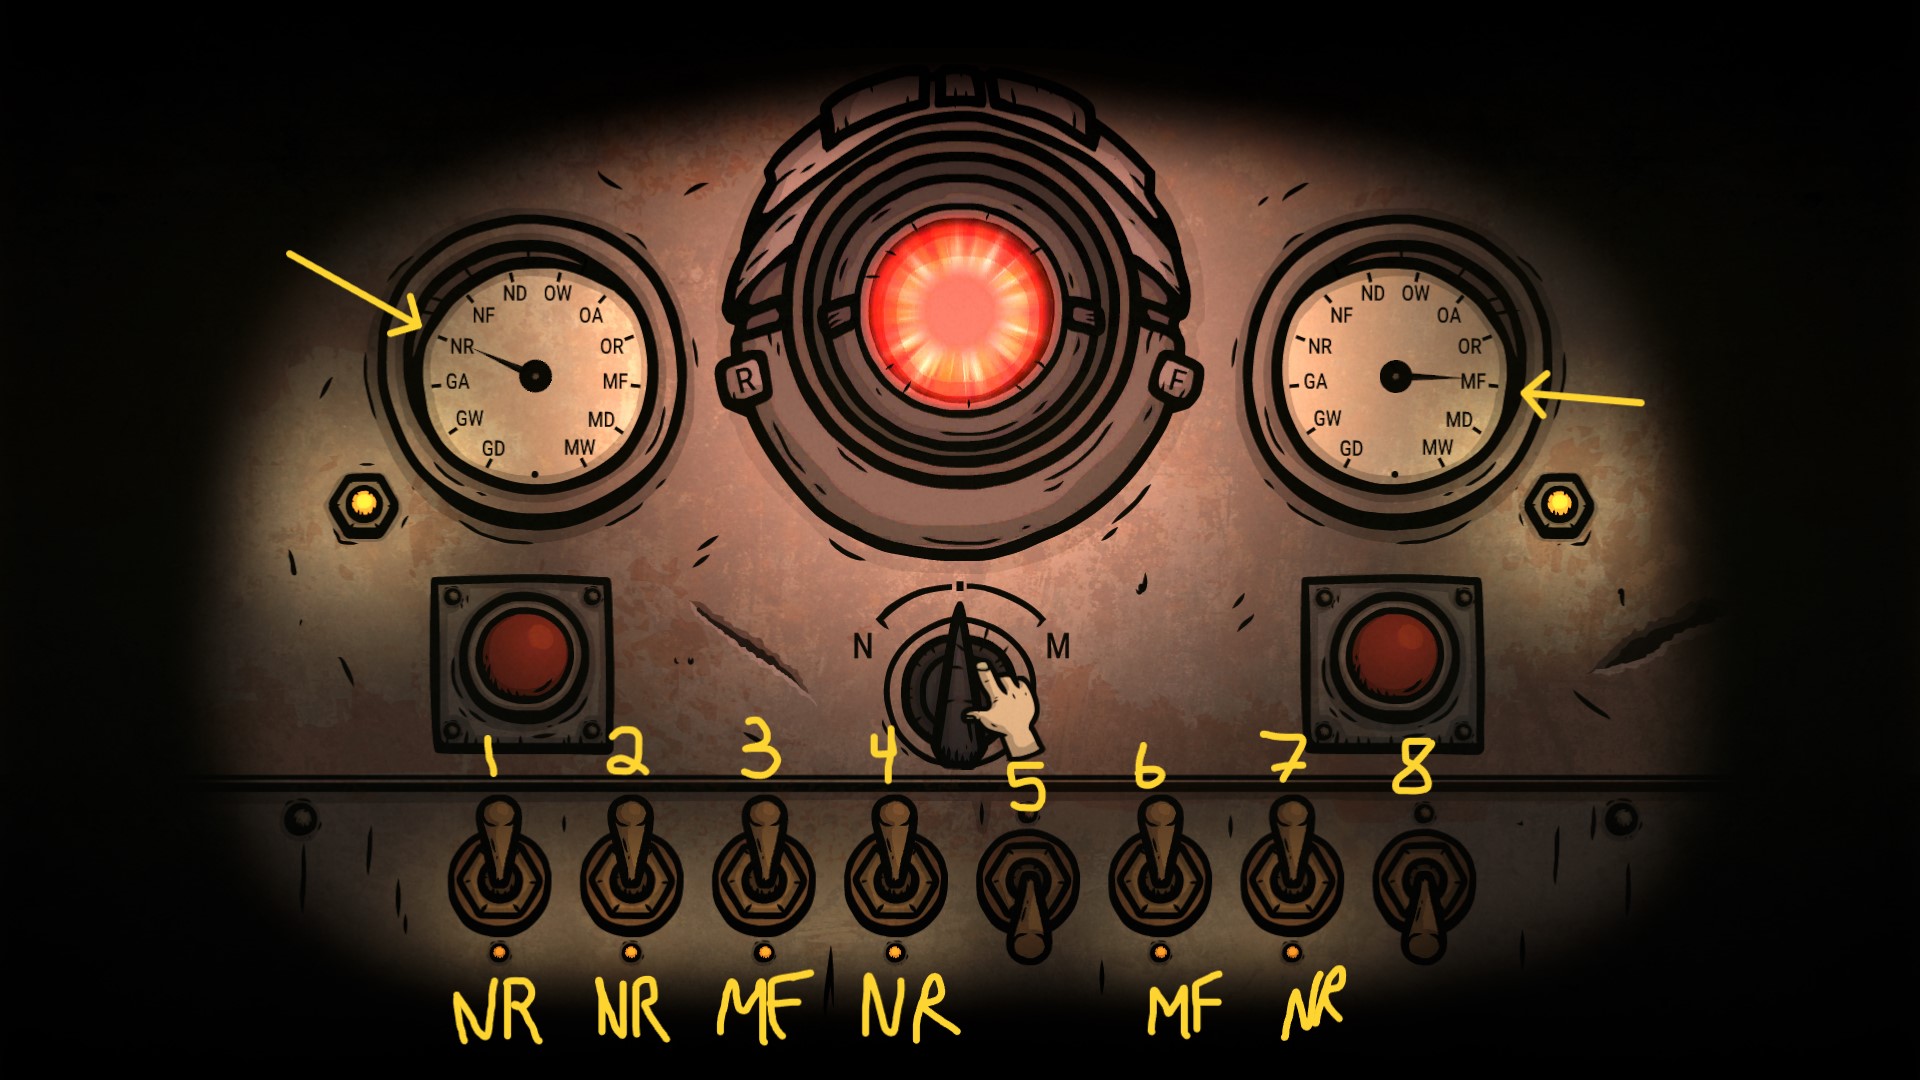
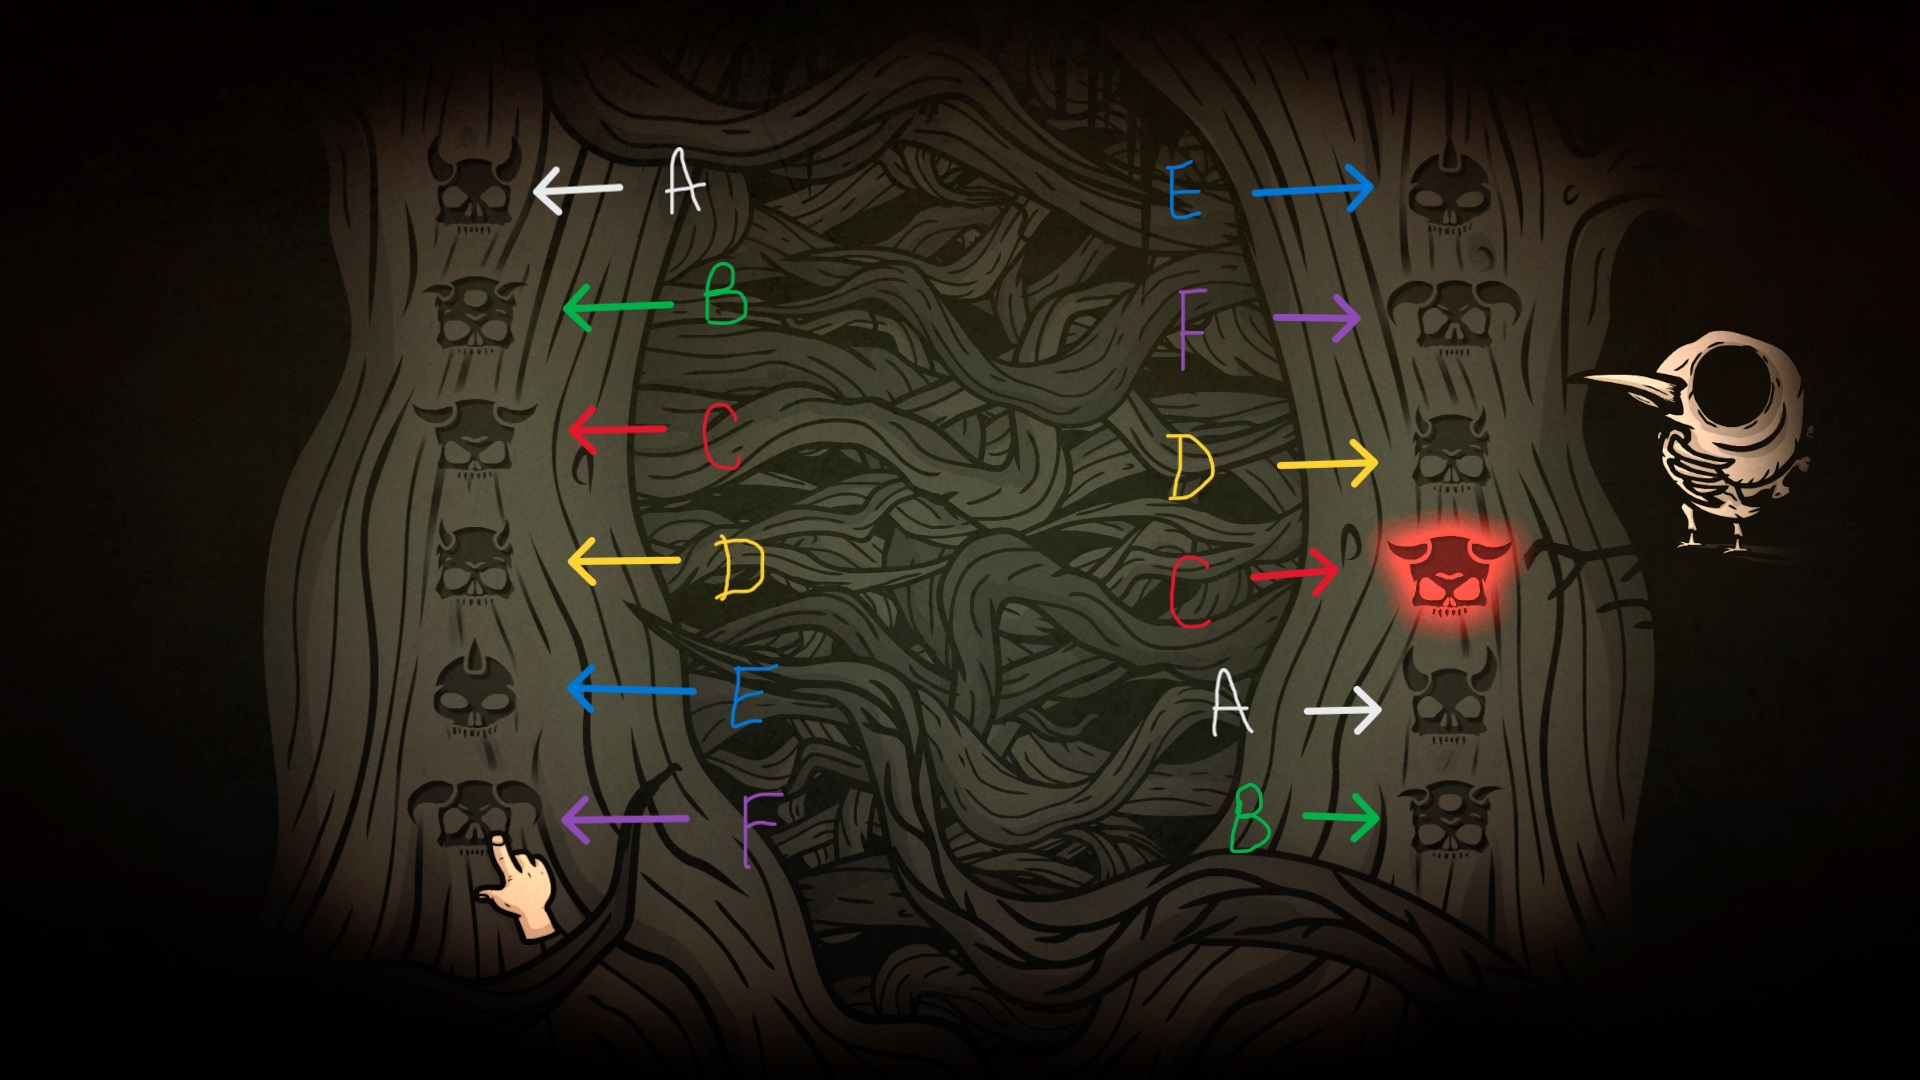
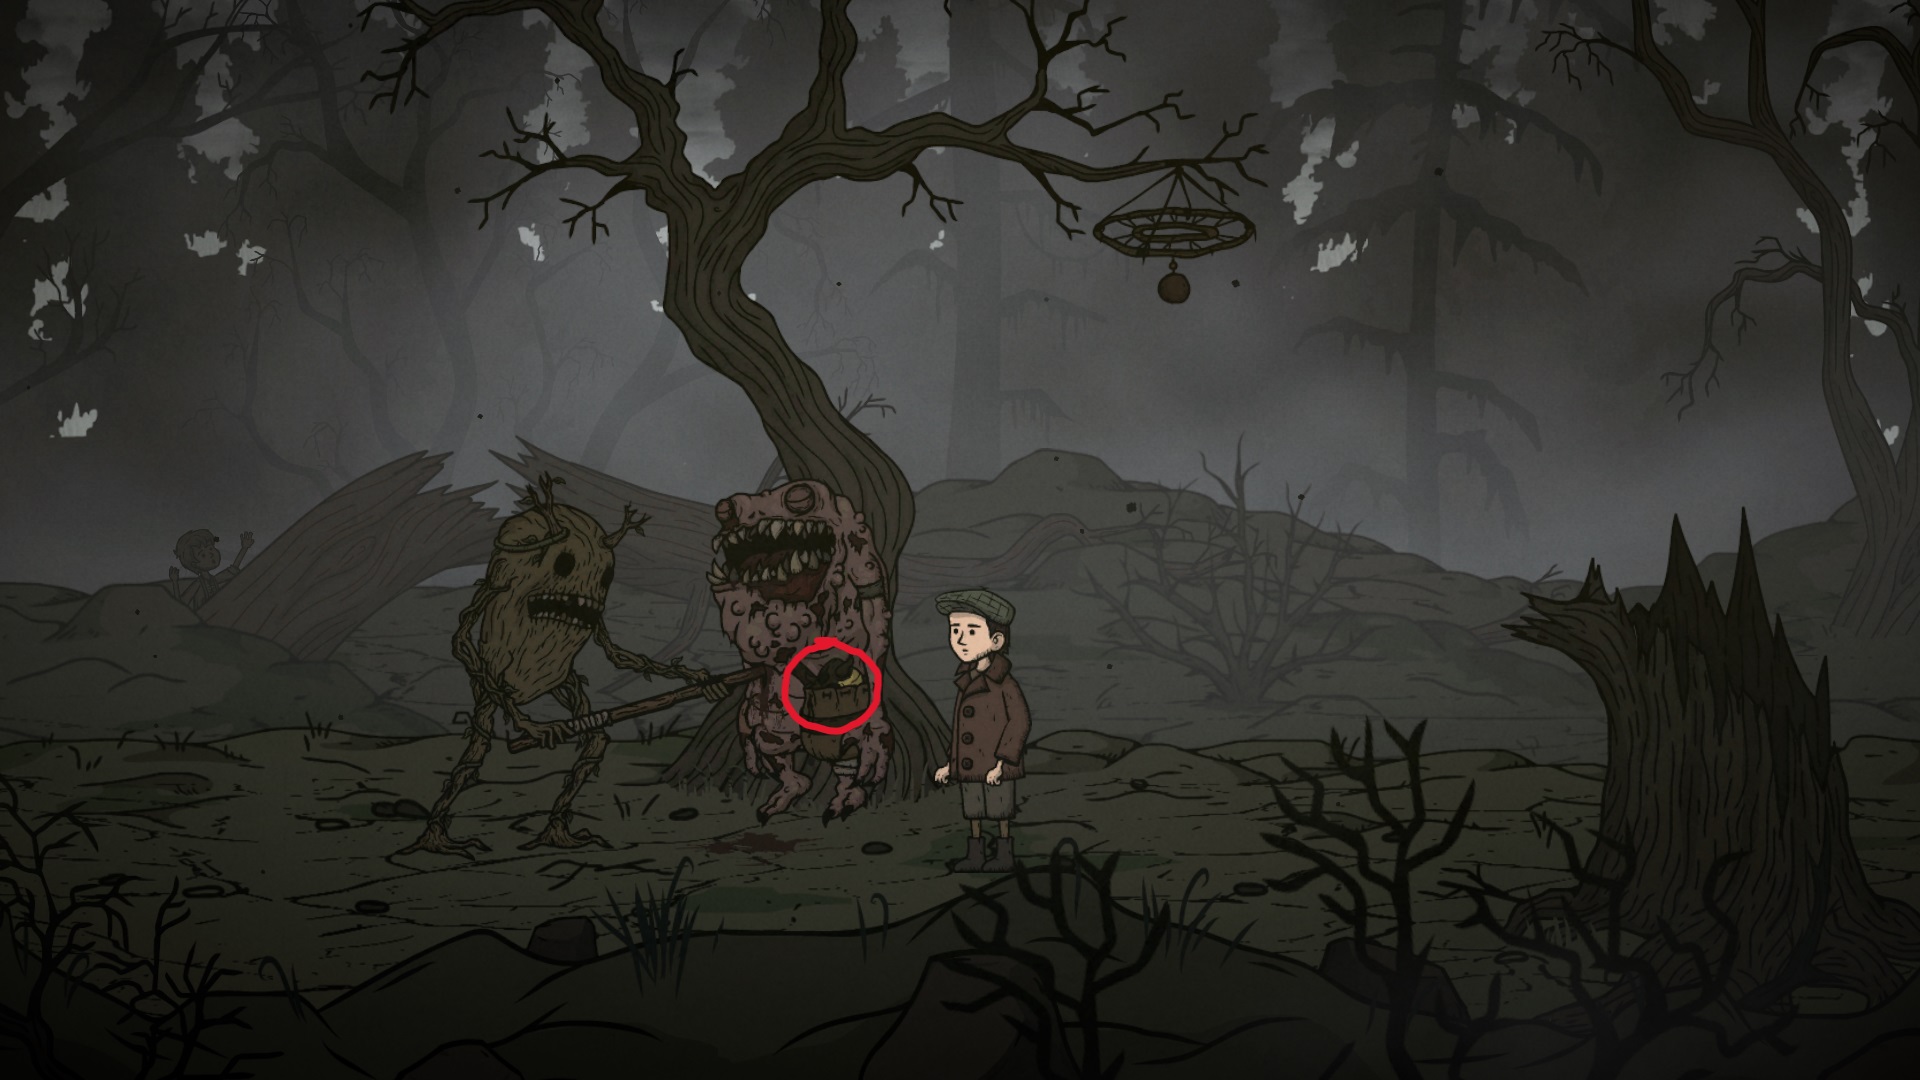
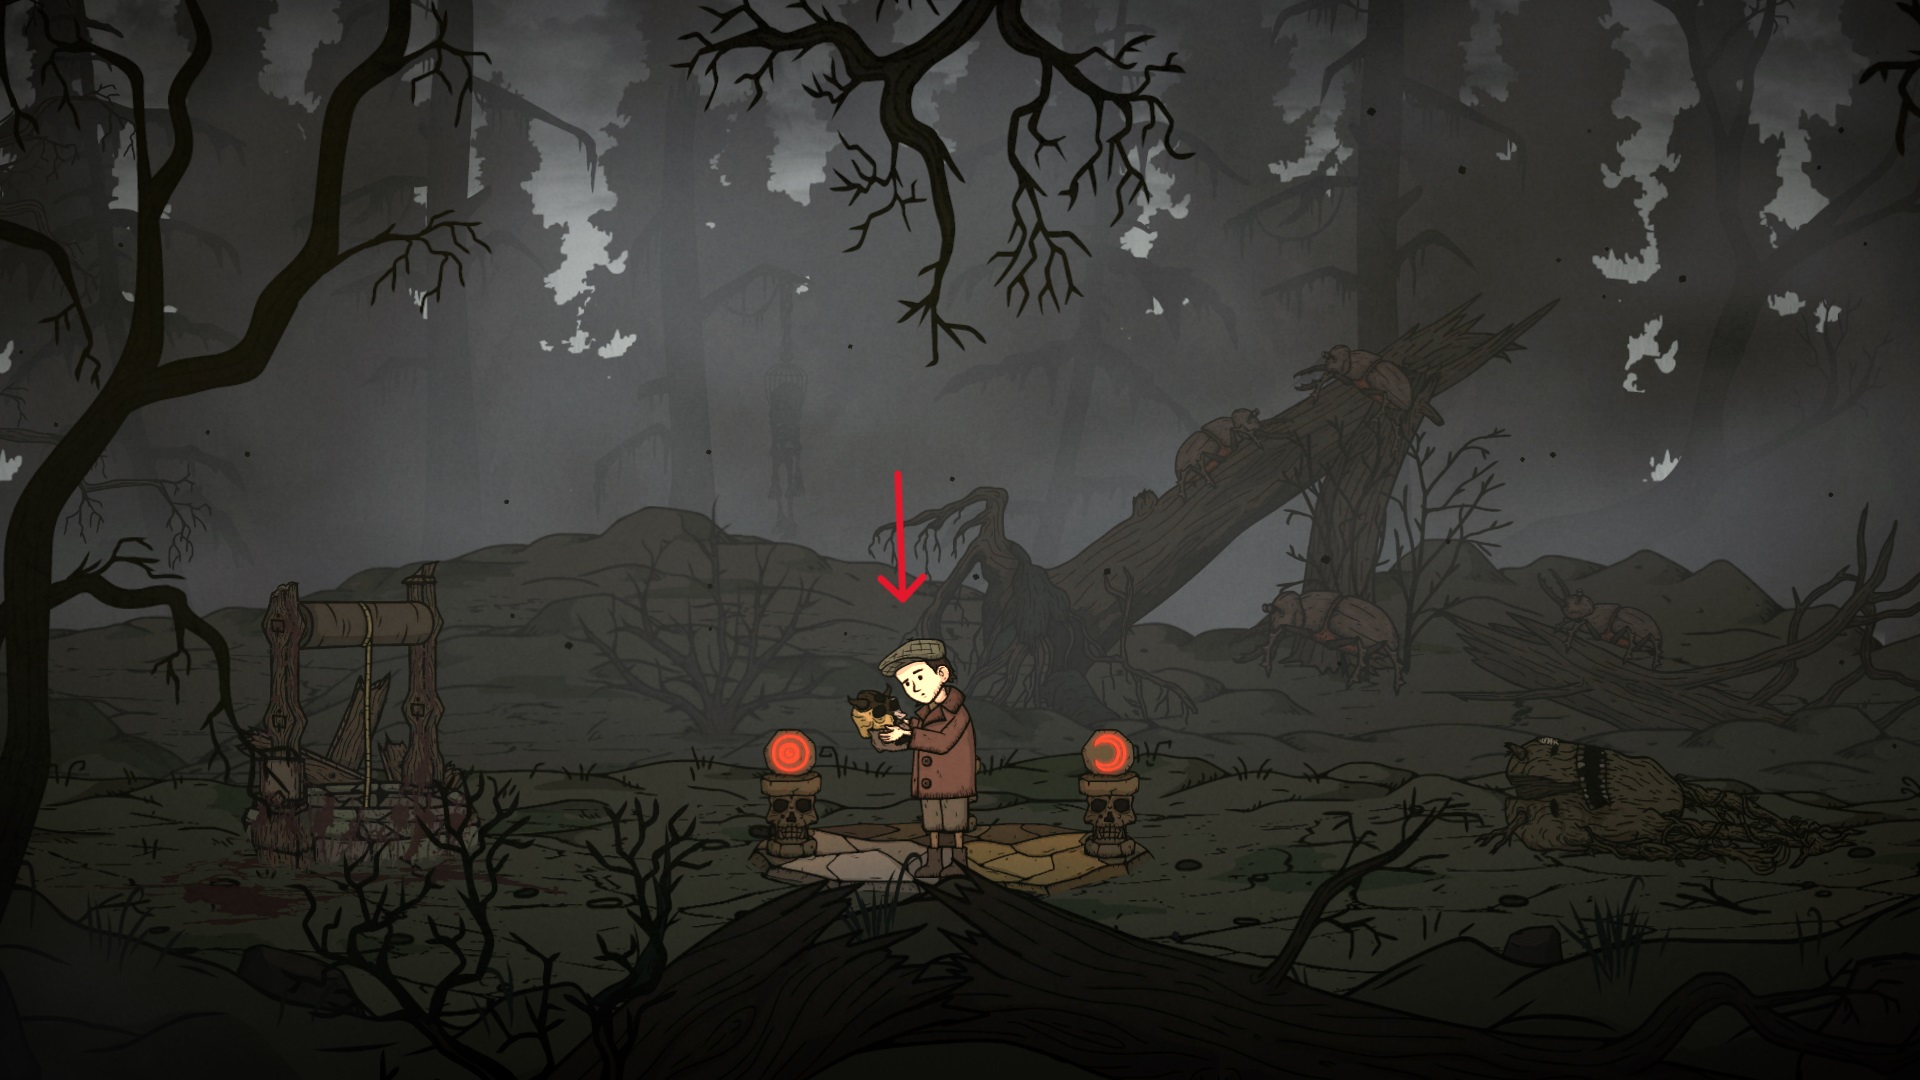
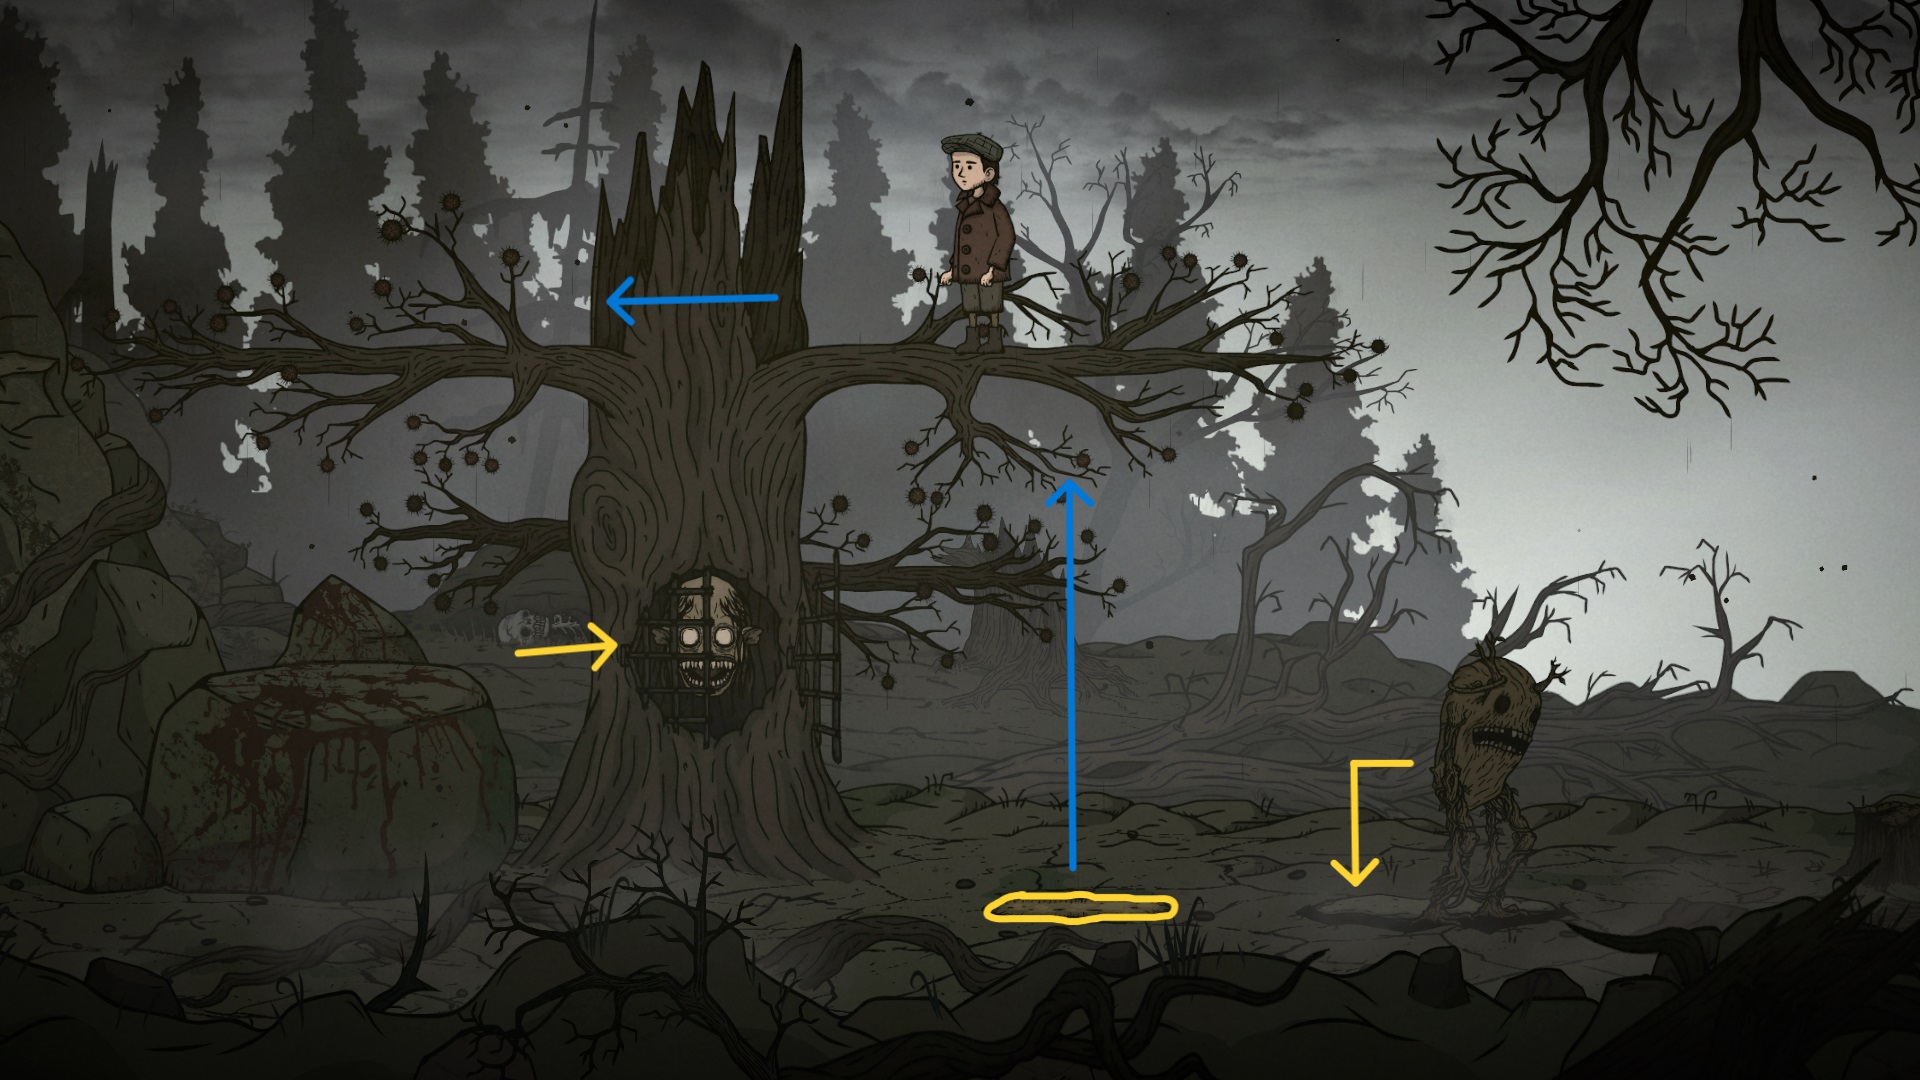
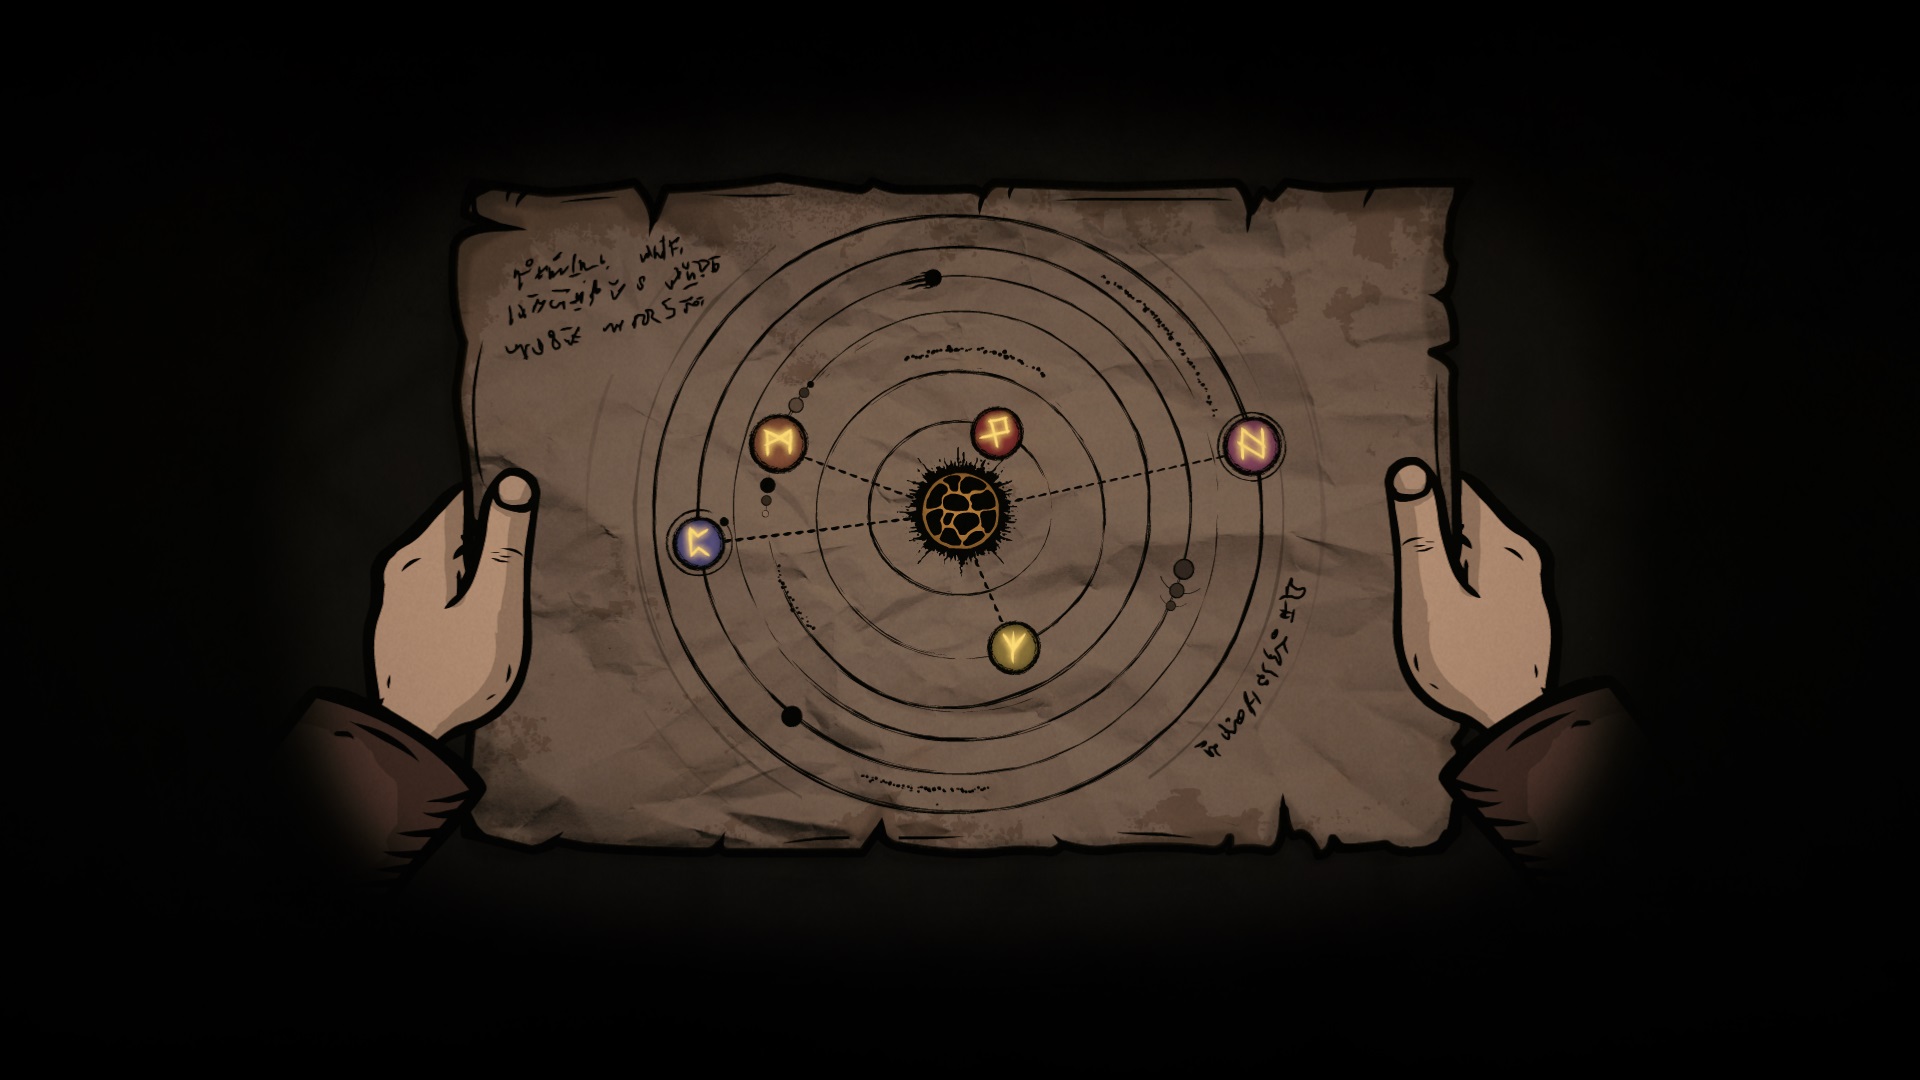
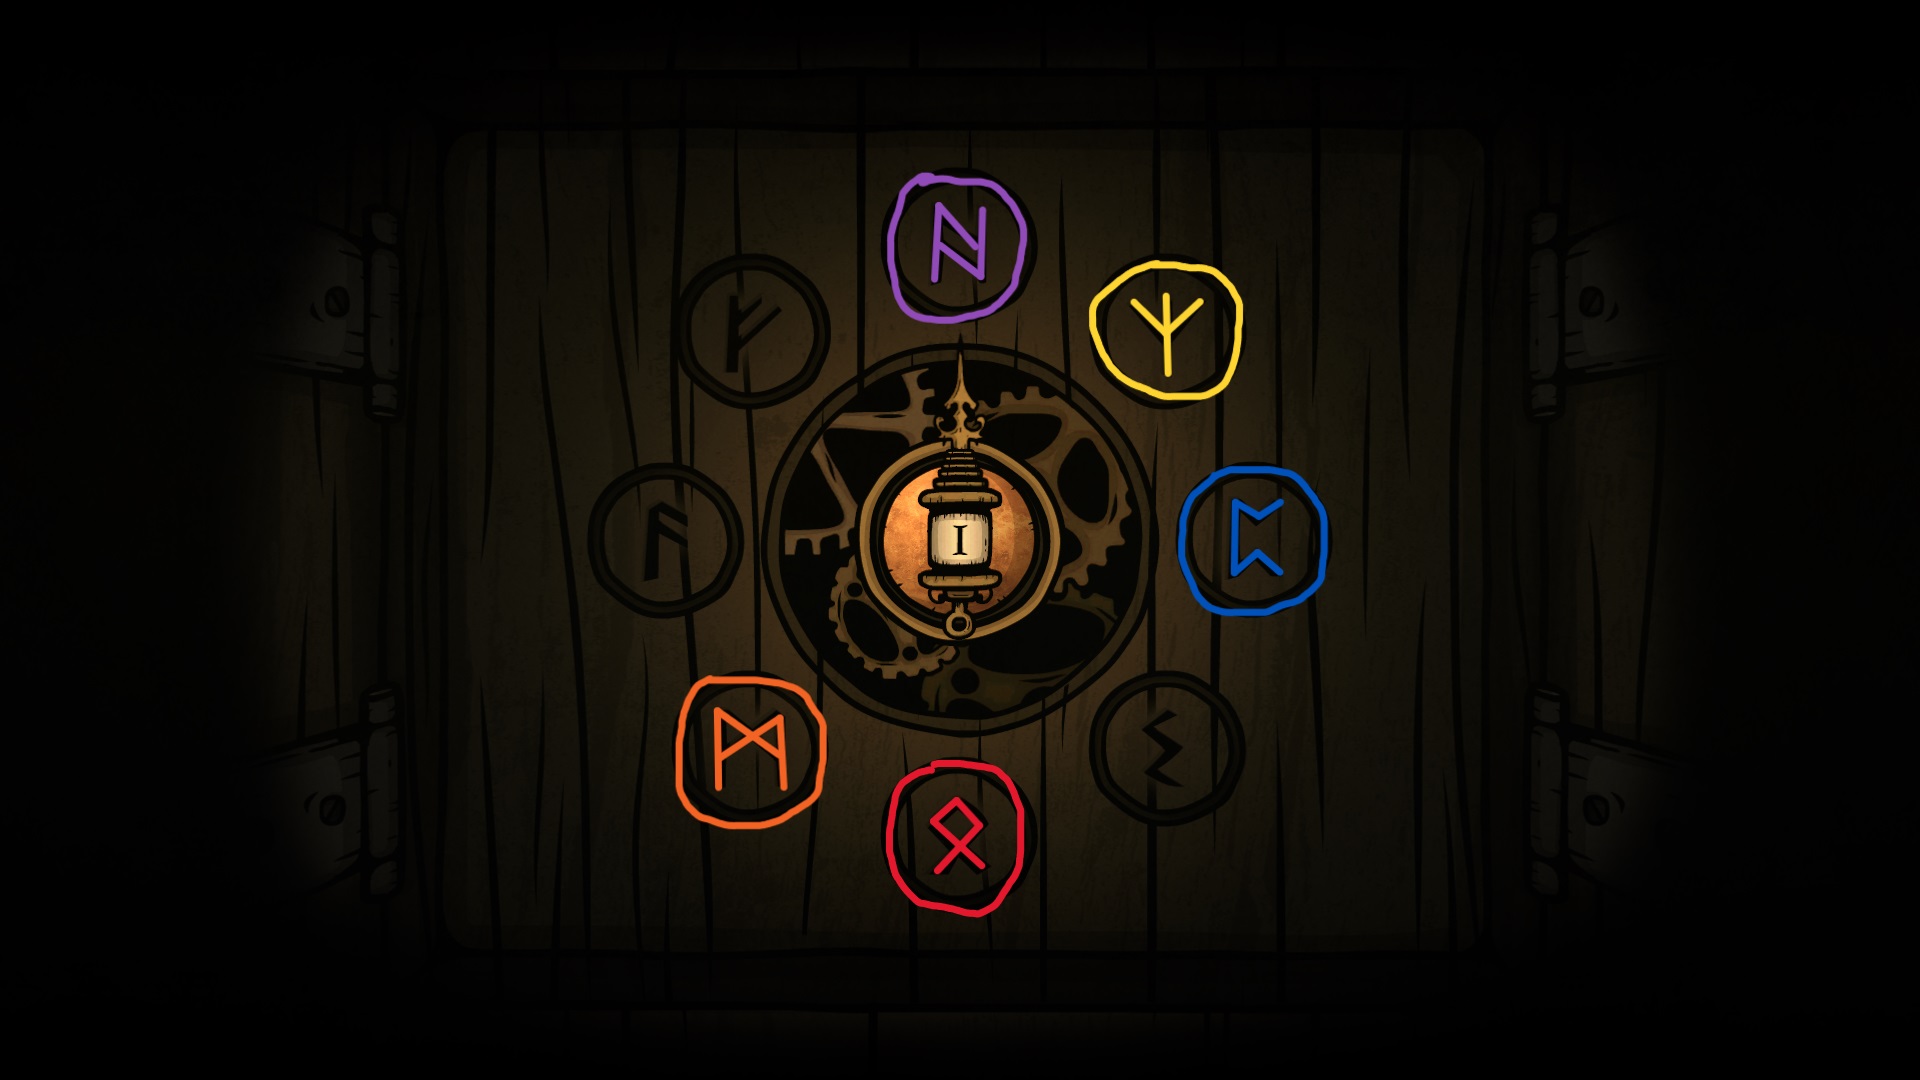
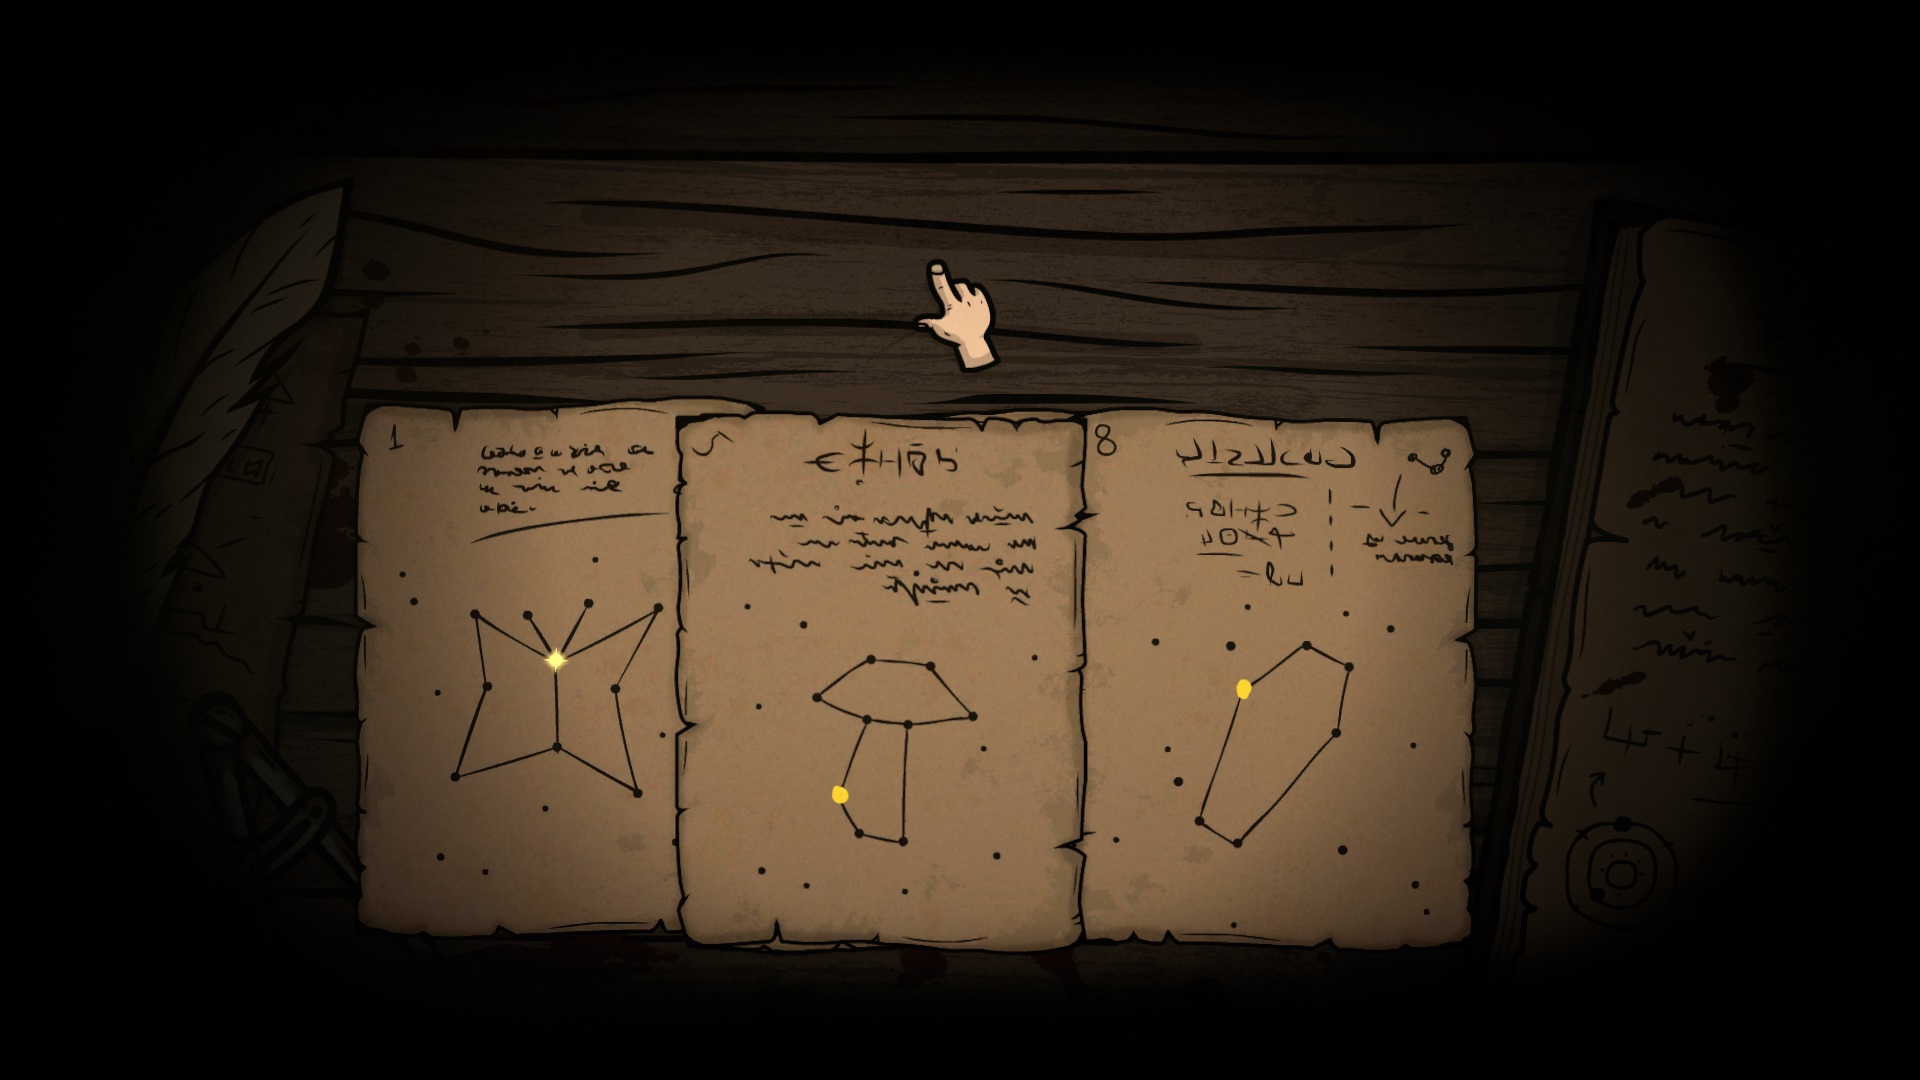
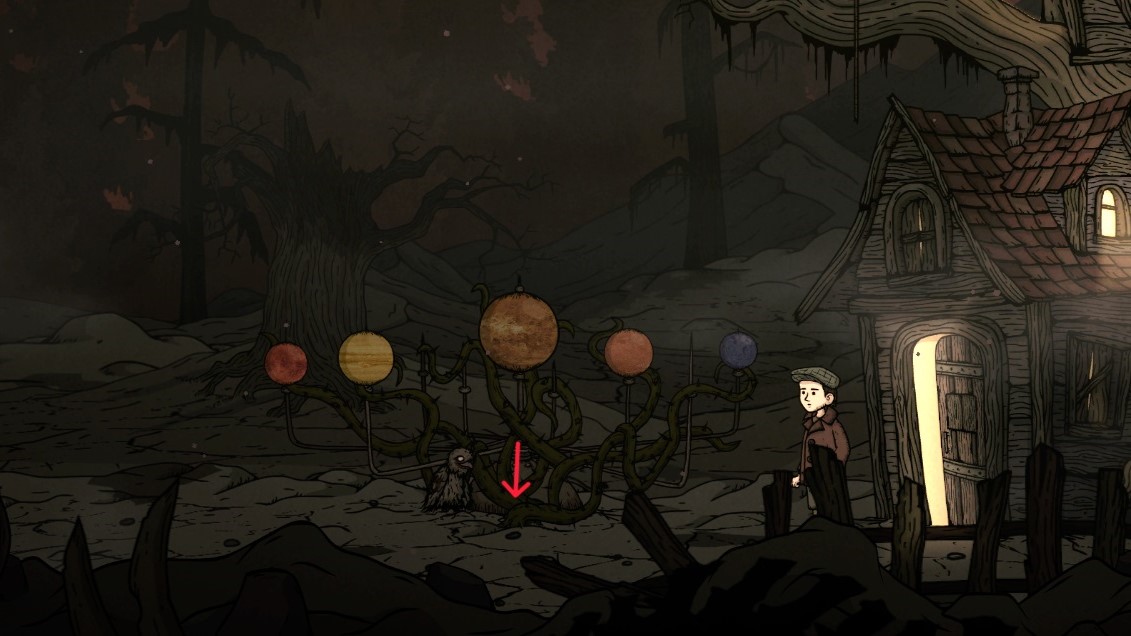
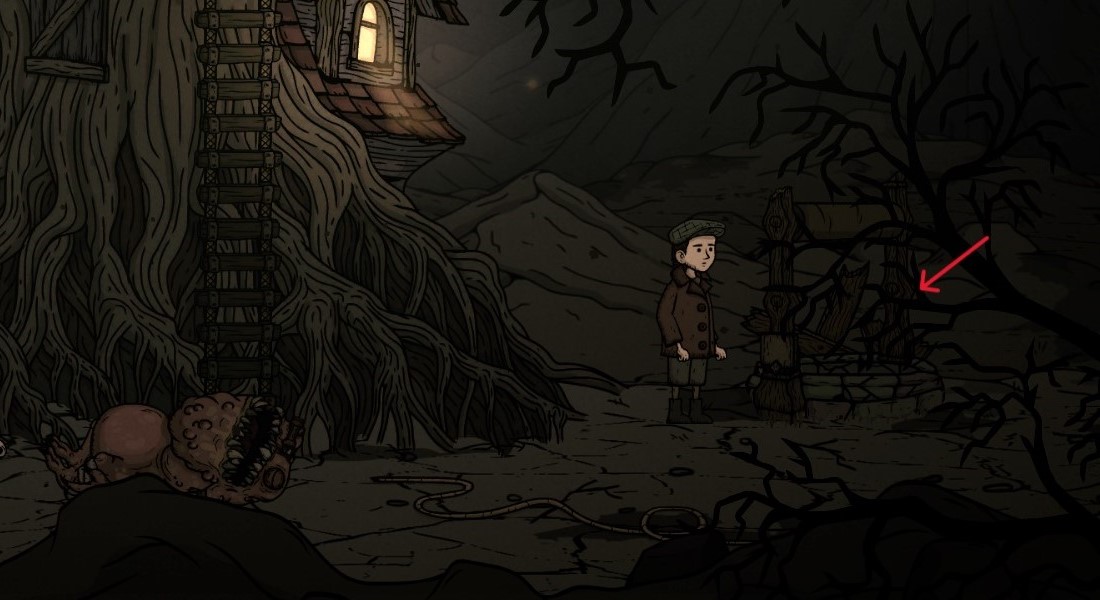
@alphabetsoup Appreciate your feedback! The NR/MF puzzle in Chapter 3 indeed has a new solution, so that has been corrected in the guide. I originally unlocked Ornithologist by accident, so I'm not clear on the requirement beyond completing the level without using the fruit on the bird.
alphabetsoup 8 月 29 日 上午 2:10 
Thanks again for the detailed guide.

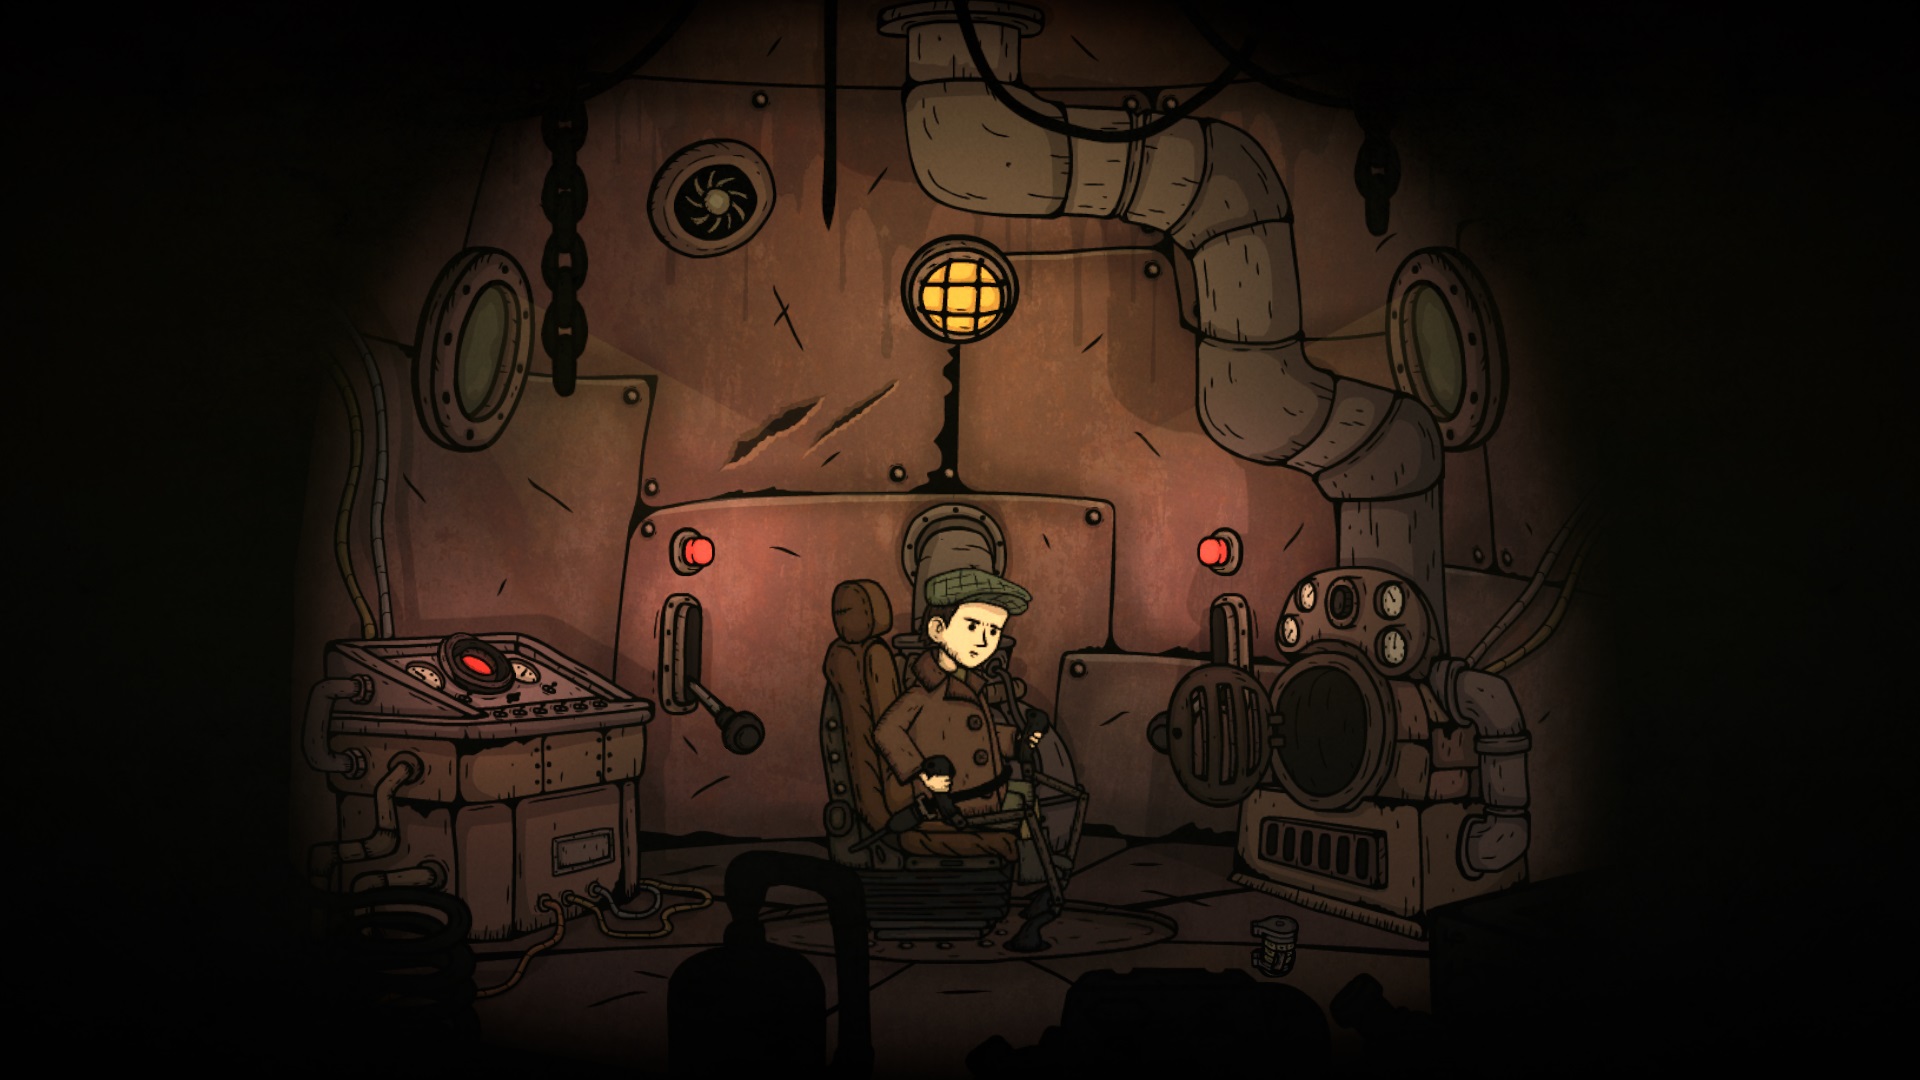
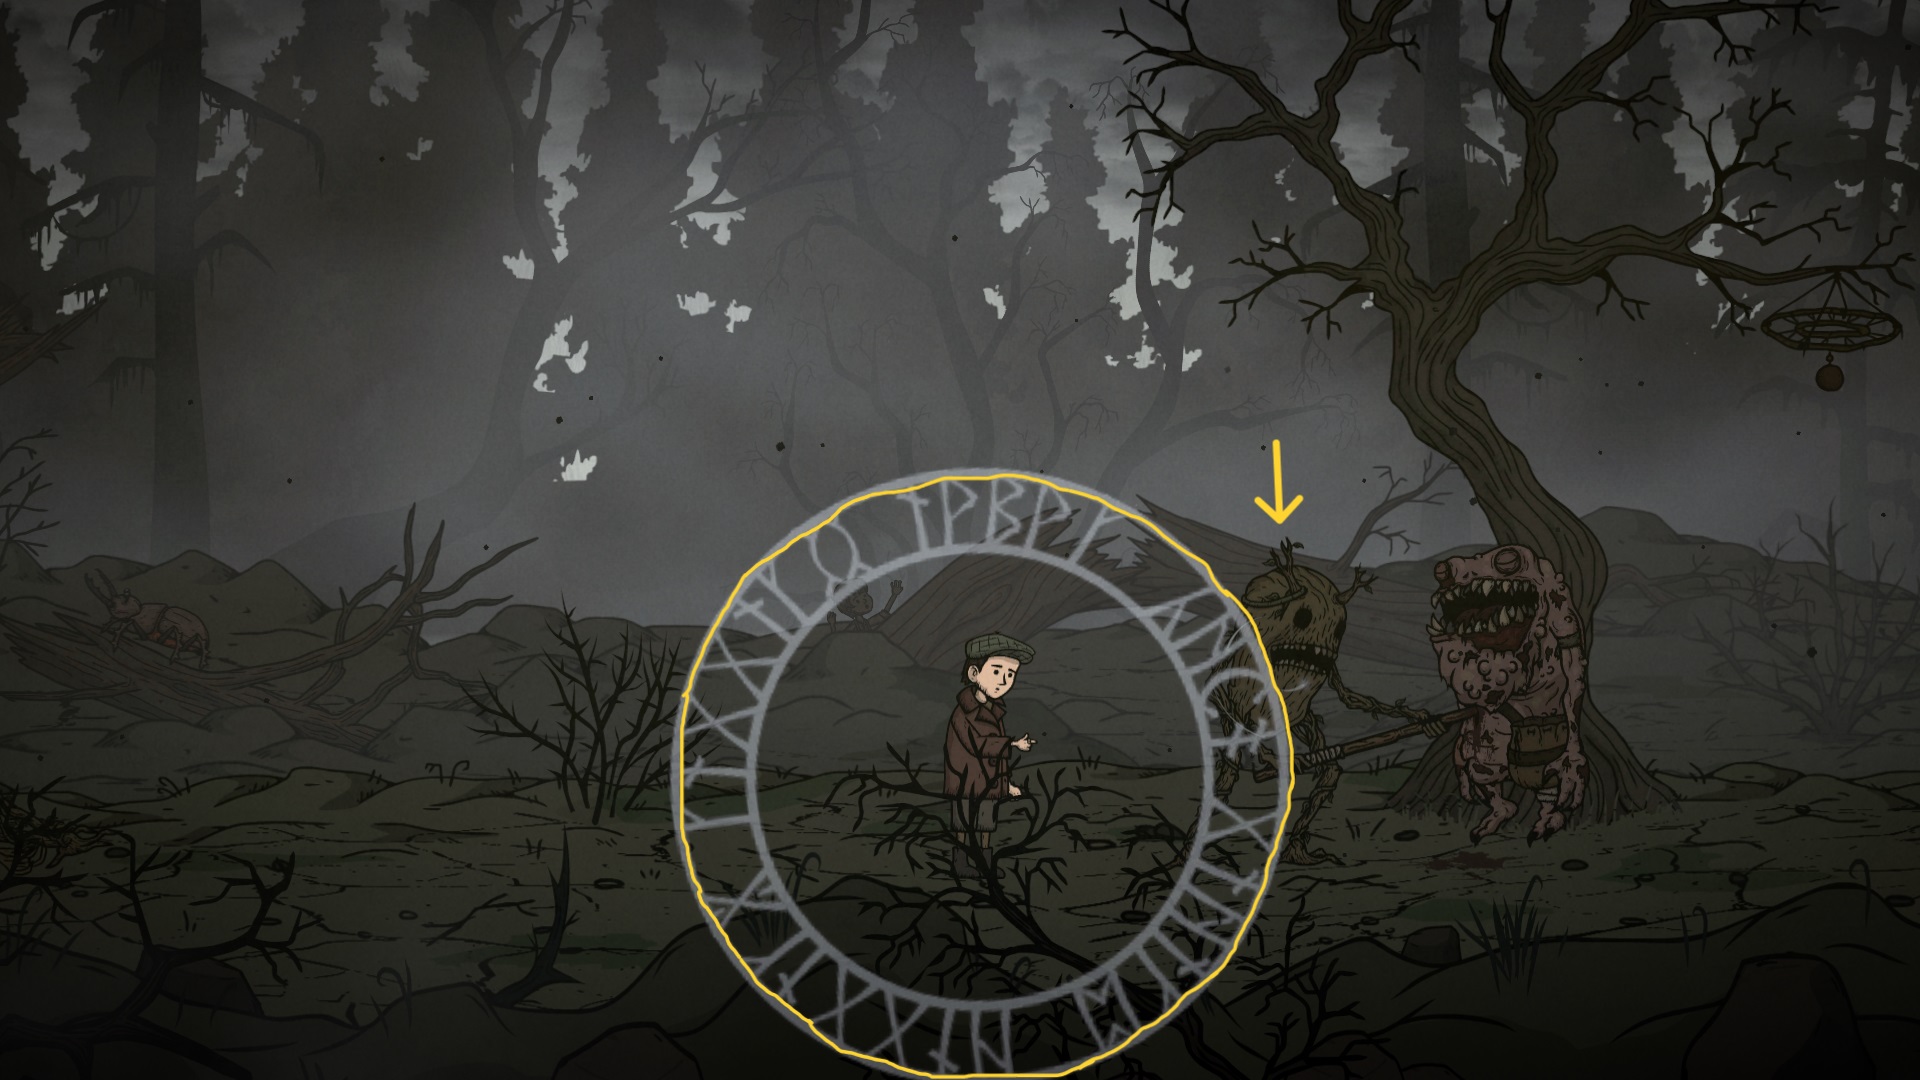
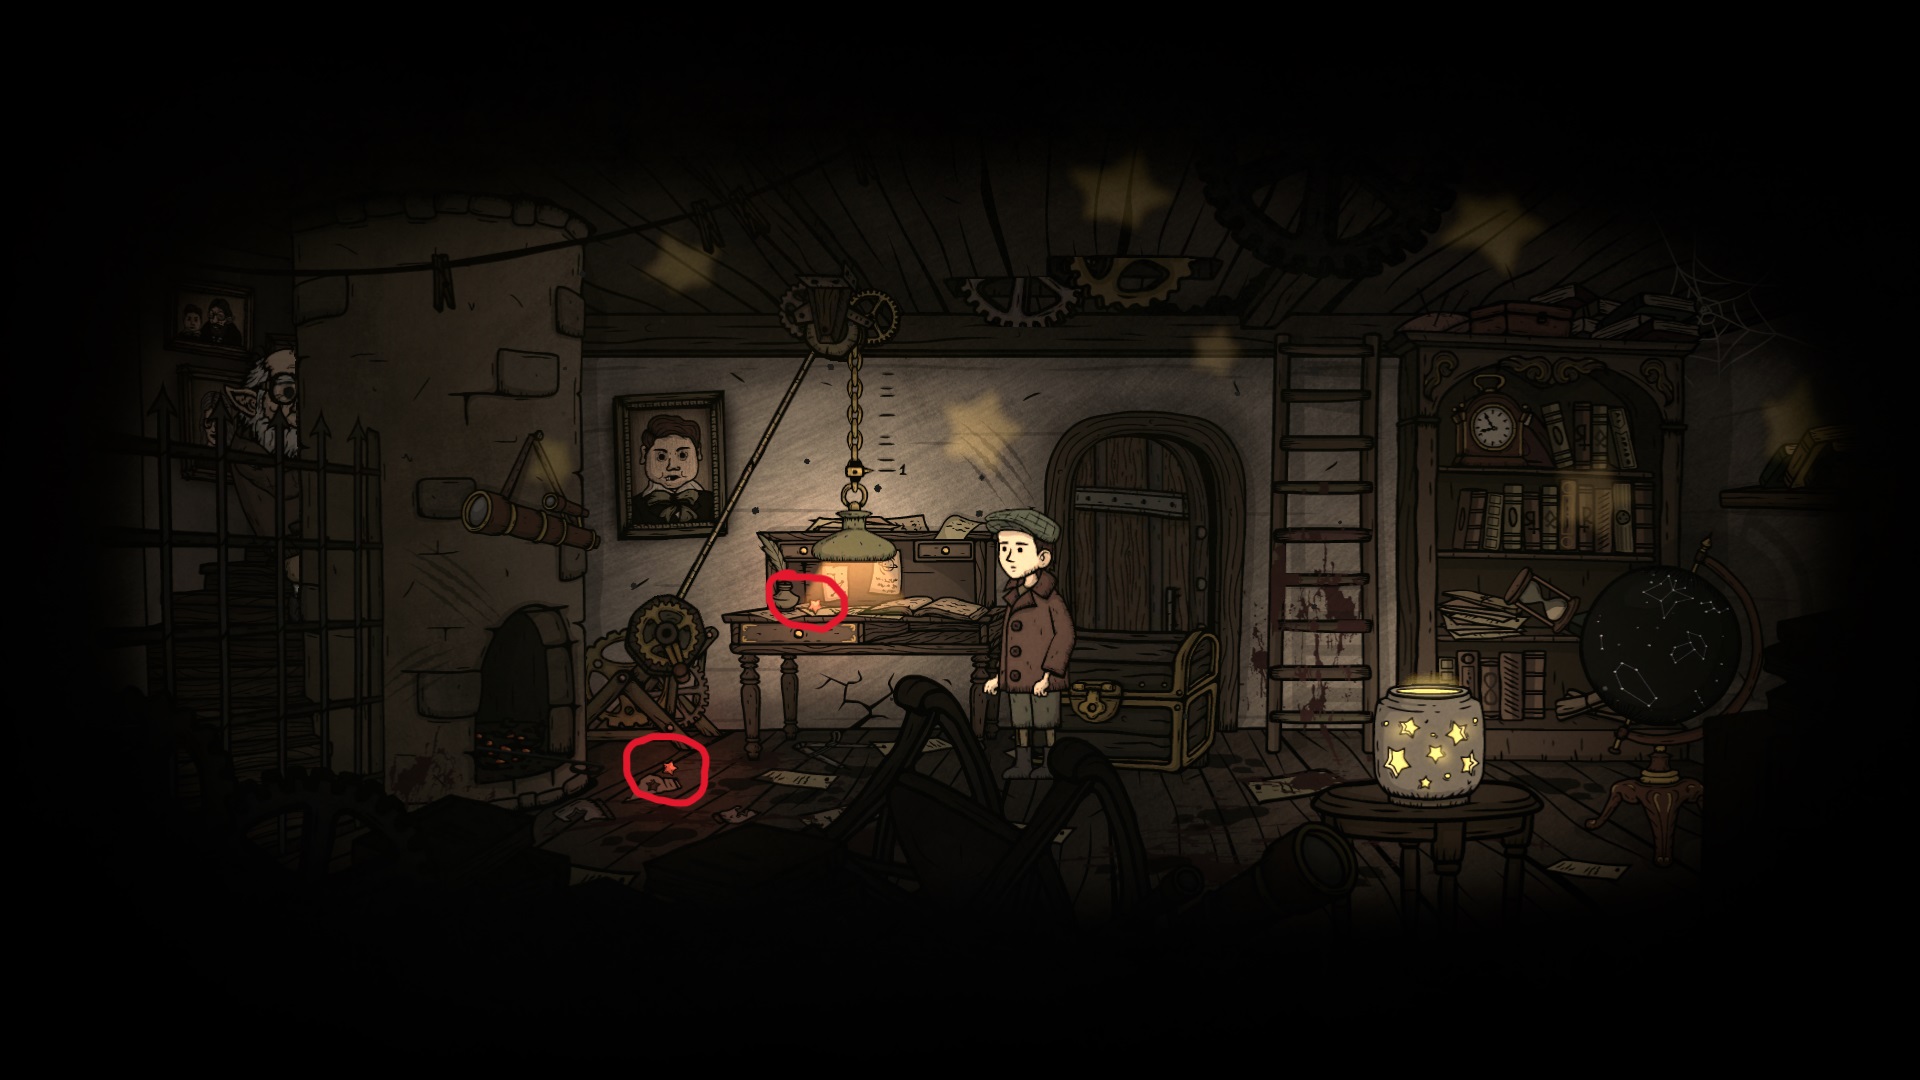
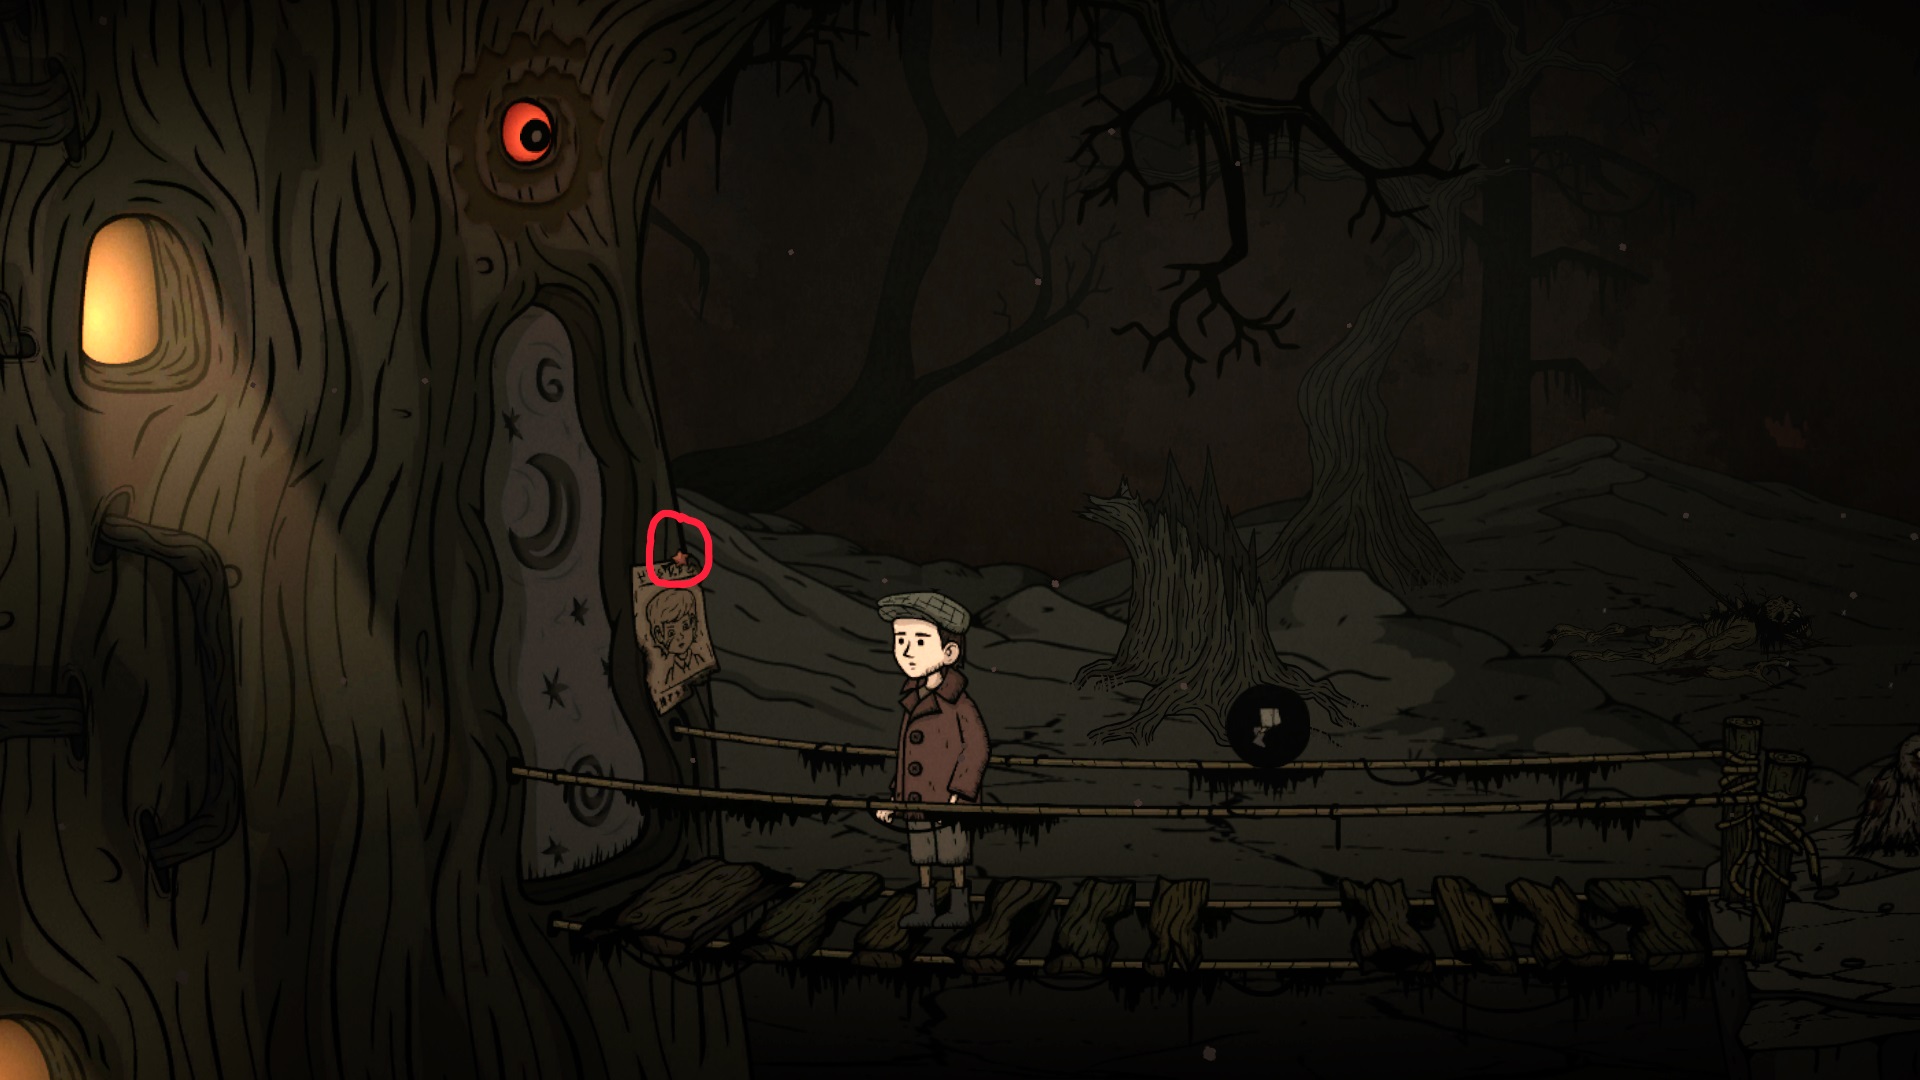
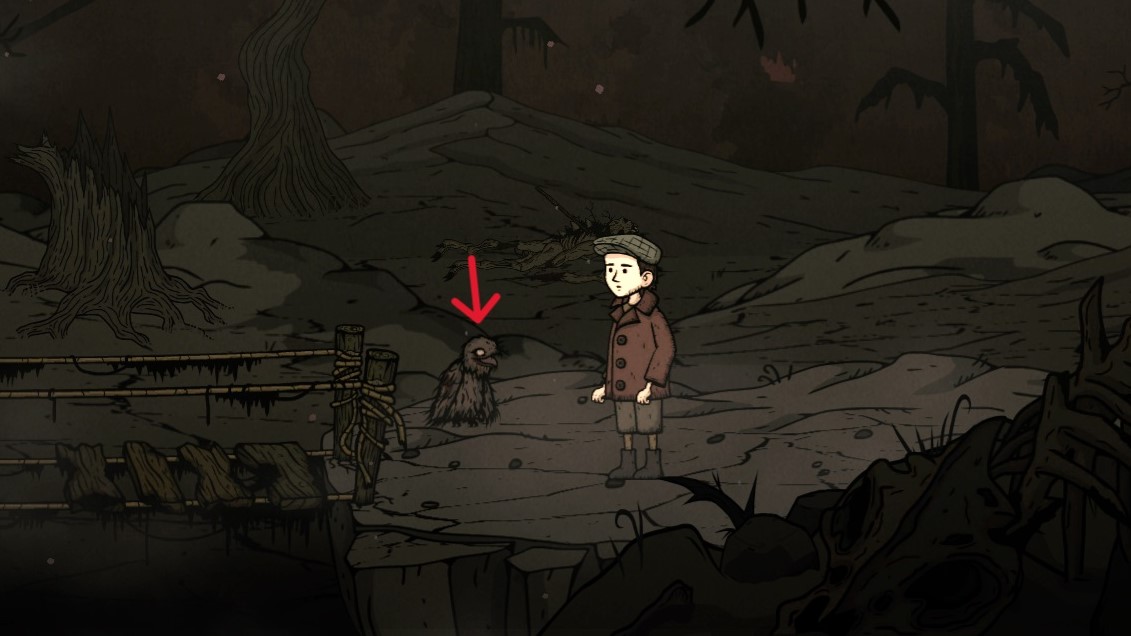
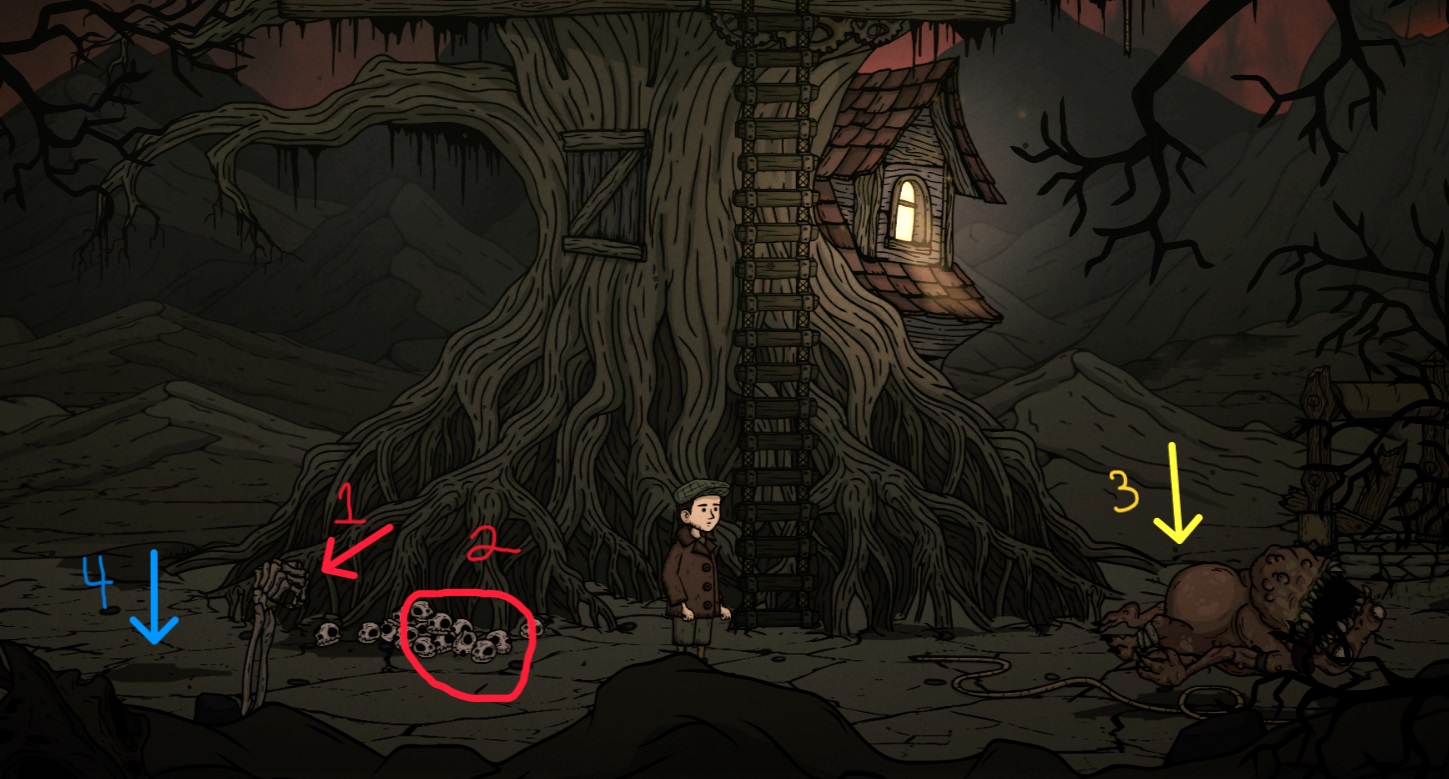
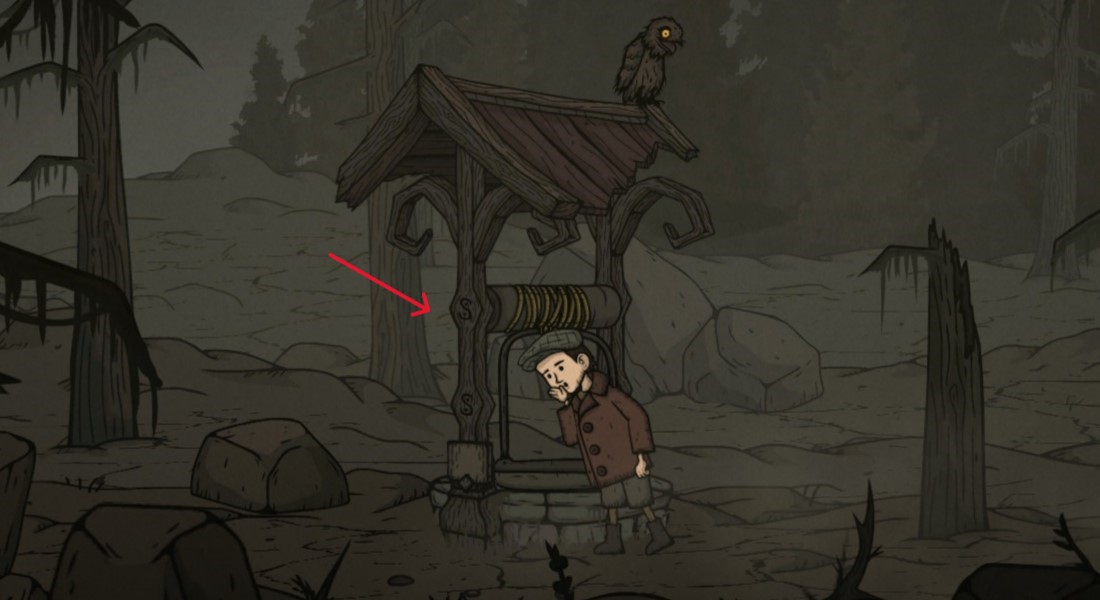
I think Ornithologist actually requires you to not use the rotten fruit on the bird so there are extra steps after 27 in your instructions to get the bird back through the portal.
Also the NR/MF puzzle may have changed since you wrote this guide since I had a different solution (maybe there are multiple, I didn't acutally test yours)
meowth.to.fakt 5 月 25 日 上午 12:47 
Very helpful but I am stuck at chapter 8 and can't finish it. I mean I did everything - gave the skeleton arm a knife, picked up a skull, revived a kvarg and the skeleton arm killed it. Then I tried to revive it again, used the ring on a well and called into it. After walking to the edge of the screen nothing happened. The chapter doesn't end. Can't go to the next chapter. Have tried many times including playing this part of the chapter again. Did anyone have the same problem?
More Than A Mia 1 月 31 日 下午 9:15 
Just as fantastic as the walkthrough for Ingrid Penance. Thank you again!
cheesaru  [作者] 1 月 12 日 下午 7:25 
@Netheru That sounds like a frustrating experience, but thank you for suggesting a change that will benefit others. I have (very belatedly) added the achievement to Chapter 1 under a spoiler tag so it can still be opt-in information for players. Thanks for reading and I hope you enjoyed the game :)
Netheru 2024 年 9 月 7 日 上午 2:04 
Really nice and useful guild, but please update it for the Screamer achievement. I just found out in chapter 8 that you need to interact with each well.