Loom
89 个评价
Loom Complete Walkthrough
由 \VIRUṢ̵̡́̋̈͂̊͘ 制作
A comprehensive walkthrough for the game Loom, as well as trivia, easter eggs, and lore information.
4
4
   
奖励
收藏
已收藏
取消收藏
Introduction

Loom is a Lucasarts graphical adventure game from 1990 designed on the SCUMM engine and released on various platforms such as DOS, Amiga and Turbografx. The project was led by Brian Moriarty. The story was originally planned to be a trilogy and as it stands, is the only one ever released and thus, the tale is unfinished.

Loom has won several awards from magazines and praise from fellow developers. It received Computer Gaming World's special award for Artistic Achievement [www.cgwmuseum.org] As well as 81st place on their 15th Anniversary "150 Best Games of All Time"[www.cgwmuseum.org] list six years later. Other noteworthy awards included 7th place in ST Format's "Best Adventure Games of 1990" as well as a mention in Power Play's "Best Graphics."

Loom has gone through several changes over the decades; content has been taken out, put in, and altered. It was one of the first games that featured full voice-acting, putting many bumps in the road for development and enhancement. These problems alongside a general lack of interest on the part of the development team can be attributed to the lack of sequels we see here today. Despite these blatant flaws, what we have is still an integral piece of gaming history and an impressive show of artistic capability on limited hardware.
Gameplay Basics and Interface
Gameplay in Loom is simple; You play as a weaver named Bobbin. As you progress through the game, you are taught spells that take form of 4-note tunes that can be played for that particular effect, or reversed for the opposite effect. You have no inventory to speak of, nor any complex actions. Examination will trigger speaking, actions, or just simple observation. One important thing to be stressed is that your spells are not saved anywhere. You must write them down. If you do not and you find yourself not remembering a certain spell, you will have to start over.

HUD

1: The Distaff
previously owned by Elder Atropos, is how you manage to weave spells. If it is not in your possession, you are unable to cast anything.

2: Notes
Pictured are the notes you're able to play. You can choose to play them by clicking directly on them, or utilizing the number keys 12345678 or the regular keys cdefgab with shift-C being the final note. There is also the option to utilize qwertyui. This allows you to play drafts that are used as spells. These spells are randomized per save file, so unfortunately they cannot just be posted. It is integral that you keep a sheet of paper with the labeled notes nearby, otherwise if you lose your individual spell combination you will not be able to progress!

3:Examined Item box
This is the item you've moused over or clicked on. Once the item is in this box, you may get Bobbin's commentary on it or use one of your spells on it.
Characters
Bobbin Threadbare
Bobbin is a kind young man, but noted to be a lousy weaver. This could be attributed to the fact that he was technically barred from weaving and would never have learned, if not for his godmother Hetchel. He has a good heart that is never led to temptation, and is always polite. He wears an extremely simple white robe and has gentle eyes.


Hetchel

An old weaver guilty of going against the Elder Council's word. She is Bobbin's caretaker and appears to be the senior of most. She is quick to help in any way she can. Her punishment for teaching Bobbin to weave was to be judged, but rather than simply transcending into a swan, she turns into and egg and hatches from it a black duck.


Atropos
The stern, legalistic distaff-wielding elder. His elaborate aqua robe makes clear his rank as an elder, and his eyes are depicted sharp and critical.


Master Goodmold

Glassblower and shop owner in Crystalgard. He is jolly, but exercises great wisdom. Like most scryers of Crystalgard, he wears a blue robe. He is open and willing to tell Bobbin about the history of his city and its experience in the past with the dragon.


Fleece
The kindest of the shepherds, and a practitioner in the art of healing. Fleece believes she made a call to Bobbin that he answered, sure that he is the mage that is fabled to help them.


Lady Cygna Threadbare
Bobbin's Mother, who transcended shortly after Bobbin's birth after being judged by the loom for some sort of breach in the trust with her fellow weavers, like Hetchel.


Rusty Nailbender
A lazy young blacksmith known by his guild for his slacking and sub-par work.


Mr. Stoke
Keeper of the furnace and member of the blacksmith guild. He is at his wit's end with Rusty's poor work.


Cob
The disfigured Manservant of Bishop Mandible. He claims himself to not be superstitious. Cob is crude and despite being loyal, he is exceedingly ignorant.


Bishop Mandible
A man of high power who is searching to utilize the skills of other guilds in an attempt to progress his unsavory plans.


Chaos
Chaos has no respect for the living and sees them as fodder waiting for death. She plans to utilize the Loom for her own purposes, and is curious about Bobbin's powers as a weaver.
Act I: Loom Island
The Hilltop
  • Click on the last leaf of autumn and then make your way down the path and into the village.

The Village
Enter the Elder's tent on the far left and follow the hallway down. Examine the tapestries if you're interested in more background story. Watch the ensuing cutscene between the elders.
  • Pick up the distaff on the ground and select the loom. The loom will teach you the "Transcendence" spell.
  • Examine the egg and it will teach you the "Open" spell. Play the spell back to the egg.
Hetchel will come out and explain what is going on. After her exposition, leave the tent and go back up the forked road, this time going left to the trees and then the graveyard.

Graveyard
  • Examine the thorns and a rabbit will come out. This owl will fly away.
  • Examine the grave while you're here and listen to the poem.
Note the tree pictured on the gravestone is the same as the one atop the hill in the beginning of the game. Leave the area and go back to the trees.
  • Click on all four tree hollows, and the owls will give you the "night vision" spell piece by piece.

Village
Go to the middle tent. Only a pile of gold is visible amidst the darkness. Select the darkness, (you will know you have done so when there are a set of eyes in the bottom-right section and Bobbin comments on not being able to see) use your night vision spell. There is a spinning wheel and piles of straw.

  • Click on the spinning wheel to gain the "straw-to-gold" spell.
Practice your new spell on the pile of straw and turn it into gold. Now play the spell backwards, and you will find that it turns the gold to straw. Exit the tent and go to Hetchel's tent, furthest right.
  • Click on the flask to learn the "empty" spell. Click on the book on the table as well.
  • Click on the bubbling cauldron to learn the "dye" spell.
You may now practice the dye spell on any of the swaths of cloth lying around. You can also bleach cloth of its color by playing the dye spell backwards. Leave the tent and go to the far left side of the map to the dock.

Dock

  • Use the open spell on the clam to the left of the dock, and leave to the hilltop.


Hilltop
  • Use your "open" spell on the sky.
You can target the sky by clicking on the wide space near the center of the screen. You will know you have done so when an image of stars appears on the bottom right. A small cutscene will take place afterwards, and the tree will be available down at the dock.

Dock
Click on the floating tree, and it will take you out to sea. There you will run into a large twister. It will teach you the twist spell. Play this backwards on the twister, and you will untwist it.
Act II: Crystalgard
Beach

You are now on a beach. There is a forest directly in front of you, and a green city called "Crystalgard" off to the right.

Forest

Attempt to take a left to the pasture. You will be stopped by four shepherds who antagonize poor Bobbin. Note their appearance spell. After the cutscene, leave.

Outside Crystalgard
  • Click on the workers up in the tower and hear Bobbin's commentary. Enter the clear dome before you enter the castle.

Goodmold's shop

  • Examine the plaque on the obelisk-like gravestone near the very front and speak to Goodmold.
Outside Crystalgard

  • Click on the workers again and play the appear spell you learned from the shepherds backwards. Enter the castle.
Castle

Watch the cutscene between the man and the bishop. Once they leave, go up and utilize the bell. This will transport you to the two workers. They should not be able to see you due to the disappearance spell that you casted on them from outside.
  • Click the scythe and learn the "sharpen" spell.
After listening to their conversation, walk to the other end of the room and use the bell there. This will get you closer to the scrying orb. Look into it, and you will see three visions: a terror spell, a cave on fire, and the transformation spell again.
Forest

  • Go to the shepherds once more and use the "terror" spell on them. They will flee, and you can now go to the pasture.
Pasture

There is a young sleeping shepherd and a small group of sheep.
  • Click the sheep and they will hop over the fence. This will give you the "awakening" spell.
Leave out to the open field to the left and keep walking in that direction until you see a small group of buildings. Enter the open one, and you will see a lamb sitting in a hutch.
  • Examine the lamb and a Shepherdess will greet you. She will teach you the "heal" spell.
Now go out to the open field with all the sheep, and use your dye spell on them. This will make the dragon snatch you up and take you to her lair.
Act III: The Caves
  • Use your gold-to-straw spell on the dragon's hoard of gold, and then use your awakening spell backwards on her.
This will make her fall asleep and accidentally set the pile aflame. Once she is out of your way, proceed to the caves.

Caves

First, use your night vision spell to partially illuminate the area. Then take the steps directly to your right down to the entrance 1. This will bring you to 2. Take the catwalk from 2 up to 3 and keep walking right. You will appear on a small screen not pictured above with a staircase. Take the staircase down, and you will pop back up on the main map at 4. Take the cave furthest left, number 5. This will take you to the small walkway on 6. Keep walking to the left.

After you fall, you will find yourself near a pool of water where you will learn the reflection spell.
  • Empty the pool of water, where you will find the scrying orb Goodmold mentioned.
    Watch the three visions within it, and then leave the caves to go outside.
  • Use your untwist spell on the spiral staircase to fill the gap.
    Make your way across, and you will find yourself in a graveyard. You can check one of the headstones.
  • Use the awakening spell on the young boy. He will introduce himself as "Rusty Nailbender."
    A short dialogue will be exchanged between the two. You cannot enter the Blacksmith's guild unless you are a part of it.
  • Use your reflect skill on Rusty to obtain his appearance and enter the guild.
    Walk all the way through and meet Mr. Stoke, who will scold you for not having picked up firewood, believing you are Rusty. He will take your distaff and lock you away.
  • Use the straw bed to trigger the next cutscene. You will now have your distaff back.
    Exit the room, and go down the stairs where the bishops and two blacksmiths are. You will have to move quickly when they are finished talking, as the only time you can cast your spell is when the blacksmith has the sword raised to show bishop and foreman.
  • Use either the twist or blunt spell on the blade while it's held up.
A cutscene will begin and bring you to the last part of the game.
Act IV: Chaos
  • Open the cage as the Bishop instructs.
Another cutscene will begin, and you will once more lose your distaff. Once you are alone with cob, examine the green dragon and then approach the orb. Cob will barr you from looking into it, but ends up doing himself in.
  • Once he's gone, look into the orb for the next three visions.
  • Go out to the balcony and confront the bishop. Take the distaff that's been dropped.
Go back into the dungeon. Bishop Mandible's open spell released the creature. Attempt to go back out on the balcony, and you will fall into the tear. Before interacting with any of the other rifts, float all the way left until you reach a little pond floating. A cutscene will begin.
  • Go to the pasture tear and heal the dead shepherds, and listen to Fleece's cutscene. Once done, exit and cast a close spell on the tear.
  • Go to the Crystalgard tear and listen to Goodmold's dialogue. There is no way to save him unfortunately. Leave through the tear once more and close it behind you.
  • Go to the graveyard tear and heal Rusty. Listen to the conversation, then go back through the tear and close it.
  • Close the large tear going to the cathedral and go back to the cosmic swan pond.
    After the cutscene, you will be taken back to the Elder's tent.
Examine the loom, and both Chaos and Hetchel appear.
  • Play Chaos' silence spell backwards. If you missed it, examine the loom.
  • Do the same with Chaos' cooking spell. It will also be on the loom if you don't remember it.

Finally, utilize the loom's rift spell to split the loom in half. A cutscene will happen with Lady Cygna and the final spell you are to cast is the transcendence spell on yourself.
Congratulations! You beat the game.
Trivia
Canon Loom Audiodrama
[][][][][][][][][][][][][][][][][][][][][][][][][][][][][][][][][][][][][][][]
This is the half-hour audiodrama that was packaged with the original Loom that utilizes all the original voice actors and actresses. It may help to flesh out the story more for you!


Secrets and Easter eggs

  • The straw-to-gold spell in the spinning room is most likely an allusion to the fairytale "Rumplestiltskin."[en.wikipedia.org]
  • Bobbin's reaction to the pile of gold implies that the weavers are above material desire.
  • Fleece's name is a pun, as she is a shepherdess and fleece is the material that comes from shorn sheep.
  • Loom is an interpretation of Tchaikovsky's Swan Lake. There are several songs from the ballet on the score.
  • The three elders carry the same names as the three Moirai.[en.wikipedia.org]
  • The face of Atropos is vandalized by a disgruntled Lucasarts artist! It is a single color off and unobservable unless put into an editing program.

Several references to Loom are made within other games.
  • The most blatant would be the cameo of Bishop Mandible's manservant, Cobb and his "Ask me about Loom" pitch in "The Secret of Monkey Island."

  • Guybrush Threepwood often has the option to introduce himself as "Bobbin Threadbare" and it's typically accompanied by the question, "Are you my mother?" In one instance, the character Meathook responds with "Your mother was a duck!"

  • In Curse of Monkey Island, the voodoo lady says "Be glad she didn't turn into a swan!" in response to Elaine's transformation.

  • In Curse of monkey Island, Le Chuck exclaims that he is too memorable of a character to be forgotten. Guybrush asks him "Do you know the name "Bobbin Threadbare?" and to Le Chuck's denial he flatly states, "exactly."

  • Crystalgard's beach is pictured in a painting in the video game "Indiana Jones and the Last Crusade."

  • The seagull chowing down on the clam can be found several times throughout the Monkey Island games as well as "Day of the Tentacle."

  • In Spacequest IV, a parody game can be found that pokes a bit of fun at Loom.
11 条留言
Pablogo 8 月 11 日 上午 2:28 
really helpful :steamthumbsup:
sgreer6721 2023 年 5 月 28 日 下午 5:18 
I thoroughly enjoyed the voice over work in the game. The dragon voice actor was really funny and the one who did Bobbin I think captured a lot of who the character is. Was it totally perfect? No. But I'm still glad it's in there.
bs_48906 2022 年 1 月 23 日 上午 2:09 
That whole "teach you a spell before you have the notes to identify it" is pretty game-breaking, since there are several points past which you can't return. drops the game to 2/5 stars, IMO. Also, you can also get past the dragon by casting "terror" after turning the gold to straw.
Francisca 2020 年 12 月 23 日 上午 12:32 
It helped me! I just wished the "Leave the cave."-part would've featured the hotspot where I have to click on to leave in the first place. Had to look it up on YouTube.
numinous2011 2020 年 4 月 13 日 上午 11:03 
Excellent work. Thank you.
Ninsar 2020 年 1 月 16 日 下午 9:30 
Near the end, you say, "Close the large tear going to the cathedral and go back to the cosmic swan pond. After the cutscene ..."

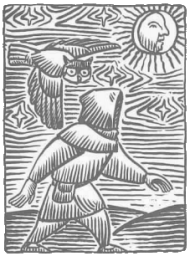
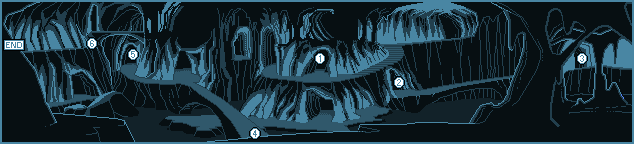
I initially thought I'd encountered a bug because no cutscene happened when I returned to the pond, and it was repeating the same line when I interacted with the swan there. What you actually need to do is return to the pond, then continue going past it, farther to the left, to another hole. You enter that, which drops you in the Loom graveyard. Exit it to the right, and that's when the cutscene happens...
Renodox 2019 年 12 月 28 日 上午 2:50 
A few Easter Eggs:

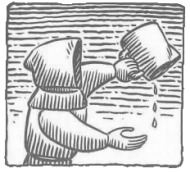
While in Crystalgard you can fill the crystal chalice with wine by using the fill spell.

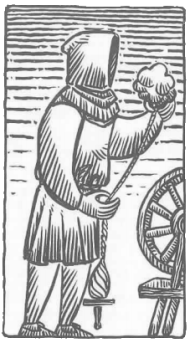
After you get your distaff back in Forge, you can turn the straw bed into a pile of gold.

When you encounter the sheep next to the sleeping shepherd you can dye them green before scaring them over the fence. He'll comment on that when he wakes up.

Try using the "Open" spell on any grave you can click on for an interesting effect.

"Hetchel" is named after a weaving tool: a bed of nails that was used to comb flax fibers.
Euronymouse 2019 年 9 月 11 日 下午 12:14 
Hey, this is nicely done and well-formatted. Good job!

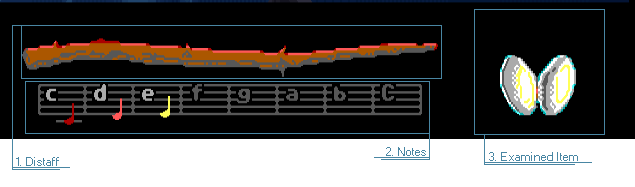
There's one thing I'd correct, which is that the pattern notes aren't actually randomized each playthrough. There are three predefined play lists, so once you've learned a single pattern (other than Opening and Transcendence, which are part of the intro cinematic and always eced and Cfgc respectively), you know which pattern list you're using and can therefore easily look up the rest.

Here's a guide that's specifically about the patterns.
xpis1 2018 年 10 月 30 日 下午 11:34 
In the caves when attempting to distract the dragon - you can also turn the gold to straw, then play the Terror spell. Her fear is fire, you will turn to fire, and it will ignite the straw.

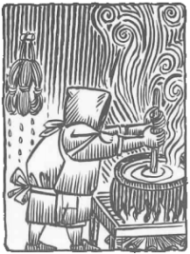
In the blacksmith's guild, after retrieving your distaff, you can choose to refill the firewood with a reverse of the Empty draft. Seems like you don't need to, but a fun effect.

And just like how you can use either Twist or Blunt on the blacksmith's sword, I think there are other times you can use different drafts. I think you might be able to just use Open on the final loom cutscene.
BananaGun 2018 年 1 月 13 日 上午 8:38 
Beautiful guide! Thanks for giving this ancient game a fitting memorial.