胡闹厨房 全都好吃

胡闹厨房 全都好吃

62 个评价
OC2/AYCE Tech v2.2
由 81rdd 制作
This guide is intended for players with a moderate amount of experience (capable of 3-4 starring most levels) covering the technical side of OC2/AYCE gameplay.
6
3
2
3
6
3
3
   
奖励
收藏
已收藏
取消收藏
Intro
This guide is intended for players with a moderate amount of experience (capable of 3-4 starring most levels) and covers the basics of the technical side of OC2/AYCE gameplay. If you're not there yet, I would recommend checking out nablet’s guide for a beginner's introduction to OC2/AYCE: https://psteamcommunity.yuanyoumao.com/sharedfiles/filedetails/?id=1700450005
The best approach to learning anything is to do it correctly, even if that means at a slow speed (e.g., if you're learning a new song start with an extremely slow tempo so you can play it perfectly, then increase the tempo.) This is much more productive than playing fast but inaccurately, trying to increase the accuracy; your brain won't form the right connections. Unfortunately, most aspects of OC2 have a time constraint, but keep this advice in mind where applicable.

Sophie's blog is also a solid resource for new and intermediate OC2/AYCE players alike (and has great OC artwork): https://overhooked.wordpress.com/


I also highly recommend checking out: https://overcooked.greeny.dev/ - Leaderboards for Overcooked 2, Overcooked 1, and AYCE. You can learn a lot and find amazing content that goes under the radar. Also, the community is very welcoming; it's very easy to get involved and start posting your runs; you don't have to be a top player!

(Click gifs to make them larger)


Controls will be listed from a Nintendo Switch perspective:
A - Pick up/Drop
B *(or R) - Dash
X - Chop/Throw


If you use a Playstation controller, I'd recommend a similar physical layout e.g.:
◯ - Pick up/Drop
X *(or R1)- Dash
△ - Chop/Throw


If you use an Xbox controller I'd recommend a similar physical layout e.g.:
B - Pick up/Drop
A *(or RB)- Dash
Y - Chop/Throw


*An alternative that I've started to use is the above, but setting dash to the right trigger (then the right thumb is less busy)


Both configurations allow you to "roll" your thumb across A (Pickup/Drop) and X (Chop/Throw) and are conducive to actions where you want to press AX in rapid succession, such as placing an ingredient down and chopping, picking up up an ingredient and throwing, or plate throwing.

A note about the Dpad: It might be tempting to rely on Dpad while learning for easy cardinal directions, but long term it's going to limit you. Dpad has its uses sparingly (e.g. when you have the time to move your thumb off the control stick to align a cardinal direction), but it will cramp up your hand and more importantly become a crutch that takes a moment to move your thumb to. Just get practice with throwing accurately and you'll be glad you did long term.


Using keyboard is just as viable as controller imo; both have their pros and cons. Keyboard is restricted to certain angles, but one input will always output an exact direction. I don't think the default keyboard layout is optimal (although 笨笨, the best solo player imo, uses the default layout so it's not impossible, just worth thinking about a more comfortable layout if you haven't built any muscle memory yet). I'd suggest WASD or the arrow keys to move and something vaguely ergonomic (keeps wrist straight with forearm) for the other hand, using index, middle, and thumb and/or ring finger (all four if you play solo)

Map inputs to whatever works for you, though keep in mind you'll be doing a lot of dashing, as well as a lot of Pick-up/Drop into Chop/Throw inputs


Definitions:
Roll - With the tip of your thumb positioned over the X button, use the region of your thumb closer to the joint to press A, then use the tip to press X in quick succession.
Set - Every possible order in a given stage (e.g. Story 1-3 would have a set comprised of: 1x Shrimp, 1x Cucumber sushi)
Equipment/Object - Anything you can pick up
Hitbox - The interactable (3D) aspect of objects, counters, appliances, etc. Which may or may not be the same as their visual shape
Dashing
  • If you have to move 3 or more tiles, use a dash.

  • If you're travelling a long distance I would recommend aiming to dash every 4-5 tiles. I think this is a better approach than what's written below about the music but hey, I don't want to delete that work.

  • Dashing has a cooldown that seems to be around 150bpm; I'd recommend aiming to dash at around 140bpm (the bpm of the "brisk" level tracks)


  • To dash optimally, it's much more worthwhile to pace yourself - dashing just after the cooldown ends - rather than spam as the game doesn’t allow early dash inputs to register (i.e. buffered inputs)
    • If you try to dash at say 160bpm every other dash input is wasted -> You end up dashing at 80bpm
    • Attached pic is a visualization of spamming (likely much faster than 140bpm, minimizing the downtime but still slower than timing and produces unpredictable dashes). Or for those familiar, it can be compared to semi-autos in FPSs not performing their best when spammed

  • Always want to face the exact direction before dashing; if you don’t, you fishtail, and it costs time/falls/bump things, it’s worth the couple frames lost to turn before dashing

  • Dashing can allow you to cross one tile gaps (even water/pits), if you dash right as you reach the edge of the gap

  • Dashing in cramped areas in multiplayer can do a lot more harm than good (hope this is obvious)

  • If you're still learning the dash timing, you can dash to the tempo of 99% of the soundtracks, and it will be reasonably close to the maximum, probably intentionally designed that way
  • I wouldn't suggest dashing like this long term (as you're limited to being ON the beats), but it's a convenient reminder about where the dash spacing could be, eventually internalizing that tempo
  • Earlier levels (e.g., Moreish Mines) typically seem to be slower bpm than later levels; use the early level soundtrack's tempo as a reference of what to be faster than
  • Anything 140bpm can be dashed to, but be careful, especially if you struggle with frames per second or are on Switch


    Tempo of the OST:
    Story:
    Sushi City: 132bpm
    Buffet Balloons: 127bpm
    Ravenous Rapids: 120bpm (+/-5 at times)
    Gourmet Galaxy: 140bpm (+/-5 at times, can throw you off)
    Conjurer's Kitchen: 140bpm
    Moreish Mines: 125bpm
    Kevin: 110bpm (VERY slow, there's such a disparity between this and 140bpm that I wouldn't recommend paying any attention to Kevin levels tempo to dictate dashing. All kevin levels in any DLC are 110bpm.)

    Campfire:
    Crème De La Campsite: 124bpm
    Tasty Treehouse: 125bpm

    Horde:
    Beastly Battlements: 112bpm
    Creepy Courtyard: 154bpm (The other track that can't be dashed to as it's too fast)
    Dreadful Dungeons: 136bpm

    Carnival:
    Big Top: 140bpm
    Salty Circus (Fairground Day): 132bpm
    Tumbling Tents (Fairground Night): 140bpm

    Surf n Turf:
    Roasted Resort (The Resort): 118bpm
    Baking beaches (The Beach): 112bpm

    CNY:
    Lovely Lunar (Plucked strings intro): 129bpm
    (Drums intro): 106bpm

    SOBO:
    Peachy Parade: 120bpm

    Moon Harvest Festival:
    Lucky Lanterns: 115bpm

    Peckish Rises:
    Voracious Vessel: 125bpm
    Dessert Island: 120bpm
Chopping
  • 7s in solo, 6 audible clicks in multiplayer
  • You don’t have to repress X to chop a new ingredient; you can walk up to an ingredient on a chopping board and hold X to automatically start chopping (then you can let go). You can also preemptively hold X in multiplayer if you're waiting to chop something that someone else is holding
    • This also applies to washing plates
  • It's worthwhile to learn how to roll your thumb across A and X (rolling AX is also beneficial for quickly picking up and throwing)
  • This is used when holding an ingredient at a chopping board, placing, and chopping instantly
  • Much faster than raising the thumb between the two buttons individually
  • The AX order doesn’t actually matter, as long as you don’t let go of X (throw) before pressing A… but it’s easiest/better to roll your thumb over A then X

  • (In solo only, you can pick up ingredients that have been minimally chopped (three~ chops max), if you decide you need the chopping board tile for another ingredient)

  • Whenever you start the chopping animation (on a new ingredient or partially chopped one), there's a small delay before the progress bar moves - Try to completely finish chopping something when possible - This happens in multiplayer and in single player, but it's more detrimental in solo due to chopping often being the bottleneck.
    • Exaggerated example, 3.93s vs. 2.87s (I'm holding X the entire time)


  • Double chopping: Two chefs can chop the same ingredient at twice the speed of one (mostly relevant for solo) - Can be side-by-side, behind, or on different sides of the chopping board
    • For orders like smoothies where you want to throw the ingredients in ASAP, it might seem that halving the progress bar earlier each time (as a result of ingredients being thrown in), as well as throwing the first ingredient in earlier would speed up the start-to-finish point for each order, but it's only marginally faster on the scale of this order finishing mixing. Double chopping will actually result in a slower rate of chopped ingredients per unit time.
    • This is because the time-save mentioned above comes at the cost of having to start chopping twice as often with each chef (which has a small delay)
  • The main reason why double chopping is used is that it allows you to avoid situations like this:
  • When done chopping, one chef will have nothing productive to do and stand around while the other gets more ingredients...


  • But if you double chopped one and left the second for the other chef to chop while transporting ingredients, there's never any "unproductive" time (one chef can fetch ingredients while the other still chops, overlapping both actions):


  • You could also leave very early and avoid any double chopping, but now nothing is mixing and you're stockpiling ingredients, that approach to OC2 can lead to backups (i.e. waiting for cups, plates, to respawn while orders are beeping at you) and is either equal to or worse efficiency than putting orders on (mixers, cooking) while stocking ingredients or other auxiliary tasks
    • I think this option is better than the first option, though, as this still employs overlapped actions


  • Takeaway: If you find yourself far from ingredients, and both chefs are at a similar point in their chopping progress, try to leave just enough for one chef to be productive while the other is gone; otherwise, one ends up standing around. Double chopping lets you focus both chef's chopping to one ingredient, allowing you to fine tune the balance of a continuous cooking/mixing flow, other auxiliary tasks, and minimizing unproductive time.


  • If multiple objects are stacked on a tile (counter, chopping board etc) your chef will* interact with the one at the bottom (*it is possible to pick up the top object, but requires some precise positioning, while pressing X to chop always results in the bottom ingredient being chopped)
  • If a wall is behind an occupied chopping board and you're running up with an ingredient (sounds specific, but it's a common scenario)... you can save some A presses/time and counter space by throwing an ingredient against the wall, and then interacting with the initial ingredient (either picking it up, or continuing to hold X to chop it if it's unchopped)
  • If you want to swap which ingredient is on the bottom (interactable) pick up the bottom ingredient and throw it against the wall again

    (Chopped ingredient scenario)

    (Unchopped ingredient scenario)
Throwing
  • About 7 tiles (5-6 tiles if there's a counter to land on)
  • Only ingredients can be thrown with X; see Plate Throwing for info on other objects
  • Can be the most efficient form of transport when done right, along with its obvious function of transporting across gaps
  • If you accidentally press and hold X, then decide you don’t want to throw the object, pressing A will drop the object
  • After using a platform control stick, you cannot throw for the next few seconds (see 2:07 in the Over tyr bug video, in Pick-up/Drop)
  • To throw without moving in that direction: hold X, aim (do not change direction, even slightly), let go of X
  • This can be helpful when you don’t want to move in that direction after throwing (e.g. Carnival 3-2 chopping boards)
  • Also helpful when you want to throw multiple ingredients from a spawn (note that the setup below allows you to not have to face the box while taking ingredients, saving time):
  • Take the ingredient, hold X, aim (don’t change angle from here onward), let go of X to throw, then continue alternating A and X to throw more without moving (more efficient than multiple trips back and forth moving them by hand)

  • You can't spam AX rolls continuously, you have to space them (see why in Pick-up/Drop)
  • It can be annoying when you DO want to move in that direction after throwing and appear to be stuck
  • Briefly changing direction after throwing allows movement again

  • Standing in close proximity to mixer stands or burners (without a pan/pot/mixing bowl etc on them) will block you from throwing


  • Ingredients/objects on a counter are "solid", and can't be thrown through, except if you stand right against the counter and ingredient (or if they're relatively flat**)


  • **While clean plates in a sink ARE flat, they have a weird property where throwing too close to them will instead block the throw


  • Simultaneous throw-catching:
    • p1 (bottom raft) throws ingredient 1
    • p2 (top raft) should be holding ingredient 2 (either in advance or picking it up right about now)
    • As ingredient 1 is about to hit p2, p2 throws their ingredient, turning to face p1 in the process
      • The incoming ingredient can be about a tile ahead of p2 (or even directly contact p2) as p2 throws and the ingredients won't collide. The key is to let it get very close to p2 before p2 throws
    • As long as p2 doesn't throw too early, p2 should auto catch ingredient 2


  • Plate throwing
  • Every held object can be “thrown” with a technique called plate throwing - even if you can't throw it by pressing X
  • The name is a bit of a misnomer, as the throw button isn't used at all here
  • Essentially, using the momentum from your dash to push the falling object
  • Less distance (5~ tiles max, but heavily depends on when you plate throw and how simultaneous the AB press is)
  • Relatively small time save and complex compared to the rest of this guide – Don’t stress it much
  • More relevant for OC1/AYCE-OC1 levels as this is the only way to throw
  • Many detailed guides out there (I would recommend aychaplin’s guide):

    An overview of plate throwing
  • Walk in the direction you want to plate throw
  • Be careful that your dash is not on a cooldown
  • Simultaneously press A and B with your thumb across both buttons (or remap dash to something like L), [and continue to walk in that direction for a moment, pushing the plate as it's falling slightly]
  • [Bracketed] step is not fully essential allows for slightly more distance
  • If trying to throw across a gap and not die, pulling away too early can result in not enough distance
  • To make it easier to throw across gaps, you can use the Dpad during the plate throw to allow an exact perpendicular angle, if not using the Dpad, then aim for an exact perpendicular angle
    • Bit of a crutch as it takes a moment extra (but always worthwhile if say it’s the last order across a gap), worth eventually transitioning to sticking to the control stick but I think using the Dpad when learning plate throwing initially allows you to learn how to press A+B simultaneously, and when comfortable, transition to using the control stick
    • (Pic got skewed a bit, imagine the red arrows moved to the left and up a bit in line with the checkmarks and Xs)

  • Once an object like a plate, pan, filled tortilla, etc. is thrown like this, it was never intended to be caught, so the recipient must press A to grab it as it won’t automatically catch
    • The object will highlight when you can interact with (catch) it, although sometimes the window will be too small to react to (in that case, you have to time the catch)
  • You can pick up anything as long as you are equal to or higher than it, a sloppy plate throw across a gap that causes the plate to fall can sometimes be saved by grabbing it as it gets near laterally, even if it is far below your height
Catching
  • If you're facing a thrown ingredient, your chef will automatically catch it
  • Imagine a 120-degree cone extending forward from your chef, centred around where they're facing; this is the angle range that you catch incoming ingredients at
  • In solo, as long as a chef isn’t busy with another action (e.g., chopping, washing dishes), they'll automatically turn to face the thrown ingredient and catch it
  • In multiplayer, you always need to roughly face the direction something is thrown from; there is no automatic turning like in solo
  • Some slight movement when you're about to catch seems (placebo?) to help the catch range. Either the catching hitbox is a bit wonky and moving allows parts to connect with the thrown ingredient that otherwise wouldn't have, or there's some part of code that grants slightly extra range
  • Catching sometimes causes a ton of knock-back, similar to getting hit without catching it; just an unavoidable bug
  • A very, VERY common mistake (that I still make too) when catching is that you don't trust the automatic catch, and press A to try to pick it up. If you did catch it, this A press drops it. It's worth putting in the effort to accurately gauge if a catch will happen automatically
Pick up/Drop
  • Pick-up delay (Bug? Intentional balancing factor?):
    • After picking up something, you can't pick up anything else for about 0.5s (But you can do other actions like place, drop, throw, etc.)
      (He's trying to put a bun on the plate, then pick up a lettuce)

    • If you notice you’re going to pick up multiple objects in quick succession, you have to space each pick-up accordingly
    • 2019 Explanation video from Over tyr:
      *I think it's more accurate to say that this is a pick-up delay, and not any A press (Although at the time of recording, that was how it had worked before being patched). Note how at 0:42 if you spam A, there's only a limit on how fast you can pick it up, never a limit on placing it down

    • These situations can be avoided at times with clever routing:
      • Assembling orders by placing ingredients where they'll be transferred. (e.g., in Story 1-3, after serving, if the next order is cucumber-rice-nori, bring a nori with you on the way to the chopping board and place it on the counter to the right. The other player can place the plated rice on that tile, you add cucumber and serve. This saves one of these pick-up delay instances as you’ve spaced out the A presses and passing the plate has also partially assembled the order)

      • The act of swapping plated ingredients to another plate isn't impacted by the delay, and doesn't cause the delay either. Swapping plated ingredients also saves an A press, so in certain situations it can be very beneficial

  • When bringing an object to a destination to process (ingredient->chopping board, bowl->mixer) you can press A to place it slightly earlier than you’d expect (if walking with no dash, approx. ~1.5 tiles away, involving dashing grants further distances), as your chef will nudge the object onto that tile (essentially a tiny plate throw) – Small time save instead of walking fully into counters then pressing A
  • Note how early the shrimp appears highlighted here; that shows just how early it can be dropped and still pushed onto the cutting board by walking into it
Misc.
  • A considerable change between OC2 and AYCE is that mixer and smoothie blender progress bars will decrease differently when ingredients are added past the green checkmark point (AKA "overmixed" mixers):
    in OC2, the progress bar resets to 6s:

    in AYCE, where the progress bar resets to depends on how "overmixed" it was, but will be higher than 6s:

  • So, why is this?
    • In OC2, when you combine partially/fully mixed bowls (or adding ingredients, which you can think of as having "zero progress") the game adds the progresses, divides by two, but will cap the progress at 12s (12s is the mixing time to reach the green checkmark)
    • So in the OC2 gif, the flour has much more than 12s of progress (but is capped at 12s), by adding the meat the progress decreases to 6s, and we can predictably know that any overmixed mixer in this scenario will take 6s more to finish mixing again
    • AYCE doesn't have this same cap, so in the AYCE gif, the game handles the flour as having 23.9s progress (24s = broken mixer) when halved this equals 11.95s progress, and it'll take 0.05s more to finish mixing again
  • Takeaway: Mixing past the green checkmark in AYCE is productive (if other ingredients will be thrown in), but also leads to a much more fast paced and harder to predict environment (mostly affects solo, duo)

  • You can serve anything on the menu as the last order and not lose any potential tips, as the order that breaks the tip streak still receives the tip streak. This can be beneficial as orders far right on the menu usually have a larger tip, and it grants options of what to make for that last order (e.g., very easy to make a plain pancake, complexity of a chocolate cake may not be servable)
  • Speaking of the last order, you do not have to wait for an order to fully settle on the menu to serve it, if the game has spawned it, it can be served (The game will always maintain two orders at the top, so after serving the fish, without delay I serve the fish sushi as it might be spawned)
    • Don't blink, watch the top right corner in the gif!

  • If you have a plated meal at the end of a round that isn't currently servable, there is no harm in trying to serve it, specifically at the last possible second, as it may spawn in

  • If something (pancake, cake, dumpling, etc.) hasn’t started mixing by 0:30~, it likely won’t ultimately be servable (12s minimum to mix from start to finish, 12s to cook for anything on an open flame burner [10s in oven/fryer/red heat-gauge appliances], few seconds travel time), so focus elsewhere on what you can serve
    • Speaking of different cooking times, something will go from finished to burnt, in the same time it takes it to go from raw to cooked
    • And during the time from cooked to burnt, it will go through 4 equally-spaced phases: No beeping, slow beeping, moderate beeping, intense beeping
    • Takeaway: This means that the most intense beeping for ovens starts at 2.5s left, while anything cooking on an open burner or mixers beeps intensely for 3s. This difference isn't insignificant and can easily lead to fires.
  • Many stages that feature cycles (e.g., Fires under woks changing spots) will have a shake + earthquake audio cue a couple of seconds before the change and also occur at the same point in the stage’s music. These will always occur at the same points in the stage’s music, as long as you don’t pause the game
  • Platform control sticks, buttons, and pull levers (in Horde) can be activated by A or X, but because when you intend to use these you'll be empty-handed, you should get in the habit of using X, as A presses can pick up things unintentionally, while empty-handed accidental X presses have no consequences


  • The game will automatically spawn an order 15s from the last spawn in solo and 10s from the last spawn in multiplayer
    • This means that in solo, on a 4:00 stage, orders will typically* spawn at 3:45, 3:30, 3:15, 3:00 etc.
    • Multiplayer on a 4:00 stage, orders will typically* spawn at 3:50, 3:40, 3:30, 3:20, 3:10, 3:00 etc. There is a convenient bell sound on these 30s marks
    • *If you serve something when there's only two orders visible, this force spawns another order, this resets the timer to 15s or 10s depending if solo or multiplayer. This desyncs the menu spawning, and allows more orders to be visible by the end
      • E.g. Solo, serving the first order at 3:47 force spawns the third order, the next order will spawn at 3:32, then 3:17 etc. Eventually an order will spawn at 0:02 (i.e. An extra order, where it typically wouldn't have)
    • *If the menu reaches its limit of 5, and the timer tries to spawn another order, it will wait until you serve something, immediately spawn that order it's been waiting on, and restart the timer. This also changes where the 10s and 15s intervals fall and reduces the number of total orders visible by the end
  • Orders can be mentally processed faster if you learn what the art icons are, as it takes a full second between when the art icon is visible and the drop-down ingredient list - Even being able to deduce one characteristic about an order from its art icon is helpful (e.g. Can probably figure out here that a red art icon blur = cherry)


  • To "plate" most cooked things asap and create a more noticeable visual indicator/audio cue, you can stand at the ready for something to finish cooking with a plate in-hand, spamming A:
    • I find the loud "ding" and contents appearing on the plate easier to react to than the green progress bar disappearing and a lack of sound. This recording even gives a slight advantage to the right oven, as I set this up solo and had to put one into an oven first


  • Note that this doesn't work with small frying pans (e.g. pancakes, *tortilla contents [*unless the plate already has rice and/or a tortilla on it]). It does work with the larger "cooked breakfast" frying pans though


  • There is only one walking (and dashing) speed, i.e., tilting the control stick fully, or slightly won't change either speed. It's like a keyboard or Dpad
  • If you leave OC2 running for too long (3 hours~?) it will start to become "heavier", like your chef is bogged down by molasses, or like the fps is low (If you want to experience what "heaviness" is like, go to Main menu -> Settings -> V Sync On). Restart OC2 to fix. I haven't confirmed if it's the same in AYCE but I would assume so
  • V sync is best left Off for optimal performance, unless you're only around 60fps anyways (steam settings can toggle an fps counter on screen)
Predicting Orders
  • In some levels, you can make orders faster than they spawn, especially in multiplayer
  • A certain level of preemptively making them can definitely help if done right
    • When done wrong...

  • Sometimes you don't even have to fully commit to one order or another if they have common ingredients:

  • If an order needs to be plated after cooking to free up the object it was cooked in (cakes->bowls, dumplings->steamers, donuts->grease traps), keep in mind how many equipment and plates are available; few = guess less. Number of possible orders also matters, more = guess less
  • Tortillas, burgers, etc., go wild

  • A note about solo: 90% of stages will always have the same orders for the first 3 to 6. These static orders have no influence on the order determination; they are just there
    • Also, it’s worth strategizing an optimal route for these orders instead of improvising each time


  • Before watching the video here's a better approach to explaining how the menu spawns orders that I wish I thought of earlier:
    • 1) Visualize a "to-do" list, begin by writing down all the possible orders for that stage
    • 2) When an order appears, cross it off
    • 3) When there is one order left, go back to step 1)

    • *If an order is listed twice on the list, it will be more likely to appear.


    Menu prediction tutorial:

    With captions in Chinese: https://www.bilibili.com/video/BV1A34y1b7hp

  • That's really the gist of it, the rest below is a lot of niche information/takeaways for anyone interested in the stats going on behind the scenes. It's very messy and might confuse most people.


  • I'll try to explain it in a few different ways, each more complex but more accurate:

  • Explanation #1
    • You can expect to get about equal amounts of each order type by the end of a stage, at most they can deviate by 2
    • E.g. Carnival 3-1, these are all the possible orders and an example of what you could end at, serving 21 orders

    • The order determination is influenced by what has spawned total so far, which may or maybe not be perfectly reflective by what has just spawned (i.e. with perfect tracking, you can predict when a b2b2b order has the potential to spawn, so once you see the order finally spawn, it would make sense to make at least one more of that order) - (if you've lost track of total amounts spawned, then referencing the recent spawns is better than nothing)
    • For instance, if the menu spawns in the order: Chocolate, Honeycomb, Raspberry, one of each has spawned and they are all equally likely to spawn for the 4th order - Referencing that a Raspberry has just spawned hasn't necessarily helped
    • For 95% of cases, a good rule of thumb is that you can expect to serve some combination of two “sets” of the level’s possible orders, then repeat. For example, if a stage has 3 possible orders, A B C, then you could spawn ACBCBA, ABBCA, CACBBA etc.

  • Explanation #2
    • Say a stage has 5 possible orders, let's name them ABCDE
      • For the first order, it can be (A, B, C, D, E) - Let's say it spawns A
      • Order #2 could be: (B, C, D, E) - Lets say it spawns B
      • Order #3 could be: (C, D, E) - Lets say it spawns C
      • Order #4 could be: (D, E) - Lets say it spawns D
      • Order #5 could be: (A, B, C, D, E) With a higher likelihood of spawning order E, but possible to spawn others again - (Why? Math)
      • It won't continue like this forever, at max, a given order type can "fall behind" by up to 2, relative to the number of otherwise complete sets, and eventually become inevitable
      • Orders #6, 7, 8, follow the same pattern as #2, 3, 4, but by order #9, if somehow no Es have spawned, it will 100% spawn here
      • Writing out the orders, a menu of 5 orders that delays spawning E as long as possible each time would look like: ABCD ABCDE ABCDE ABCDE ABCDE... etc. (spaces are for clarity)
        • Pick any amount of orders^ (from left to right) and tally up the amount of each letter, at most, E will be behind the rest by 2
      • Takeaway: The menu won't spawn duplicate orders until it reaches the final order which would make the menu set complete
      • i.e. Swapping out the letters for the amount of the orders spawned, some possible scenarios:
        • (2, 2, 2, 2, 0)
        • (5, 4, 5, 5, 3)
        • (3, 1, 3, 3, 3)
        • These outcomes can only play out in specific ways, for example (2, 2, 2, 2, 0) would have to progress something like:
          • (0, 0, 0, 1, 0)
          • (0, 1, 0, 1, 0)
          • (0, 1, 1, 1, 0)
          • (1, 1, 1, 1, 0)
          • (1, 1, 1, 2, 0)
          • (2, 1, 1, 2, 0)
          • (2, 1, 2, 2, 0)
          • (2, 2, 2, 2, 0)
        • But note that orders can't get ahead of the rest by 2, only fall behind by 2 - impossible scenarios:
          • (6, 5, 4, 4, 4)
          • (2, 0, 2, 0, 1)
          • (3, 5, 3, 5, 5)

      • Explanation #3
        • The order determination uses weighted odds for each order type, with the formula:
        • ((#OrdersSpawned +2)/n) - x = Weighted odd for order x
        • Where:
          • #OrdersSpawned is the number of orders that have spawned so far (remember, if solo, don't include the static orders at the start)
          • n is the total number of order types for that stage (E.g. Horde 2-2, n=4)
          • x is the number of times the order you're currently looking to figure out the weighted odd for has spawned
          • (The +2 is always there)
        • Example: Let's say the menu has spawned 1 of order A, 0 of order B, and 2 of order C, AKA (1, 0, 2)
          • For order A: ((1+0+2 +2)/3) - 1 = 0.67
          • For order B: ((1+0+2 +2)/3) - 0 = 1.67
          • For order C: ((1+0+2 +2)/3) - 2 = -0.33 = 0
        • Compare the weighted odds:
          • For order A: 0.67/(0.67+1.67) = 0.285 = 28.6% chance to spawn
          • For order B: 1.67/(0.67+1.67) = 0.80 = 71.4% chance to spawn
          • For order C: 0/(0.67+1.67) = 0% chance to spawn
        • The formula can almost be boiled down to:
        • (# of sets) - X = Weighted odd for X
        • But because the +2 in the numerator makes the "(# of sets)" slightly larger than the actual number of sets, the weighted odd of spawning a duplicate is greater than zero once you're at the slot which would complete a set

        • Example:
        • (1, 0, 0) Has spawned -> What spawns next?
          • For order A: ((1+0+0 +2)/3) - 1 = 0
          • For order B: ((1+0+0 +2)/3) - 0 = 1
          • For order C: ((1+0+0 +2)/3) - 0 = 1
        • Equal odds of B or C spawning here, let's say B spawns -> (1, 1, 0)
          • For order A: ((1+1+0 +2)/3) - 1 = 0.33
          • For order B: ((1+1+0 +2)/3) - 1 = 0.33
          • For order C: ((1+1+0 +2)/3) - 0 = 1.33
        • Order A (a duplicate) can spawn here, yielding (2, 1, 0)
        • This applies at any # of sets, i.e. same results starting at (501, 500, 500)

        Functional online code by CapSora for determining the probability of a certain menu layout incorporating serving the final order as something visible down the menu:
        https://py3.codeskulptor.org/#user306_0EyvsyvTV0_0.py
        To use, scroll to the bottom and edit these fields, then click Run in the top left
Finding the optimal menu
This builds off of the logic in Explanation #2 from earlier and should allow you to figure out what menus are possible, then use the above code to find the probability

  • Starting with knowing you can serve a certain number of orders and want to work out the optimal menu:
    • E.g., Horde 2-2 is a prep level, and has these orders:

    • Let's label them ABCD
    • A is desirable because it only takes a moment longer to assemble and is worth 40 more points
    • A spawning as early as possible, repeatedly, is a menu that maximizes A
    • So, we could get: ABC ABCD ABCD ABCD ABCD ABCD etc...
    • Here, each A spawns as early as possible, and each D order is delayed as much as possible (the delaying doesn't really matter in this example, but some stages have undesirable orders that you could label as D)
    • So, if you know you can serve 14 orders, you could encounter a menu of:
    • ABC ABCD ABCD ABC (4 A orders, and only 2 D orders)

    • Also note that the last order could be anything servable, so instead of ending with a C in the above, if you know that typically 3 orders are visible at the end when you serve your 14th order, you could see: CDA
    • Another A! Which means the optimal menu in this scenario could ultimately serve 5A, 4B, 3C, and 2D without losing potential tips
    • Same pattern for different sizes, e.g., if 3 possible orders (ABC) (Maximizing A and minimizing C) would be: AB ABC ABC ABC...

I'm continuously adding to this guide over time and am happy to answer any questions in the comments and open to suggestions of topics to cover.
10 条留言
lepv 2024 年 7 月 12 日 上午 1:32 
J
西西 2024 年 5 月 21 日 下午 8:32 
好厉害
81rdd  [作者] 2023 年 9 月 5 日 上午 7:44 
v2.2 changes: Corrected calculations in Predicting Orders. Added tile distance to dashing. Minor rephrasing elsewhere.
Benjamin 2023 年 5 月 12 日 上午 11:33 
Thank you so much for the guide!
Gadse 2022 年 7 月 28 日 上午 11:55 
@81rdd It helps me a lot, thank you very much !
81rdd  [作者] 2022 年 7 月 27 日 下午 5:31 
A good reference point to keep in mind though is that if you assemble everything you need for a BBQ order, then bellow it to full (and keep it in the red zone throughout) it'll take 10s to cook. If you were to do the same thing but never re-bellow it, allowing it to slip into the middle zone as it finishes, it would only take 14s, four more than before. I think that 4s longer but granting a lot of freedom to do whatever is usually a safe bet for duo and solo gameplay. Hope that helps:)
81rdd  [作者] 2022 年 7 月 27 日 下午 5:31 
What's the team size? What's the level? What're the current orders? The more players, the more potential *firepower* you'll have (to chop, wash plates, pass plates, etc.) and so you'll want to move things along faster so it's smart to have someone maintain the heat fully in the red zone if you're playing 4p or sometimes 3p. On stages with orders other than BBQ orders (like Surf 3-4) it could be smart to not put much effort into bellowing if the current menu is a lot of smoothies - the bbq orders might finish cooking before they're needed anyways, or at worst you'll have to save them from burning, if you were to bellow them there.
81rdd  [作者] 2022 年 7 月 27 日 下午 5:30 
Thanks @felinachen, I'm really glad to hear:)

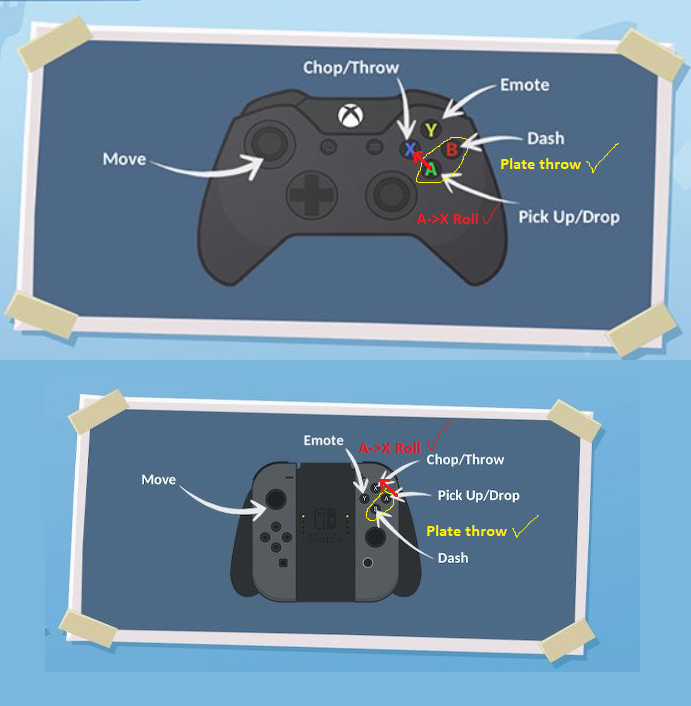
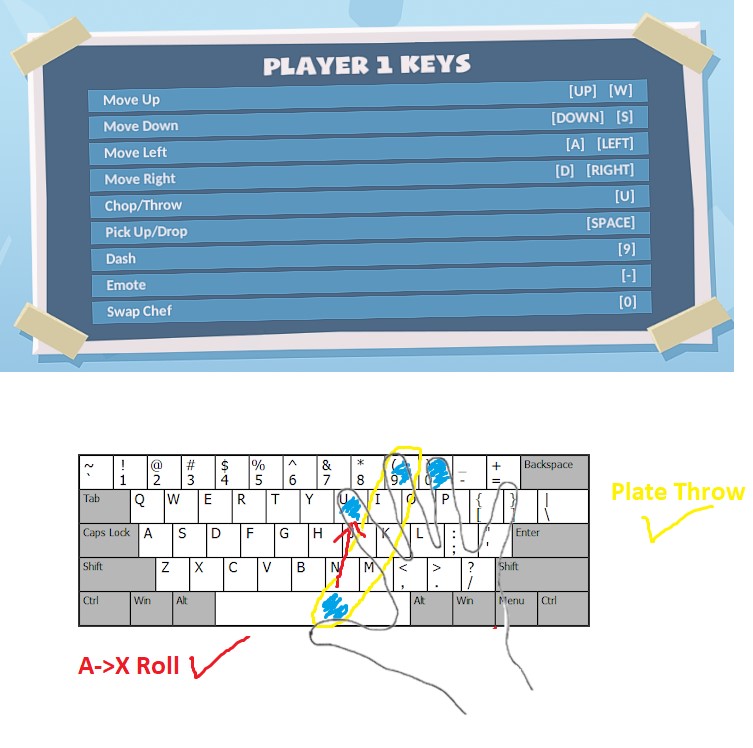
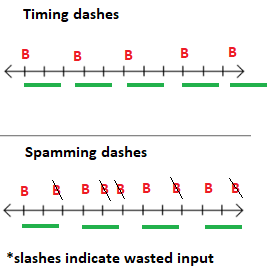
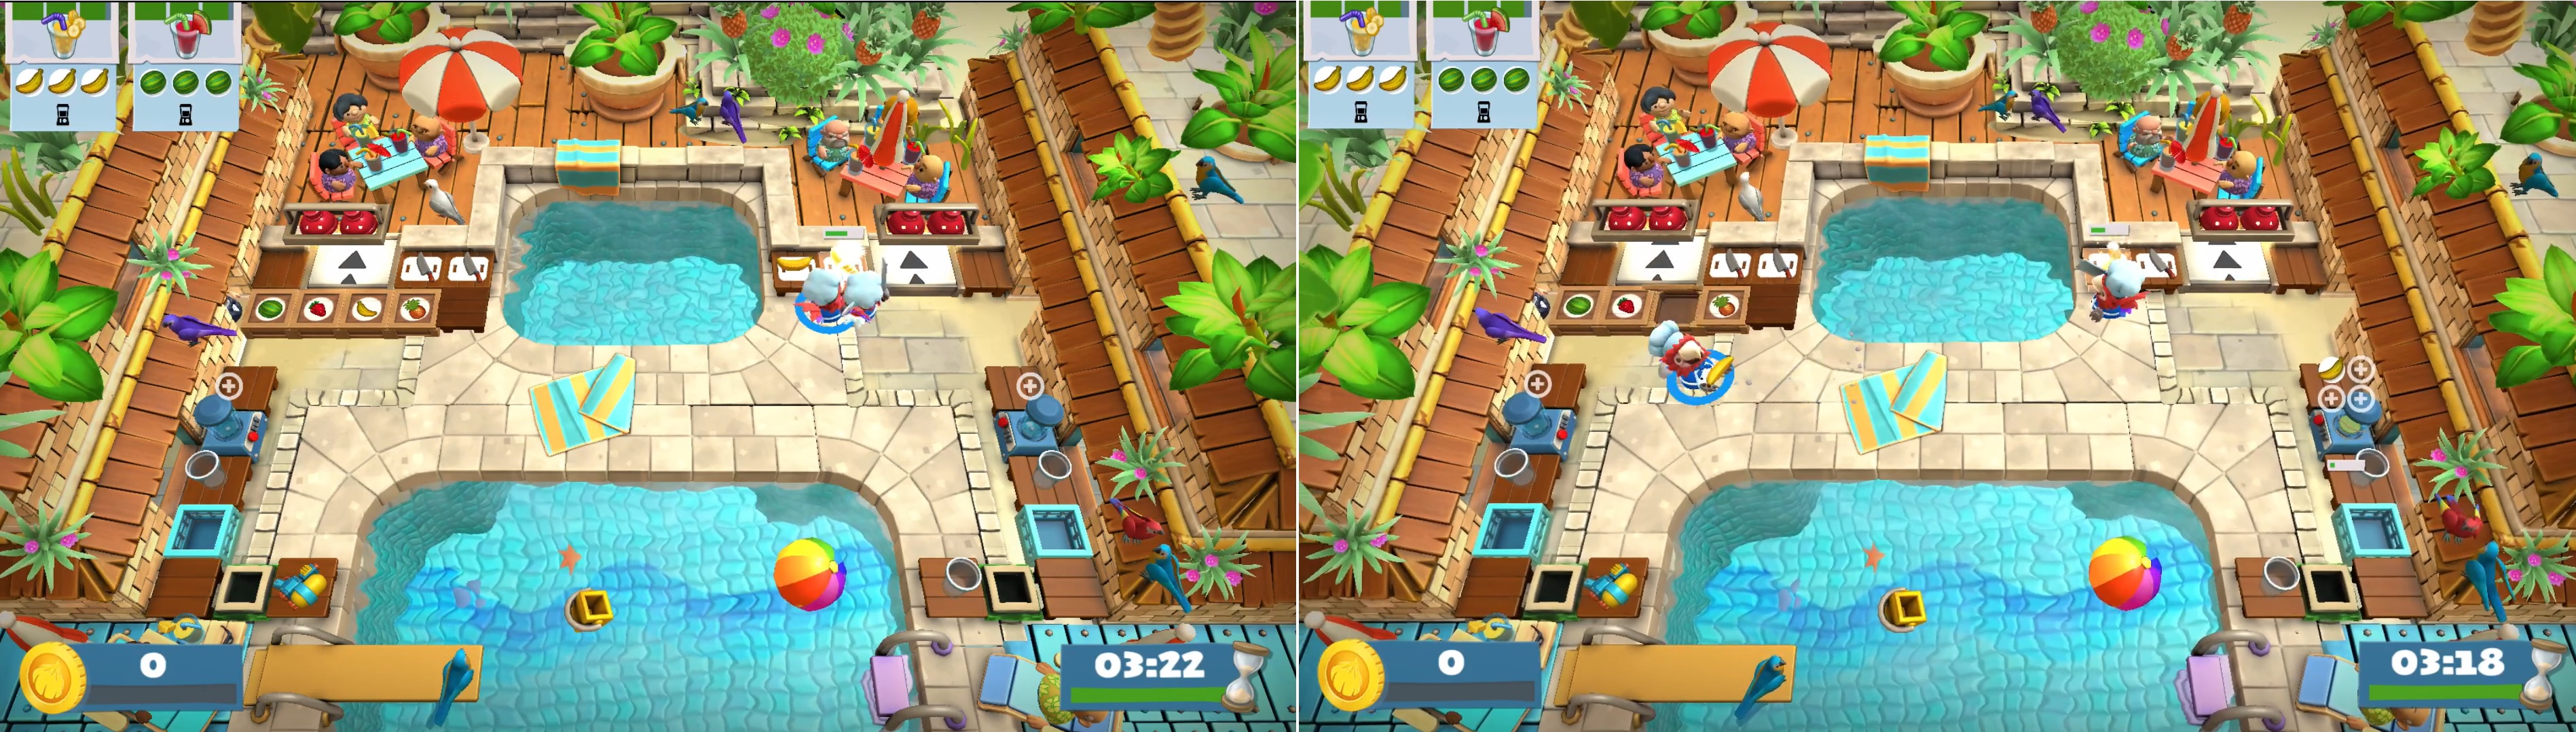
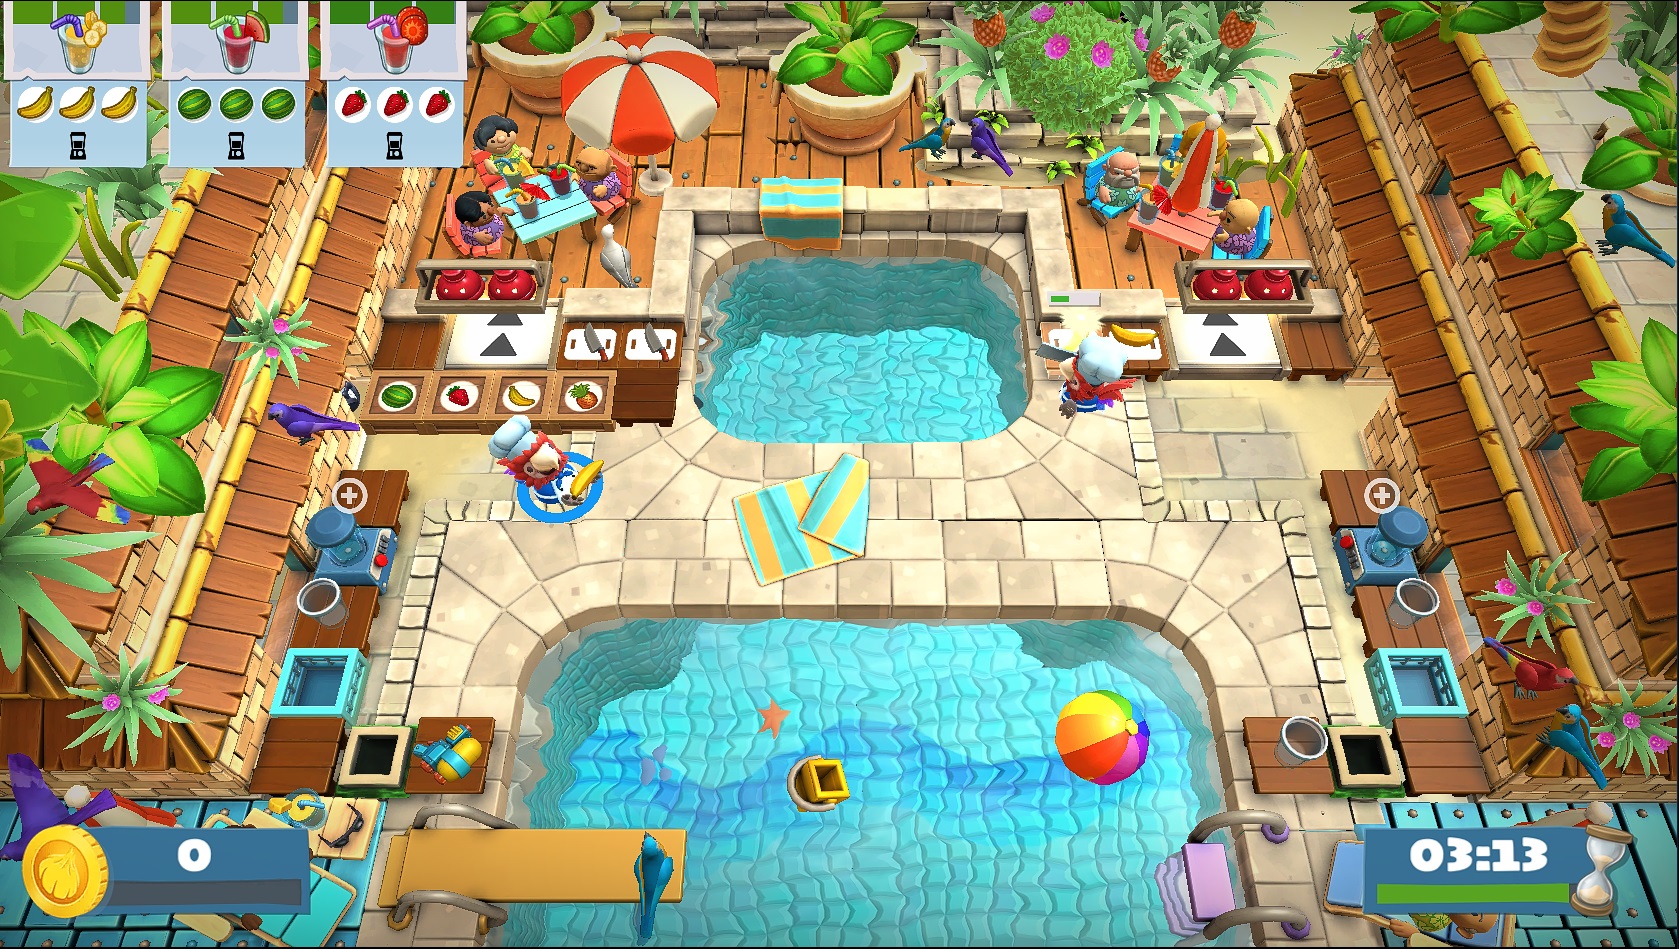
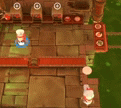
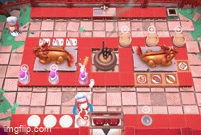
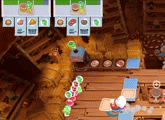
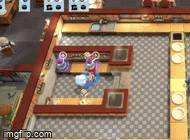
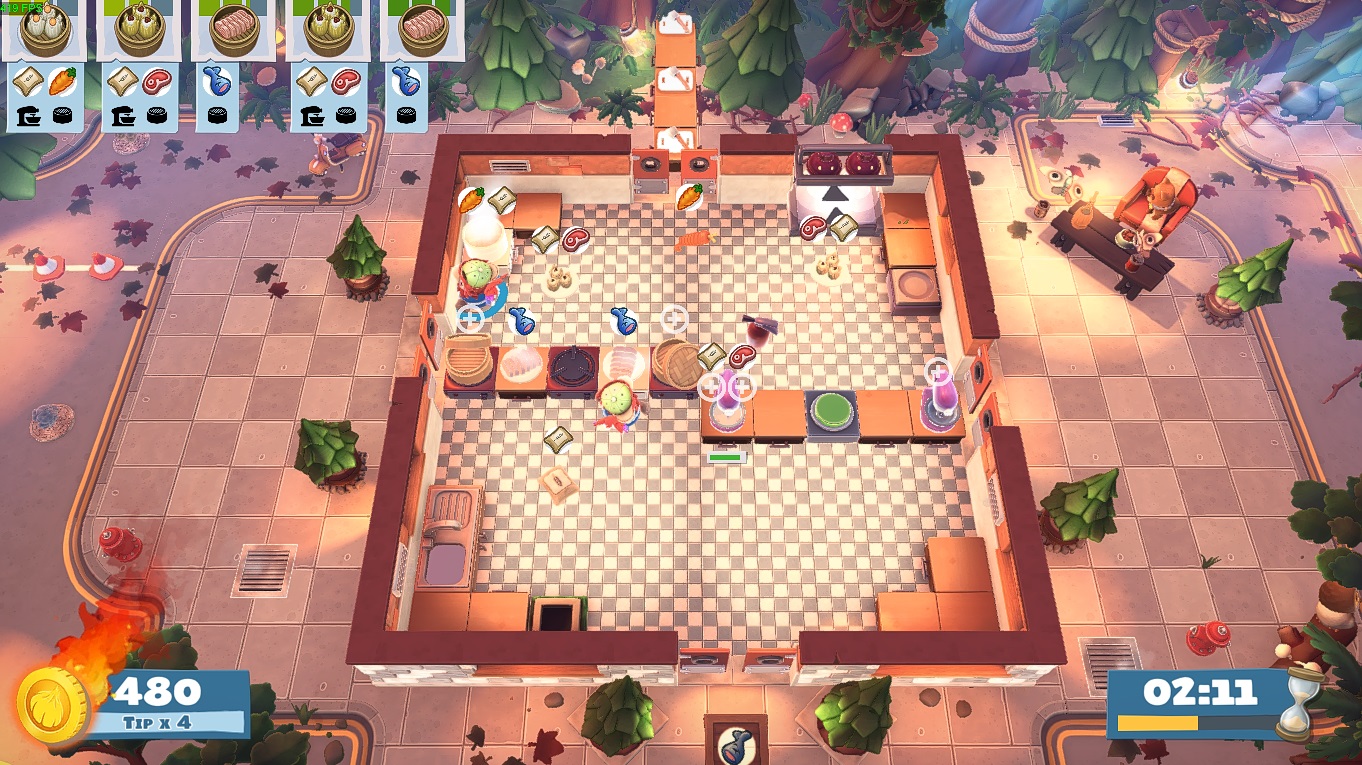
If you hold the bellows and walk right up to the BBQ and press A (pickup/drop), it will increase the heat gauge silently, with no animation, and won't have a delay between button presses, allowing you to heat up the BBQ much faster. I think it's either 3 or 4 of these to max out the heat gauge this way (pretty sure it's 4 the normal way.) I just mash A for a little bit:')

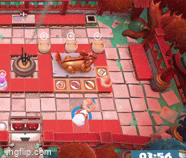
As far as when to bellow it, that's harder to answer cause it's case-by-case, moment to moment. Like a lot of decisions in OC2 there isn't a universal answer. It comes down to picturing how the short-term scenario will play out ahead of time, and picking the right decision. That's a huge part of gameplay and much more important than a lot of the objective things I can communicate in a guide.
Gadse 2022 年 7 月 26 日 下午 2:43 
Very helpful.
I'm happy that someone would do this for the game and provides such a good thing for the new players or some people who lack strategy like me. I've learned a lot from it and the world record videos you've posted on Youtube. There are so many people on the world record list, but you are the only one I saw who would share his own experiences, praise and support other players who did well under their comments. The world records you've made are astonishing and very meaningful.You are the legend of Overcooked game.
I still want to thank you for what you've done for the players who love Overcooked game,whether you will continue this game in the future or not, what you've done is really meaningful.
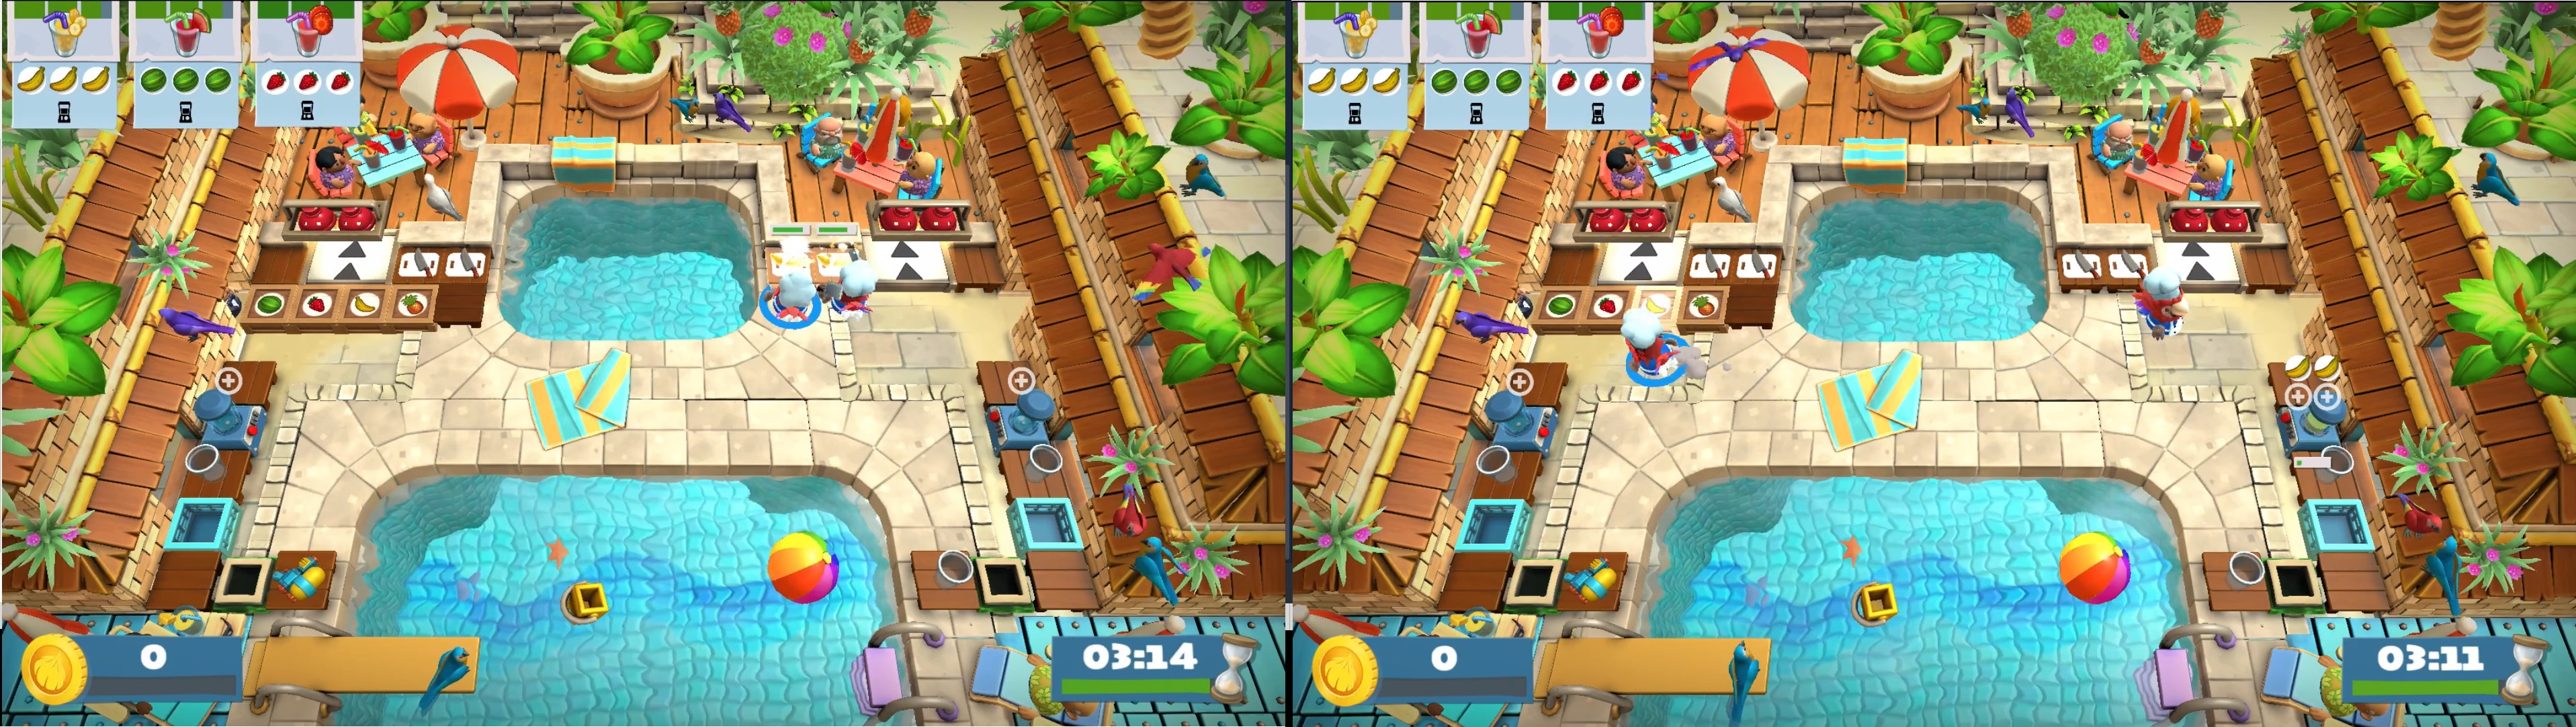
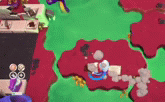
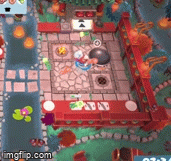
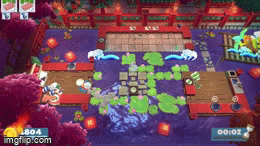
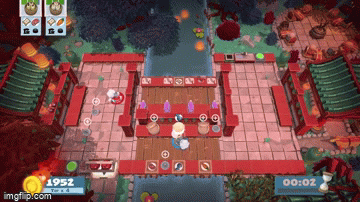
Here comes a question about Overcooked 2: How do you decide when to use the air blower?(in Surf 'n' Turf) Or how many times to blow? And I found that you can blow the fire to maximum in one blow(visually), how does it work? Usually I need to blow 2-3 times, how to shorten the number?
81rdd  [作者] 2022 年 7 月 6 日 上午 9:20 
v2.1 changes: Added a link to my menu determination video and a simple 3-step explanation ("to-do" list approach)