Atomicrops

Atomicrops

238 个评价
The Basics of Farming (Oregacrow's Seed System Included) (Updated as of May 19, 2022)
由 Mr. Aqua 制作
This guide will go over the basics of farming and will be more in depth than the game's tutorial. Both the basic farming and Oregacrow's custom seed system are covered.
5
5
18
5
3
2
   
奖励
收藏
已收藏
取消收藏
Introduction and Disclaimers
Farming is obviously a major part of this game. In this guide we will cover several different aspects of farming, and will be more involved than the tutorial. This guide also goes over quite a bit of the UI basics.

This guide is primarily for people who found that the tutorial didn't shed enough light on the game's mechanics, and as such may seem a bit redundant to more experienced players.

We will not be going over any of the game's guns, enemies, bosses, most upgrades, or any other material not mentioned directly.

Keep in mind this guide will only cover the basics and will not go into later game material, especially things found after year one.
Soil and Pickaxes
Before we get to sowing any seeds, we must first discuss how the soil works. There are four different "phases" of soil, the default state, the broken up state, the regular tilled state, and the better tilled state.

The default state is what the majority of the ground is at the start of the game. In order to utilize this space, the ground has to be broken up with a pickaxe. Pickaxes are found through various means, such as:
  • Crates found in areas outside the farm. These usually contain one pickaxe, but sometimes they contain five.
  • Occasionally sold from the flower guy in town for 100 Cashews
  • Rare drops from enemies
  • Rare drops from weeds
  • Picking up the Pickaxe Pack item packs four pickaxes upon pickup

The player's pickaxe amount is shown in the bottom left corner of the screen.


Zero pickaxes.

The rate of which the ground is broken up or tilled depends on the level of farming skill. The higher it is, the faster it will go.

When the ground is in the regular tilled state it can then be turned into the better tilled state. The player is unable to do this directly, with one exception, but pigs and certain spouses are able to. The exception to this is the Golden Hoe upgrade, which will make all soil the player tills into the better tilled state. Doing this makes the soil last longer instead of needing to be re-tilled after every harvest.

Once the ground has been broken up, it can then sown with seeds. Obviously, tilled land is the only phase that can support crops. The exception to this is the Resilience upgrade, which allows crops to spread onto default soil. This doesn't allow the player to directly plant on the soil however.

In addition to all these phases, there are weeds that can cover tiles during any phase. Weeds start out small, and can be quickly be cleared with a single click or just squishing them. However, if left unchecked, they will grow larger and more rampant. Similar to the ground, weeds get cleared at a rate proportional to the level of farming skill. No weeds will ever grow in top of existing crops, so there is no need to worry about that.
Fertilizer
As the name implies, fertilizer is used to fertilize crops. Fertilizing crops makes them more valuable overall, and is a key component on merging crops (more on that later). Fertilizer will despawn when left on the ground for too long.

Fertilizer is displayed in the bottom left corner of the screen.


Zero Fertilizer.

Fertilizer can be obtained in many different ways. These include:
  • Killing enemies
  • Killing bosses
  • Giant Slug setpiece found in Tier II Biomes gives around 400
  • Cutting up farm debris yields two
  • Rarely cutting up weeds
  • Rarely given by farm animals
  • Rarely given by some spouses on the farm

The way fertilizer works is that the more that is given to a crop the more likely it will be a fertilized or what can be referred to as a "good" crop. Note that this does not mean that each fertilizer will increase the value of a crop by a set amount, but rather increase the chance of it being worth more. If enough is given, the chance is guaranteed. The exception to this is sunflowers, which provide a set additional value per fertilizer chunk given.
Watering
Watering has a simple purpose: to water crops. The player can only hold a limited amount of water at a time, displayed in the bottom left corner.


4/4 units of water.

The player is only able to water one crop at a time, unless they have the Doubled Headed Water Can upgrade or Hose upgrade. Each watered crop will deplete the stored about of water by one. Fortunately, the size does increase with the player's farming stat, allowing the player to store more water. The watering can is able to be refilled at any time at the well. It is recommended to keep farming operations near the well because of this.

Watering crops is also required to put them out if they are burning. Unfortunately, it's difficult to water fast enough to put out several flames at a time. As such, if multiple crops are engulfed, it's likely that several of them will be lost. If you would like to know the specifics of crop burning as well as crop durability when being eaten, check the wiki[atomicrops.fandom.com]. I will say however that this isn't going to be super important while you are first learning the game, therefore you shouldn't worry about this too much yet.

However, there are other units that can assist the player in watering. The most common of these is the cow. Upon being rescued, cows will wander around the crops and water them one at a time. In addition, there is an item called the Sprinkler Head that allows for turrets to water crops. Getting a decent amount of both cows and turrets with the upgrade will greatly speed up the watering task, and may save all crops from a dreadful fire. But perhaps the most efficient item at watering is the rain cloud scroll, which you'll find out in the world.

Here is a table with some of the crops, showing how much water they need.

Crop Type
Location
Water Needed
Potato
Misc.
2
Prickly Pear
Desert
0
Beans
Desert
0
Cabbage
Plains
3
Corn
Plains
3
Turnip
Tundra
2
Pea
Tundra
2
Grape
Tundra
2
Chili
Jungle
4
Rice
Jungle
4
Aloe
Desert Tier Two
1
Broccoli
Plains Tier Two
4
Tomato
Plains Tier Two
4
Coffee
Jungle Tier Two
4
Pineapple
Jungle Tier Two
4
Carrot
Tundra Tier Two
2
Onion
Tundra Tier Two
2
Heart Beet
All/Misc.
2
Pumpkin
All/Misc.
4
Rose
All/Misc.
5
Cashews
Cashews are the game's currency. They are acquired through farming and selling crops, eggs, berries, and other goods. Each good varies in value. For that, once again check the Crops page on the wiki[atomicrops.fandom.com].

The player's current Cashew count is displayed at the top left corner of the screen.


Zero Cashews.


78,580 Cashews.

A few achievements are associated with Cashews. Each of them involve having a certain amount at any given moment; one achievement is given at 5,000, another at 15,000, and the last one at 30,000 Cashews.
Crops and Seeds
With all that out of the way, we can finally talk about crops. Sowing seeds is just as simple as it sounds. Just plant them. There are several different kinds of crops found throughout the game, but what is more important is to know the different varieties of crops and where to acquire them.

The player will start out with no seeds in their inventory, but there will be a basket next to them containing four potato seeds. This is the start of your crop empire.

There are many different ways to obtain more seeds. These include:
  • Freeing small critters outside the farm
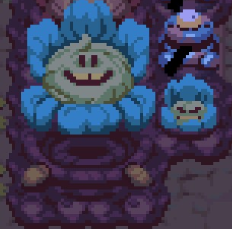
  • Opening giant flowers found outside the farm
  • Sometimes cutting up weeds
  • Rarely from harvesting crops
  • Rarely from killing enemies
  • Buying them from the flower guy in town

Saving small critters refers to the squirrel-like creatures that are guarded by enemies at small outposts. Upon killing all the enemies surrounding their camp, they will drop a few seeds when approached.


A small critter.

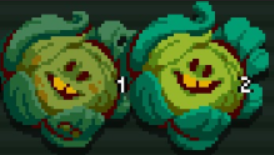
Seeds come in different varieties, qualities, and profits. While I could go into a lot more detail with that, I don't want to spoil too much of it. Just remember this for the most part: the harder the seeds are to get, and the better they look upon harvest, the more valuable they are. The last part of that refers to whether or not a crop was a "good" crop upon harvest instead of a "bad" crop. Here's an example of that:


A "bad" and "good" cabbage.

The one on the left was picked without any fertilizer, giving a good chance that it would be "bad." The one on the right is the complete opposite, having had fertilizer applied to it and increasing the chance for it to be a "good" crop. "Bad" crops won't ever sell as well as "good" crops, so it's important to keep that in mind before harvesting. Now, that doesn't mean throw fertilizer on every crop. That will burn through fertilizer too quickly. Since some crops are by default more valuable than others they should take priority when being fertilized. These are generally the same crops that are harder to obtain.

Important Note: Currently, most of the crops values on the wiki are wrong. It's advised to not try to shape runs around those profits, since most are currently incorrect.

The values have since been corrected.
Mega Crops
Let's talk mega crops. You've likely seen them in the game's trailers, so here's how to do it. Mega crops can be grown by planting four identical crops in a 2x2 square and fertilizing all of them. This will cause all those crops to merge into one, large crop. Mega crops are significantly more valuable than their smaller counterparts.


A mega cabbage and a regular cabbage side by side.

The "good" and "bad" crop idea still applies with mega crops; "good" mega crops will be worth significantly more than their "bad" counterparts.


"Bad" and "good" mega cabbages.

Even though all crops are more valuable in their mega form, certain mega crops will still be more valuable than other mega crops. These are the same normal crops that are more valuable than other normal crops. So those crops in their mega form should take priority during fertilization.

Mega crops cannot merge with each other, so don't bother trying.
Fruit Trees
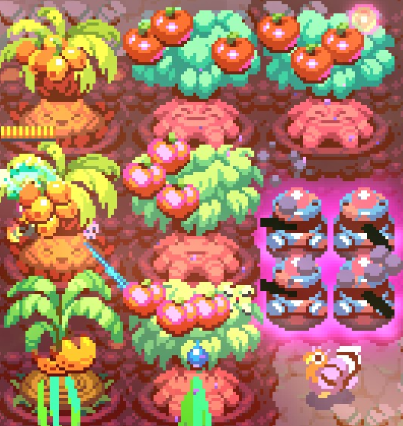
In addition to all the other crops, there are four different fruit trees that can be planted. These include apple, banana, date, and peach trees. Each ones of these trees occupy a 2x2 space on their own, meaning that they up the same amount of space as a mega crop. What makes them different from all other crops is that, as long as they are not destroyed by being eaten or entirely burned, they will continue to provide harvests for the rest of the game. This means that these trees will provide a nice sum of Cashews all on their own. However, trees cannot be removed unless they are completely eaten or burned, so they are a big commitment.


A whole orchard of fruit trees.

Here is a table with each fruit tree's value and other information.

Tree Type
Location
Value (Unfertilized)
Value (Fertilized)
Value (Mega, Unfertilized)
Value (Mega, Fertilized)
Date
Desert
10
12
16
18
Peach
Plains
10
12
16
18
Apple
Tundra
12
15
18
21
Banana
Jungle
12
15
18
21

Looking at this it's apparent that date and peach trees are worth the same, but still less than apple and banana trees. So it's recommended to focus efforts on getting the latter trees.

These trees are also capable of merging as well, potentially making a large sum of Cashews in doing so. However, this is rather difficult to pull off. Not only is getting four identical trees difficult, but a 4x4 space of land available is quite a lot. The first part can mostly be resolved through the Daily Orchard item, with gives one free tree everyday. It is RNG as to what type of tree though.


The Daily Orchard item.

All four different mega fruit trees and the Arboreal Deal achievement.

Mega tree fruit produce are worth considerably more, bear fruit faster, have more health, and can store up to ten fruit instead of three. Definitely worth the effort.
Sunflowers
So you may have collected some Sunflower seeds and noticed that they keep dying before you can harvest them, and as such you may be wondering why that is. Well here's the answer. No, they don't have to be grown during the day or any specific time, like how I first thought.

Sunflowers are unique from other crops in terms of how they provide profit. Instead of simply being planted then harvested, Sunflowers must be sown and quickly given fertilizer. One Sunflower will give six Cashews per fertilizer given, up to 50 fertilizer. This indirectly means that each Sunflower is worth up to 300 Cashews. If not given any fertilizer after some time or if it is already at full height, the Sunflower will eventually die.

 Left: A mega Sunflower.

As fine and profitable Sunflowers seem on their own, their mega crop version is far superior. When planted in a 2x2 square, Sunflowers will automatically merge. This means that no fertilizer is required to make four Sunflowers merge.

Instead of only giving six Cashews per fertilizer, the mega version gives 30. The maximum amount of fertilizer doesn't increase though. Regardless, that means that every mega Sunflower is indirectly worth up to 1,500 Cashews. Compared to farming four Sunflowers individually, a mega Sunflower is still worth 300 more. It's basically like getting an extra Sunflower for free.

However, it gets better. Planting five Sunflowers for 1,500 profit will take 250 fertilizer. But the mega crop version will only use 50, 20% as much. So this will also save some fertilizer as well.

Note that if a Sunflower is given fertilizer and then merged, it will decrease the amount of fertilizer that can be given to the mega crop. So, when merging Sunflowers, only start fertilizing after they have merged, not before. Doing so will maximize your profits from a single mega Sunflower.
Roses
Roses are special crops that are not sold for Cashews but used primarily for romance. The player can give a certain amount of roses to bachelors/bachelorettes in town to increase their relationship status with them. Doing that will also provide the player with additional items and sometimes Heart Beet Seeds depending on what the given person was offering. The cost starts at three roses, the second five, then six, and finally seven for the final act of marriage. It cost 21 roses total to marry anyone. It used to cost 17 roses, but that has changed within the last couple updates.

Roses are also used to buy upgrades from the exclusive shop during the town fair at the end of each season. These can range from items to scrolls (all varieties, ranging from mid-tier to top-tier) to farm animals (all varieties and tiers). These are between two to four roses each.

A lovely rose.

There are some means of obtaining roses, though for the most part they are hard to come by. These methods are:
  • Freeing flamingos drops two rose seeds
  • Killing bosses drops one rose seed
  • Rarely from freeing small critters
  • Rarely from large flowers
  • Rarely from clearing enemy camps
  • If the player reaches the maximum milestone during the Mayor's Evaluation during the Seasonal Festival they will get one rose seed


Three rose seed packets.

If four roses are planted in a 2x2 square they will automatically merge, requiring no fertilizer to do so. Doing so will net the player one extra rose upon harvest.
Heart Beets and Health System
This game features an interesting health system that can be difficult to maintain. The player's current health can be found at the top left corner of the screen.


The Heart Beet health bar.

The amount of "Heart Beets" depends on the current year. Generally though, as the years increase, the amount of Heart Beets decreases. Obviously, if the player takes damage they will lose one Heart Beet, and if they take too much damage they die. The only way to regain Heart Beets is to grow them from Heart Beet seeds.


A Heart Beet seed packet.

Heart Beet seeds can be acquired in numerous ways. These include:
  • Four are always given from the Beet Drop item, which is found in camps and from potential spouses. This item used to be a Golden Pupa item but was moved to the normal pool in the Doom and Bloom Update.
  • Killing bosses drops one
  • Rare enemy drops
  • Rare weed drops
  • Rare seed drops from Flamingos and other trapped critters
  • Rarely from the Beet Drop chance
  • Buying them from the flower guy in town for a large sum of Cashews. Price increases with each season, as shown in this table:

    Season
    Price of a Beet Seed (Cashews)
    Spring
    200
    Summer
    400
    Fall
    800
    Winter
    1,600

  • Buying them from the Medical Doctor in town for Roses. Price starts at one rose, and increases with each seed bought. So the first seed cost one Rose, the second will cost two, etc. The player can only buy one seed per day from this individual.
  • Occasionally offered by bachelors/bachelorettes in town for Roses. The cost depends on what level of relationship the player is currently on.
  • One heart beet seed is given by the Mayor if the player reaches a 6/10 during the Mayor's Evaluation during Seasonal Festivals.

Once a Heart Beet seed has been acquired the player will have to grow them, just like any other crop. Instead of growing them when they are immediately needed, one strategy is to save them and grow them in a 2x2 square and fertilize them. Similar to roses, Heart Beets will benefit from this by giving one extra crop. So instead of only receiving only four Heart Beets if they were planted otherwise, the player will get five. This does require a significant amount of fertilizer to produce however, perhaps making it less worthwhile. This is also less effective in later years too, due to how much the game cuts back on max HP.

Because of how Heart Beets are used exclusively for health, they cannot be sold for Cashews.

There is a way for the player to increase the total amount of Heart Beets. Fertilizing the beets increases the odds of getting mini Heart Beets, and after getting enough that will increase the maximum HP by one. This can be repeated over and over to increase max HP.

Mega heart beets only give two mini heart beets upon harvesting. So, in terms of increasing max health mega beets are less efficient. Doing the math, you'll find that per four heart beets planted individually and fertilized four mini heart beets will be given. As mentioned, mega heart beets only give two. So, for increasing max HP stick to planting and fertilizing heart beets individually.
Oregacrow's Seed System
Oregacrow is the game's paid DLC character. He features a unique seed system that is apart from the rest of the cast. If you do not own this character, then none of the information pertaining to him matters for your game.

Disclaimer: This is only a basic overview of Oregacrow's seed system. I will not detail most of his unique items here. For information on those, check the wiki.[atomicrops.fandom.com]

Overview
Oregacrow's seed system only features four cash crops in addition to Roses, those being Corn, Rice, Tomatoes, and a custom crop called Oregano. Note that Heart Beets are not present as Oregacrow, which will be clarified why down the line. Roses are primarily disconnected from this system and only serve their typical function as any character: romancing spouse candidates or purchasing upgrades from the Rose Market.

Initially, Oregacrow can only find Corn seeds. This applies to most sources, including seed bags, camps, enemy drops, the Sprinkler Tractor, and more. This means that biome-specific seeds no longer exist. Furthermore, Sunflowers and all varieties of fruit trees can no longer be obtained.

To gain access to Oregacrow's higher tier crops, you must harvest megacrops. Harvesting a megacrop that isn't Oregano or Roses will give two to four seeds of a more valuable crop. Small crops will not provide seeds of the next tier. This upward progression follows the value of the crop, or as a visual:

Corn >>> Rice >>> Tomato >>> Oregano

Where you need a mega Corn to get two to four Rice seeds, a mega Rice to get two to four Tomato seeds, and then a mega Tomato to get two to four Oregano seeds.

Oregano and Oregano Cauldron
Oregano is Oregacrow's custom crop. As described, you need to harvest mega Tomatoes in order to obtain these seeds. However, Oregacrow begins the game with three Oregano seeds as well.

Oregano has sell values that are unique from any other crops in the game. Said values are displayed below.

Size & Fertilizer Amount
Value
Small Unfertilized
14
Small Fertilized
28
Mega Unfertilized
168
Mega Fertilized
224

Once harvested, Oregano will be sold like any other crop. However, it will also be added to the Oregano Cauldron. This is located on the farm next to the well. More valuable Oregano will fill the Cauldron up faster. Once enough is added, the Cauldron will fill up and can be interacted with. It will then provide a choice between two rewards. After selecting a reward the Cauldron will be filled again, with more Oregano than before.

The Oregano Cauldron possesses the reason why Heart Beets don't exist for Oregacrow -- Oregano takes its place. One of the options from the Oregano Cauldron will always be an Oregano Heart Bundle, which have between one or three Oregahearts in it.

Below is a list of the possible rewards from the Oregano Cauldron.

Item Name
Description
Ability to be Stacked
Oregano Heart Bundle
Heals. Randomly comes in sizes of one, two, or three.
N/A
Bark Feathers
Grants 5% Bark Skin.
Yes (∞)
Defense Bundle
Gives a Turret and a Scarecrow.
N/A
Oregaweeds
Grants a 3% chance for any weeds cut to drop an Oregano seed.
Yes (∞)
Soup Thermos
Grants a 33% chance to heal one health each morning. When stacked, the chances add together. However, this item appears to be broken at the moment.
Yes (3)
Deervil Pen
Allows the player to obtain another Deervil Deal
N/A

For our purposes of farming, the primary item to consider here is Oregaweeds. While the 3% chance may sound small, recall that this item does stack. Provided you farm enough Oregano, you can bolster that chance, making weeds a decent source of Oregano overall.

Town Cauldrons
Oregacrow has three other Cauldrons, those being located in town. These ones correlate to each of the other cash crops Oregacrow has: Corn, Rice, and Tomatoes. However, they take longer to fill up and only provide three rewards each. These provide numerous rewards of their own, however most of these aren't heavily relevant to Oregacrow's farming.

One of the more directly related items is Crow Glasses. This makes it so that dropped seeds are sometimes Rice instead of Corn. When obtained early on, this can save time and fertilizer, allowing for faster progression through Oregacrow's seed system. As a result, Crow Glasses is a worthwhile option early on. However, later on in the run they aren't as valuable due to most seed camps already being clear.

Recommendations
There are two primary recommendations to consider when tackling Oregacrow's seed system, specifically relating to the thirstier crops and the greater need for fertilizer.

Thirsty Crops
All of Oregacrow's crops belong to the more water demanding variety. Whether it'd be the basic Corn or the custom Oregano or the lovely Roses, all of Oregacrow's crops need a fair amount of water to grow. As a result, you'll want to megacrop these as often as possible in order to mitigate watering targets. This shouldn't be a big ask, as with Oregacrow's seed system you should be megacropping frequently anyhow. Furthermore, you'll want to prioritize gathering watering means in the early game, such as cows, the Sprinkler Tractor, rain scrolls, and more.

Fertilizer Devourers
Since Oregacrow's seed system requires fertilizer in order to function, you'll want plenty of fertilizer generating means. Avian Placenta, the Wood Chipper Tractor, Fat Grub, Mysterious Flower, Thankful Crops, and many more will be worth considering.

The absolute best fertilizer-related item for Oregacrow is the Participation Trophy. This automatically merges crops, which is perfect for Oregacrow. However, this is a Golden Pupa item, meaning you'll have to hunt down and kill Tree Guardians in order to find it. This item is not guaranteed to appear each run either.

If you cannot find the Participation Trophy, another option is Companion Planting. This item causes crops to give fertilizer when ones of the same variety are planted near them. The amount of fertilizer given scales with the amount of familiar crops planted. Since Oregacrow features such a limited seed pool, this works out excellently. As such, use this item to your advantage.
Farm Animals
As you are a farmer, you are naturally going to have some farm animals. There are four main kinds, with a semi-additional fifth that you can find. The primary four have two variants, those being the Tier I and Tier II kinds, while the aforementioned fifth only comes in one flavor. Tier I means that it is found in Tier I biomes while Tier II ones are found in Tier II biomes. In addition, Tier I farm animals are less powerful than their Tier II version. Due to how the mysterious fifth farm animal is a spoiler it is blacked out as such.

Farm animals will perform their chores automatically and will need minimal influence from the player. They can greatly assist to automate the farming process and provide extra goodies with other items.

The player's current count of all farm animals (with the exception of the mysterious fifth type) is displayed in the top right corner on the inventory screen. Use this in order to try to maintain a good balance of farm animals.

Here is a table with all the current farm animals. There are also some notable items and interactions mentioned here, however understand that these are certainly not all and there are many more.
Image
Name
Tier
Abilities
Cow
Tier I
Waters one crop at a time. Returns to the well to refill.
Special: With Cattle Turret Tumors, gets a turret on its back. This turret benefits from all turret upgrades.
Special: With Glass Bottles, gives milk worth 60 Cashews.
Grass-Fed Cow
Tier II
Waters one crop at a time. Larger water capacity and faster watering speed. Returns to the well to refill.
Special: With Cattle Turret Tumors, gets a turret on its back. This turret benefits from all turret upgrades.
Special: With Glass Bottles, gives milk worth 90 Cashews.
Chicken
Tier I
Eats weeds. Lays eggs worth 10 Cashews upon pickup.
Special: With Spring Chicken, 50% chance to turn a weed into a flower when pecking at one. If the chance does not proc it will simply eat the weed like normal.
Turkey
Tier II
Eats weeds. Lays eggs worth 40 Cashews upon pickup.
Special: With Spring Chicken, 50% chance to turn a weed into a flower when pecking at one. If the chance does not proc it will simply eat the weed like normal.
Pig
Tier I
Tills soil and sometimes breaks open crust.
Special: With Swine Turret Tumors, gets a turret on its back. This turret benefits from all turret upgrades.
Special: With Nasal Spray, sometimes uncovers truffles while tilling that sell for 200 Cashews each.
Hog
Tier II
Tills soil and sometimes breaks open crust. Sometimes rams enemies for 100 damage.
Special: With Swine Turret Tumors, gets a turret on its back. This turret benefits from all turret upgrades.
Special: With Nasal Spray, sometimes uncovers truffles while tilling that sell for 200 Cashews each.
Bee
Tier I
Pollinates one crop at a time, doubling its growth speed. Does not affect fruit trees.
Special: With Trophillaxis, instantly waters crops it pollinates.
Special: With Hipbees, sometimes converts weeds into flowers.
Hummingbird
Tier II
Pollinates an area of crops at a time, doubling their growth speed (this information is uncertain and requires more testing to be verified). Does not affect fruit trees.
Special: With Trophillaxis, instantly waters crops it pollinates.
Special: With Hipbees, sometimes converts weeds into flowers.
Alien Pet
N/A
Obtained by opening Alien Pods spawned after another farm animal is abducted by Mini U.F.O.s (see the wiki[atomicrops.fandom.com] for more info on spawning). Orbits the player. Waters nearby crops, never needs to refill. Cuts all weeds and tills all soil it passes over. No cap on how many can be had at a time.
Tractors
Tractors can greatly shape how the game is approached. There are six different kinds, each with different abilities and purposes. With the exception of the Megaton tractor, all tractors can be bought for Cashews during Seasonal Festivals or found guarded by enemies out in the world.

Wacker Tractor

The Wacker Tractor is designed to cut any weeds in it's path. It has a highlighted, rectangular shaped area in which all weeds will be cut. This tractor can be helpful in later years due to the spawning of weed monsters. Cut weeds will have a high chance to drop seeds and fertilizer as well. However, this tractor isn't necessary if the player already has enough weed cutting items or has enough chickens/turkeys to automate the process. At that point a different tractor would be advised.


Wood Chipper Tractor

This tractor is probably the simplest. When placed, every enemy that is currently in or enters the highlighted area will be grounded up into fertilizer. More tanky enemies will give more fertilizer due to having more health and therefore grounded up more. This can also be used to pull enemies away from the player if they desire. Be careful with that though, since enemies pulled into the tractor that deal contact damage can still cause contact damage. The Wood Chipper Tractor also works on bosses, though it won't completely kill them. However, it will generally last long enough to kill all enemies in a camp, making it almost like a free clear.


Tunneler Tractor

This tractor was added in 1.1, or Thyme Flies. When being used areas not nearby tilled soil, it will drill a hole that the player can jump into to go back to the farm immediately. Best used when things are getting out of hand and a quick escape is needed. Holes drilled with this outside of the farm are consumed on use.

When used next to other tilled tiles it will drill into a single crust tile, putting it into the broken up state. It can only do one tile at a time. It is required to use this next to already broken up land. You cannot drill new tiles on parts of the farm that don't have broken up land nearby. Doing that will just make it drill an escape hole on the farm, which for some reason is never consumed and can be used multiple times.

Sprinkler Tractor

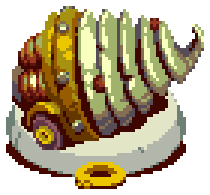
This tractor will water crops in it's range. When being used, two highlighted circles will appear, one inner and the other outer. The outer ring indicates the whole area that will be watered. However, the inner ring does not represent an area that will not be watered. Rather, it represents the area where seeds will be "cloned." This means that any crops are directly underneath the tractor when it's placed will give back one seed of their type. The exceptions are roses, Heart Beets, and fruit trees. Technically, fruit trees can give seeds through this process, but it's a low chance that they actually give seeds. For all other non-excluded seeds the chance is guaranteed. For the excluded ones they will simply give random seeds when this tractor is used on top of them.

There is a method using this tractor that essentially allows the player to "multiply" their seeds. It requires the placement of this tractor repeatedly on the same patch of crops. Doing this multiple times will essentially multiply them. So for example, let's say there's a 4x4 patch (16 crops total) of cabbages in a tight square. When the sprinkler tractor is placed on them 16 seeds will be returned, breaking even with the seeds planted. However, if the tractor is placed on those same seeds again, 16 more cabbage seeds will be returned. Doing this over and over again will greatly increase the amount of seeds the player first started out with. Placing this tractor on a mega crop will give back four seeds of the crop's respective type, making it effectively the same as four small crops.

Motivator
The Motivator is the newest tractor in the game's current lineup, added in 1.3, or the Doom and Bloom Update. Upon being used it will instantly energize all of the player's allies (farm animals, defenses, spouses, etc.), making them preform their jobs faster. It will also make the player completely invincible for five seconds. Furthermore, all enemies in the immediate area will drop some seeds and fertilizer. This tractor is best used when the player either has lots of chores on the farm that need to completed at once, want to avoid damage, or want more loot from enemies.


Megaton Tractor

The Megaton Tractor is generally regarded to be the best and yet most elusive of the six tractors. Upon being used it will instantly grow any crops, clear out any weeds, till any land into the better tilled state, break open some default soil, and damage (usually, kill) every enemy in it's range. It does this instantly as well. It's basically like having a nuke in your pocket. Keep in mind that it will not outright kill bosses or some Tree Guardians and Elites, but it will damage them.

This tractor is also the hardest to obtain, and isn't guaranteed every run. To find it, the player must defeat Tree Guardians found by following the Golden Pupas. Upon defeating Tree Guardians and opening the giant flowers there is a chance that the Megaton Tractor will appear in place of an item. The best method to get this tractor, besides being lucky, is basically to do a full map clear. The player can only find one of these tractors per run.


All tractors have a cooldown that recharges overtime. Several items can speed up this cooldown, such as Whiskey Shot, which decreases cooldown upon taking damage, Double Cream, which decreases cooldown when foraging berries, and Fertilizer Fuel Converter, which makes collecting fertilizer decrease cooldown.

However, the best item for decreasing cooldown is Hotwire. This item outright allows a tractor to be used prematurely before it recharges naturally, though there's a 25% to take damage when using it. Note that the tractor can still recharge naturally over time, and such charges will not hurt the player when used.


The Hotwire item.

There's also a couple other items that impact tractors as well. First off, there's the Extra Tractor Slot, which just allows the player to hold two tractors. They can be two different or identical tractors.


The Extra Tractor Slot item.

Then there's the Backup Generator, which allows a tractor to store two charges instead of one. Overall, Extra Tractor Slot is a bit better, since the player can hold two of any tractors they want. Holding two identical tractors is better, since both tractors charge simultaneously.


The Backup Generator item.

However, combining these two items is quite powerful. Having both would mean having two tractors, each holding two charges. Having two identical tractors with Backup Generator is kind of like having one tractor with four charges.
Other UI Basics
There's also a couple other parts of the UI worth discussing. The top right corner of the screen features the most information compared to any other part.


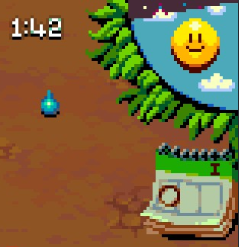
Daytime UI.

Up here the player will find:
  • Amount of time left in the day.
  • Calendar showcasing the current day, season, and year, indicated by a circle, colored strip, and a roman numeral respectively.
  • Seasonal effects on the clock; green leaves for spring, petals for summer, multicolored leaves for fall, and a snowflake for winter.
  • A water droplet that appears if crops need water. The size of the droplet and movement speed is determined by how many crops currently need water, both increasing as more crops need it.
  • A biting GIF, which is only shown if crops are being eaten or burning. This same icon is used for either situations.


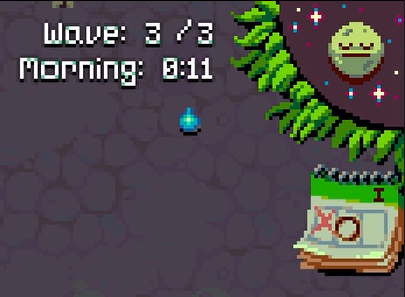
Night UI.

During night the above information is still present, with some new features thrown in as well. These include:
  • The amount of waves remaining. There are usually three, though there can be up to five.
  • The amount of time left in a wave before the next one starts and the amount of time until morning.

It is advised to keep an eye on this area of the UI, as it can reveal important information about the situation of any planted crops while the player is out and about exploring.
End Notes
So that's the basic gist of farming. There's a bit more to it, but those parts will be learned in due time. Remember, farming is only half of the game; you still got the entirety of the bullet Hell aspect to worry about.

At the time of writing this I have completed the game, so I have quite a fair bit of experience on how it works.

Now go on out there and try to beat my Winter high score for year one.


For additional information, check out the wiki[atomicrops.fandom.com]. Myself and others have been hard at work to make this wiki informative, and it well covers most of the game's current content.

If you want other tips, I do have some videos on YouTube regarding this game. These range from direct guide videos to challenge playthroughs. If you want, you can check them out here.

Information presented here is from my own experience and a bit from the wiki.
Broccoli gif was used from the Atomicrops website then increased in resolution by me.
Some item and tractor images were used from the wiki and then increased in resolution by me.
Other images were used from screenshots in game.


25 条留言
Mr. Aqua  [作者] 5 月 26 日 上午 10:16 
Glad the guide helped you out! :stardrop:
james_mcbride 5 月 26 日 上午 2:42 
Thank you SO SO much for this!! The tutorial for this game may as well not exist.....it is helpful in only the most basic way and doesnt cover much of anything.
Color Or Die 2024 年 9 月 21 日 下午 4:39 
dude worked so hard so i have to respect him!
Grug 2023 年 10 月 2 日 下午 3:53 
Can you include a section about the Harvest Moon?
KotMonsoon 2023 年 6 月 24 日 下午 6:23 
in deerly beloved they added this pickup which allows player to replant trees
Mr. Aqua  [作者] 2022 年 5 月 19 日 下午 7:46 
This has been updated with Oregacrow's seed system. I did not cover all of his custom items due to many not being relevant to his farming, which is the aim of the guide.

Thank you all again for the awards and kind feedback. 25 total awards now -- that's quite a lot. It makes me glad to hear this guide is helping others get into the game. :cozyjunimogreen:
Hellawack 2022 年 3 月 30 日 下午 11:45 
Thanks for making this guide :) Lots of useful knowledge while respectfully hiding late game spoilers. I was really struggling with this game but now I'm having a blast thanks to you
Kokoa 2021 年 12 月 25 日 上午 11:00 
thanks for that guide its gonna be very helpful!
Mr. Aqua  [作者] 2021 年 11 月 23 日 上午 6:58 
The guide has just been updated to now include a farm animal section. Also some information updates and some grammatical improvements.

Thank you all for the many awards. I'm glad that this guide has been helping out so many people. If I get the chance I want to add a few more things to this, and may even need to add more with the planned December update (for those interested you can find out about that here: https://twitter.com/Atomicrops/status/1457139537214251009 ) .
I'm not your Mary 2021 年 10 月 18 日 下午 7:12 
The Motivator is such an underrated tractor, for me its the best tractor in the game -- since by end game you'll have a petting zoo. Great guide!