DOOM Eternal

DOOM Eternal

116 个评价
Eternal Notetaking: Documentation of the Entire DOOM Eternal Campaign
由 ★CamLikesCow★ 制作
Every major fight, boss battle, enemy, upgrade and more! I've documented the entire DOOM Eternal campaign in this guide, along with some of my own tips and tricks for specifically hard fights. I'm focusing on the combat aspect of the game, so collectibles that are purely cosmetic are left out, but everything else is in here, so take a look!
2
2
2
   
奖励
收藏
已收藏
取消收藏
Introduction


Hey there. I'm CamLikesCow, and I've been trying to beat Ultra Nightmare for a while now, and I finally beat it after about two weeks of grinding last Sunday. To help me with the struggle, I made a 20-page long Google Doc chronicling every major fight in the game, and over time I expanded this to routing every upgrade and perk so I could optimize my runs. Now that I've beaten the game on Ultra Nightmare, I figured it would be a waste to just delete my work, so I spent the past few days making it into a guide so I could help others who are suffering as I was. Maybe I'll even be more help that those "Top 15 BEST TIPS for DOOM ETERNAL ULTRA NIGHTMARE!!!!" videos that just tell you how to play the game for 10 minutes so they can get their ad revenue.

Okay, but what do I have to gain by reading this?
Unfortunately for some readers, I didn't write this as a step-by-step guide on how to get good at DOOM Eternal. While this guide was written for Ultra Nightmare runs, with a focus on what will actually help you beat it, that doesn't mean this guide won't help you on other difficulties. I will expect some level of proficiency at the game throughout this guide, but don't feel pushed away if you're uncomfortable with playing at that difficulty just yet. Every encounter has the exact same demons on all difficulties, the only difference is how they act and how much damage they do, so the vast majority of this guide will apply to all difficulties.

In the same frame of mind, this is less of a demon-by-demon walkthrough and more of a fight-by-fight walkthrough, if that makes any sense. I won't be pointing out every single demon you will encounter, since you should be able to handle a single Mancubus at a time, I think. Because of that, most of the filler demons between large fights will be ignored. However, I will be cataloging the contents of every single encounter in the game.

If you're looking to get better at DOOM Eternal, you should consider practicing levels on higher difficulties until you're consistently able to beat them without dying. I had to do this a LOT to beat UNM, and I hope that the fact that I was able to beat UNM alone is enough to convince you that it isn't impossible for you to beat. I'm decent at shooters but I'm nowhere near top-tier. I didn't think I would be able to beat it, but I was actually able to beat it after around 2 weeks of grinding. If you are reading this to help you with Ultra Nightmare, I would recommend playing through the whole campaign at least once, and at least once on Nightmare. It is a huge step up in difficulty from Ultra-Violence.

Since I wrote this guide with UNM in mind, I will not be telling you the location of secrets that are purely cosmetic, nor will I be telling you the location of every single helpful collectible. I think the game does a good job of letting you find everything on you own with the Automap and other upgrades. However, I will expect that you are getting every Praetor Suit Token, Sentinel Crystal and Sentinel Battery since they are critical elements to succeeding. I will be explaining upgrade routing in later sections, so I can help you make a more informed decision on what to pick to suit your playstyle.

Now, with all of that out of the way, let's get that Gold Slayer skin! That's what we're all here for, right?

DON'T DELETE YOUR UNM SAVE FILE
Ultra Nightmare has this one small quirk about saving the game that helps prevent cheesing:
If you exit to the main menu or the desktop when in your run, YOUR SAVE FILE WILL BE DELETED. THIS INCLUDES IN THE FORTRESS OF DOOM. Your only real chances to save and quit are on level end screens. I deleted my save file on accident in the FoD after my first time past Taras Nabad because I wasn't paying attention and I went too fast to read "This will delete your save file, are you sure?"

I had to make sure there were no sharp objects in my room for a few days afterwards, because Taras Nabad is probably the second hardest level in the game and I spent days trying to beat it in a run.

Possible needs for a psychiatrist aside, you can avoid this by closing the game with ALT + F4, and your last checkpoint will be saved and your save file will remain undeleted.

So remember, if you want to get off for the day and forgot to click "Save and Exit," ALT+F4 and your file will be safe.

That way, you'll also be able to keep that Game Completed Screen on your save files forever!
Getting Prepared: Controls and Graphics Options
One thing you might realize when playing a game with so many weapons is that your fingers can't reach all the way down to the 8 key without moving off of your WASD. This is a massive issue in DOOM Eternal, because success is dependent on moving fast and precisely. In order to fix this, many players change their keybinds so they can change to those hard-to-reach (but VERY important) weapons much quicker, without worrying about being unable to dodge the Pinky that's currently charging at their face.

Please note that I have two extra mouse buttons for the Chainsaw and the Flame Belch, which are absolutely critical to staying alive. If you don't have extra mouse keys, be sure to set Chainsaw and Flame Belch to easily-pressed keys.

WASD - Moving
M1/M2 - Fire/Secondary Fire
  • Obvious choices
Mouse 4 - Chainsaw
  • Very important in this game. I recommend binding it to a key you can reach without any trouble.
Mouse 5 - Flame Belch
  • Same as above.
1 - Combat Shotgun
  • The first weapon you get, and you'll be using it for the entire game.
2 - Heavy Cannon
  • Second weapon acquired. Incredibly useful for dealing with weak points.
3 - Super Shotgun
  • Fifth weapon acquired. There's a level-and-a-half period where I had a bind for 4 but not 3, but that's really it. The immense power of this weapon should place it at a high-priority key.
4 - Plasma Rifle
  • Third weapon acquired, and (in my opinion) probably the weakest of your weapons. Don't take that harshly, but my playstyle just had no real place for it. It's only real use for me was destroying energy shields, which are uncommon enough to place this at the end of my number keys.
Q - Rocket Launcher
  • Fourth weapon acquired. Lock-on Burst is an AMAZING damage dealer, and the Rocket Launcher's damage capacity is incredible.
R - Ballista
  • Sixth weapon acquired. Another main damage dealer, the Ballista is too good to leave bound to 6.
Z - Chaingun
  • Seventh weapon acquired. Same as above.
C - BFG/Unmaykr
  • Eighth/Ninth weapons acquired. Not a main damage dealer, but you should never need to press 8 for a panic weapon when you're in a desperate situation.
X - Crucible
  • I use V for voice chat so...
T - Weapon Wheel
  • I don't use the weapon wheel since I've got my changed binds, but it's nice to have when you're having a stroke and can't remember what button changes to the Plasma Rifle when a Shield Soldier is backing you into a corner.
F - Use/Melee/Glory Kill
  • This is originally bound to E, which makes sense, as most games set E to use. I don't remember why I changed this, but I'm used to it now so it's what I use.
E - Frag Grenade/Ice Bomb
  • I didn't really like pressing CTRL to do something I use so much, so I moved it to a button I can reach comfortably.
CTRL - Change Grenade
  • I change between them less than I use them so I moved this to the less comfortable spot.
B - Change Mod
  • Due to my specific routing of the game, I only ever got two mods for one weapon, and I almost never used the second one. You might deem this more important than me, but I never use it.
Shift - Dash
  • Default. Good button.

Having Graphics Issues? Check out this guide!
If you're looking for help with graphics choices, I found one extremely helpful guide that goes into great detail on every single option and what they do. I'd recommend looking at it if you're having issues with maintaining good FPS.

This guide isn't one of my own, I'm just recommending it because it's that good.
https://psteamcommunity.yuanyoumao.com/sharedfiles/filedetails/?id=2031300297
Some Tips and Tricks that ACTUALLY Help
I understand that this guide is focused on Ultra Nightmare, so I will assume you know the general way to play this game. I won't bore you with "oh you gotta shoot the demons to win hahahaha asdhgfaeriuyfgsdfgousb," instead I'll give some tips that might actually help.

  • When using Flame Belch, try flicking your mouse around so you might catch a demon that's nearby that you don't see.

  • Chainsaw fuel is weird. You will always generate fuel, but only until your chainsaw has one bar, then it will stop. If you're in an arena that you've just cleared and you see a fuel canister, wait for this bar to fill up, THEN pick it up so you can move on with 2 charges rather than 1.

  • Grenades are WAY better than they were in the last game. The Ice Bomb in particular is amazing.

  • Glory kill whenever you can, but don't jeopardize your run by going for one. The health drops are essential for survival, and increases the lower your health is.

  • Try not to waste the chainsaw on heavy demons. They don't drop more ammo and waste all three of your chainsaw fuels.

  • The BFG projectile deals much less damage than the tendrils it shoots out. The tendrils are much better at clearing an arena, so it's actually beneficial to miss the main shot and let the tendrils fry everything in sight. Try and fire it in a way that the bolt will stay out for as long as possible to maximize damage.

If you're looking for tips for fighting specific demons, there will be a section near the bottom that goes in-depth on fighting every demon in the game.
Planning Ahead: Sentinel Crystal Routing
Since I don't want to make you look for these information bits throughout the Encounter Documentation if you want this specifically, I'm going to put all upgrades in the next couple sections with some explanation on my choices. In a later update, I'll have this dispersed throughout it as well if you like knowing in the moment, but for now this is the only place to find this information in the guide.

Keep in mind that these are the routes that worked for me and are by no means the optimal paths for you, so if you think you'd do better with a different upgrade, go with it.


Now, on the topic of Sentinel Crystal upgrades...
Health, Armor and Ammo upgrades are a huge factor of your success in later parts of DOOM Eternal, but sometimes exactly what to upgrade when might leave players confused. Add in Eternal's new mechanic of perks paired with upgrades and we've got ourselves a whole slew of options to pick from.


When considering the fact that you have such low ammo counts, you might think your best bet is to go for ammo upgrades first. This is the exact opposite of what you should actually do, and for one reason: ammo upgrades give you almost no extra ammo (+2 shells, +20 bullets, +25 cells, +1 rocket). This, paired with how much damage that enemies can do to you, should be more than enough for you to want to prioritize health and armor.

Between those two, I say to prioritize Health, since you can usually only gain armor through your Flame Belch, which is available less often than Glory Kills (which refill health), which are always available (in combat, at least).

Below, I have a list of every Sentinel Crystal you will find, in order, with a general description of where you find them. I also have below each one the upgrade that I got in my successful UNM run for that specific crystal.

Fortess of Doom (after Hell on Earth)
-This one's required for progression, and I recommend Health in Quickdraw Belch.

Exultia
-Inside the second titan if you go to the left into the sludge. I recommend Armor in Quickdraw Belch.

Cultist Base
-You get this one after The Pit. I recommend Health in Belch Armor Boost.

Doom Hunter Base
-This one is outside the building that has the Red Keycard in it. I recommend Ammo in Belch Armor Boost.

Fortress of Doom (after Doom Hunter Base)
-You get these two with 4 Sentinel Batteries used behind the Unmaykr case. I recommend both Health and Armor in Health for Blood.

Super Gore Nest
-This one's in the room with all the "SUBMIT TO THEM" screens where you find the first Spectre. I recommend Health in Napalm Belch.

ARC Complex
-Go left and break a punchable wall after jumping down to a skyscraper near the middle of the level (check your map for this one, I can't describe exactly where it is, but it's easy to miss). I recommend Ammo in Napalm Belch from this one.

Mars Core
-Where the boost pad that sends you through armor pieces sends you. I recommend Armor in Loot Magnet.

Taras Nabad
-You find this if you drop down and turn around during the fight in the circular room with the Spectres and Pain Elementals. I recommend Ammo in Loot Magnet.

Nekravol
-Go left at the start of the level and past some wall cannons. I recommend Armor in Armor for Blood.

Nekravol Part II
-This one is to the right in the hallway after the first fight. I recommend Ammo in Armor for Blood.
Planning Ahead: Praetor Suit Token Routing
Here's the exact order of upgrades I got during my UNM runs. I focused solely on upgrades that had a practical benefit (I got none for exploration), so I won't have the barely-useful upgrades here. If you want to get them just continue on after Taras Nabad.

Cultist Base
Thicker Skin (2)
-Barrels do a TON of damage to you, and getting this as soon as possible is a great boost to your survivability.

Hot Swapper (2)
-A great, cheap boost to your weapon switch speed.

Faster Dasher (4)
-Almost a necessity in later fights, it's good to get this here.

Permafrost (3)
-I got the Ice Bomb upgrades because they're a huge help in fights, and I use it a lot.

Doom Hunter Base
Faster Ice Cooldown (3)
-More Ice Bombs. Enough said.

Super Gore Nest
Hit and Run (4)
-Another insanely useful dash upgrade. I probably should be getting this earlier but I never felt like I needed it until here.

Frost Bite (5)
-The first 5 cost upgrade, and that's the only reason we haven't gotten it yet.

ARC Complex
Frag Stock Up (5)
-Getting the second grenade first is (I think) better than getting a single one faster, because you're usually not using the grenades as soon as they're available, and a second one can help you in a pinch when you'd otherwise be stuck without one on recharge.

Faster Frag Cooldown (3)
-See above

Mars Core
Combustion Concussion (3)
-This falter wave is a massive improvement to the grenades, but I feel like the other two are more important to get first.

Ice Drops (4)
-The health from iced enemies is a good bonus, but I never found myself getting that much use out of it, so it's near the end.

Grappler (1)
-I just got this here because it's a 1 cost. It's really not that useful but it's objectively an upgrade so I got it.

Taras Nabad
Scatter Bombs (4)
-While this is by no means a bad upgrade, most times when you kill enemies with the grenades these extra scatter bombs won't hit anything. It's good when it works but it doesn't work as much as you might expect.

None of the other ones matter (they’re either exploration or have so little effect they’re not worth mentioning). For this routing to work, all Praetor Suit Tokens in each level must be collected up to Taras Nabad, and Sentinel Batteries must be spent on tokens after getting the two crystals. Modbots in the FoD don’t really matter because you get a modbot in Super Gore Nest for the Ballista before you really need Arbalest and that’s the only time you’d start a mission without it, so Sentinel Batteries for Modbots are kind of a waste unless you're going for 100%.
Planning Ahead: Rune Routing
In Ultra Nightmare, the only rune that you absolutely should get is Saving Throw. It functions as a sort of extra life that is an enormous help in difficult fights you might be worried about dying in. Aside from that you have 3 other runes you should have on when you aren't about to die (Saving Throw gives no benefit when you aren't almost dead, so it can be quickly swapped with another rune when you drop to low health).

The runes I got were these four, in this order:
Chrono Strike in Exultia
-Chrono Strike is essentially a necessity for my playstyle, since I love using the Precision Bolt to snipe weak points on demons.

Equipment Fiend in Cultist Base
-This rune gives you an insanely useful boost to your equipment, effectively shortening the recharge time of all of them (granted, you need to get a kill with them, but you should be getting kills when you use them so that requirement is negligible at best).

Blood Fueled in Doom Hunter Base
-This rune is probably the most debatable choice for me, but the only other one I would consider here is Punch and Reave (I'll explain my thoughts on every rune below). When comparing the two of them, the benefit of health from the Blood Punch is too risky to use, since I found myself normally getting punished for going to use it. The speed boost you get from Blood Fueled is really nice to use for boss fights, and it can sometimes get you out of sticky situations you wouldn't expect to survive otherwise.

Saving Throw in Super Gore Nest
-The reason I get Saving Throw last is because I feel that if I need to use it before Super Gore Nest, the run will not succeed anyway, so it's probably not worth trying. My reasoning for this is that the only really hard level before Super Gore Nest is Cultist Base, while you've got the rest of the game to worry about after it, so using it before the fifth mission is probably a waste.

After Super Gore Nest, I ignore every other rune in the campaign, since I already have every rune I would want to equip.

My Thoughts on Each Rune
Savagery: Faster Glory Kills.
-Believe it or not, I consider this rune a straight downgrade. Consider this: you're invincible while performing glory kills, so why would you want to be invincible for a shorter time? Even if you have lots of staggered demons you'd love to glory kill, you're better off with Dazed and Confused, which isn't that good either.

Seek and Destroy: Launch into a Glory Kill from much further away.
-Another meh-tier rune relating to glory kills. While this rune is more useful than Savagery, it's still pretty average at best. Usually you're able to just dash to a staggered demon to glory kill them, and the (while very large) increased range is hardly the best option if you're trying to survive Ultra Nightmare, so your rune slot is probably better filled elsewhere.

Blood Fueled: Gain a speed boost after performing a Glory Kill.
-In my opinion the best rune with a glory-kill-triggered bonus. It gives you a massive speed boost for a few seconds with every glory kill you perform, and this added mobility is insanely useful in the high-intensity fights where a speed boost can help you dodge shots better. It's one of my main three for sure.

Air Control: Greatly increase movement control while in the air.
-Personally, I don't like the way this affects movement. I think the dashes offer the same utility that this rune gives but better, since using this to dodge shots often doesn't move you enough out of the way, while a dash will move you to a much safer position when moving away from projectiles.

Dazed and Confused: Increase how long enemies remain in a stagger state.
-Another meh-tier glory kill rune, but this is probably the best of the ones I don't care much for. Keeping demons out of the fight for longer allows you to use this for more than just glory kills. You can also use it to "stun" demons for the duration of the stagger while you focus on what will actually kill you. Even so, it's usually better to flat out kill the demon instead, so this takes a back seat to runes that promote slaying.

Saving Throw: Basically an extra life except your health isn't regenerated.
-The only true necessity when playing Ultra Nightmare. To answer a frequently asked question: No, it does NOT regenerate on level completion. The best strategy for this rune is to keep it unequipped so you can utilize the benefits of three other runes, and then when you're getting low on health or are about to step into a hard fight, equip it then.

Chrono Strike: Slowdown while using weapon mods mid-air.
-This is the first rune I get, since I use the Precision Bolt on the Heavy Cannon for almost every weak point I see, and the slowdown in incredibly helpful when performing these shots. Other than that, this rune can actually be annoying, activating when you don't want to use it, but that's the price you pay for the ability to completely eliminate the chance of missing a hard shot sometimes.

Equipment Fiend: Faster cooldown when you kill an enemy with equipment.
-Another essential rune for higher difficulties. When you're in the middle of a fight, it's always a good idea to be using your Flame Belch and Grenades whenever they're charged up, and this makes that happen faster. It's probably the objective best rune in the game, and I would always recommend that you use this no matter what.

Punch and Reave: Enemies killed by the Blood Punch shockwave drop health.
-Blood Punch is a tricky mechanic. While a powered up melee strike is great (the Pinky one-hits, Cyber Mancubus armor crushing and Doom Hunter sled weaknesses are also huge bonuses), the fact is, I've almost always found myself taking more damage when going for a Blood Punch than I gain from the rune. Getting close to demons is almost always a bad thing (especially when considering the Mancubus), so you should probably save Blood Punch for a utility tool for specific demons rather than a method of gaining health.
Planning Ahead: Weapon Upgrade Routing
Weapon upgrades are great. They take an already powerful weapon mod and turn them into incredible tools that you can use from the time you get them to the end of the campaign. Below I have the order that I upgraded my weapons throughout the campaign. This is by no means the optimal method, as I don't believe there is one, but it's what worked for me.

Remember that these points are considering that the only secret encounters done are the two in Exultia, and no Slayer Gates, since this was routed in an Ultra Nightmare run and I didn't want to risk dying for upgrade points I probably wasn't going to use (you get like 15 more than you need to 100% all weapons, and you're usually maxed out on UNM before you finish Nekravol Part I).

Exultia
Both upgrades for sticky bombs on the shotgun. Bigger Boom first.

Cultist Base/Doom Hunter Base
Save your points until you get the Super Shotgun, then max it out. You want to grind the mastery on it since the armor-on-demand Meat Hook is insanely useful. It’s actually possible to do the entire thing during the Doom Hunter boss fight with the infinitely spawning fodder, it just takes 5 minutes or so of dodging and killing, which isn't that bad considering the Doom Hunter is basically no threat once you knock it off its sled.

Super Gore Nest/ARC Complex
Max out your Precision Bolt and grind it on fodder enemies. By the time you get to the cutscene that you discover you’ll need to use the cannons to clear the way in ARC Complex, you should be about 4 kills away if you’re focusing headshot kills.

Mars Core
Focus upgrades on the weapons you use most (I’d recommend Lock-on Burst since the faster lock-on is super helpful. The mastery is possibly a downgrade so don’t go for it unless you like it)

Taras Nabad
Use the 10 points from the Gladiator to max one of the weapons left, and use the mastery token on either the Mobile Turret (extremely helpful during the Archvile in the Sewers encounter) or Precision Bolt if you don’t have that yet.

The Rest of the Campaign
Upgrade what you use.

My exact upgrade order for the whole campaign was Sticky Bombs, Meat Hook, Precision Bolt, Lock-on Burst, Mobile Turret, Arbalest, and finally Heat Blast. The other weapon mods didn’t find a real place in my playstyle so I decided against using them. I either did the challenge or used a mastery token on every mod except for Lock-on Burst, since I consider the dual lock to be a downgrade since more often than not it just locks onto a zombie and wastes 3 rockets.

I'm not sure if I listed it anywhere else, but my exact order of weapon mods was Sticky Bombs, Precision Bolt, Heat Blast, Lock-on Burst, Arbalest, and finally Mobile Turret. Basically, I modded each weapon as soon as I got the first modbot after acquiring them, since I only used one mod per weapon.
Mission 1: Hell on Earth - Difficulty 5/10
But Cam who Likes the Cow! Hell on Earth is the first level! How is it 5/10 difficulty already?

Let me preface our 13-mission campaign of demon slaying by saying that there are only two remotely easy levels in this game, and this is not one of them. Also, the difficulty ranking is more of a "how worried should you be about this fight" meter than anything else. Every player is different, so this holds little actual value when considering objective level difficulty. I personally think mission 7 is the easiest in the whole campaign, but someone else might have notable trouble with it. That's why this guide tells you EVERYTHING and lets you find out for yourself what's hard and what isn't as opposed to only mentioning what I found hard. However, you get only two weapons in this level, no dash or any special abilities and I wrote this for Ultra Nightmare so nothing is easy.

And like that, our journey begins. Prepare yourself.

I played this level so many times that I started ignoring the Zombies at the beginning of the level. They're not required kills (except for the first 3) and it's faster to run past them.

Always get Stickybombs from the first Modbot. Full Auto is a huge waste of ammo when your shotgun one-hits most demons and even when mastered its objectively worse. At that point you have better damage weapons anyway.

Encounter 1: Imps (I), Soldiers (S) and Zombies (Z). Difficulty 3/10
-Spam stickies to win. Zombies can be ignored and the door will open anyway.

Modbot - I skip this because it's faster and I had to do Hell on Earth more times than I can count. I also never use Full Auto so I don't want to run the risk of accidentally switching to it.

Encounter 2: Arachnotron (A), I S Z. Difficulty 5/10
-FOCUS THE ARACHNOTRON FIRST. Something you'll quickly realize is that they're one of the most threatening enemies in the game, and they're the first heavy demon introduced for some reason. Their grenades do insane damage and that turret is annoying too. They will be staggered by 6 stickybombs, 6 Precision Bolts, or any combination of the two that adds up to 6.

Heavy Cannon acquired.

If you climb up on the giant bell you can reach a 50 armor in the floor above the two zombies.

Encounter 3: A I S Z. Difficulty 4/10
-There's a 1-Up, which has been replaced with a Full Armor (I'll still refer to them as 1-Ups. Also take note that I will not mention all of these, since less appear in UNM) in the building on the left.

Sewer Strat: Run past everything in the first hallway, then turn to the left. Chainsaw the Soldier, pop the turret on the Arachnotron (even if you miss it's fine, just keep running), sticky the second Soldier, then get the Modbot and leave. You don’t need to kill them and it’s an annoying fight so I just skip it.

Modbot - Precision Bolt recommended.

Encounter 4: Cacodemon (C), A I S Z. Difficulty 4/10
-Go for the Cacodemon that spawns near the entrance right away. Once you've killed enough IS an Arachnotron spawns close to where the Cacodemon spawned initially. You can pop its turret before it starts attacking if you're fast enough.
-Another A pops through the wall at the end. Save some Z for health/ammo.

Cacodemon pops up from the chasm, then platforming. You can actually jump straight up from the first climbable wall to the train and ignore the fire. There's a 50 armor where you jumped from if you're not full after the fight.

Tentacles + S Z. C S Z in the bottom of the garage. There are 3 tentacle holes, and there are only tentacles in the first and third ones.

Encounter 5: A C I S Z. Difficulty 4/10
-Focus on the Cs first, since two at once are hard to dodge. After the first two an Arachnotron spawns under the stairs opposite where you entered. A third Cacodemon spawns with this Arachnotron, so don't be surprised when it inevitably does a charge attack and you've got 5 blasts flying at you.

Encounter 6: A I S Z. Difficulty 5/10
-I hate this fight. It ended so many of my runs way too early, but I've come up with a decent strategy for it. Drop a Frag Grenade to kill the two soldiers that jump through the wall, then snipe or stickybomb the infighting demons from afar. Once they start shooting back, jump down and take them head on. As you walk through the wall cannon obstacles, an Arachnotron hops onto a rock across the chasm. Snipe its turret FAST or you're pretty much dead. I then kill the close demons before focusing fire on the Arachnotron. Once it dies, you've got a few Imps left, then two final Imps will spawn and you're done.

Two final imps killed, one elevator ride later and you've beaten your first level! We've got one more tutorial-esque level before the game really takes off though, so don't get comfortable yet.

You acquire the Flame Belch at the Fortress of Doom, and are given your first Sentinel Crystal. Refer to the Sentinel Crystal Routing section for what upgrade you should get later on, but this one should be Health, and I specifically got the one in Quickdraw Belch.
Mission 2: Exultia - Difficulty 5/10
Encounter 1: Gargoyle (G) C S I Z, Hell Knight (K). Difficulty 3/10
-This encounter has a fun challenge I like to call the Gargoyle Shot. The first Gargoyle will jump at you from the top of a statue. While it's midair, I go for a Precision Bolt shot. If it's a headshot, your run is blessed! The only runs I made it to Taras Nabad were times I landed this shot, so try it out!

-There's a specific mechanic we can abuse here that's pretty funny and will help us at the same time. The Cacodemon here spawns slightly in the wall, and it will kill itself if it doesn't move for a few seconds, effectively making it harmless if you stand under it when it spawns for a few seconds. This is the only example of a bad demon spawn I've found in the entire campaign, so I thought i'd point it out.

-Meme strategies aside, just sticky spam. If the door isn't opening it's because there's two zombies that spawn behind you and are required kills to progress. Once the Hell Knight charges you (sometimes he clips into the door lmao), spam stickies at his face. They will do headshot damage, and 3 headshot stickies will sometimes stagger him entirely. This is inconsistent so prepare to dodge.

Blood Punch acquired.

Use group of Z at end for armor with Fire/Frag instead of Blood Punching them. It's a waste of your meter.

Rune 1 - Chrono Strike recommended.
I went for Chrono Strike because it's really good for weak points when paired with the Precision Bolt. I recommend getting Saving Throw last since if you use it before then, chances are the run is doomed anyway.

Encounter 2: K S Z. Difficulty 2/10
-The Zombies are not required kills. Use the barrels but look out for them, they do tons of damage to you from further away than they should.
Megahealth if you swing up.

Encounter 3: C I S, A. Difficulty 3/10.
-Circle the room counterclockwise to get all 3 Cacodemons before they attack you.

Dash acquired.

1-Up behind the throne.

Encounter 4: C I K S Z, K I Z. Difficulty 4/10.
-Avoid floor, kite around each K. Second K after C dies.

Secret Encounter 1: 2 Cs, 25 seconds. Difficulty 0/10.
-It’s literally harder to get to it than it is to finish it.

Plasma Rifle acquired.

Encounter 5: Revenant + G I S Z, C K I S Z. Difficulty 4/10.
-If you stare at the explosive barrel directly in front of you and wait for the Revenant to jump down, you can pop the barrel and destroy one turret with the explosion. Snipe its other turret and two stickies should stagger it. Send a Frag left and you should be left with some Gargoyles before you move on to the next area. A Hell Knight will jump up towards you, so cover it with stickies during the little animation, watch out for the Cacodemon that spawns to your right and it's pretty easy.

50 Armor at top left if you go up the stairs in the first area.

Encounter 6: A G I K R S Z, A G I S Z. Difficulty 5/10.
-Save the 50 armor if you’re near full, you can get it later from the spear.
-Here's another particularly hard fight, but you can make it laughable by staying up by the 50 armor and raining ammo down on them. My strategy for this one is to snipe the turrets off the Arachnotron/Revenant patrolling the area, then I bomb the Arachnotron with stickies and snipe the Revenant.
-Kill them both and wave 2 spawns, which is a Hell Knight that can't pathfind to you (if you stay on the ledge, of course) so it doesn't move. Bomb it. Shoot the soldiers below until the Cacodemon reaches you eventually (I usually ran out of ammo by then so I fed my Frag Grenade to it once it got close), and one final Arachnotron that you usually have enough ammo to snipe its turret off, then you gotta hop down and chainsaw back to full ammo. By then it's just a single Arachnotron and a few G I S so it's MUCH easier.

Encounter 7: C I S Z. Difficulty 2/10.
-You can cheese this by dashing to non-sticky ground while falling down, just watch out for jumpscare C if you’re standing still up top.

AZ on the other side of the gate. Can’t dodge goo this time unless you fall back.

Secret Encounter 2: 3 Lost Souls. Difficulty 0/10

SLAYER GATE 1: Difficulty 6/10. Feasible one-shot, but not recommended if you aren't going for 100% since the other ones are HARD.
2.5 Phases:
1. Lots of I G
2. Dread Knight (D) + I G, two R
2. Second D short after.
Basically just kite and spam stickies on D/R. You're not given much time to snipe R.

Fun Fact: During the Betrayer cutscene, the item he gives you is a knife to "put his son’s heart to rest". You actually do this in Urdak, when you interrupt the ritual and break the Icon of Sin free from the Khan Maykr. I'm just mentioning this because it's a major story element that I missed, so you might have noticed this. It's a cool detail though.

Encounter 8: A G I S Z, A C K R S Z. Difficulty 6/10.
-This is the first notably difficult fight in the game (excluding the Slayer Gate). Save the Quad Damage ONSLAUGHT until the Revenant spawns, then use it to kill the Revenant, the Hell Knight, a second Arachnotron and the Cacodemon (prioritized in that order, since the Cacodemon is essentially free with stickybombs)


Fortress of Doom, not worth it’s own section
Ice Bomb acquired.

Ripatorium Visit: I S. Difficulty 1/10
-Probably the easiest required fight in the game
Mission 3: Cultist Base - Difficulty 7/10
There are 4 levels I've given the rank of Big Boy Levels, and this is the first one. This level has one particularly insane fight that has killed many a CamLikesCow. So much, in fact, that I started my trend of naming hard fights right here. The Pit is literally one of the hardest fights in the game. It's not over once you finish The Pit (and yes, it's always said like that), either, because this is a Big Boy Level, and it's full of very hard fights. It's also in Cultist Base that we get introduced to Public Enemy No. 1: The Whiplash. It's fitting that it's got some brutal glory kills, which I would absolutely recommend performing to relieve the stress they cause.

Encounter 1: R S Z. Difficulty 2/10.
-Snipe Rs if they don’t see you. Flame and frag Z for full armor.

1-Up off cliff if you shoot the bomb near Dopefish.

Encounter 2: 3 Mancubus (M), I Z, Mecha Zombies (Z+). Difficulty 4/10.
-Use the traps to shred M, hide near where the first one spawns once it dies, or else you'll get torched by the one that spawns next to the pressure plate.

Z+ will almost always appear with Z so Z+ = Z + Z+ from now on.

Encounter 3: A S Z+. Difficulty 3/10.
-Get A’s turret while the platform is rising and it’s free.

50 Armor below the middle crusher. There's also a 1-Up if you go around to the right and platform through the gate with the green button.

Lost Souls (L), K R Z+ after Cultist Key. Use traps and snipe R. Nothing targets you until you jump down, so use that.

Rocket Launcher after some platforming.

Encounter 4: C M G. Difficulty 5/10.
-The turrets on the Ms and use the Rocket Launcher. 4 Rockets will kill a full-HP M, and it takes 3 if you snipe both turrets.

Rune 2: Equipment Fiend recommended.

Megahealth behind coffins on the crane.

Encounter 5: WHIPLASH (W), S S+. Difficulty 5/10.
-Rocket Launcher 2-hit staggers W with direct hits, so do that. Ice Bomb works wonders too.

Modbot - Lock-on Burst recommended. Lock-on Burst is insanely good, killing tons of heavy demons (most notably Hell Knights, Revenants and Whiplashes) and more in a single firing. It also staggers Dread Knights in one firing, so it's really good to use against them too.

Encounter 6: C M S Z+, A M W S Z+. Difficulty 6/10.
-Just keep moving. M is not a threat once cannons are gone, so pop them and ignore it until all else is dead. Just stay out of melee range and Rocket Launcher to victory.

Kill all the cultists for a Megahealth.

3 Ls in the box, then push the button to open the floors and send you descending into
Encounter 7: The Pit. Difficulty 7/10
AAAAAAAAAAAAAAAAAAAAAAAAAAAAAAAAAAAAAAAAAAAAAAAAAAAAAAAAAAA
For real though, this fight is crazy. You've got tight quarters, enemies that relish close proximity, and floor/wall hazards that force you out of nice places to be.

Alright, we've got 4 waves.
1. Z+
-Easy, just sent a Frag or 2 stickies into the cage they're in.

2. I S S+
-Here we go. Plasma rifle on S+, try and dodge.

3. A I W
-Try and Cueball the Arachnotron. Freeze or Lock-on Burst the Whiplash.

4. Fire walls, I 2M
-Try and use the Cueballs on the Mancubi, since its a one-shot. That or break their cannons fast before you get cornered by them, which is instant death.

Yeah if we have named encounters they're pretty crazy.

Secret Encounter 1: C R 4S with shields (S+), 2 Cueballs. Cueballs need to die to complete. Doable but I only did it with high health.

Revenant Drone Encounter: A C M Z+. Difficulty 0/10.
-Everything is basically two or three shots, it’s really easy.

Encounter 8: Loot Boxes. Difficulty 3/10.
This fight is actually really cool.
Layout (enter at E, X is the Exit):
6 7 8
4 X 5
1 2 3
_ E _

1. 1S 2S+
2. 1I 2G
3. C
4. Cueball, lots of shotgun ammo
5. M
6. 1A 1K
7. 2L 1R 1W
8. Cueball, health and armor

Secret Encounter 2: M 2W Z+, 25 seconds. Not worth the risk of dying, which is high.

Megahealth on top of crusher. IKZ+, AS+ after Cultist Key Door 2.

SLAYER GATE 2: Difficulty 5/10
3 Waves:
1. I M S, M C
2. PROWLERS, I M
3. 3A I

Encounter 9: A I K R M S W Z+ Difficulty 7/10.
-This one is probably objectively harder than The Pit, but I had less trouble with this so idk
-I like starting this off by sniping the 2 Revenants that are patrolling around, then entering. Just keep moving, freeze W and it’s not super bad. Just keep moving.
-There's also a secret Haste Overdrive powerup to the left behind a punchable chain, which helps a bit.
Mission 4: Doom Hunter Base - Difficulty 6/10
I like trains

Encounter 1: I M S. Difficulty 3/10
-M dies to 4 rockets. Snipe his cannons and it’s 3. Enough said.

Modbot - No recommendation, but I got remote detonation because it’s useful sometimes

Encounter 2: Pinky (Pk), G I R S Z. A K I S W Z. Difficulty 6/10.
-The best way to kill a Pinky is to freeze it and then Super Shotgun its tail, which is an instant kill.

The Floor is Lava: Carcass (Ca), R Z. Difficulty 2/10
First run past Cultist Base ended with me getting torched by the fire dumper thing. I was at full health and it killed me in half a second, which I was pretty mad about lmao but it's far from my worst lost run* and it's easy to avoid if you remember it.

*See DON'T DELETE YOUR UNM SAVE FILE

Rune 3: Blood Fueled recommended.
By now you should probably have Chrono Strike, Equipment Fiend and Blood Fueled. If this is an earlier run for you or you're unsure of your ability to one-shot the boss fight, get Saving Throw.
Keep in mind that if you have to use it this early in the run, you probably won't be able to make it all the way to the end yet. We all make stupid mistakes though, so maybe you like the security. In the run I beat UNM in I used it in MARS CORE. That's right, my self-declared "easiest level in the game," so maybe Saving Throw is nice to have if you know you feel like you'll make a stupid mistake somewhere. It's up to you though. It's your run, of course.

Encounter 4: Ca K M S Z+. Difficulty 3/10
-Lure the Knight out to the lobby so you can fight it without getting 3rd partied by a Carcass shield and a rocket to the face.

Encounter 5: Ca M R S. Difficulty 4/10.
-Snipe the Mancubus and Revenant before jumping across

Encounter 6: Doors. Difficulty 3/10
1. 2S, K
2. Prowler (Pr), W
I honestly wanted this encounter to be longer, it's a pretty cool idea that's never repeated.

1-Up in spinning fire room, seen before jump, so it’s pretty obvious

There's a green button above the platform you gotta jump to, shoot it first. Don't forget to run around and grab the Suit Token.

Boss 1: Doom Hunter EX. Difficulty 6/10
This is called Doom Hunter EX because the Doom Hunters (Shown as Dh later) have *around* double the health of a normal one. Their damage is the same though (I think. I haven't really kept track)

Phase 1
Basically just dash to dodge and keep at it with plasma/rockets. A wonderful tip is that Blood Punch does a ton of damage to the Phase 1 Doom Hunter, so shoot the shield with your Plasma Rifle, then when you break the shield, it does a falter. Use this window to dash in, punch it and dash out, then go at it with rockets or more plasma.

Once you destroy the sled, Ca Pr S+ spawn. Focus on them first, then go back to the now-unshielded Doom Hunter. It will be staggered with two Lock-on Bursts. Kill it and jump in the pit.

I would recommend using the infinitely spawning fodder during this phase to grind your Meat Hook Mastery on the Super Shotgun if you're following my Weapon Upgrade Routing, since the Phase 2 Doom Hunter is basically a nonexistent threat if you stay away from it (it doesn't really chase you and its projectiles are easy to dodge) and it'll only take a few minutes.

Phase 2
The first time I saw that I had to fight two Doom Hunters at once (this was after spending an hour beating the first phase), I literally got up and stopped playing for the day. Luckily, at this point you should have multiple Doom Hunters under your belt, so this should be less of an issue for you.

The fight is basically the same thing for Phase 2, except the Ca Pr S+ spawn after one Doom Hunter dies instead of when one reaches half health.

In all, this fight is much easier the second time than when I first did it (I did it only dying once as opposed to taking 2 hours the first time). Learning how to fight them through the later encounters in the campaign helps a lot. You might even feel like it makes the fight easy.


Meanwhile, at the Fortress of Doom...

Ballista acquired. Use your batteries for the two sentinel crystals. Check Planning Ahead for which ones to get.
Mission 5: Super Gore Nest - Difficulty 6/10
Probably one of the hardest levels in the game during your first run. That Buff Totem introduction is brutal. Luckily with some practice this level isn't much harder than Doom Hunter Base.

Encounter 1: C M K I Pr S W Z+. Difficulty 5/10
-Wait for the first M to jump up to you, then move to the one across to the left

Modbot near climbing walls if you turn around, Arbalest recommended.

Encounter 2: Dread Knight (D), A D G S Z+. Difficulty 3/10

Encounter 3: BUFF TOTEM, G Pr S+ Z+. Difficulty 6/10
-This encounter is awful if you don't know what to do. Luckily, what you need to do is kill the initial group of GS+ and then a Prowler comes out of a gate. Once that Prowler dies the portals open up.
-From where the Prowler spawns facing out to the portals, the close portal to the left goes to the totem. Destroy it or Prowlers will infinitely spawn, which is certain death.

After you get the yellow key, go back to the 1-Up on a pillar. You'll spawn a Pinky and a group of Zombies will uncover a Praetor Token.

Encounter 4: A Ca C D G I K M R S Z+. Difficulty 6/10
-Megahealth and Onslaught in arena, use them when necessary, but don't use the Onslaught too late, probably around when the Revenants spawn.

Encounter 5: Spectre (Sp) M P Z+. Difficulty 3/10

M 2Ca, then Rad Suit section.

Secret Encounter 2: M on top of you, Ca Z+ in radiation. Tight timer. Not worth it.

Chaingun acquired, then a prelude to the next level when the floor drops out from under you and you gotta fight a Dread Knight. Obviously, the chaingun is the right weapon for this.

Quick fight with 2Ca D, then push a switch. Be sure to go to the door that opens on the side that goes to the final Modbot I will make note of in this run, since the other mods just wasted time for me.

Modbot - Mobile Turret recommended.

Encounter 6: C G R. Difficulty 4/10
-Totem across pit, middle platform. You'll need to move straight and down, then wrap around left to a boost pad that launches you to the totem.

Rune 4: Saving Throw recommended. By now you should have your main 3 and Saving Throw. For optimal performance, only equip Saving Throw before hard fights or if you're at low health and feel like you're going to die.

A bunch of small encounters, then you get the Blue Gore Key and the level's basically over.

There's an annoying radiation section with a Mancubus at the end. Only the Mancubus needs to die to unlock the door, so Lock-on Burst+Ballista it to get out fast. You can jump over the tentacles pretty easily, just be sure to get the Rad Suit Recharge.

3 Arachnotrons. If you take the path to the Slayer Key it's easier to snipe them.

SLAYER GATE 3: don’t use rockets until part 2. Difficulty 6/10
1. Lots of Ca and S. DON’T USE ROCKETS.
2. D and 3 K, S don’t stop coming. A few Pr too.
-Take a guess as to how I died in this during my documentation run

Cue the most unsettling cutscene of the game (visually speaking at least), and now we Metroid Escape/Get to the Choppa! Third best objective name in the game. My fastest time out is when the timer is at 62.80 (no cheats, obviously). See how fast you can make it!
Mission 6: ARC Complex - Difficulty 7/10
This level has potentially the hardest encounter in the game. I've named it The Kitchen, and the only reason it's only potentially the hardest fight is because there's a Berserk powerup in it that let's you completely destroy it if done correctly. If you're getting stuck on this particular fight, chances are you're not using the Berserk to its full capacity. Just find The Kitchen below and I'll let you in on the secret to DESTROYING it.

Encounter 1: G I M Pr Z+, I K W Z+. Difficulty 5/10

Encounter 2: I G K M R P, I S 2W. Difficulty 5/10

Encounter 3: G I M R S Z, C Ca M S Z, D R S Z. Difficulty 4/10
-Stay in the air and avoid the purple sludge, use the boost pad to stay up
-I actually like hiding back around the corner near the advertisement signs because nothing spawns over there and it lets you kill most stuff before it reaches you

Encounter 4: Cyber Mancubus (Mc), A I K R Z. Difficulty 5/10
-Mc dies to freeze, blood punch and Super Shotgun shot if you have Frost Bite (follow the Praetor Token Routing above for my idea of the optimal route)

SLAYER GATE 4: FILL OUT THE SUPER HEAVY SECTION. Difficulty 8/10
This literally introduces you to three (technically you've seen Doom Hunters before but these are the unbuffed ones) new Super Heavy Demons like what were they thinking here.
-TWO TYRANTS
-A BARON
-A DOOM HUNTER
Also there's tons of other Heavy Demons that are terrible to fight
I actually did this first try on Nightmare so it might not be that bad. I will recommend you get VERY consistent at doing this if you want to get the Unmaykr in a UNM run (which really isn't necessary and is more for completion than usefulness, which is cool but I don't recommend risking it)

Encounter 5: A Ca D G I M S S+ Z. Difficulty 6/10
-Keep your distance from the enemies and you should be fine. A carcass will spawn to the right from where you exit the plane so go there and blow it away with a Super Shotgun blast before it shields you into Mancubus fire.

Secret Encounter 1: Pain Elemental (E), A C. Difficulty 4/10
-If you have Ballista ammo it’s free. 2 Arbalests will usually stagger a Pain Elemental.

Fall down some more floors, and "use the elevator" to get to The Kitchen.

Encounter 6: The Kitchen. I 3M Pk S Z+, A I 4W Pr Z, I Mc M Z, Pk. Difficulty 8/10
-Here we are. The hardest fight in this level by far. There's a Berserk near the center of the arena below a bridge by the portal. This Berserk will carry you to victory, but first you need to get to where you're able to use it. First, circle the room until the entire first wave has died (I 3M PkSZ+). Basically just focus Mancubus turrets and the Pinky that busts through the wall and dump rockets and ballista shots on them.
-Eventually an Arachnotron will break in through a window near the left side of the arena. Now is the time. Get the Berserk and, well, go berserk. One nice thing about Berserk is that the timer goes up whenever you get a kill, so if you kill the heavy demons that spawn and keep tearing Imps in half while they're coming in, you can actually take it all the way through the 4 Whiplashes that come through the windows and to the Cyber Mancubus at the end if you're constantly killing.

Encounter 7: G I M R S Z+, G I 2K P 3W Z, 2A G I Z, Mc. Difficulty 7/10
-Before you walk in, see if you can snipe the turrets off the Mancubus, which should be infighting with the Revenant. Next wave will be Pinkies and a Hell Knight, then 3 Whiplashes. The Cyber Mancubus hops through the floor after you kill everything.

The Sewer Section: Walk through the small tunnel with Mobile Turret out, and shred anything that pops up (some Zombies, Tentacles and eventually a Hell Knight). Once you get to the end, it's possible to dash straight to the monkey bar before you hit more sludge, allowing you to skip another Hell Knight and an annoying sludge section.

Secret Encounter 2: A Destroyer Blade can one-shot everything except the M. Only do this if you have the faster charge upgrade or you might be in danger. (Obviously I didn't do this because destroyer blade slows you down and isn't good :P)

Encounter 8: A Ca M 2W S Z+. Difficulty 6/10
-Cueball either the A or the M. Destroy turrets on whichever you don't kill, and then go for the Carcass next. If you're fast enough you'll do this before the Whiplashes spawn, which you can then focus entirely on.
-There's also a megahealth in the top floor of the garage.


It's time.
Encounter 9: Marauder, G I Z+. Difficulty 7/10
-Oh god oh frick it's the only-sometimes-green-eyed runkiller himself. Marauders are the worst enemy to deal with in the entire game, and there's a total of 8 in the campaign you'll be dealing with in a UNM run, so you've gotta get used to dealing with them.
-The problem with Marauders is that they're inconsistent, which is difficult to plan against. My strategy is to alway use the Ballista against them. It will either kill or stagger them in 5 or 6 shots (inconsistent again :P).
-Another thing I've found out is that they don't always dodge your Frag Grenades. You can launch a grenade at them, and they might just not dash away, and it will hit and falter them. You can use that falter to shoot them again, and sometimes that shot will falter them again.
-If he spawns a wolf, you need to a) get angry because the wolf is one of the reasons the Marauder is so unbalanced and b) vaporize that ♥♥♥♥♥♥ immediately. However, the wolf only spawns while his shield is up, so don't shoot him unless his eyes are flashing, and you can avoid it entirely.
Mission 7: Mars Core - Difficulty 5/10
Finally, a nice break after 4 pretty hard levels. I didn't have big strategies for any of these fights except for the last one since they're all pretty easy. If you didn't have the BFG the last fight would definitely be one of the hardest in the game, but you do have the BFG so, uhhhhhh...

I have a theory that this level was originally planned to be way earlier in the campaign because of the cutscene at the beginning where you take a Plasma Gun from one of the guards, which seems like it was intended for you to first get it in that cutscene. It's way out of place because you supposedly get a second one but you can't dual wield them (that would've been so cool though thinking about it now). Anyway, this level's difficulty is another piece of evidence that it was probably supposed to be placed way earlier, but it would've probably been weird to get the BFG so early. That's just a Game Theory, though.

Anyway, on to the part you actually care about.

Encounter 1: Baron, I Z. Difficulty 3/10
-Freeze the Baron and this is free.

Encounter 2: A C Ca Mc I S Z. Difficulty 5/10

Encounter 3: Pain Elemental (E), S S+ Z+, Dh S S+ Z. Difficulty 6/10
-The best way to kill the Doom Hunter is an Ice Bomb followed up by a Blood Punch and Super Shotgun blasts until it unfreezes, then Mobile Turret on the sled (You can damage the sled while the body is shielded). Usually it gets knocked off while frozen, and then it's a single Lock-on Burst away from a glory kill.

Encounter 4: hahahahahaha use the BFG for these situations 0/10

Encounter 5: I S S+, I D K M S S+ W Z - Difficulty 5/10
-Totem is below the portal on the left. Turn directly left, and it’s behind the wall

Secret Encounter 1: G R Sp Z+. Not too hard, some risk.

Secret Encounter 2: C I Pr W. Not hard. Little risk.

Encounter 6: A 2B Ca, IS+Z+. Difficulty 4/10
-BFG Ammo in the arena, so fry them

Encounter 7: E G Pr. Difficulty 1/10
-why is this here just Arbalest the Pain Elemental twice and you're basically done the others usually just run into lasers and die lmao

Tons of Tentacles, G I K R S+.

Push the button at the panel near where the Revenant spawns and you'll gain access to the vent that holds the Slayer Key. Use it to access
SLAYER GATE 5: The Marauder one. Difficulty 7/10
1. Marauder, other stuff (Pr S and maybe something else). Basically just kite Mar, kill everything until just Maykr Drones are spawning, then kill Mar.
2. 3 Hell Knights, more Prowlers
3. 2 Barons, just run around and bomb them with Rockets or Freeze/Mobile Turret

Encounter 8: Open with a BFG shot (fire slightly upwards once you break the wall), then B, A D G I K Z+, Dh Pr Z+. Difficulty 5/10
-Fun fact: Dh phase 2 dies to 2 Super Shotgun shots.

BFG the last group of demons before the portal. You won’t need it next level so it’s fine to not have full ammo.
Mission 8: Sentinel Prime - Difficulty 6/10
Remember how I said the heart getting crushed in Super Gore Nest was the most visually unsettling cutscene in the game? Well, this level has the most audibly unsettling one. And it's because of GUTS, HUGE GUTS

Seriously though I love the story they added but they honestly could've chosen a better voice actor. I understand the lines themselves are pretty cringey but a better actor could've sold them better. It just didn't seem "in character enough" if that makes any sense. I guess he could've sounded angrier.

Yeah I don't really care either. Back to the reason you're here.

Lots of exposition you can run past, then
Boss 2: The Gladiator. Difficulty 6/10

Phase 1: When he does a taunt-looking smack on his shield, he’s charging his shield blast. Dash to avoid it. Ballista to stun him, then light him up with the chaingun/rockets and he dies in two or three cycles. Ignore the glory-kill thing, it really doesn't do that much damage compared to just shooting him. At 2/3 and 1/2 health he spawns 2 soldiers and a Prowler at 2/3 and a Hell Knight at 1/2. If you're fast enough he'll spawn them both at once, which is fun. Just ballista the Prowler to stagger it and Lock-on Burst the Hell Knight.

Phase 2: this phase is so dumb. It's basically Marauder-tier inconsistency where it can take shots and still attack anyway which is really annoying because he does like 100 damage a hit sometimes but if you're good at dashing it's not that hard to dodge anyway. He has the same 2/3 and 1/2 spawns as last time, see above for strategy to deal with them.


Fortress of Doom Part 2 - It’s Red Now
Just fire the BFG lmao
Mission 9: Taras Nabad - Difficulty 9/10
You've made it. Big Boy Level Number 2: Taras Nabad. Here's a hint on how fun this level is on Nightmare. It's actually in the name: you're in for a Taras NaBAD time.

Yeah I'm probably going to delete that later, that was terrible.

Encounter 1: K Mc, C Mar M Z+. Difficulty 6/10
-Thought I was joking? The fourth enemy to spawn in this level is a Marauder. It's not terrible, but it's a Marauder. You'll want to kill the Zombie that spawns behind you once the Marauder charges because that Zombie will probably kill you if you forget about it.

Encounter 2: K Pr, Archvile. Difficulty 5/10
-Here's the final Super Heavy demon, and oh boy is he a fun one. If you're in a room with an Archvile, he's kill priority number one. Instantly. The best way to do this encounter is to go up the stairs to the left and head around the balcony (past the automap). There's a 50/50 chance you'll walk into a spawning Prowler. If you do, Super Shotgun it. Either way its time to play everyone's favorite game, Find That Archvile!. It can spawn in three places. The balcony you just walked along, the one across the plaza, or behind you in the center. Look for the wall of fire. Freeze it and two Lock-on Bursts will kill it for good (only if you have Frost Bite, or else it'll take 3). Then it's just a Hell Knight, which usually can't catch you before you reach the Archvile anyway. If you let the Archvile get a summon off this fight becomes much more difficult, but it's pretty easy to avoid.

Encounter 3: D E G I Mc Z+, Dh Z+. Difficulty 7/10
-Here's another fight you can make much easier with good BFG planning. My route for this fight is to use the monkey bar on the right to jump up to the Cyber Mancubus, freeze/Blood Punch/Super Shotgun it dead, then pick up the BFG ammo. I then wait for the Dread Knight to hop up, and I fire a BFG shot a little upwards across the arena. This will clear it, and if you time it right, it'll deal damage to the Doom Hunter that spawns after the Mc dies. Sometimes I get lucky and it destroys the sled. Other times it deals no damage. It's a bit inconsistent but a single Doom Hunter should be no issue at this point in the run.

Slayer Gate 6: Actually kind of easy :/ - Difficulty 7/10
Wave 1: Arachnotron, Archvile and Pain Elemental, another Pain Elemental
Wave 2: Like 12 Prowlers
Wave 3: 6 Whiplashes
Wave 4: G I 2M T

Archvile in the Sewers: Ca G I K Pr W Z+, B G I Pr Z+, Archvile. Difficulty 8/10
-This fight. THIS FIGHT. I have no idea why I had so much trouble with it once I started UNM runs but this fight is EVIL. I'm not even sure why. You might have the same problem with this one, or I could just be bad which is also very likely.
-Anyway, my strategy was to walk in, boost forward twice, fire a freeze to the left over the Carcass shield (sometimes he gets one off early sometimes not) so it hits both the Carcass and the Hell Knight, then turn right and Lock-on Burst the Whiplash across the walls. Turn back and kill the CaK before they unfreeze, and then usually kill the Prowler that's gotten close by now. A Baron will spawn in the middle, and Mobile Turret should take care of it relatively easily, just make sure to watch out for the Prowler that keeps respawning. Once the Baron dies an Archvile spawns in the room somewhere. Freeze and double Lock-on Burst it apart, and congratulations! You're not even past the hard part yet.

Go grab your Crucible hilt and get ready for the worst Marauder in the game!

Encounter 5: C D Mc Pr W Z+, Mar Z+. Difficulty 8/10
-This fight is awful. You've got five heavy demons to deal with and a Marauder that spawns before they're all dead. My strategy is to perform the quick kill on the Cyber Mancubus (Freeze/Blood Punch/Super Shotgun), then turn left and Lock-on Burst the Dread Knight. Run up to it and glory kill it. Turn around and find the Whiplash, Lock-on Burst. Find the Cacodemon (probably to your right at this point), then Meat Hook/Super Shotgun the Prowler out of time itself, and THEN fight a Marauder around Mecha Zombies in a tighter-than-it-looks area IF everything I just planned goes right. Usually the Marauder spawns early and you gotta run around and try to kill the other heavies while Mr. Have Another Wolf is breathing down your neck. It's far from ideal, but kill the Marauder and you're past the hard part.

Now, the next two encounters are special. You can literally just run past them and you won't miss out on anything except for a Praetor Suit Token that you might not even need (if you do, get to it through Fast Travel at the end of the level, the demons will despawn by then).

The ledge encounter has a Dash Refill across a chasm, which is easy to get to before anything attacks you, and then you go up an elevator and are greeted with another awful fight. This one can be skipped, but there's a Sentinel Crystal you'll want to grab that spawns down below the Pain Elemental that spawns straight in front of you and back in the building. My strategy for this fight is to Arbalest the Pain Elemental twice, rocket it while it's staggered to ensure death, grab the Crystal, and keep running across the bridge. Get to the gate with a button on it and you've avoided two more annoying, tight-quarters battles and like 5 Pain Elementals.

Sewer Time Part 2!

Encounter 6: Ca Pr Sp 2W Z+. Difficulty 6/10
-Focus the Carcass first, then the Whiplashes.

Encounter 7: D Mc Pr Z+. Difficulty 4/10
-Quick kill the Cyber Mancubus, Lock-on Burst the Dread Knight and you're basically free.

Don’t forget the Mastery Token in front of the shrine

Crucible Acquired! Don't get used to seeing this, it's just used for Archviles and Tyrants from here on out :P.

Encounter 8: Just use the crucible for heavy demons lol. Difficulty 3/10
-If you use the Crucible for every heavy demon you should have enough left over for full charge going into Nekravol. I think Prowlers infinitely spawn so don’t focus on them.
Mission 10: Nekravol - Difficulty 6/10
Here we are! The final stretch... of easy levels. Fun and games ends after this level, so I hope you've been practicing!

Recognize the tower? You can actually see the Soul Factory in the second half of Exultia, which is a really cool detail I noticed when replaying the campaign for this guide.

You can just run past the A 2Mc, but there’s a sentinel crystal to the left. Kill the A early with a lock-on burst, then try to get the 2Mc to bunch up, then freeze them.

CaPkPrZ+

Encounter 1: Tyrant (T), C Pr Mc W Z+. Difficulty 5/10
-Onslaught and 4 rockets kills T. Don't waste a Crucible charge on it.

Encounter 2: I Z, B. Difficulty 3/10
-A frag grenade can kill IZ before they leave their box

Encounter 3: Kalibas, E G. Difficulty 6/10
-Rockets kill the eyes in no more than 3 hits. The biggest threat here is the lava floors. I ignored the Pain Elemental because it respawns infinitely and is usually too slow to get in the way.

Encounter 4: Pr Sp Z. Difficulty 5/10
-Use the traps

Encounter 5: Ca D I K W Z+, Archvile up top. Difficulty 7/10
-BFG ammo near Archvile, use that if you need it

Encounter 6: A I G Mc Pk. Difficulty 6/10
-Totem is found by doing a circuit of the room’s platforms. Alternatively, go to the spinning platform directly in front of the entrance, and do a Ballista jump to reach it without crossing the room.To do the jump you need to shoot the Ballista directly down at the same time you jump off of the platform towards the Totem. If done correctly you'll ledge grab up to it. The Ballista jump is kind of hard (for statistics reasons, I tried the jump 100 times and got it 43 times), but if you time it right the fight is free.

Marauder with W Z+ aftter the second two smashing ceilings

Encounter 7: Open with BFG, D 2Dh Z+. Difficulty 5/10
-If you're full on BFG ammo, you can fire into the room from outside the doors and go back to get the BFG ammo near the entrance.
Mission 11: Nekravol Part II - Difficulty 7/10
This level is awesome. It's a perfect DOOM level. It captures the classic feel of the old games in a way that the massive scope of the newer levels don't often do. It's short, full of nothing but insane fights, and the setting is literally a soul factory in Hell. It doesn't get much more DOOM than that.

BFG routing is pretty loose here, just make sure you enter the final fight with at least 1 shot.

Encounter 1: E I G S Z+. Difficulty 5/10

Cacodemons spawn while platforming (you need to go right). They're required kills.

Encounter 2: Ca Pr R S S+. Difficulty 6/10
-Crucible charge in this fight, save it for elsewhere.

Encounter 3: B E G I Z+, Dh Pr Z+. Difficulty 7/10
-I used a BFG shot in this fight.

Encounter 4: A Ca D S+ Z+, Archvile, Mar Z+. Difficulty 7/10
-Crucible on Archvile. BFG ammo in center.

Some platforming. When you break into the first wall, you can just ignore the demons and go up a boost pad and break out again. The demons aren't worth fighting, and I didn't write what they are because I ran past :P.

Encounter 5: Two Kalibas Eyes, D G I Pr Z+. Difficulty 4/10

Encounter 6: Almost every enemy except for an Archvile and a Marauder. Difficulty 9/10
-One of the best fights in the game. UNM routes should use the BFG here, but it's a TON of fun to do without super weapons when you're not 7 hours into a run.
-This has one of two Tyrants I didn't Crucible. Run to one side of the arena and send a BFG shot across so it kills the rest of the demons. Then kill the Tyrant and either save your Crucible shot or use it on the Baron. A Doom Hunter spawns last, just freeze it and Blood Punch/Super Shotgun it off the sled then Lock-on Burst it into oblivion. There's another BFG ammo in the middle of the arena, and a 50 health and a 50 armor on two platforms going towards the center of the tower.
Mission 12: Urdak - Difficulty 9/10
Back to the 9/10s, are we? Yeah, this one's a Big Boy. If its Marauder was more evil it might even top Taras Nabad, but it's not quite THAT hard. It's still pretty terrible for the first few times on Nightmare, so you might want to practice this a bit.

Crucible charge behind the first boost landing.

Chrono Strike is recommended for this level since you've got Maykr Drones (Mdr) to deal with everywhere.

Encounter 1: D G I M Mc Mdr S 2W. Difficulty 6/10

Encounter 2: C E 4Mdr. Difficulty 3/10

Encounter 3: A Mdr Pr Z+, Dh Mdr Pr Z+, D Pr Z+. Difficulty 7/10
-This fight has a buff totem. Circle around counterclockwise, try to snipe the Arachnotron's turret while you do it, and it’s about halfway around.

Encounter 4: B G I Pr. Difficulty 5/10
-I like freezing them all once the Baron gets close, Flame Belching them, and then going to town with the Mobile Turret.

Encounter 5: Mc Mdr R S Z+, Mar Z+. Difficulty 6/10
-Like usual, kill everything that doesn't respawn before the Marauder. This one isn't that bad, since you've got some good room to move around.

Encounter 6: Archvile, C D E M Mdr. Difficulty 7/10
-Crucible the Archvile

Go right at the two boosters for the right order of encounters below

Encounter 7: D G Z+. Difficulty 2/10
-Lock-on Burst to stagger the Dread Knight and you can sleep through this one. Never mind, it's actually too short to even close your eyes.

Encounter 8: 2B 2Mc Mdr 2W Z+. Difficulty 8/10
-Fire a BFG shot once the second Baron spawns. That'll clear out a lot of annoying enemies and you'll be able to do the Baron Dance in peace.

Encounter 9: Like 2 of every heavy demon and some Tyrants too. Difficulty 9/10
-There's a buff totem in this one. Circle along the monkey bar counterclockwise to get to it. Megahealth in the center of the arena. This is probably the hardest fight of the level, but if you keep circling they'll bunch up and be good rocket bait.

Boss 3: Khan Maykr. Difficulty 7/10
-If you’re not using Chrono Strike, I hope you’re a trickshot god, because you’ll need it for the drones.
-Lock-on Burst will make her vulnerable after 3 shots. The strategy I used was 3 Lock-on Bursts, blood punch her, then snipe a drone, get ammo and repeat. Just stay on the pillars above the ground once she starts playing The Floor is Lava, dodge the Orbital Strike Laser and you're good.
Mission 13: Final Sin - Difficulty 10/10
Remember how I said Taras Nabad was awful? Yeah, then there's this level. You'd think the final boss level would be maybe a fight or two then the boss, right? WRONG. This level features easily the most difficult fights in the game, and don't even get me started on the final boss. That fight took me a good four hours the first time I did it (given Nightmare isn't the best difficulty for your first blind playthrough of a game this hard but still). Did you know he gets stronger the longer he remains on Earth?

Who's ready to save the universe? It's time for the Biggest Boy Level.

Encounter 1: A C Ca G I M Mc S S+ Z, B G I K R S Z, E G I W S Z, T G I S Z, Dh G I Z. Difficulty 9/10
-If you have a BFG shot use it when the Cyber Mancubus spawns
-Use the Crucible charge in the arena on the T when it breaks through the wall

Encounter 2: M I Z+, A I Pr Pk Z+. Difficulty 4/10

Encounter 3: A I K Pk R S S+ Z+. Difficulty 7/10
-Totem spawns in hallway a few seconds after you enter
-BFG ammo in the corner, get it but don’t use it

Encounter 4: A D Mc S S+ Z. Difficulty 6/10

Megahealth through vent

Encounter 5: A G I R S S+ Z+, G I Mar Z+. Difficulty 7/10
-The Marauder spawns once everything in the first wave dies, so you can grind out some armor on the zombies if you need it.

Encounter 6: A M T S Z, B G I Z, 2P R 2T Z - Difficulty 9/10
-Snipe the first T from across the street, it dies to 10 Arbalest shots
-Crucible the Tyrants that spawn with the totem if you have the charges

K 2R, go up the stairs and fight A B M

Encounter 8: Open with BFG (lots of bad stuff), I G Mar, Archvile. Difficulty 10/10
-If you don't use the BFG here, this fight is unbelievably difficult. The game basically tells you to use it by giving you a shot before entering, so use it.
-When entering, run straight through the doorway to the far corner and shoot the BFG diagonally across so it goes out the hole in the building, this way it can kill the Es that spawn late if fired right.
-Archvile spawns once Mar dies, this should be the last enemy you Crucible before the final boss. If you don't have a charge, freeze/Lock-on Burst.

When crossing the bridge, fire a BFG shot high (aim for the top of the cliff) along the bridge. This will kill everything on the bridge while maintaining full ammo before the fight. You should pick up the final BFG ammo before the fight and be able to enter with full ammo if you followed my BFG shot routing in the level.

Final Boss: Icon of Sin. Difficulty 8/10
-This fight is HARD. It's a ton of fun though.
-Probably the worst thing to dodge is his punches. They deal around 150 damage and are nearly impossible to dodge if you're in a bad spot.
-Megahealth at top center of both arenas
-Use Crucible on any non-fodder demons, chainsaw fodder demons
-Crucible charges and chainsaw fuel respawn, health/armor/ammo doesn’t
-If you follow the BFG routing in the Final Sin encounters list, you should have 2 shots leading into the fight. Use 3 shots to destroy his face and two chest armors, then save the rest for phase 2.
-BFG should be prioritized on the high-hp parts (head, the 2 chest parts, and the torso), and your other ammo should be used on his arms.
-When he takes away all the enemies and begins summoning a large group of heavies, use a BFG shot to hit him and destroy the group. Don’t only use it on these waves though, or else the fight will take too long.
-If he decides to spawn Pain Elementals in Phase 2, be warned that the Crucible basically can't hit them for some reason. You need to be at eye level with them. I've never gotten a hit from below, and the hitbox is either god awful or I'm missing something really stupid, but I doubt that after doing this fight so many times.
A Detailed Look at Every Demon: A-D
Every demon has its own strengths and weaknesses. In the following sections I'm going to go through every demon alphabetically (by the letter key I use for them in the Encounter Documentation) and explain how to best take them down in combat.

A: Arachnotron

-Arachnotrons, despite how early they appear in the campaign, are one of the most threatening demons you'll face. Their turret will force your attention off of other targets, and their grenades do insane damage. Getting up close isn't recommended either, since they'll hit you with a heavily damaging swipe that's hard to dodge even with a dash. They're at their deadliest in the first two missions, where you don't have your dash to dodge their attacks.

HOW TO KILL IT
-They will be staggered by 6 Stickybombs, 6 Precision Bolts (or any combination of stickies and bolts that adds up to 6), and a Lock-On Burst.
-Super Shotgun deals good damage, but you get closer to them than I'd recommend.
-FOCUS THE TURRET FIRST. No matter what, the turret should always be your first priority in a fight, even if there's stronger demons alive. Removing their projectile spam is a great first step to clearing an area of threats and being able to shift your focus from dodging to killing.

Archvile: Archvile (idk why but I never abbreviated its name)

-These guys don't give a flaming ♥♥♥♥ (haha get it) about your feelings, and would love to watch your dreams burn in front of your eyes (I did it again hahahahahaha). They are the single highest kill priority in the arena, since they can spawn in an infinite number of other demons that will be sure to ruin your day. Apparently they also spawn stronger demons the longer they're alive, up to and including groups of Marauders (I'm not sure about this but I've seen some frightening screenshots). I cannot confirm this personally, since I always kill them before they're able to spawn more than a single wave, but that meme back at the end of the ARC Complex section doesn't look Photoshopped as far as I can tell.

HOW TO KILL IT
-There will only ever be two Archviles (except the one in Slayer Gate 6) that you won't have the Crucible for. The Crucible should be saved only for Archviles and Tyrants, which you should pretty much use on every single one to appear.

-Aside from the Crucible, my favorite method of killing one is to freeze them with an Ice Bomb (I often do this even when going for a Crucible slash since they have a Whiplash-tier fire wave attack that's impossible to dodge at close range) and then hit them with two Lock-on Bursts. If you have the Frost Bite upgrade (which you should have by the time you see your first one in Taras Nabad), it will die from two. Otherwise you'll need a third.

B: Baron of Hell

-Basically a stronger Hell Knight, these guys only pose a threat when you're not paying attention to them. For this reason, Ice Bombs are a huge help when dealing with them. On the plus side, their new Fireborne style looks AMAZING.

HOW TO KILL IT
-Don't be fooled, the BFG will usually not kill a Baron. Don't waste your ammo.

-The Mobile Turret will normally kill one before overheating, so turn it into a pincushion.

-Ice Bombs are also a great help since they can't move and you can kill the other distractions around them while they thaw.

-You might be tempted to use the Crucible on them, but that's really a waste of charges since they're not that big of a threat.

Buff Totem: The encounter/part of encounter is bolded

These are honestly little threat once you understand how they work. The worst one is the first one you encounter in Super Gore Nest, where you need to kill buffed demons to reach it. Otherwise, you can beeline straight for it and don't have to worry about the infinitely spawning buffed demons it will spawn to kill you.

HOW TO KILL IT
-Melee attack. I have every buff totem encounter bolded in my Encounter Documentation, so look for those and I have their position described under each one.

C: Cacodemon

-These guys are an example of why Nightmare's "Demons perform charge attacks more often" mechanic is completely unfair. Cacodemons will more often than not fire a barrage of 5 shots (which each deal normal damage) straight at you, which is very hard to dodge. Pair this with a melee bite that deals close to 100 damage and you've got yourself one annoying meatball.

HOW TO KILL IT
-Luckily, they have two huge weaknesses: Grenades and Arbalest. Arbalest will kill it in one shot with a direct hit, while the explosion will stagger it. Grenades, whether they come from your shotgun or launcher, will stagger them instantly once it goes into its mouth. Keep in mind that this stagger does not reduce their health to the usual staggering level, so a glory kill is the only easy way to finish them off in this state.

Ca: Carcass

-Another infuriating demon to fight, this guy's shields are one of the most annoying things you'll face in your campaign. They have two other attacks that are equally annoying, one where it fires a three triple bursts of rings straight out of Sonic, and another where he steals the Whiplashes' signature ground wave attack. Luckily, we have a few of our own tools we can use against them.

HOW TO KILL IT
-I'm not sure about this or not but I feel like the Plasma Rifle does more damage to them. This might be incorrect though. Either way, its shields can be exploded with Plasma bolts to deal splash damage (a Ballista will instantly destroy it, but it will not explode), and a Ballista shot will usually stagger it. The Super Shotgun also one-shots it at close range, only occasionally staggering it instead.

Cueball: Cueball

-These guys are a huge help, actually. They can do insane damage, but this is offset by their insanely low appearance rate.

Things a Cueball can Kill in One Hit
Arachnotrons
Cacodemons
Carcasses
Dread Knights
Hell Knights
Mancubi (I'm not sure about Cyber Mancubi since I don't remember getting an opportunity to test this)
Prowlers
Revenants
Whiplashes
Every Fodder Demon (obviously)

Every demon not on this list might still be killable by a Cueball, but you don't encounter them at the same time, so you won't ever be able to use it.

D: Dread Knight

-These are really scary the first time you see them, but you should quickly realize they're not much to be worried about if you keep moving around. Jumping from high to low ground and vice versa will confuse them enough for you to kill them relatively easy.

HOW TO KILL IT
-A Lock-on Burst will stagger a Dread Knight if all 3 rockets connect. 3 Super Shotgun shots will kill them, and 2 Arbalests/1 Ballista shot will stagger it. The Chaingun will also shred them.
A Detailed Look at Every Demon: Dh-M
Turns out there's a limit to section length in these guides! I actually didn't know about that.

Dh: Doom Hunter

-Outside of the initial boss battle, these guys are really not a threat. Their rockets are stupidly easy to dodge (double jumping or dashing will make them stop tracking you and just spin around uselessly for a few seconds before exploding) and their energy blast is pretty easy to dodge with a dash or using cover.

HOW TO KILL IT
-The absolute best way to knock a Doom Hunter off its sled is by freezing them with an Ice Bomb when they spawn, going up to them and hitting them with a Blood Punch and 2 Super Shotgun shots. After you kill the Khan Maykr, you get a second Blood Punch charge, and 2 of them will knock a frozen Doom Hunter off its sled. There's only one Doom Hunter in Final Sin though (it's in the first fight of the level), so that's not a huge help.

-If your Ice Bomb is recharging, instead be sure to shoot the sled on both sides with the Super Shotgun. This makes an explosion animation happen, which I actually have no idea whether it does anything special, but it will falter them for a second. This only works twice (one for each side), so focus the shield with your Plasma Gun otherwise.

-Unfortunately, the boss variants in Doom Hunter Base are immune to freezing, so your best Blood Punch window is during the falter animation caused by its shield being broken by the Plasma Gun.

-Once they enter Phase 2, it's just a matter of either 2 Super Shotgun shots or a single Lock-on Burst. Both will either stagger or kill it, but be sure to not fire your Lock-on Burst too early into its "CRITICAL DAMAGE" transition or it won't be hurt.

E: Pain Elemental

-Considering how much of a pain these Lost Soul cannons were in DOOM II, I'm actually surprised how much less of a threat they are in this game. They still technically throw Lost Souls at you, but instead of spawning the enemy they just have a projectile that looks like one. These projectiles deal splash damage on contact with any surface, so you gotta learn to avoid their explosion too. Luckily these guys are very rare occurrences in the campaign.

HOW TO KILL IT
-These guys are super annoying because of their high HP. They will be staggered by 2 direct hits from the Arbalest, but this will sometimes kill them. Two Lock-on Bursts will do the job too. Freezing them is usually not the best idea, since they usually won't be the reason you die. I like freezing other demons, then focusing them while the others thaw, maybe while dropping two frags on the frozen group.

G: Gargoyle

-These Naruto-running, flying Imps are just as annoying as you'd imagine. On Nightmare, they love to use their charge attack, where they jump up in the air and shoot three projectiles at you in quick succession. Luckily, their fodder status is their undoing.

HOW TO KILL IT
-They'll die to almost anything you hit them with, taking 2 Heavy Cannon shots to stagger and 3 to kill, 4 or 5 plasma bolts will do the same thing, and they will die to the explosion of a stickybomb (contact will stagger them if its a headshot). Anything else will shred them. The biggest threat they serve is if they decide to go for melee swipes, which they quickly chain together for insane damage.

I: Imp

-Basically Gargoyles but their charge attack is a single, stronger shot rather than a quick burst. Also, they can't fly.

HOW TO KILL IT
-Combat shotgun will stagger at medium range and kill at close. 2 Heavy Cannon shots to stagger/3 to kill. Dies to stickybomb explosion, anything else is overkill.

K: Hell Knight

-Another fast, bruiser-style demon who loves running up to you and stomping you into the ground. They can be dealt with almost the exact same way as Barons, except they have much less health and they do not throw projectiles.

HOW TO KILL IT
-A single Lock-on Burst will kill them. Two or three Super Shotgun shots will do the same, and the Chaingun does a good job of faltering them, and the Mobile Turret will kill it before it can reach you.

L: Lost Soul

-Probably the least threatening demon in the game (that can actually damage you), these guys are way rarer than you'd expect. I honestly think there's more encounters that have Marauders than there are with Lost Souls. They appear in groups, but they will only attack you one at a time. The one that isn't blue is getting ready to charge you.

HOW TO KILL IT
-They die to a single combat shotgun shot from pretty far away, two Heavy Cannon shots, three Plasma Bolts, and basically get one-hit by anything else.

M: Mancubus

-Talk about getting an upgrade from the last game. These guys are one of the most threatening demons in any arena, but once you take out their turrets they practically can't hurt you. Don't think it's over yet though, because if you get within melee range, they'll do a ground-pound style attack that does an absurd amount of damage if you stay in it for even a second.

HOW TO KILL IT
-Snipe its turrets. Once they're destroyed its projectile becomes smaller, slower and weaker and he loses his flamethrower ability. At full health they will die to 4 rockets or 5 Ballista shots. If you snipe their turrets first, a single Lock-on Burst will kill them. The Super Shotgun does great damage against them too, but I'd recommend against getting within their melee range.
A Detailed Look at Every Demon: Mar-R
Mar: Marauder

-Oh god oh ♥♥♥♥ it's evil red axe man. I already went into decent detail on how to deal with this inconsistent mess of new mechanics back in the ARC Complex section, but I'll go into more depth here. There isn't a "HOW TO KILL IT" section because you need to know everything about it to be able to kill it. Chances are, if you need a tutorial mid-fight on how to fight an enemy, it's too complicated. But whatever, it's in the game, let's kill it.

-First, you basically have to kill everything else in the arena before dealing with the Marauder. He will require your complete focus, and other demons will kill you if you let them.

-When he's not attacking you, he's supposed to always use his shield to block attacks and he dashed away from grenades. For some reason, I've been able to just shoot him with the Ballista and hit him during this phase, and he will usually get hit by grenades (again, inconsistently but he can get hit by them), which allows one or two Ballista shots again.

-He's got four moves, and they're supposed to happen from certain distances, but I don't think even the Marauder knows what those distances are. Be ready for all of these no matter where he is.
  • From long range, they will shoot an axe blade at you, usually leading their shots. Despite the "long range" description, he does this from anywhere. Once the shot is in the air, change direction to avoid it, or block it with cover. These do pretty high damage.

  • From "medium range," he is supposed to do his melee strike (which makes no sense), wherein his eyes flash green and he gives you an opportunity to hit him. In reality, he initiates this from anywhere. You'll know he's trying to do it because he puts his axe away and starts sprinting at you (which is funny to watch). He'll whip it out again, and his eyes will flash green for about half a second. When his eyes are green, hit him with a strong weapon (Ballista is my go-to, but the Super Shotgun or Rocket Launcher will work too), and he'll be faltered long enough for you to get another hit in before he becomes practically invincible again. Unfortunately this falter opportunity is very bad at determining if he should falter or not. I've had many instances where his eyes were flashing and I shot him with the Ballista but he didn't falter, so expect him to just keep going sometimes. This attack does high damage.

  • From close range, he's supposed to shoot you with his shotgun. This attack happens very quickly and is almost unavoidable, but mercifully doesn't do a ton of damage.

  • Whenever the Marauder's shield is up (from blocking attacks), he can spawn a wolf. The wolf is nothing but a distraction, which is the one thing that you don't want to deal with when fighting the Marauder, who already requires your complete focus. It has very low health, so kill it quickly before it separates itself from the Marauder, because then you'll have to hope he doesn't sneak up on you while you're dispatching the wolf. The wolf will always charge at you, dealing moderately low damage, but it's the Marauder you want to worry about, not his poor design choice of a pet dog.

Other than that, he will die to 5 or 6 Ballista shots (yet another inconsistency). I don't know other numbers since I've never experimented with it because I didn't want to screw up a Marauder fight near the end of an Ultra Nightmare run. Apparently there's a way to kill him in two cycles if you switch to the Super Shotgun between Ballista shots but I've never gotten it to work (I get the shots off but he doesn't die), and that's after trying a LOT.

Mc: Cyber Mancubus

-These green variants of the regular Mancubus are somehow even more threatening despite their lack of a flamethrower. Their cannons are no longer weak points, and they shoot out radioactive goo that turns wherever they land into a damaging surface for the next 15 seconds or so. They have more health thanks to their armor, and they still have the ground-pound attack, which makes dealing with them much more annoying.

HOW TO KILL IT
-Luckily, they are weak to your Blood Punch, which will destroy their armor in one shot. Unfortunately, needing to perform a Blood Punch means that you have to get close to them, allowing them to use their ground pound, which can kill you in around a second if you're not careful. My strategy to avoid this is to use the Ice Bomb, Blood Punch them, and a follow-up Super Shotgun shot will kill them.

Mdr: Maykr Drone

-These guys are basically free ammo and health if you have Chrono Strike. When killed by a headshot with any weapon, they will drop 50% of every ammo type (except for BFG) and 200 health. They do have a couple dodges they use to mix up their movement, and they have a Doom-Hunter style projectile shot that they fire in long bursts, so they can deal more damage than other fodder demons.

HOW TO KILL IT
-Headshot them. Any weapon, even the Rocket Launcher, has this capabilty. You'll be rewarded with full health and a large ammo boost, which is very helpful in the massive battles of Urdak and the Slayer Gate that they appear in.

Pk: Pinky

-Have you ever wondered how a matador feels in his bull fights? The Pinky wants to show you! Your best bet for dodging their charges is to double jump over and dash behind them, where you can attack the weak tail.

HOW TO KILL IT
-A single Super Shotgun shot to the tail will kill them. Most other weapons will take 2 shots, but it doesn't take much. The real challenge is getting behind them, since they turn much quicker than you'd expect sometimes. If that doesn't work, a single Blood Punch to the face will kill them instantly.

Pr: Prowler

-These guys are a lot more deadly than you'd expect. Their real threat to you isn't their teleport, which is more of an invisible/invincible move (they continue along their path for a few seconds before they reappear, so it's predictable at worst), it's their surprisingly high health. My biggest issue with them was I kept expecting a stickybomb to stagger them because, well, they look like bigger Imps. Once you realize you'll need bigger weapons to deal with them, they're not that bad.

HOW TO KILL IT
-A single blast from the Super Shotgun will kill them at point blank, which makes the Meat Hook a godsend. My go-to method for dealing with them is to grapple onto them, which stuns them, making them unable to teleport. From there, they're already dead.

-Other than the Super Shotgun, they are instantly staggered from a single Ballista shot, a direct hit from the Rocket Launcher, or two stickybombs. I would recommend against trying to kill them with the stickybombs, since they are very agile and hard to hit.

R: Revenant

-Doot doot it's the rocket skeleton! At the very least, they're more deadly than they were in DOOM 2016, but they can be quickly disabled by sniping their rockets. If you see !ROCKETS INCOMING! on your screen, a single dash or double jump will render the attack useless.

HOW TO KILL IT
-Snipe off their turrets, and they will take a few seconds of raging before they charge you with the intent to smack. Be warned, if they get in melee range of you, it's going to hurt. I've died to more melee Revenants than I have rocket Revenants. Once you take out their turrets, a few extra Precision Bolts will do the trick. They also stagger from an Arbalest, and will die to two or three Super Shotgun blasts. A single Lock-on Burst will also kill them.
A Detailed Look at Every Demon: S-Z+
Fun Fact: the previous section is exactly at the character limit for a guide section

S: Soldier

-Another fodder demon that's really only threatening during the first level or two. Once you get the dash these guys offer little to no threat, and are more or less chainsaw food.

HOW TO KILL IT
-A single shot from the Combat Shotgun at close range will stagger them, and they will die to a direct hit from a stickybomb, while the stickybomb explosion will stagger them. The stagger to 5 Heavy Cannon shots, and anything else will kill them in one shot. Of course, they're better suited to giving you ammo rather than wasting it on them, so give 'em the chainsaw.

S+: Shield Soldier

-These guys are even less of a threat than their unguarded counterparts. Their shotgun only works at close range, and you can always kill them before they get that close (except for sometimes in The Pit.

HOW TO KILL IT
-10 plasma bolts will destroy their shield, causing insane damage to everything around them (it's enough to flat-out kill a Whiplash). Otherwise, the chainsaw will ignore the shield.

Sp: Spectre

-The exact same as Pinkies, except they're nearly invisible and have a little less health. I've been able to kill them with a Super Shotgun blast to the face, but that's not consistent at all.

-See the Pinky entry (Pk) for more detail.

T: Tyrant

-I love the design of these guys. They're probably one of my favorite demons in this game. They're essentially mini-bosses that actually fit well when placed with other demons, unlike the Marauder.

-They have a charge-up laser that makes a beeping noise when ready to fire. When it makes this noise, change direction. You'll regret not moving.
-They fire a bunch of rockets into the air, and the ground around you will start glowing in targets. That's where they will land, so you should move.
-They shoot a fire blade at you which follows the ground. This is pretty easy to dodge, just don't try to jump over it.

HOW TO KILL IT
-Like the "Pro Tip" says, they have a ton of health. It takes 10 Arbalest shots to kill one. For this reason, they're one of the best uses for the Crucible.

W: Whiplash

-Hugo Martin himself said that the Whiplash was designed to be hated and, well, it worked. These slithering run killers have the single hardest to avoid projectile in the game, which also happens to kill you in three hits in most cases on Nightmare. Guess how many they shoot at you? That's right! Three. The projectile in question is of course the homing ground wave slash. My strategy for dodging this is to kill the Whiplash before it's able to fire it, which is mercifully easier than other high-damage demons.

HOW TO KILL IT
-Like most other Heavy Demons, they will die to a single Lock-on Burst, which is a great counter to them since they love slithering around, which makes them very hard to hit. Two Super Shotgun shots will either stagger or kill them, and the Ice Bomb is a sure way to keep them in one place while you cover their body with stickybombs.

Z: Zombie

-These guys are in almost every single fight in the game, primarily serving as a source of ammo. On Nightmare, they keep up the trend of "nothing in DOOM Eternal is easy" by dealing 45 damage per hit, so watch out for ones that like to sneak up behind you.

HOW TO KILL IT
-Literally almost anything in the game staggers or kills them in one or two shots. The chainsaw loves them too, so get that ammo!

Z+: Mecha Zombie

-For some reason, they decided to make the most spammable fodder enemy have an upgraded version that they also like spamming. The Mecha Zombie has an arm cannon that serves as a cross between the Arachnotron turret and the Mancubus flamethrower, both spamming projectiles and fire whenever you get close, but it does very little damage, thankfully.

HOW TO KILL IT
-They will be staggered by a stickybomb, but basically anything that does more damage than that (Precision Bolt, Super Shotgun, etc) will kill them outright.
Closing Thoughts
Coming up on one month since the launch of DOOM Eternal, I didn't expect this guide to take so long to put together. After around 30 hours of work, I am really happy with how this turned out, and I think it's pretty good for the first guide I have ever made.

I would like to thank you for reading this guide, whether it was to help you through the campaign for your first time, to use as notes for beating Ultra Nightmare, or to just figure out how to deal with one enemy that you just couldn't get the hang of. Either way, I'm happy that this was able to help you with the game.

Thank you for reading this guide! I hope it was as much of a help for you as it was for me.
Until next time.

Changelog
4-16-2020: Release
4-16-2020: Documented the Slayer Gate in Taras Nabad
4-20-2020: Updated Pinky entry (thanks to tech for pointing out missing info!)
4-21-2020: Fixed a few formatting/grammatical errors
4-25-2020: Updated the Marauder entries (thanks to ZlatanTheCrow for telling me about the wolf!)
4-28-2020: Added supporting thoughts to the Praetor Suit Token Routing
5-11-2020: Added some clarifications surrounding weapon upgrades and Modbots
10-21-2020: Fixed a few typos.
3-11-2021: Fixed a bunch of typos.
4-14-2022: Removed the Planned Updates section. It just isn't going to happen, if that wasn't obvious after nearly two years of no major updates. There are better guides out there that would make it a redundant effort when I wouldn't do as good a job anyway. Go check those out if you're interested in TAG 1/2 or the few parts I missed.
12 条留言
Sharkbilby 2024 年 11 月 4 日 上午 5:45 
The shielded chaingun with the expensive latter upgrade completely counters pinkies at practically no cost. It allows you to dash into heavier demons, constantly staggering them and dealing decent damage while making you invincible to most sources of damage. The pinky's armour does not protect it from this.

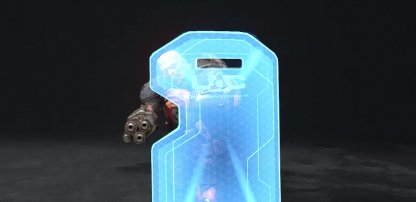
I recommend rebinding the chaingun to T to quickly swap to it.
FreeYourMind 2020 年 6 月 8 日 上午 1:18 
Amazing Guide.
moat 2020 年 5 月 19 日 下午 8:11 
Be OMNIDIRECTIONAL: Running forwards, backwards and sideways is something that you do at the same speed, and this goes for Dashing, too! Get used to rhythm-dashing sideways or backwards and try to decouple your facing direction from your travel direction. This will give you a tremendous advantage when it comes to being able to dish out damage while you're running your circuit.
moat 2020 年 5 月 19 日 下午 8:11 
Any time that you're finding that your're struggling to pop an enemy is time that you should can do another lap on your circuit to return to finish the job later. Enemies don't heal, use that to your advantage. Even Arch-viles can be left for later if you've exhausted your cooldowns. Your life/lives are more important than getting cornered/pinned down.

Rhythm Dashing: Rather than saving your dash for the time you need it, dash *all* the time!
Your dash cooldown is around a second, and as long as you're on the ground, you'll hear the "doot" of your dash coming back. Get into the routine of spamming your dash at *exactly* the rate of this "doot... doot... doot... doot" and you'll find yourself covering a *lot* more ground whenever you're on the ground.
moat 2020 年 5 月 19 日 下午 8:11 
Great guide. It really came in handy during the Icon Of Sin fight.

Here's my three favorite tips:

CIRCUIT, CIRCUIT, CIRCUIT! Rather than getting to slaying as soon as a fight breaks out, *learn the layout of the location* That means you should learn the CIRCUIT of the place. That usually means that there's looping path that has you taking a few monkey bars to swing on, some jump pads, some teleporters, etc. This high-mobility path is your CIRCUIT. As soon as a fight breaks out, find the circuit and start running and swinging and bouncing and Rhythm-Dashing (that's the next tip) through it.

So long as you're moving swiftly through that circuit, very few things can hurt you and you can then start to take note of the collection of enemies and figure out which ones need to die first and do what you have to do as soon as they cross your path.

cont'd...
XentziS 2020 年 5 月 11 日 下午 12:27 
I have a question about saving your UNM save after completion. I added you to message you but we can always discuss it here too.

When do I alt-f4 to save my save after beating Final Sin? Is it during the credits, or do I go back to the Fortress of Doom after the credits?
★CamLikesCow★  [作者] 2020 年 4 月 26 日 下午 8:28 
@The Spida
Saving Throw does not recharge on level completion. See my entry in Rune Routing for specifics.
You are able to Alt+F4 mid-level, but that's obviously cheating and completely nullifies the challenge of Ultra Nightmare, so I'd recommend against it.
spoop finger 2020 年 4 月 26 日 下午 4:18 
1st Question: Does Saving Throw recharge on going into another level, or is it a one time use for the entire run?

2nd Question: Can you Alt+F4 mid-level?
(a great example would be Gladiator Fight)
ZlatanTheCrow 2020 年 4 月 24 日 下午 4:16 
Really detailed guide, very well explained, and with some funny stuff XD. I'll save it for when I try Ultra-Nightmare again.
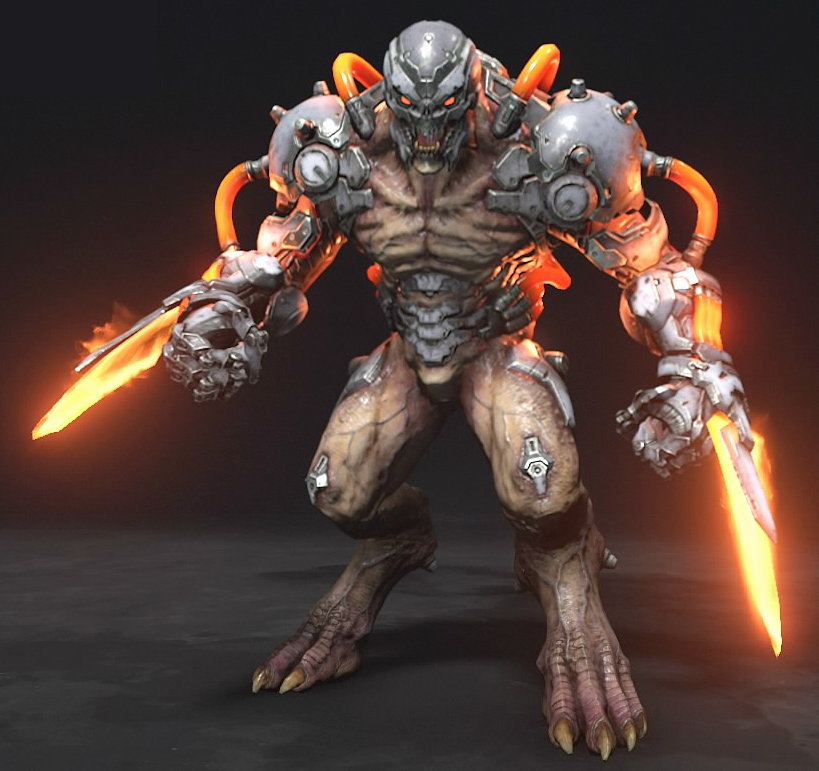
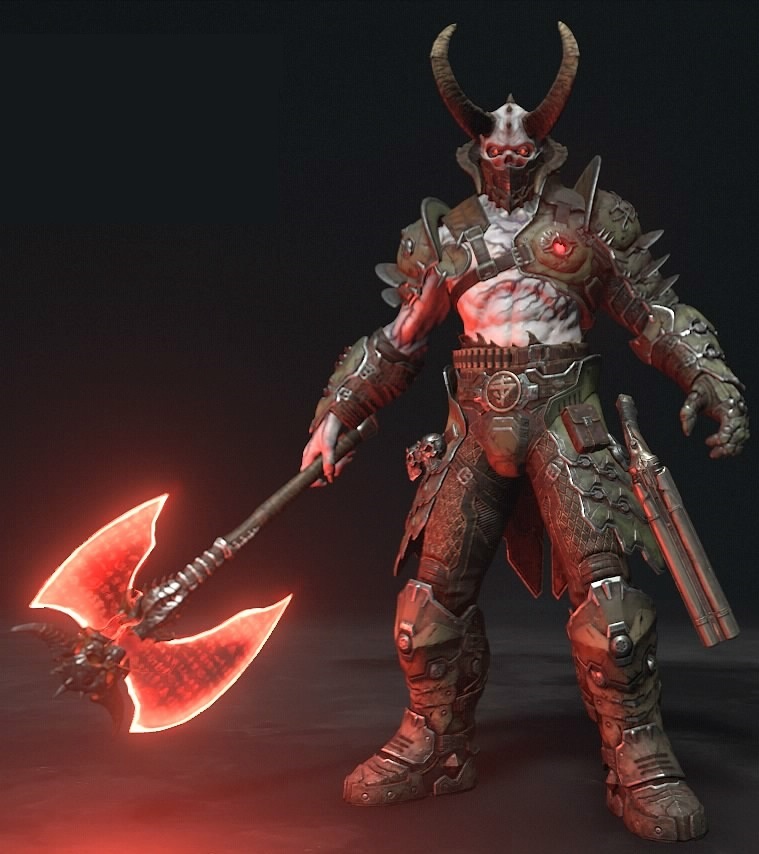
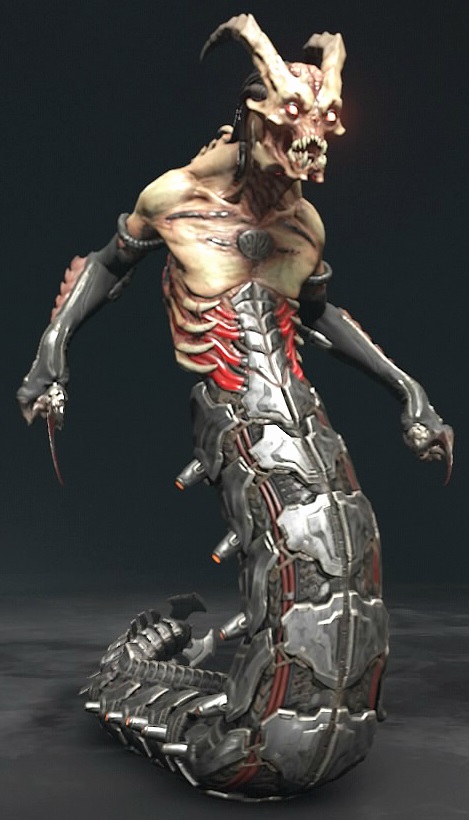
The Marauder's wolf actually isn't random, it will spawn if you shoot at the shield or if a demon shoots at the shield, otherwise it will NOT spawn, and the best way to kill him is to stay ALWAYS at long range, avoid the axe, wait for him and when he flashes his eyes, SSG+BALLISTA as much as possible, then repeat. Sure, he moves a lot so that can be annoying, and once you get closer to him it can be more inconsisten with the attacks, but well, I have more trouble fighting the Whiplash xd.
Anyways, thanks again for this, this must have taken a LOT of effort to prepare, and I can't imagine the pain of dying in Final Sin while doing this. Stay safe!
tech 2020 年 4 月 20 日 上午 10:30 
Great guide.

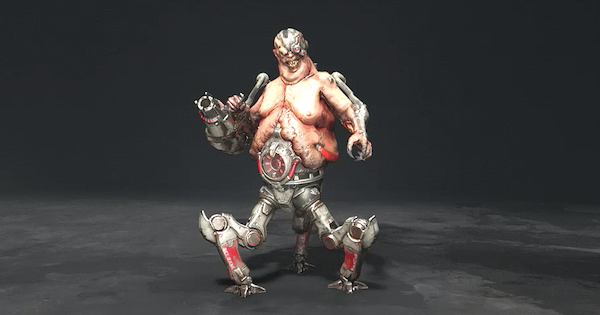
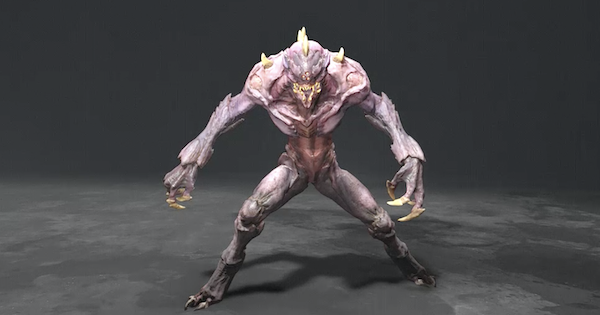
I'd add that you can kill Pinky demons with one blood punch.