Survarium

Survarium

30 个评价
Owens's PVE (Dangerous Knowledge) Guide
由 C.Owens 制作
A comprehensive guide to team missions (PVE) with some humor sprinkled in. Has information useful for players of ALL experience levels and for play types including 3/3 Speedruns and 10/10. All stash locations are clearly shown in concise videos that are organized by stage.
3
   
奖励
收藏
已收藏
取消收藏
Difficulty
There are three difficulties for team missions: Easy, Medium, and Hard. The higher the difficulty, the higher the damage you will take from enemy bots and invisible anomalies. Enemy bots are also better equipped and can sustain more damage the higher the difficulty you select. You can view the possible rewards for each difficulty by selecting it in the team mission window. Higher difficulties have greater rewards.


Easy

Notable Rewards:
  • 20-25 Spare Parts: 4% drop chance per stash


Medium

Notable Rewards:
  • Stash Map: 0.5% drop chance per stash
  • Rare Module: 0.25% drop chance per stash
  • 50-100 Spare Parts: 5% drop chance per stash


Hard

Notable Rewards:
  • Stash Map: 1.0% drop chance per stash
  • Rare Module: 0.5% drop chance per stash
  • 150-200 Spare Parts: 7% drop chance per stash
  • Premium Cartridges
Opening Stash Boxes
The first mission completed of the day grants all the boxes you find. After the first mission is completed you will only receive 3 boxes regardless of how many you collect in the match until your daily reset.

The daily 10 box timer resets at the same time as the daily quest timer. In the top right corner of the Team Mission window is a description indicating if you will receive 10 or 3 boxes upon completion of your next match.


If you do not find all the boxes and ALL THREE players leave the match you can open all boxes you find next game. However, if you leave the match and one of your squadmates completes the mission that will count as first completed mission for you and you will only receive 3 boxes the following match.


After you have received all stashes from the first completed match of the day you have the option of spending an access key to open all the stashes you find. You also have the option to re-open your stashes with an access key. If you re-open the stashes you will NOT receive the boxes you have already opened. If you die there is the option to use an access key to respawn at the last checkpoint but you aren't going to die though, right? I mean, you have this perfect guide! You should never die! You can purchase additional access keys for a great reduction in price here.


If you are all out of access keys you have the option to use 50 gold in place of a key to respawn when you die, to open all the stashes you find on subsequent missions, and to re-open the stashes.
Terminology
There are three distinct ways you can play and players looking for squad mates will specify what kind of team mission (PVE, 3/3 Speedruns, and PVE 10/10) they are interested in.


PVE: the participants know some of the stash locations and will pick up what they can find, finishing the game with anywhere between 4-10 boxes.


3/3 Speedrun: all three players are trying to get to the end in the shortest amount of time possible. This is generally only done after a player has completed their first match of the day and can only receive 3 boxes regardless of how many they collect.


10/10: the participants know ALL the stash locations and will pick up every single one finishing the game with 10 boxes. Expect to be received poorly (uninvited and "blacklisted") if you join players looking for "10/10" without knowing ALL the stash locations.


You can also play without any other players or with only one squadmate. To play solo, open the team mission window and block both random players. This can be done for free.

Tapes
Picking up tapes results in receiving -5,000 karma, becoming vilified in Goodsprings, ignore listed, and uninvited. Also I will come to your house and drown your goldfish. For the sake of other players, please don't pick up any audio tapes. This includes the one in the beginning beside the nuts. You can pick up the nuts without the tape by looking straight at the nutsack when pressing E.

Stages
There are 4 stages and completion of each stage grants a stash box. Completing the mission without picking up ANY boxes results in having 4 boxes at the end.

Stage
Location
Action To Complete Stage
1
Forest
Going past the metal fence beyond the middle camp
2
Sawmill
Opening the door in the sawmill
3
Teleport and Lab
Interacting with anomaly in the laboratory
4
Anomaly Field and Sawmill
Interacting with the truck

Unless you are playing 3/3 speedruns you should NOT pass the checkpoints into the next stages until all three squad members are ready for you to proceed. Confirm they are ready by asking them in chat. A common indicator players use to signal they are ready is to use the "Attack!" quick command. Once a stage is completed you will not be able to return. The only exception to this is the sawmill.


Stage 1


The end of the first stage is marked by a long metal fence and gate. Going passed this gate will advance to the next stage and the other teammates will be transported here as well. It is important to know that the player who crosses this checkpoint will not have their ammunition and supplies replenished but the other teammates will.


Stage 2


The end of the second stage is marked by a large door inside the warehouse. Interacting with the door will advance to the next stage. Unlike every other stage, you will return to this location and have another opportunity to search this zone for stash boxes.


Stage 3


Inside the laboratory, beyond the door that is closed and requires a battery to be opened is an anomaly. Activating the anomaly will complete the third stage. All players will have their ammunition and supplies replenished and will gain the benefits of the anomaly which includes increased movement and reload speed.


Stage 4


To complete the mission and receive your stash boxes, get in the truck.
Environmental Dangers


Invisible anomalies only appear in anomalous zones. These zones are clearly marked as danger areas by metal fences and signage. Invisible anomalies can be detected by throwing nuts or by watching your squadmate walk into them. You can navigate around these anomalies or destroy them with anomaly capacitors. Invisible anomalies have dynamic spawns, meaning they may appear in different locations within an anomalous zone.


Radioactive water appears in several places such as puddles, rivers, and a swamp. Bathing in it deals damage and drinking it kills you immediately.


Toxic gas appears in a place known as the gas forest and in the basement of the laboratory. You'll know by the smell when you encounter toxic gas, as it smells like the K/D ratio and winrate of players that make haccusations and use the phrase P2W unironically.

Enemy Bots
The best way to avoid being killed by bots is to avoid being detected by them. When a bot spots you they will go into an aggroed state and begin wildly moving side to side faster than any human player is capable of doing while accurately engaging you. They will also move out of their position, putting your squadmates at great risk because the frenzied bot will be in an unexpected location.


Things that alert enemy bots:
  • Sprinting
  • Firing an unsuppressed weapon.
  • Standing
  • Not brushing your teeth


Some enemy bots are set to a higher state of alertness than others. Those guys are total jerks and are no fun at parties. Watch out for them because they will detect you quicker than other bots, even when you are crouch-walking. If a bot detects you they will return to their default, non-frenzied state a few seconds after they lose sight of you. However, if they moved out of their default position they may not be able to return to it. The key is to avoid putting enemy bots into a frenzied state so that your squad can kill them quickly with minimal effort.
Glitched Bots


On the final stage, after the warehouse doors open and the enemy frontal assault, beware of "glitched" enemies. It is common for enemies to get stuck behind the warehouse doors on the right and left side. You can shoot them through the walls with a weapon that has decent penetration. With a weapon that has poor penetration you will have to stand further to the side and shoot them through the actual door which is more risky because they can shoot you back. Get in the habit of shooting this wall to check if there is a bot stuck here.


There is another enemy that frequently glitches on top of the boxes inside the small shack. He can shoot you from here but the biggest danger he poses is getting "unstuck" because he will leave this spot and flank you, kill you, and teabag you in front of your friends. If you climb the roof of the shack you need to kill the guy inside as well as the guy glitched on the boxes if he is there. If you do not kill them before getting up there they will shoot you through the roof.
Dynamic Map


There are a few variations of the map on the first stage. The map is divided in half by a cliff on the left side and a river running through the middle. There will either be a footbridge on the far left side anomaly field against the cliff or there will be an opening just beyond the center anomaly field allowing access to the other side. If one of these locations are "closed" the other one will be open.


A separate variation in the map exists between the right bandit camp and the anomalous zone in the center of the map. There is an area that can either be open or have a massive cliff. When the cliff is present you will have to go all the way back around the way you came from to reach the middle anomaly field from the right camp. When open you can travel freely between the right camp and the middle anomaly field.


Alternative Way To Cross Map
On the first stage, there is a little known method to getting across to the other side of the map that works regardless of if the middle is open or the footbridge is up on the left side. To begin, go towards the far left side of the map to this spot. Climb the hill and scale the rocks. Be careful, there are invisible anomalies here. Use your nuts and proceed carefully. You will need anomaly capacitors to traverse this area safely. Reach the narrow gap and carefully jump across to reach the other side. There is an anomaly directly under this gap so if you fall you will instantly die and your squadmates will think you are a total noob.

Stash Locations
Maps with all the stash locations marked exist here.[survarium.pro]

Map Key
Red X
Stash Locations
Check Mark
Tape Recordings (Don't pick these up or uninvite)
Green
Safe Area
Orange
Anomalous Zone
Blue
Clean Drinking Water


There are 6 stash boxes that will spawn randomly in a total of 60 different spawn locations. Each stage grants a stash box, making the total number of stash boxes that you can obtain 10. There are no set amount of box spawns per stage. Although rare, it is possible for 0 boxes to spawn on the first stage and the rest to spawn on the other stages.

Stage
Location
Box Spawn Locations
1st
Forest
36
2nd and 4th
Sawmill and Anomaly Field
14
3rd
Teleport and Labatory
10
Stashes, 1st Stage: Forest


At the very beginning, turn around and search behind this rock. There is a possible stash location here. Get in the habit of always turning around at the start of the match here to avoid forgetting about this box. Even seasoned players frequently forget to check this spot or make the wrong assumption that someone else checked.


Experienced players separate from each other and search specific regions of the map to save time. On the first half of the first stage map there are three areas, designated "left, middle, and right." It is a good idea to write in chat when you have cleared your side.


On the other half of the map is a bandit camp inhabited by 4 black market thugs, a lovely oasis, and a swamp believed to be inhabited by Shrek. There are 10 potential box locations here.


Before proceeding past the fence into the second stage climb the fence and look over at the stash spawn on the right. From here you can clearly see the box glowing.

Stashes, 2nd Stage: Sawmill
There are 11 stash spawns in the sawmill area. The area is guarded by a ton of black market thugs. Be very careful or they will tear you apart and sell your organs for good money.


From the catwalk you can look and see if there is a box beside the tree in the anomaly field. The box is very easy to see if it is present. You can also see the box that can appear beside the fence from the catwalk, however it is extremely difficult to see though the anomalies and the tall grass.


At the end of the second stage you will encounter a door in the large warehouse. Upon interacting with this door your team will come into contact with the hallucinogen anomaly and immediately begin tripping balls. Just like the morning after any good party you will wake up alone, confused, and in an unfamiliar place. It will be great! Unless you end up in the gas forest, screw that place.

Stashes, 3rd Stage: Teleport Locations
The gas forest is one of the three possible teleport locations. Walking into the gas will result in you dying quicker than you would if you had dirt on the Clinton family. Speaking of dirt, look for the dirt path on the ground and follow that path. The gas will dissipate in front of you as you walk forward. There is a stash location just off of the path on the left side.


The cave is a maze like structure. It has a stash location inside a nook that can only be reached by crouching. To get to this nook take right turns all the way through the maze until you reach it.


The most simple teleport location is known as "entrance" and has the teleport portal right in front of you as you spawn in. However, there is a stash location here. Turn left and face the rocks.


At the end of each three teleport locations there is a portal. Walking into the portal will transport you into the underground laboratory. You will not be able to return once you go into the portal.

Stashes, 3rd Stage: Laboratory
The underground laboratory is blah blah blah blah yada yada yada yada no one cares. Here's the stash locations:


There is a stash box spawn behind the "gas puzzle" in the laboratory. Toxic gas is extremely deadly. If it so much as touches your nose you will die instantly. Many players struggle to consistently get through the gas in the laboratory because they have a nose like a garden hose. When a valve is turned it shuts the gas off for the pipe it is attached to and causes gas to leak from another pipe. To begin, turn the bottom valve followed by the top valve.


The player going through the gas should shoot the pipe that needs to have the gas turned off to signal the other player when they are ready and which pipe they want turned. Center yourself and your crosshair on the place shown on the picture below before signaling your teammate to turn the valve.

Stashes, 4th Stage: Anomaly Field
There are three stash spawns in the anomalous zone behind the sawmill and way too damn many invisible anomalies. I mean really devs, did you have to put 574 of those things here?

Weapons: Overview
Disclaimer
What works well in PVP doesn't necessarily apply to PVE and vice versa. Meaning, being as this is a PVE guide I will be making statements and recommendations that are true of PVE and not of PVP.


Types of Weapons
Type
Ammo Pool
With 3
Ammo Bags
Comments
Example
Carbines
120
Great range and penetration
SOCOM 16
Lever Action Rifles
120
Requires "Trigger Discipline" skill to match carbines
Winchester 1894
.30 Cal Sniper Rifles
60
Extremely slow
SV-98
.50 Cal Sniper Rifles
30
Extremely slow, high slowdown, and sparse ammo pool
AVSK
Assault Rifles
180
Sparse ammo pool
AKM
Mag-Fed Machine Guns
180
Sparse ammo pool, no sound suppressors
RPK-74M
Belt-Fed Machine Guns
300
High slowdown, no sound suppressors
PKP Pecheneg
Submachine Guns
300
Poor penetration
PP-19-01
Shotguns
120
Very poor penetration and range
Vepr 12


Generally speaking, scoped carbines such as the SOCOM 16 and the SVD dominate matches. They kill fast, have a large ammo pool, great material penetration, low scope sway, and moderate slowdown. Sniper rifles are often chosen by novice players but are a poor choice. They are simply way to slow to kill enemies and clear camps with the exception of the Winchester 1894. Big-bore sniper rifles such as the Barrett and AVSK are absolutely horrible choices. They do not kill heavy armor opponents with a single body shot like they do in PVP. They have no advantage over the smaller caliber sniper rifles but have huge slowdown and an extremely small ammo pool.

Assault rifles and magazine-fed machine guns are generally effective but there are huge differences between particular ones. There are rifles like the AKM and RPK-74 that are very easy to use and are effective in the hands of players of all skill levels. Then there are ones like the H&K 416A5 that can be incredibly good in the hands of someone highly skilled but is a poor choice for someone inexperienced. The biggest handicap assault rifles have overall is their small ammo pool relative to other weapons. With assault rifles, carrying additional ammo bags is an absolute must. Which means you may have to sacrifice capacity for equipment or have to sacrifice mobility by taking a heavier backpack.
Weapons: Carbines & Sniper Rifles
Weapon
Class
Tier
Heavy Armor Enemy
Material Penetration
Damage
Capacity
Reload Speed
Effective Range
Slowdown
SVD
Carbine
T4
1 Headshot
Brick [8]
56.05
10 rds
3.5 sec
120m
5%
SVU
Carbine
T4
1 Headshot
Brick [8]
56.05
10 rds
3.5 sec
120m
6%
SOCOM 16
Carbine
T3
2 Headshots
Brick [8]
49.6
20 rds
3.4 sec
105m
4%
SKS
Carbine
T2
2 Headshots
Brick [8]
42.75
10 rds
3.7 sec
85m
4%
Winchester 1894
Sniper Rifle
T1
1 Headshot
Steel [10]
76.7
6 rds
4.0 sec
110m
3%
Damage calculated on Zubr UM-4 chest armor @ 60 meters


SVD & SVU
The SVD and SVU are functionally identical other than the SVD being able to accept a silencer and having 1 less slowdown. The SVD and SVU kill all enemies with one headshot. Which is a big deal, cause shooting twice is just stupid. Just ask anyone who carries a 1911; they'll tell you. No actually don't ask them, they are generally not too bright.


SOCOM 16
The SOCOM 16 kills light and medium armor bots with one headshot but requires two to kill heavily armored opponents. Its 20 round magazine makes up for its weaker headshot damage compared to the SVD.


SKS
If you are a low level player and you don't yet have access to higher level carbines the SKS is a good choice. Like the SOCOM 16, the SKS requires two headshots to kill heavy armored opponents but only takes one to kill medium and light armored bots. However it has a shorter effective range than the SOCOM, which can result in having to score an extra hit to make a kill at long distances. It has a rather small ammo capacity of 10 rounds and is fed by stripper clips instead of detachable magazines, making it slower to reload. Unlike most weapons it is much faster to reload when completely empty rather than to reload before completely running out of ammunition. It is recommended to only "top off" when you need to. This can be quite jarring and uncomfortable for players to get used to, as it is a different manual of arms from every other weapon in the game. If you haven't unlocked the SKS yet consider purchasing a premium one for a great price here.


Winchester 1894
Another option for low level players or wannabe cowboys is the Winchester 1894. It is classed as a sniper rifle but unlike all the other sniper rifles it doesn't suck. No "scoping out" required between shots and has a much higher rate of fire. In fact, it is actually the only sniper rifle worth using. If you use the Winchester, be sure to take the "Trigger Discipline" skill in the Firearms skill tree.

Weapons: Assault Rifles, Machine Guns, & SMG's
Weapon
Class
Tier
Damage
Capacity
Reload Speed
Material Penetration
Effective Range
Slowdown
Scope Sway
VSK-94
Assault Rifle
T4
19.47
20 rds
3.2 sec
Wood [5]
50m
4%
Low
VSS Vintorez
Assault Rifle
T5
19.47
20 rds
3.5 sec
Wood [5]
50m
4%
Low
FN SCAR-H
Assault Rifle
T5
20.70
20 rds
3.5 sec
Steel [10]
55m
4%
High
AKM
Assault Rifle
T1
17.98
30 rds
3.7 sec
Brick [8]
45m
4%
High
AK-74M
Assault Rifle
T2
17.50
30 rds
3.4 sec
Wood [5]
50m
4%
High
RPK-74
Machine Gun
T3
19.6
45 rds
3.5 sec
Wood [5]
80m
6%
High
PKP
Machine Gun
T5
22.23
100
8 sec
Brick [8]
85m
10%
High
PP-19-01
Submachine Gun
T3
16.13
30 rds
3.5 sec
Tinplate [3]
45m
4%
High
Damage calculated on Zubr UM-4 chest armor @ 60 meters


VSK-94 & VSS Vintorez
The VSK-94 and VSS Vintorez are great choices for experienced players but they require compensating for bullet drop and have a slow bullet travel time. Meaning it is more difficult to hit moving and distant enemies. If you are a novice you should probably use something else.


FN SCAR-H
There are some highly experienced players that can do well with the FN SCAR-H. It has a ton of recoil so if you can't grind logs into sawdust with your bare hands you might want to use something else. No really, use something else.


AKM
The AKM has great penetration and low recoil. It can be equipped with 40 round magazines but it will become slower to reload. The AKM is a fantastic choice for beginners.


AK-74M
Overall the AK-74M is an upgrade in performance to the AKM. Its only real downside compared to the AKM is lower material penetration. It can except 45 round magazines that are slower to reload, in the same way the AKM can. The AK-74 is a fantastic choice for novices and masters alike.


RPK-74
The RPK-74 has amazing range, low recoil, and a large magazine. Its only downsides are that it can not accept a sound suppressor and it has a large amount of slowdown compared to similar weapons. The lack of ability to attach a suppressor is a huge liability, as enemy bots will often become frenzied from hearing your gunfire.


PKP "Pecheneg"
Extremely powerful but extremely cumbersome with a slowdown of 10%, the PKP is best utilized with only the absolute lightest of outfits. It has fantastic damage, range, material penetration, moderate recoil, and a large ammo pool. It is fed by a 100 round belt but it has a slow reload speed compared to box magazine fed weapons. Like the RPK-74 unfortunately, it can not accept a sound suppressor.


PP-19-01
There is only one submachine gun worth using in PVE and that is the PP-19-01. It has a huge ammo pool but it has horrible material penetration. It is a good weapon in the hands of a master but far from ideal for the average player. Tell me if you like my PP down in the comments.

Weapons: Attachments & Modifiers
The most significant attachment is the optic. Generally speaking, you should select either a scope or a reflex (collimator) sight that has magnification. All fully-automatic weapons, with the exception of the VSK-94 and VSS Vintorez, have horrible aiming sway when used with scopes. On those weapons, it is best to use a reflex sight that has zoom such as the CompM4, BelOMO PK-01V1, or RSA-S rather than a scope.

It's also a good idea to equip a silencer to reduce the weapon's signature. Enemy bots will become frenzied when you fire your weapon without one.


Modifier
Comments
-20% Reload Speed
A must on ALL weapons
+5% Rate of Fire
Increases DPS on all fully-automatic weapons.
+2.5 Materiel Penetration
For shooting enemies behind cover (walls, boxes, etc.)
+15% Effective Range
Improves lethality at distance
-15% Chambering Time
If you are using the Winchester 1894
-10% Recoil
If you are too wimpy to handle a little recoil


Regardless of which weapon, attachments, and modifiers you select, ALWAYS go for headshots! Headshots result in quicker kills and less ammo expended so SHOOT THEM IN THE FACE DANG IT!
Armors: Overview
Spectre-Summer camouflage: can be purchased in-game

Light armors are ideal for PVE. High mobility aids in jumping and climbing into positions to find boxes in 10/10 as well as crossing the map quickly in 3/3 speedruns. Run speed and reload speed are the MOST important factors for speedruns, as the faster you can run and the faster you can kill the quicker you will complete your run.

Be sure to equip complete outfits sets to receive the set bonuses they offer. Protection from anomalies has no effect on the damage taken from invisible anomalies. Backpacks with artifact containers and oxygen tanks provide no benefit in PVE.

Best Choices:
Tier
Faction
Outfit Set
Chest Armor
Face Armor
Slow-down
Energy Cost
Reload Speed Bonus
Aim Time Bonus
Other Bonus
Capacity / Ammo
T5
Ratings
Delta
47
35
1%
-10%
Reload -15%
None
N/A
5 / 2
T4
Event
Snow-20
58
25
2%
None
Reload -10%
-15%
-7% Recoil
4 / 2
T5
Black Market
Mercenary
47
25
0%
-20%
None
None
-10% to ready grenade
5 / 4
T4
Scavengers
Combat
58
N/A
4%
-15%
Reload -15%
None
N/A
5 / 1
T5
Scavengers
Nomad
49
N/A
1%
-20%
None
-20%
-40% Fall Damage
5 / 1
T2
Black Market
Marodeur
45
40
1%
None
Reload -15%
None
N/A
4 / 2
T3
Scavengers
Reinforced
46
N/A
6%
-20%
Chambering -15%
-20%
-50% Unmasking
4 / 1


Some outfit sets do not come with a mask so you will need to equip one from another set. Keep in mind that having low or no mask armor will result in instant death if an enemy so much as farts in your direction.

Chart showing how many shots it takes to die from headshots.
Mask
Armor
Slowdown
MP7 @ 50m
AS Val @ 45m
AK-12 @ 50m
Damage from individual Vepr-12 pellets @ 45m
Zubr UM-4 Mask
71
2.0%
5
2
2
15.62
Molot UM-2 Mask
67
1.5%
4
2
2
16.98
Assault Mask
55
1.0%
4
2
2
21.05
Veles Mask
40
0.0%
3
2
2
26.14
Delta mask
35
0.0%
3
2
1
27.84
Protective Mask
25
0.0%
3
1
1
31.24
Armors: Sets
Delta
Black Death camouflage: earned by winning 1000 rating matches

Combining extreme mobility of one slowdown and -10% energy cost with a reload speed bonus of -15%, the Delta set could easily be considered the epitome of speedrun sets. It also has a better than average (of recommended sets) complement of ammo bags and capacity. The downside is its poor survivability. It only has 35 armor on the mask, so avoid taking any hot loads to the face. A single shot from a PP-19 will end you. Oh, and then there is the fact that you will need to play a ton of ratings matches to obtain it.


Snow-20
The Snow-20 set can only be obtained from special events

The Snow-20 set is unique in being the only outfit set in the game with a recoil reduction bonus. That alone however is not what makes it a great choice for PVE. It also benefits from a reload speed bonus and a low slowdown. An aiming speed bonus of 15% nicely rounds out its weapon-centric set bonus trifecta. Its biggest shortcoming being its face armor of 25 which is even weaker than the Delta set, meaning even more weapons are able to one-shot kill you. It's mobility is negatively impacted by not offering any reduction in energy cost, which in speedruns can be a problem on the first stage when the exit is on the left. This can be mitigated by rolling -10% energy cost bonuses on the pants or jacket. It has adequate room for supplies and ammunition but you may find its capacity of four to be underwhelming.


Mercenary
Warrior camouflage: can be purchased in-game

If your biggest concern is being able to have a ton of supplies and ammunition look no further than the Mercenary set. To make things even sweeter it has the best mobility in the game, with a slowdown of zero and an energy cost reduction of 20%. It's not all sunshine and rainbows though, as it has no reload speed bonus and it has the same abhorrent amount of face armor as the Snow-20 set. So don't expect to survive an enemy so much as shooting you a dirty look.


Combat
Mirage camouflage: can be purchased in-game

The "tankiest" set recommended for speedruns, assuming that you select an adequate mask, is the Combat set. If you are highly aggressive (or clumsy like my girlfriend Midori Fuse) you will enjoy the added protection it offers, as you will survive burst that land on your chest from PP-19's. The cost of that added protection is a bit more slowdown than most of the armors recommended for speedruns but its overall mobility is still good, as it has has a 15% reduction in energy cost. It has a fantastic reload speed bonus of 15%, which couples beautifully with the aggressive style you should be using while wearing this set. Really the only big downside this set has is how dorky it looks but you get used to it. It's really only bothersome when you are in the lobby.


Nomad
Digital camouflage: can be purchased in-game

A rather unusual but useful bonus of -40% fall damage is certainly handy but not the only thing the Nomad set has going for it. Most noticeably it is very pleasing to the eyes. Yes, it really is quite exquisite I must say. Oh, you want to know about performance? Well, It is extremely mobile with only a slowdown of one and an energy cost reduction of 20%. It has a fantastic aiming speed bonus of -20%, allowing quick alignment of your sights with the source of the significant emotional event you are experiencing. Also, did I mention how nice it looks? The only real downside is its lack of any kind of reload speed bonus.


Marodeur
Spectre-Spring camouflage: can be purchased in-game

An excellent option for low level players, the Marodeur set combines a fast reload bonus and a fast run speed. Unfortunately, like the Snow-20 set, it lacks any reduction in energy cost. This can be mitigated by rolling -10% energy cost bonuses on the pants or jacket. At 45 chest, 40 mask, and 45 crotch armor, it offers adequate protection. With a capacity of four and two ammo bags it offers a decent amount of supplies and ammunition.


Reinforced
Flecktarn camouflage: can be purchased in-game

The Reinforced set is only recommended to be used in conjunction with the Winchester 1894 and other sniper rifle class weapons. It decreases the chambering time, which increases the rate of fire of repeating arms greatly. Specifically this means weapons that the action must be manually cycled after each shot. In addition to improving the speed in which you can express your discontent, it improves the swiftness of acquiring your target with an aiming speed bonus of -20%.

Its biggest downside is its large slowdown (by speedrun standards) of six. One saving grace, is that the Winchester 1894, which it should be used with, is very light with only a slowdown of three. In fact, the Winchester is two slowdown less than the SVD, which it is most comparable to. For speedruns, you can easily get away with using it without a backpack, especially if you take the ammunition skill from the firearms tree.


Don't be this guy


If you don't have one of the recommended outfits you can still get work done so don't sweat it. Just be sure your outfit looks cool, because if it sucks and it doesn't look cool what are you even doing? WHAT IS WRONG WITH YOU? No really though, don't be that guy who shows up to a PVE speedrun in heavy armor with a heavy backpack and an AVSK and says "iT wOrKs fOr mE" because no man, it doesn't work for you... uninvited.
Armors: Modifiers
The most important modifiers for your outfit are -10% reload time on the gloves and -2.5% slowdown on the boots, pants, and jacket. You will see a huge difference in performance with these upgrades. Everything else recommended here is very nice to have, but not anywhere near as crucial.


Jacket and Pants Modifiers
Break camouflage: can be purchased in-game


Modifier
Comment
-2.5% Slowdown
This is required! Just do it!
+5% Armor
Better survivability
+1hp/s Regeneration
Quicker healing
-10% Energy costs
Lots of running around in PVE...


Boots Modifiers
Panther camouflage: can be purchased in-game


Modifier
Comment
-2.5% Slowdown
Don't even think about not getting this!
-10% Energy costs
Definitely put this on your boots
+20% Damage reduction upon falling down
You'll be falling some...


Gloves Modifiers
Wood camouflage: can be purchased in-game


Modifier
Comment
-10% Reload time
This is a must!
-10% Aiming time
Great for quickly aiming, duh!
-5% Recoil
If you got weak little girly hands
-10% Time to ready a grenade
Can be useful for throwing anomaly capacitors faster


Decals
You can purchase your country's flag or crest ingame.

Decal and camouflage bonuses do not have any impact on PVE. So this is a great time to have fun with them. Go crazy!
Equipment
Be sure to bring plenty of anomaly capacitors and bandages or medkits with you. It is generally a good idea to bring an ammo crate with you so that you can replenish your ammunition and capacitors when needed.

Mines or C4 planted in front of the warehouse at the second stage, before proceeding through the checkpoint, will help soften up the enemy assault during the final stage.


Ammo boxes only appear on the sawmill. One of them is beside a covered transport truck parked near the gate. The other one is against the wall inside the large warehouse towards the anomaly field.

Picture - stage 2 ammo crate 2
Skills
Physical


Stayer, Endurance, & Rapid
You probably don't want to be constantly stopping to catch your breath when searching for boxes and running out of stamina turns a speedrun into a slowrun. All three of these skills are a must.


Firearms

Iron Lungs
If you are using a scoped weapon this is a must!


Reload
10% faster reloading, definitely get this!


Ammunition
Essential with most outfits if you run an assault rifle.


Survival

Metabolism
Very nice skill, especially when combined with +1.0 hp/s regeneration on your jacket and pants for a total of +4.5 hp/s regeneration bonus.


Additional Medicine
A very underrated skill. Think of this skill as +1 capacity. You can subtract one medpack from your kit, still having the same amount of medpacks, and have room for one more anomaly capacitor, mine, C4, or ammo crate.


Technical

Quick Resupply
This one might sound like a waste of precious skill points to you, but on a speedrun every second you spend at the ammo box is a second added to your time.
Speedrun Examples


Trashrun Examples
A trashrun is just a speedrun done with less than optimal weapon choices, purely for fun or out of boredom.


Common Misconceptions
Myth: "You get more maps on medium difficulty."
Truth: The drop chance for a map on medium is 0.5% and the drop rate for hard is 1%.

Myth: "Speedruns are inefficient; you don't get 10 packages!"
Truth: A decently skilled team of players can complete a speedrun in about 6 minutes. That's 1 box every two minutes.

Myth: "You can not cross X anomalous zone without anomaly capacitors"
Truth: You can travel through any and all anomalous zones without capacitor. It just might be more difficult and require taking a different route to get through. Just sling your nuts around and believe in yourself. You can do it!

Myth: "You can't do the sawmill parkour jumps without having the speed bonus from the artifact."
Truth: You can do the parkour jumps on the 2nd stage without the effects of the artifact. A run speed of at least 5.5 greatly aids in making the jumps.

Myth: "You should never equip an ammo crate because it will slow you down."
Truth: You can drop the ammo crate when you won't need the extra ammunition and as soon as you drop it your run speed will be up to the same level it would be without ever having the ammo crate.

Myth: "Picking up audio tapes makes loot better."
Truth: It doesn't effect loot at all. Tapes = uninvite.
Outro
You are still here? You read... you read that whole thing? Well, umm... congratulations, you should be a PVE pro now!

*dies right after picking up the nuts*


In all seriousness, thank you for taking an interest in improving your PVE game by reading my guide. When I started this project I only ever intended for it just to be a few things that I frequently noticed players struggling with. I figured "I will type a few things out and take a few screenshots and then I'll have a link to give to the newbies. It will be less effort for me to do that than to type the same stuff over and over again, right? Oh was I wrong about that? Once I started this project I couldn't stop. But hey, now the community has a thick guide they can pass around to anyone that needs it. Speaking of which, please, if you encounter anyone who needs help drop them a link to this guide. That's what it is here for.

If you have any questions, feel free to drop them down in the comments section and I'll get back with you. Unless your profile picture is a furry or anime picture. If it is you have about a 50% chance of getting an answer out of me. Think of it like upgrading attachments. No really though, drop your questions in the comments and I'll get back with you, you degenerate.
Credits
An extra special thanks to my girlfriend Midori Fuse who has helped me greatly with this guide. Everything from screenshots to talking for hours about weapon recommendations.


Thanks to the following for their input and critique:
[admin] Chandrian
[Doctor] Midori Fuse
UnknownPlayer666


For help with screenshots:
[admin]HazeCake
[Doctor] Midori Fuse
[Hаcker] yep Patched Ax
[Hаcker] Khan2997
[Hаcker] Marteling


For his TTK Calculator:[survarium.pro]
[Doctor] t0FF
7 条留言
Autumn 2021 年 5 月 6 日 上午 2:20 
♥♥♥♥ you, I'm picking up all the tapes I can. How else can one realize the fact that these anomalies repel iron?
JarasonPC 2021 年 2 月 27 日 上午 2:48 
What is with the tapes? What karma points? I don't understand that one. Can someone explain?
WZNGT 2021 年 2 月 17 日 上午 7:59 
Pfff... I've been a pro in the PVE for a while with my SVD and VSK-94 and the map stored on my phone in case I don't recall, but I still had a go, you humor is great and made the guide an interesting one ;3
D • E • L • T • A 2020 年 5 月 8 日 上午 2:15 
Thanks this was really helpful and ill point others to this
C.Owens  [作者] 2020 年 4 月 2 日 下午 8:25 
@Midori, Sorry this guide doesn't have enough text to satiate your desires. Much more text will be coming soon. It will get at least 25% more thiiiiiick in near future.
אמת 2020 年 4 月 2 日 下午 8:16 
Midori does not like this guide, it does not have enough text.
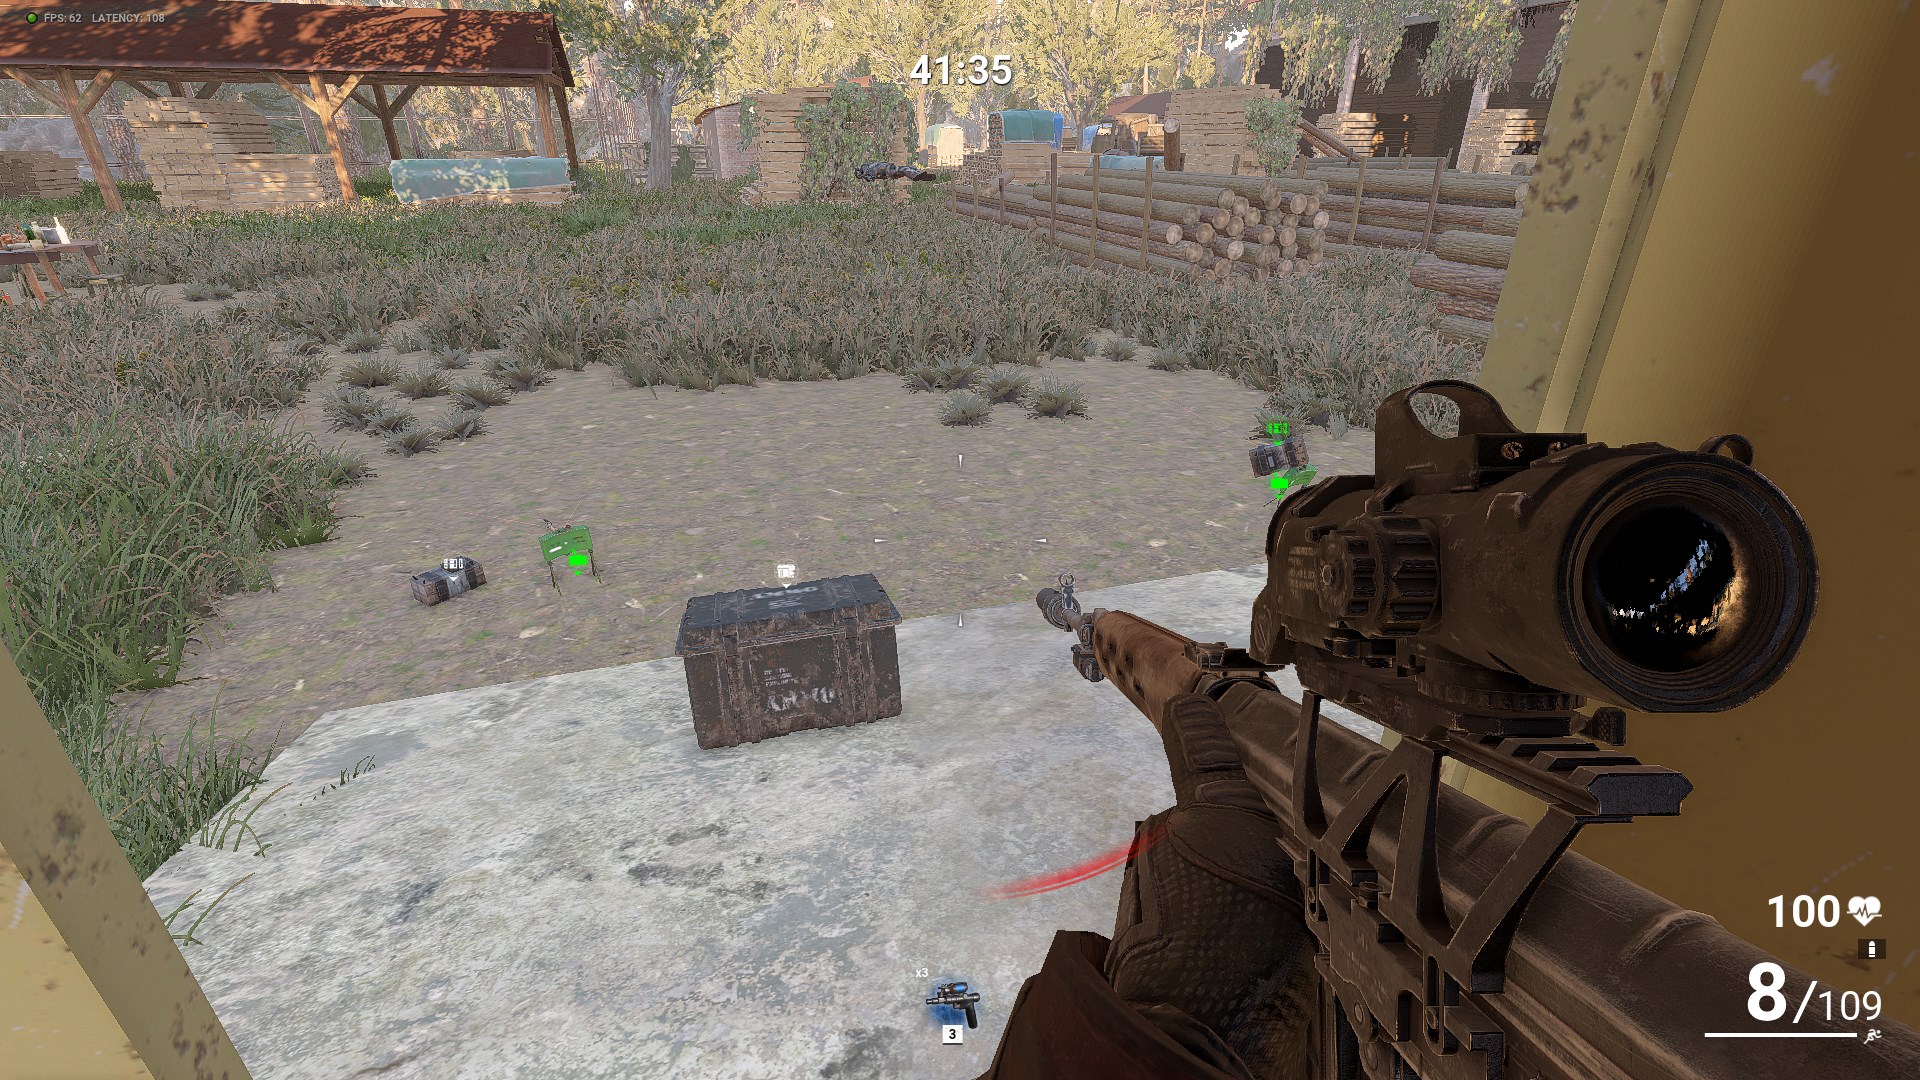
This guide also fails to explain what it does mean "based and blackpilled" or haha money printer goes brrrrr.
It also does not help us to deal with emotional trauma caused by killing millions of innocent bots.
Still sane exile? :steambored:
-RAGE3o6- 2020 年 4 月 1 日 上午 12:21 
Owens the mighty hacker